
Users of all roles can view Google Workspace tenants present in the Management Console, however a Cove user account at SuperUser or Administrator level is required to make any changes to settings and backup selection.
Once the Google Workspace tenants are displayed, the following actions can be taken:
- View data source statistics
- Manage backup selection
- Add or remove protection for assets or services
- Automatically include new mailboxes for each service
- Remove data source for selection
- View backup and restore activity
- Delete Google Workspace domain
View Google Workspace Tenants
There are several ways to view only Google Workspace tenants:
Widgets
To display only Google Workspace domains using the widgets:
- Expand the widgets at the top of the Dashboard
- Click Google Workspace on the Cloud tenants widget
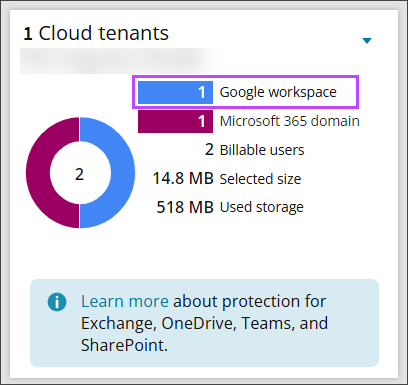
- The list below the widgets will update to display only the Google Workspace tenants.
- Click the Google Workspace tenant name from the list to view that tenant's properties
Searching
To search for Google Workspace tenants:
- Use the Search bar to the top right of the devices and tenants list
- Enable Advanced searching by clicking the toggle

- Use the shortcode of
ATand the value of== 3to search for devices with the Account Type of Google WorkspaceFull details on Advanced searching and the syntax and column codes to use can be found on Searching in Management Console
- Hit Enter
- Click on a tenant name to view the Tenant's properties
Filtering
To filter for Google Workspace tenant:
- Use the Filter panel to the left of the devices and tenants list, this can be expanded or collapsed by clicking the two arrows (>>/<<)
- Under the Device Properties section, select the type filter
- Tick Google Workspace
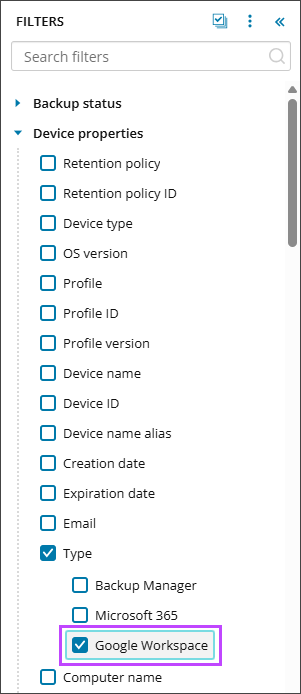
- The list will automatically update to display the list of tenants meeting this criteria
- Click on a tenant name to view the Tenant's properties
For full details on filtering, see the Filtering Devices in Management Console page for full details.
View data source statistics
To view the Google Workspace tenant's backup history, open the tenant properties and switch to the Overview tab.
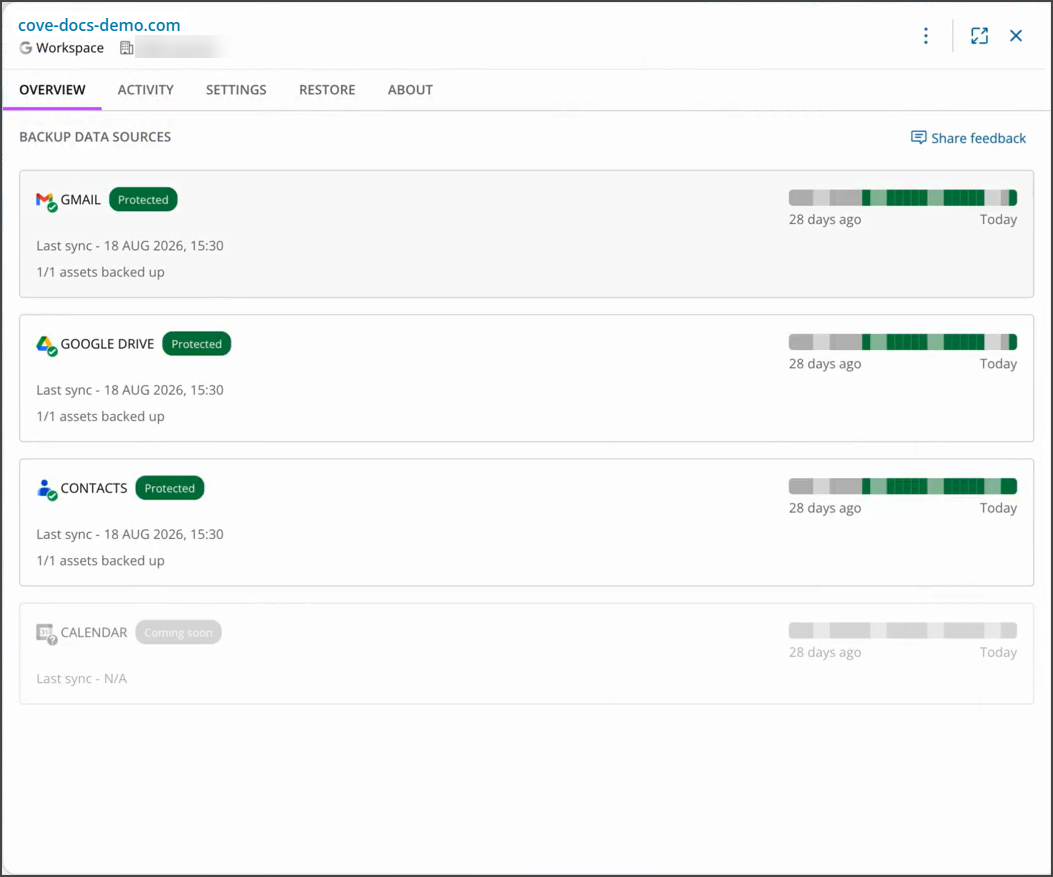
In this tab, you will see details relating to each data source, including backup information on the last sync date, number of assets backed up and the status of the backup.
Any errors will be displayed per data source in this tab.
Manage backup selection
When looking at the Google Workspace tenant's properties, select the Settings tab to view all assets present in the tenant.
Add or remove protection for assets or services
In the Settings tab, add new data sources/services for backup by placing a check mark in the Select all box at the top of the assets list, or remove protection for the entire service by removing this check mark.
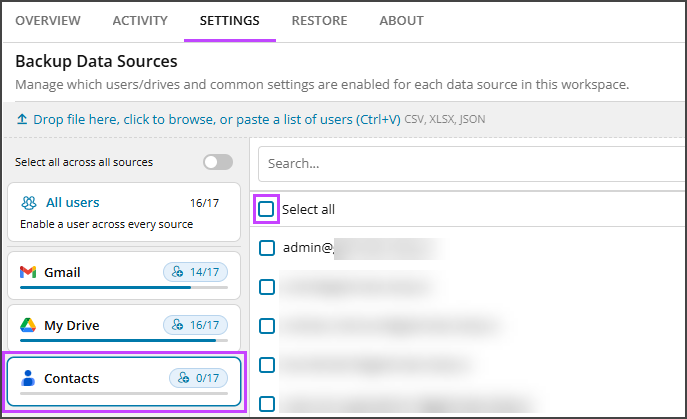
Add an asset to the Backup by placing a check mark in the box to the left of the asset, or add the asset to all data sources by hovering over the asset and selecting Apply to all sources.
Remove backup protection by unticking any that no longer need to be backed up, or remove the asset from all data sources by hovering over the asset and selecting Remove from all sources.
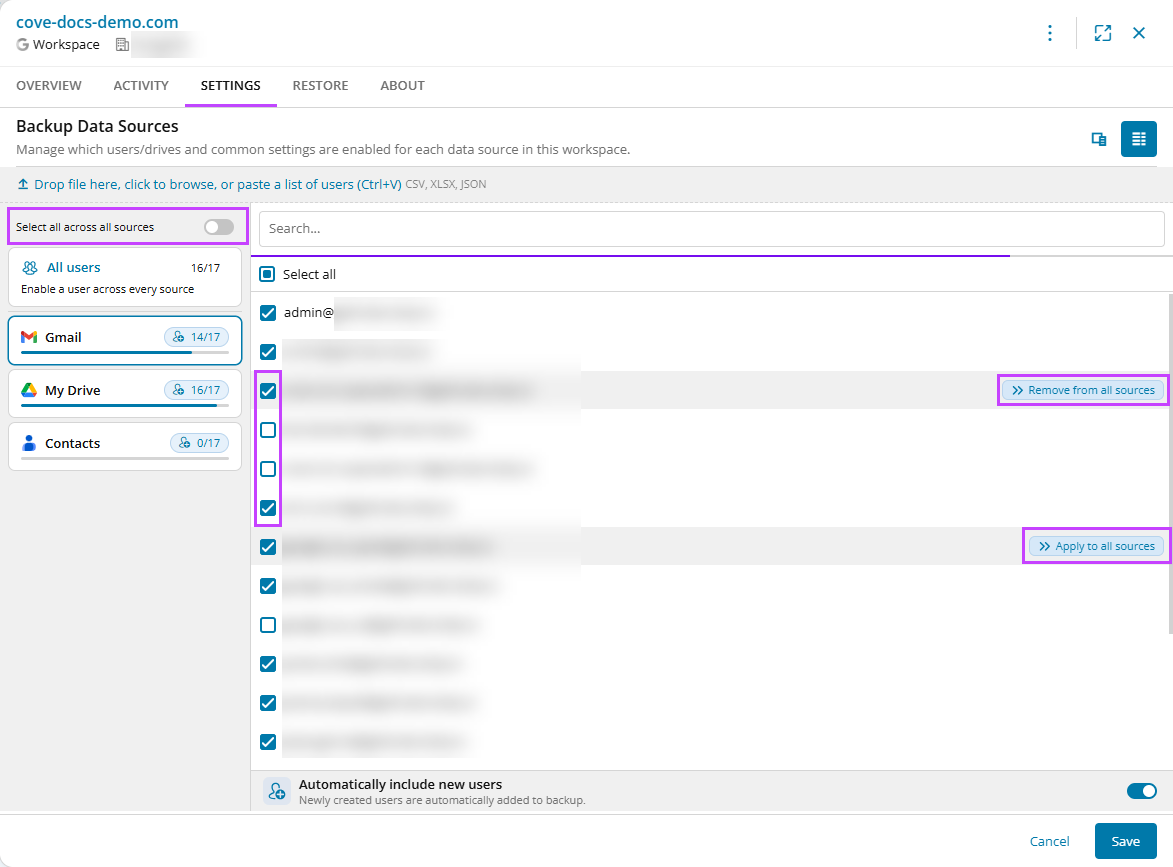
After making any changes, you must click Save at the bottom of this dialog box or changes will be lost.
Automatically include new users
You may also enable or disable 'Automatically add new users' per data source by toggling the on/off slider at the bottom of the Settings tab.
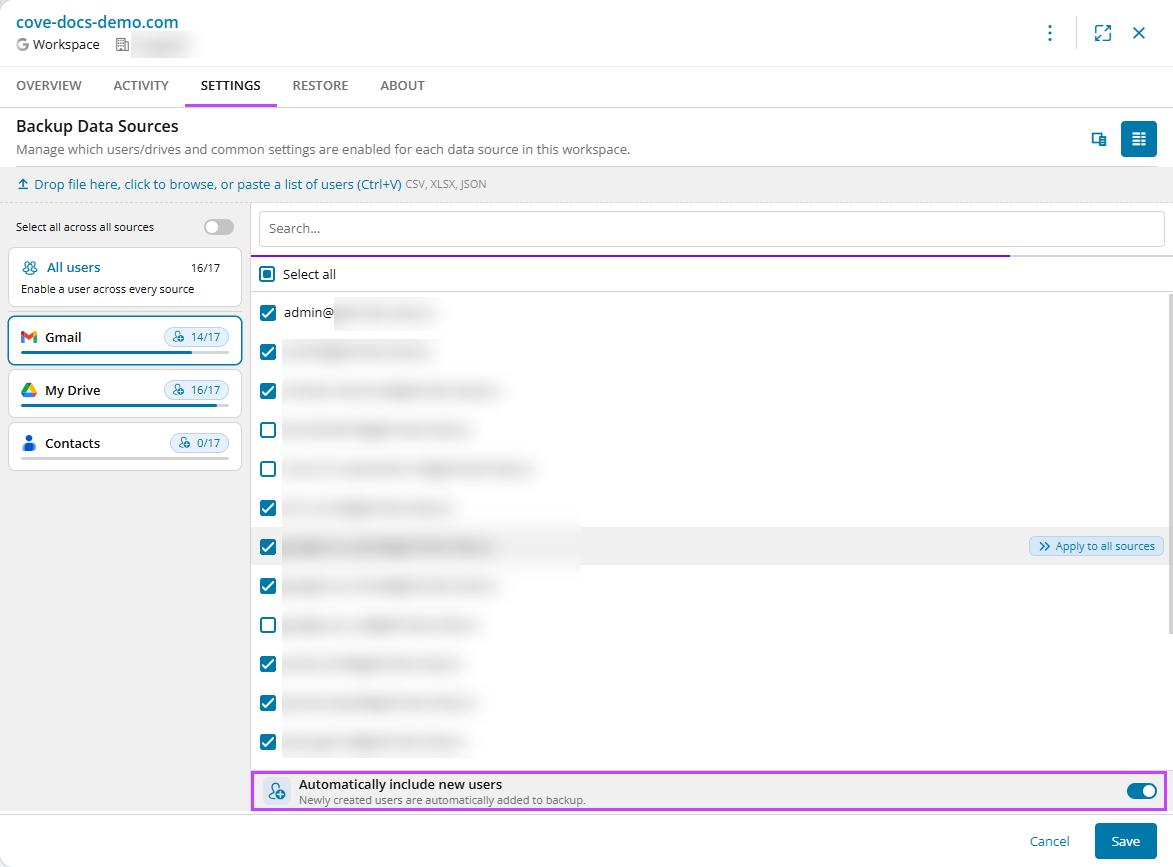
After making any changes, you must click Save at the bottom of this dialog box or changes will be lost.
Remove data source
This is only available to Management Console users with Security Officer permissions, all other users will not see this option.
It is possible to delete a Google Workspace data source to stop assets from backing up this data from the Settings tab by removing the check mark beside Select all at the top of the assets list.
To add the data source back to allow backups, select individual assets to Backup or click Select all to Backup the entire data source.
View backup and restore activity
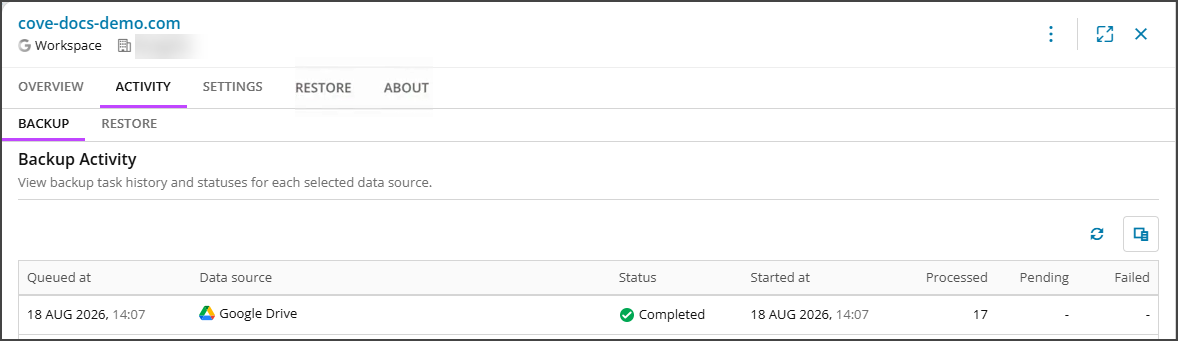
To view recent backup and restore sessions that have completed, these can be found in the Activity tab, split into Backup and Restore tabs. You can see date and time that the most recent backup or restore was queued, data source, status, date and time the backup or restore was started, the number of processed items, pending items and failed items.
Ignored Items and Backup Status
Ignored identifies items that were not processed during the current backup session because a backup prerequisite was not met. An Ignored item is different from a Failed item: Cove did not attempt to process it because the required conditions were not met- An Ignored item is different from a Failed item as a Failed item was attempted to be backed up but could not be processed successfully, whereas an Ignore item was not processed because the required conditions were not met.
- An item may be Ignored because of configuration, eligibility, licensing, or other backup requirements. For example, a selected user may not currently have access to the Google service required for that data source.
- If the underlying configuration, licensing, or eligibility condition is resolved, the item can be processed again during a subsequent backup.
- An item may have been successfully protected previously and later become Ignored, for example if the required Google service or license was present during a backup but is then removed. Existing recovery points remain available according to the configured retention period, but protection is not up to date while the item continues to be Ignored.
- Ignored items are reported separately from Protected and Failed items, allowing customers to distinguish items successfully processed in the current backup, items not processed because requirements were not met, and processing failures.
Delete Workspace
To delete a Google Workspace tenant:
- Find the tenant to delete in the list of devices and tenants.
- Click the tenant name to open the tenant properties.
- Click the three dots to open the action menu.
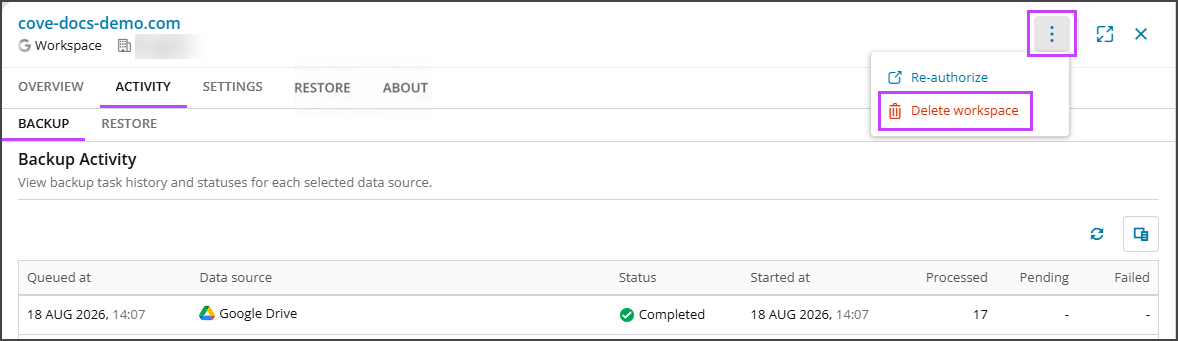
- Select Delete Workspace.
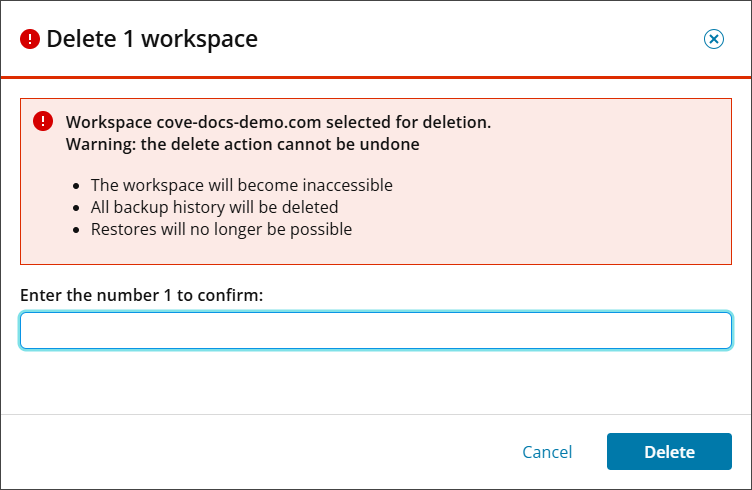
- Confirm your intention to delete the workspace by entering the number of workspaces you are deleting and selecting Delete.
Re-Authorize Workspace
To re-authorize a Google Workspace tenant:
- Find the tenant in the list.
- Click the tenant name to open the tenant properties.
- Click the three dots to open the action menu.
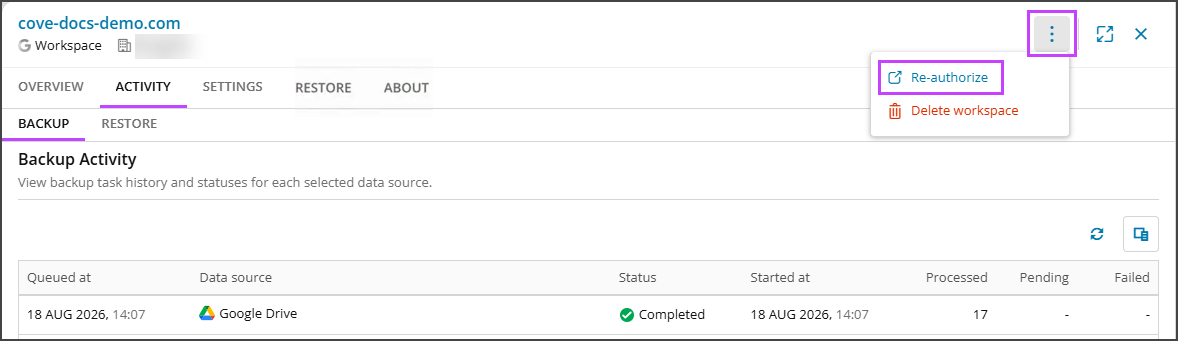
- Select Re-authorize.
- Sign in to the Google Workspace tenant with a Super Admin account to enable API access and authorize the client on the Google Workspace admin console.
- Click Continue to permissions.
- Follow the instructions for granting permissions and authorizing Cove's access.
View Audit Log
To view an audit log history of actions taken against the Google Workspace, including adding, modifying, and removing services, and deleting the tenant, see the User Actions page.