
Add or remove group owners and members
Cloud Commander will be decommissioned and stop functioning on May 13, 2026. You can use the product until that date.
Review and update workflows to remove any dependencies before the product is decommissioned.
Support, bug fixes, and security patches will be available until April 13, 2026.
You can add and remove members for platform user groups, Microsoft 365 groups, and Microsoft Security groups. Additionally, you can add and remove members and owners from distribution groups.
Prerequisites
- You must be assigned the User Groups Administrators role scoped to the tenants you want to manage.
Add or remove group members
- In the , select
 Identity > Groups.
 - If the group list is empty or you can't find a specific group, refresh the page to show the most recent data.
- Select the group name to view its details.
- Go to the Members tab.
- To add group members:
- Select Assign members.
When multiple customers are selected in the customer selector at the top of the dialog only options that apply to all selected customers display.
- Select the checkboxes for the users to add them to the group and select Next.
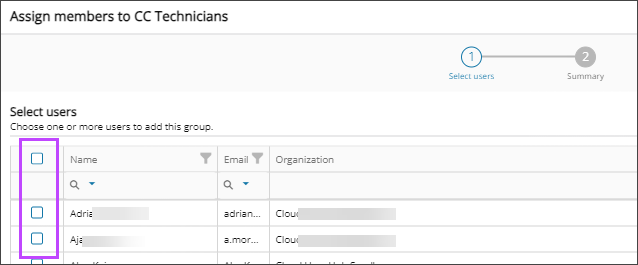
- Review the list of members to add. If you need to make changes, select Back. Otherwise, select Done.
The users are added to the group and display on the members list.
- Select Assign members.
- To remove group members:
- Select the checkboxes for the users you want to remove from the group.
- Select Remove membership.
When multiple customers are selected in the customer selector at the top of the dialog only options that apply to all selected customers display.
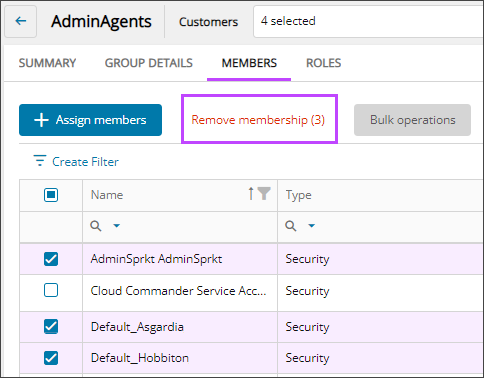
- When prompted, review the summary of your request, and confirm.
The users are removed from the group and no longer display on the Members tab.
Add or remove distribution group owners and members
- In the , select Identity > Groups.
- Use the customer selector to choose the customers you want to view data for.
- Filter or search to find the distribution group you need, then select the group name to view its details.
- Go to the Members tab.
- To add group members or owners:
- Select Add members or Add owners.
- Select the checkboxes for the users you want to add and select Next.
- Review the list of users to add. If you need to make changes, select Back. Otherwise, select Done.
- To remove group members:
- Select the checkboxes for the members you want to remove and select Remove member.
- Review your selections and select Remove.
- To remove group owners:
- Select the checkboxes for the owners you want to remove and select Remove owner.
There must always be one owner for a distribution group. You can't remove an owner of a distribution group if they are the only owner.
- Review your selections and select Remove.
- Select the checkboxes for the owners you want to remove and select Remove owner.
- It may take some time for the changes to display. Refresh the page from the top of the dialog to view the updated members and owners for the distribution group.
Related articles
Updated: Jan 09, 2026