Configure and manage your API Keys
To interact with the Take Control API, you'll need to create a REST API key. This key acts as a secure identifier, allowing only authorized users to access and manage the various options provided by the API. By obtaining an API key, you can enable seamless and secure communication between your applications and our remote support tool. In this section, we will guide you through the detailed process of generating an API key, ensuring you can start integrating and automating your processes. Your API key is configured and managed in your Take Control dashboard.
Public and Private API Key
Public and private API keys are used to control access and provide security when interacting with APIs. Take Control supports the use of different public and private API keys, each can have its own permissions, expiration date and allowed IP addresses. In line with recommended security precautions, API keys should be kept secure and hidden.
Public and private API keys are created with a default expiration date of one year, after which they are disabled. However, technicians can re-enable API Keys and change the expiration date at any time, provided the new expiration date does not exceed one year.
Public API Keys
Public API keys can be exposed to the end user and are typically used for client-side applications, for example their device or your website.. These keys provide access to non-sensitive data and operations. Our public API keys ar restricted in scope to limit the actions they can perform and the data they can access.
Use cases:
-
Accessing public resources.
-
Performing read-only operations.
-
Accessing non-sensitive data in client-side applications.
Considerations:
-
Public keys should have specific, limited permissions based on their required tasks. This enhances security and control, and limits the potential damage if a key is compromised.
-
To make tracking easier, it’s good practice to use multiple public keys if they will be used at various integration points.
REST API Usage:
-
"Create a new session" method of the Session API.
-
"Create a new deferred support request" method of the Tickets API.
Private API Keys
Private API keys can be thought of as admin keys and are typically used for server-side applications where the key can be kept secure and hidden from the end user. These keys provide access to sensitive data and operations, allowing full control over the API.
Use cases:
-
Accessing and modifying sensitive data.
-
Performing write or delete operations.
-
Server-to-server communication.
Considerations:
-
Private keys should be kept confidential and stored securely, they should never be publicly exposed.
-
Private keys should have the necessary permissions to perform critical operations.
-
It's essential to rotate private keys periodically to enhance security.
REST API Usage:
-
"Get session history" method of the Session API.
-
All methods for the Technician and Device APIs.
Create an API Key
-
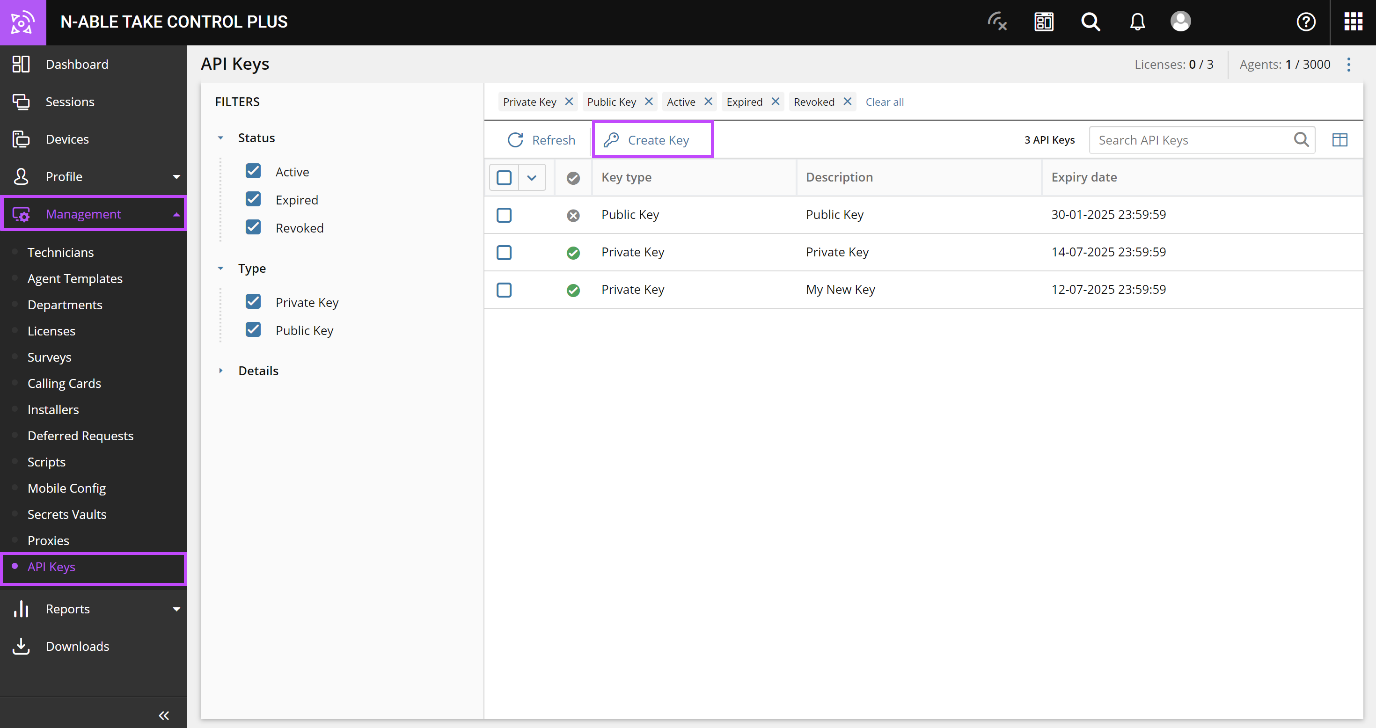
Navigate to the API Keys section of the Dashboard, go to Management > API Keys.
-
Click Create Key.
-
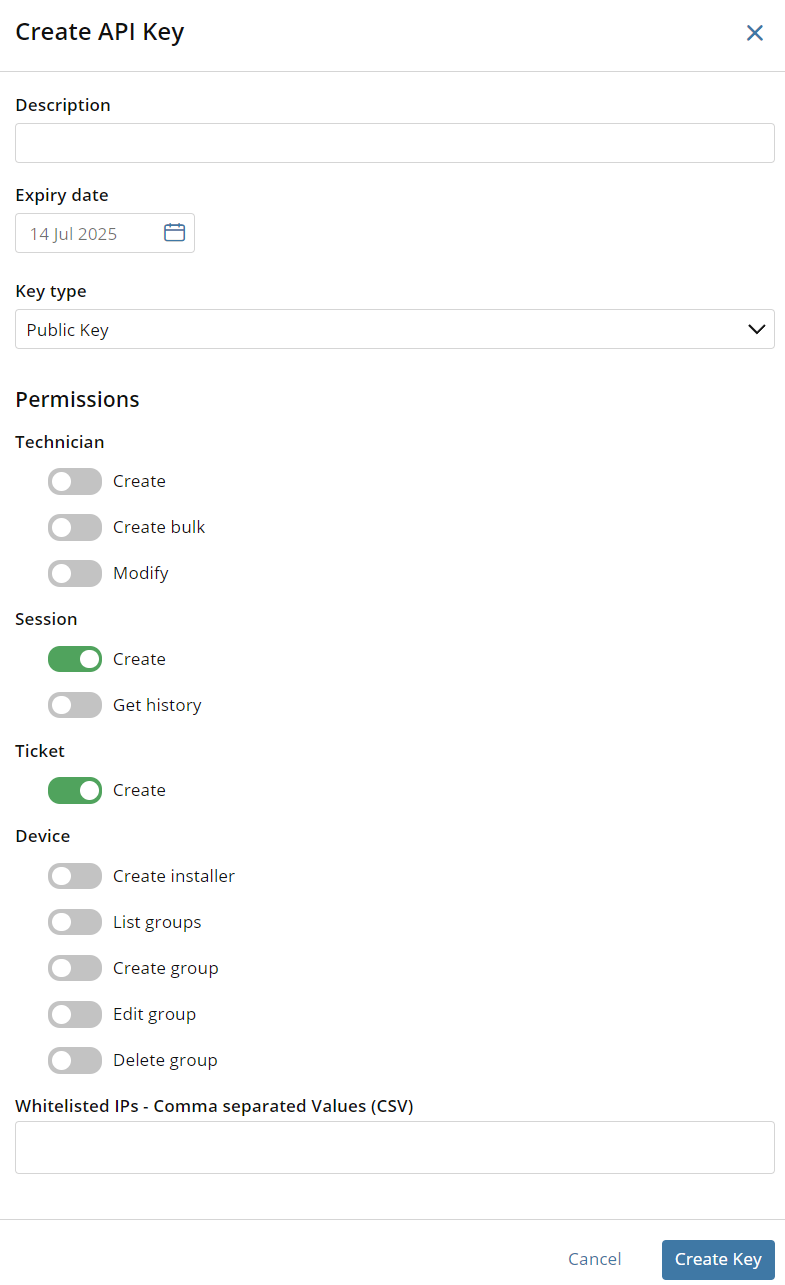
Populate the Create API Key dialog:

- Description: Enter a description that will help you identify the API key.
-
Expiration date: Specify the date after which the key will no longer work.
-
Key type: Decide if this key will be public or private
-
Permissions: Choose the API endpoints that the key is permitted to interact with.
-
Whitelisted IPs: As a security precaution you can supply a list of IP addresses, separated by commas, that are authorized to use the API key.
API keys have a default expiration of one year, after which they become inactive. Technicians can re-activate and adjust the expiration date, as long as it does not exceed one year.
-
After you are satisfied with the API Key setup, click Create Key to add.
Once generated, securely store your API key. Ensure it is not shared publicly or exposed in your application code.
Manage your API Keys
-
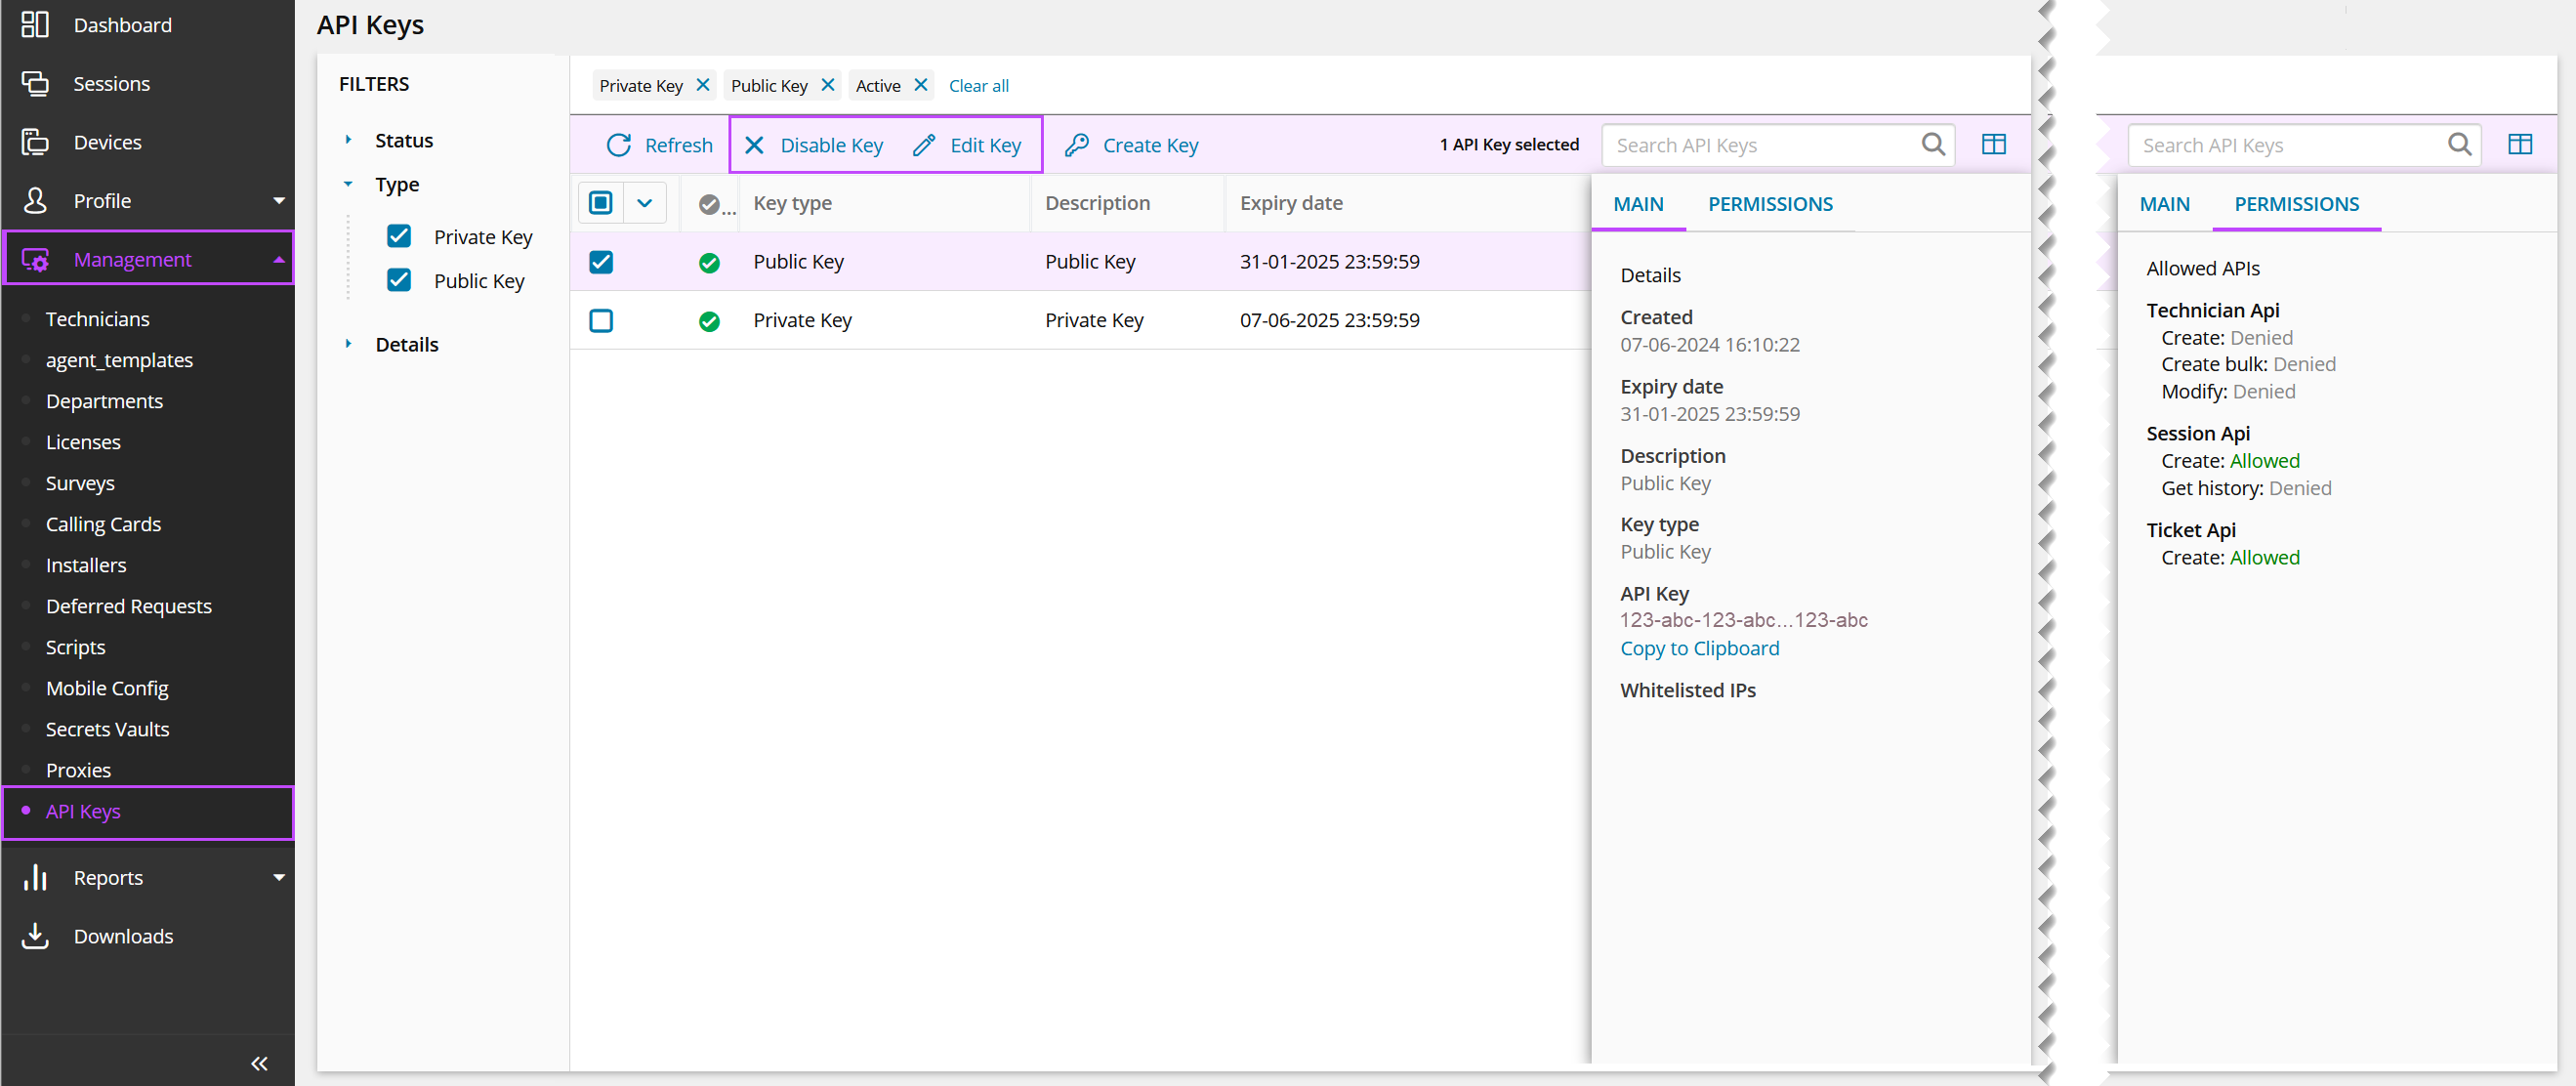
Review information on the API Keys associated with your account, in Management > API Keys.
-
To narrow down the results displayed in the table:
-
Filter the table with the left panel options.
-
Use the search function to return specific entries. The search queries the key content, description, and allowed IP addresses (if configured).
-
-
Check the box against a key to view the Main and Permissions informational panels, and quickly copy the API key to their clipboard. Selecting an API key displays the top menu options:
-
Disable Key to deactivate
-
Edit Key to apply changes, including changing the expiration date up to a maximum of one year.
-


