
System Requirements
To use the cPanel add-on, ensure your system is configured according to the following requirements:
- Full root/shell access to be able to install the add-on
- cPanel running from stable/release/current versions only (we cannot support edge). LTS versions are not supported
- The Spam Experts Local Cloud or Hosted Cloud product and admin credentials
- The "Change MX" feature has to be enabled in the feature list. To do this, select Packages > Feature Manager, click on Edit Feature List and tick the MX entry box. This should be enabled by default
- PHP 5.4 or above
- PHP support for:
- cURL
- OpenSSL (recommended, not mandatory)

cPanel Server Recommended Setup
Set up optimal protection for the cPanel server:
- Log into the
- Navigate to Users & Permissions > Manage Admins
- Select Add to create a new Admin account for the cPanel server
- Install the Spam Experts cPanel add-on. This can be done via the command line using the following command:
wget -N https://raw.githubusercontent.com/spamexperts/cpanel-addon/master/bin/installer/installer.sh && bash installer.sh
- Select Remote Access Key and click Generate New Key
- Configure the correct API/MX/user details for the cPanel add-on
- Disable incoming filters from the Spam Experts servers
- For Local Cloud, select Exim Configuration Manager > Basic Editor > Access Lists > Only-Verify-Recipient
- For Hosted Cloud, ensure proper delivery from the filtering servers
- Run bulk protect from the add-on in WHM
- Restart Bind:
/etc/init.d/named restart
- For outgoing filtering: Set outgoing smarthost details
A re-run of the installer will not overwrite the add-on configuration.
Configuring PHP to support cURL and OpenSSL
The cPanel add-on relies on cURL to communicate with the API's it uses. You'll need to ensure both cURL and OpenSSL are supported via EasyApache. The activate this, login as super-administrator to WHM:
- Select EasyApache (Apache Update)
- Choose Start customizing based on profile
- Follow the steps, until the Exhaustive Options List is displayed
- Select OpenSSL and CurlSSL, click Save and build
Add-on: cPanel
The cPanel part of the add-on provides the end user with a (brandable) icon in their control panel, allowing them to view and log into their domains.
The List Accounts section displays a list of domains for which the cPanel Add-on has been installed:
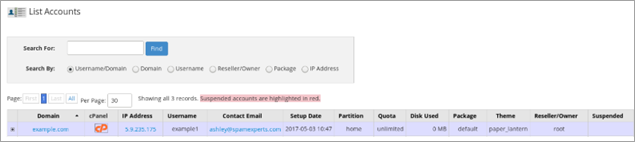
Click the cPanel orange icon next to each domain, this will automatically log you into the spam filter, where you can manage all antispam settings for the domain.
Add-on: WHM
The WHM part of the add-on includes all configuration options and features for the Super-admin user.
Upgrade Instructions
The system automatically updates itself (when enabled), and can optionally be updated manually via the web interface. If you experience any issues using the web-based/automatic updater, please contact our support. You can always run the installation command as above to force a new install of the latest version of the add-on, all settings will remain preserved.
Downgrade Instructions
- If you need to downgrade to an unsupported version, (for example when a WHM version becomes LTS or EOL), you need to use the following instructions. Please note that support for a older version is not supported. This should only be used in emergencies. It is strongly recommended to upgrade your WHM platform to a supported version
- Disable the "automatic updates" from the add-on settings page
Execute the following
wget https://raw.githubusercontent.com/spamexperts/cpanel-addon/master/bin/installer/old_installer.sh
chmod +x old_installer.sh
./old_installer.sh x.x.xxxxx
Replacing x.x.xxxxx with the add-on version number you wish to downgrade too
Uninstall Instructions
In case you want to remove the add-on, you have to run the uninstaller using the following command:
cd /usr/local/prospamfilter/bin/ && ./uninstall.php
The above command will just uninstall the add-on, but all added domains will still be protected as mail will be routed through the Spam Experts system and the MX Records will still point to your Local or Hosted Cloud solution.
To remove all domains from the Spam Experts system and reset the MX Records to their original state from before the add-on’s installation, run the following command:
cd /usr/local/prospamfilter/bin/ && ./uninstall.php --resetmx
Troubleshooting
There are two parts of enabling debug mode, one is enabling debug mode for the add-on and the other is to have syslog save debug-level logs. Both steps are required to successfully enable debug level logging.
You can enable the add-on's debug mode by entering the following in a terminal:
touch /etc/prospamfilter/debug
This feature should only be enabled when there is a problem and you want to debug it.
To disable it, enter:
rm /etc/prospamfilter/debug
We recommend to enable debugging when there are problems (white pages, unexplainable errors). This mode logs quite some information to the log file and starts displaying more errors in the Control Panel.
Log Debug Level Data
This is very important in the event of any issues you may encounter with your installation. Please follow the below steps to log debug level data:
First, you must change your sysl-og settings.
cPanel (or CentOS) has a default setup which ignores the "DEBUG" entries.
To make them show up, you can add the following line to /etc/syslog.conf (or /etc/rsyslog.conf) and restart (r)syslog afterward:
*.debug /var/log/debug
To restart syslog or rsyslog, depending on the case, just execute one of the following commands:
sudo service syslog restart
sudo service rsyslog restart
If you want to keep this enabled for a longer period, you might want to add it to the log rotation configuration.
The log will be stored on /var/log/debug.
Disclaimer: This documentation may contain references to third party software or websites. N-able has no control over third party software or content and is not responsible for the availability, security, or operation, of any third-party software. If you decide to utilize a release involving third-party software, you do so entirely at your own risk and subject to the applicable third party’s terms and conditions of the use of such software. No information obtained by you from N-able or this documentation shall create any warranty for such software.