Spam Experts no longer supports CloudBlue integration. This will be deprecated shortly.
Before beginning with the below steps, please ensure you have completed Step 2: Add a CloudBlue instance.
Requirements
The application requires at minimum each of the following resources for the newly created CloudBlue application instance.
Key
The following icons indicate availability:
| Key | Status | Description |
|---|---|---|
|
|
Available | Is available for all |
|
|
Available if additional criteria met | Is available for all, so long as an additional criteria is met (see * for additional information) |
|
|
Not Available | Is not available |
| # | Name | Service Name | Default Limit | Auto-provisioned |
|---|---|---|---|---|
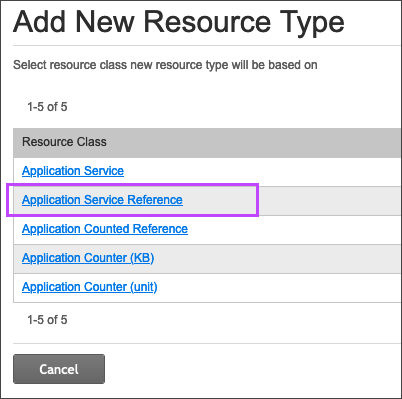
| 1 | Application Service Reference | N/A | 1 | N/A |
| 2 | Application Service | Context | 1 |
|
| 3 | Application Service | Domain | Unlimited |
|
| 4 | Application Service | Unlimited |
|
The Context resource will be the only automatically provisioned resource.
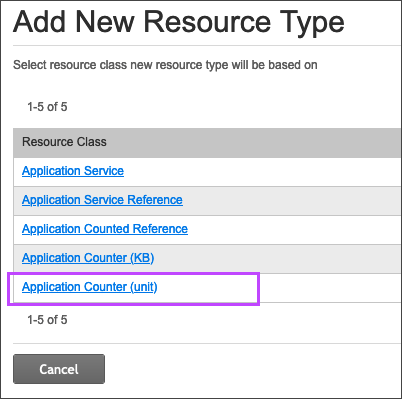
Application counters are optional, but you may find these useful. They allow more control over the application, users and resource administration/billing.
Create the Resources
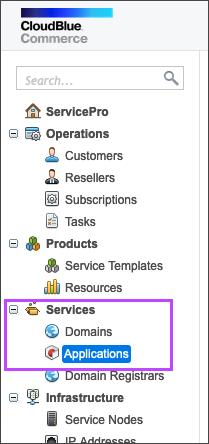
- In the CloudBlue Commerce interface, navigate to Services > Applications
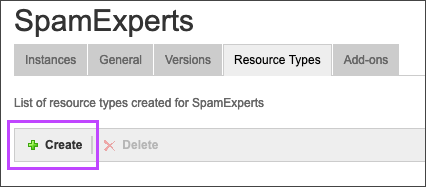
- Select the Resource Types tab and click Create:
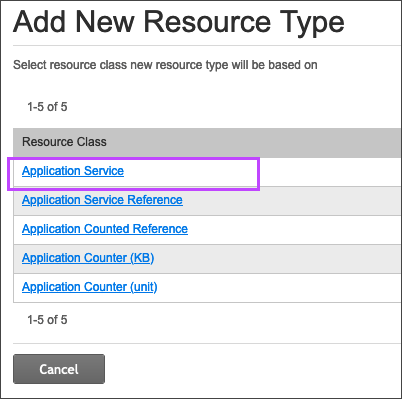
- Select the resource to create. These resources must be created in the below order:
We highly recommend using SE as a prefix before the name when creating these resources. This makes it easier to find the resources later.
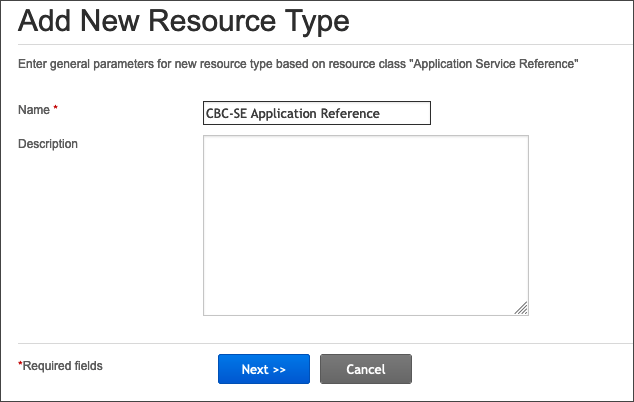
- Give the resource a name that will be recognizable to you in the future. To make the resource easier to find when creating the Service Template we recommend using something like SE Application Service Reference. Click Next
- Select the APS Type Spam Experts
- Then select the Application Instance created earlier
- Click Finish once you see the green banner at the top advising the resource type is ready to be created.
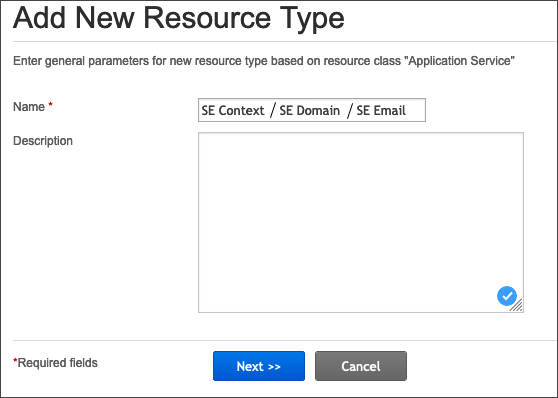
You will need to complete these steps three times; once for Context, once for Domain, and once for Email.
- Give the resource a name that will be recognizable to you in the future. We recommend SE Context, SE Domain and SE Email, and click Next
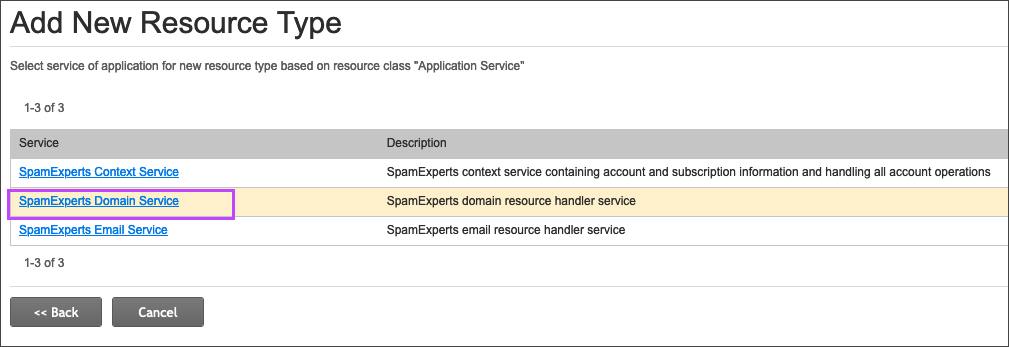
- Select a resource handler for the service you chose:
- Click Next
- Set the Additional Parameters as follows:
- SE Context: priority =10, Automatically provision service = ON
- SE Domain: priority =20, Automatically provision service = ON
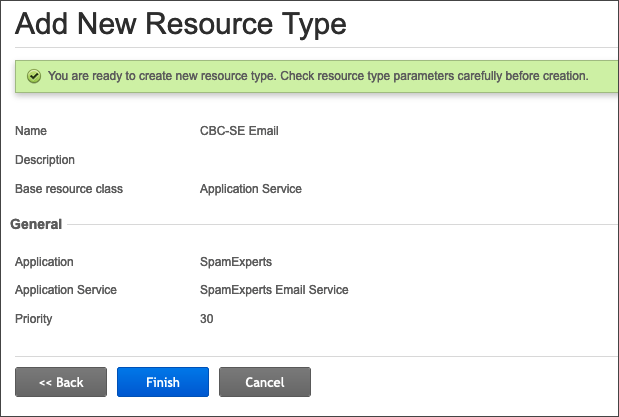
- SE Email: priority =30, Automatically provision service = ON
- Click Finish once you see the green banner at the top advising the resource type is ready to be created
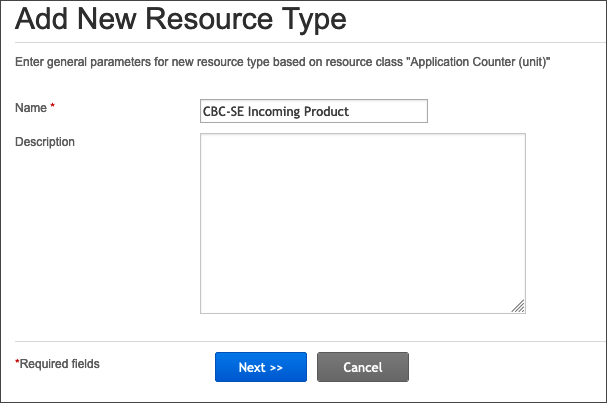
- Enter a name for the counter and click Next e.g. SE Incoming
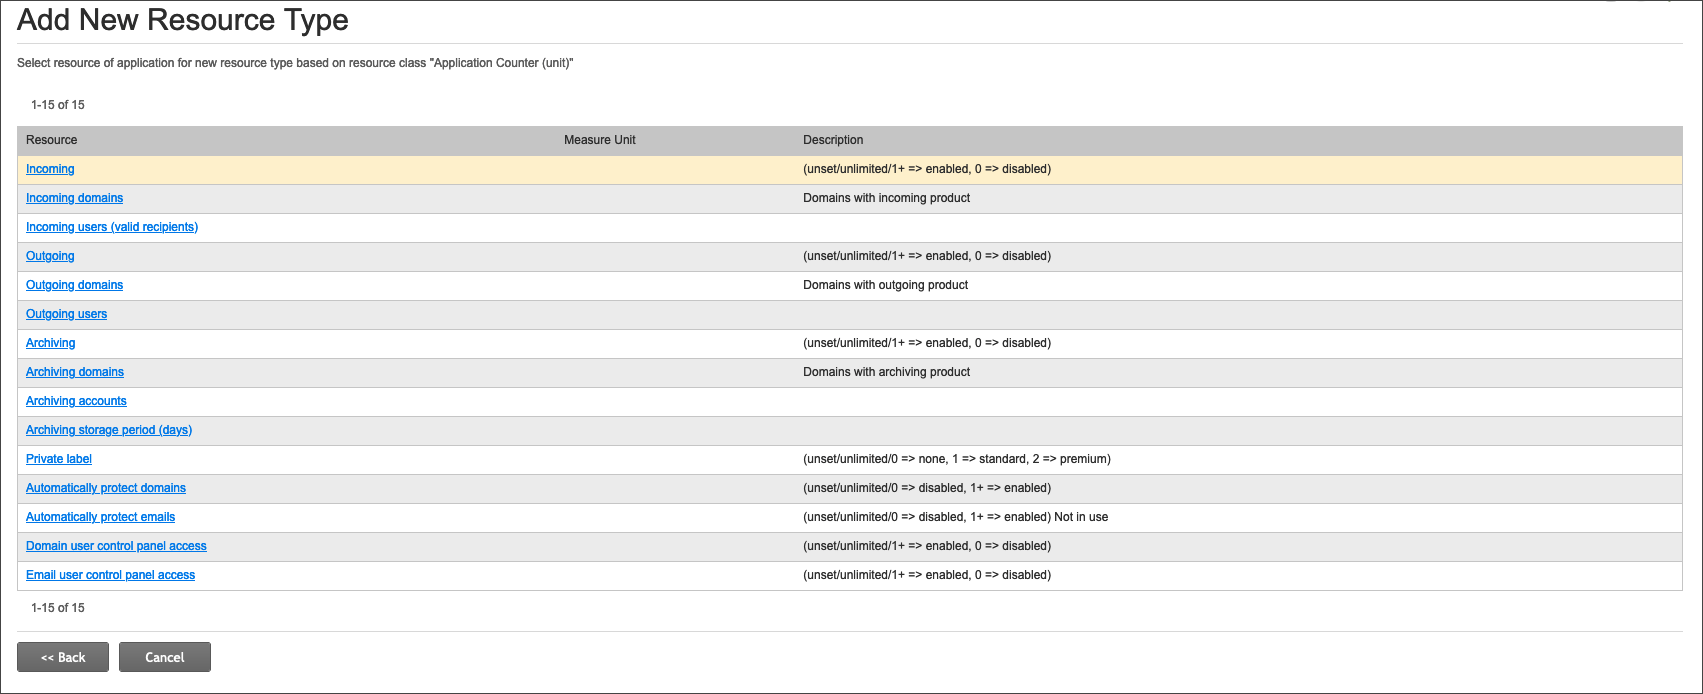
- Select the correct counter from the resource counter list
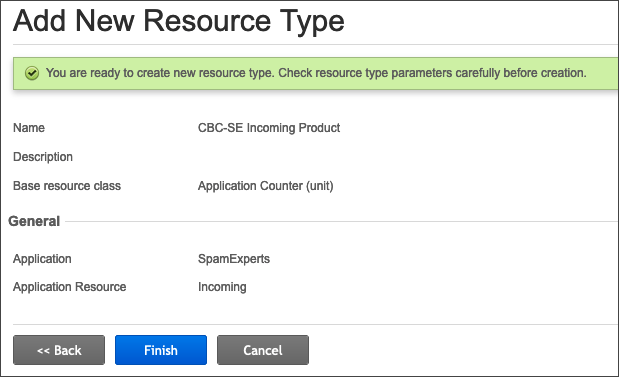
- Click Finish once you see the green banner at the top advising the resource type is ready to be created.
See Application Counter Types for details on resource types.
After completing the above steps, move on to Step 4: Add a service template.
Disclaimer: This documentation may contain references to third party software or websites. N-able has no control over third party software or content and is not responsible for the availability, security, or operation, of any third-party software. If you decide to utilize a release involving third-party software, you do so entirely at your own risk and subject to the applicable third party’s terms and conditions of the use of such software. No information obtained by you from N-able or this documentation shall create any warranty for such software.

