
Spam Experts no longer supports CloudBlue integration. This will be deprecated shortly.
Before beginning with the below steps, please ensure you have completed Step 4: Add a service template.
To access the Service Plan you need to switch to the CloudBlue Billing interface.
Add the Service Plan
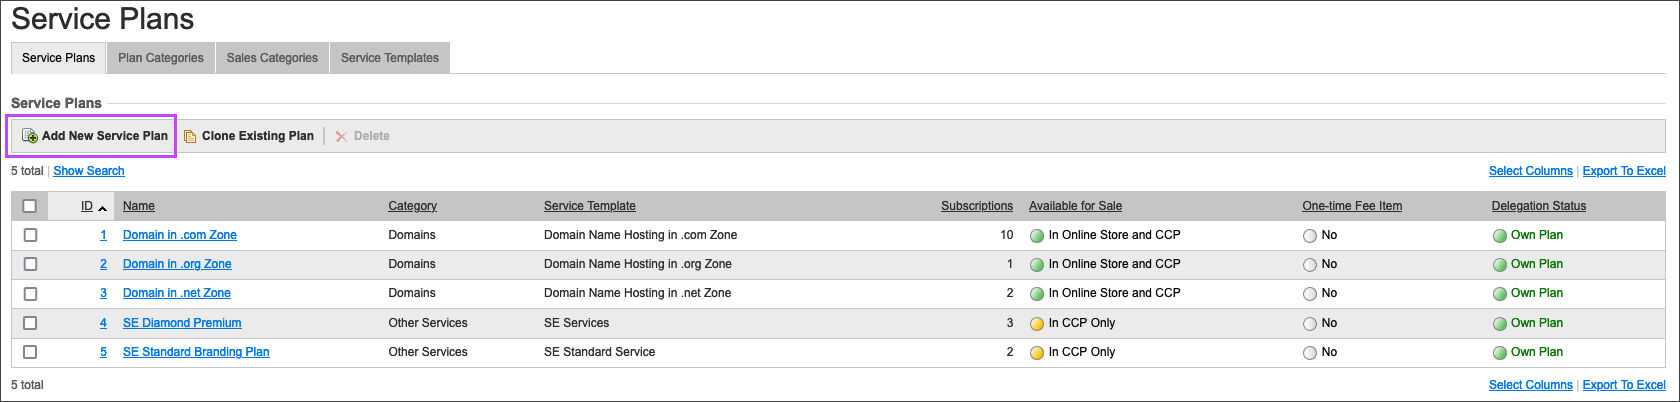
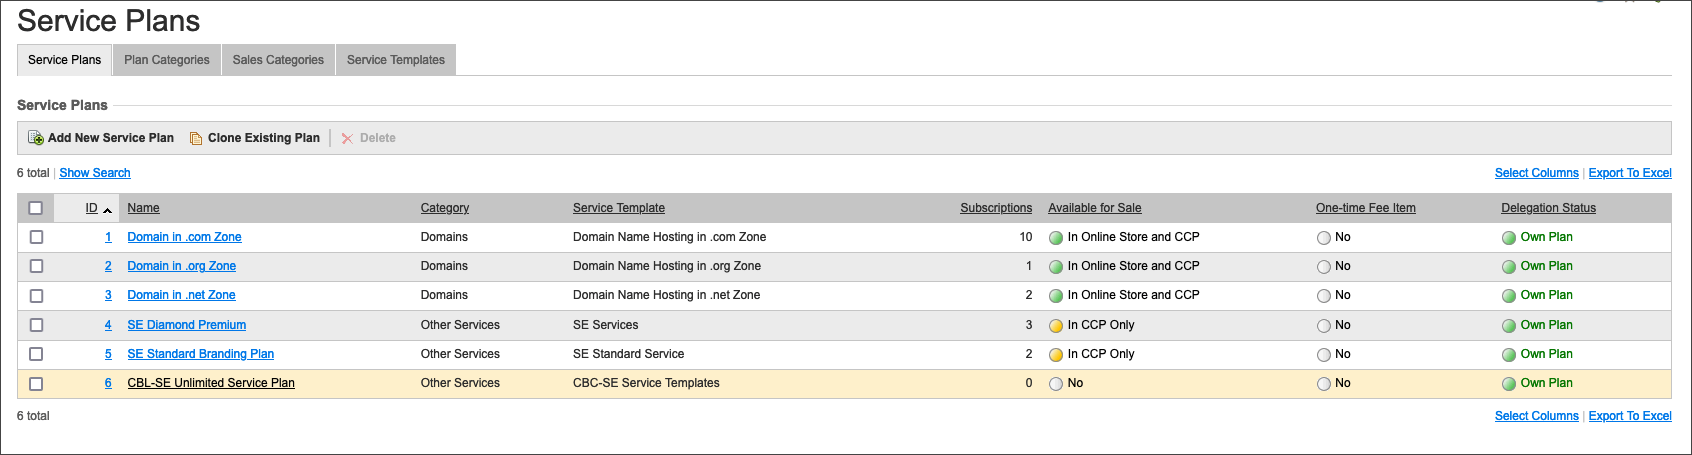
- Go to Products > Service Plans from the left-hand menu
- Click on the button labeled Add New Service Plan
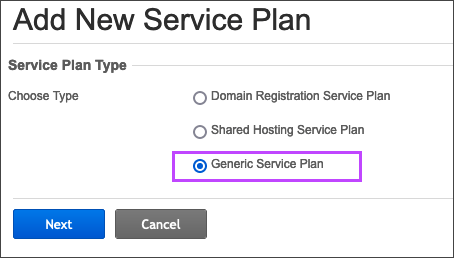
- Select the Generic Service Plan option
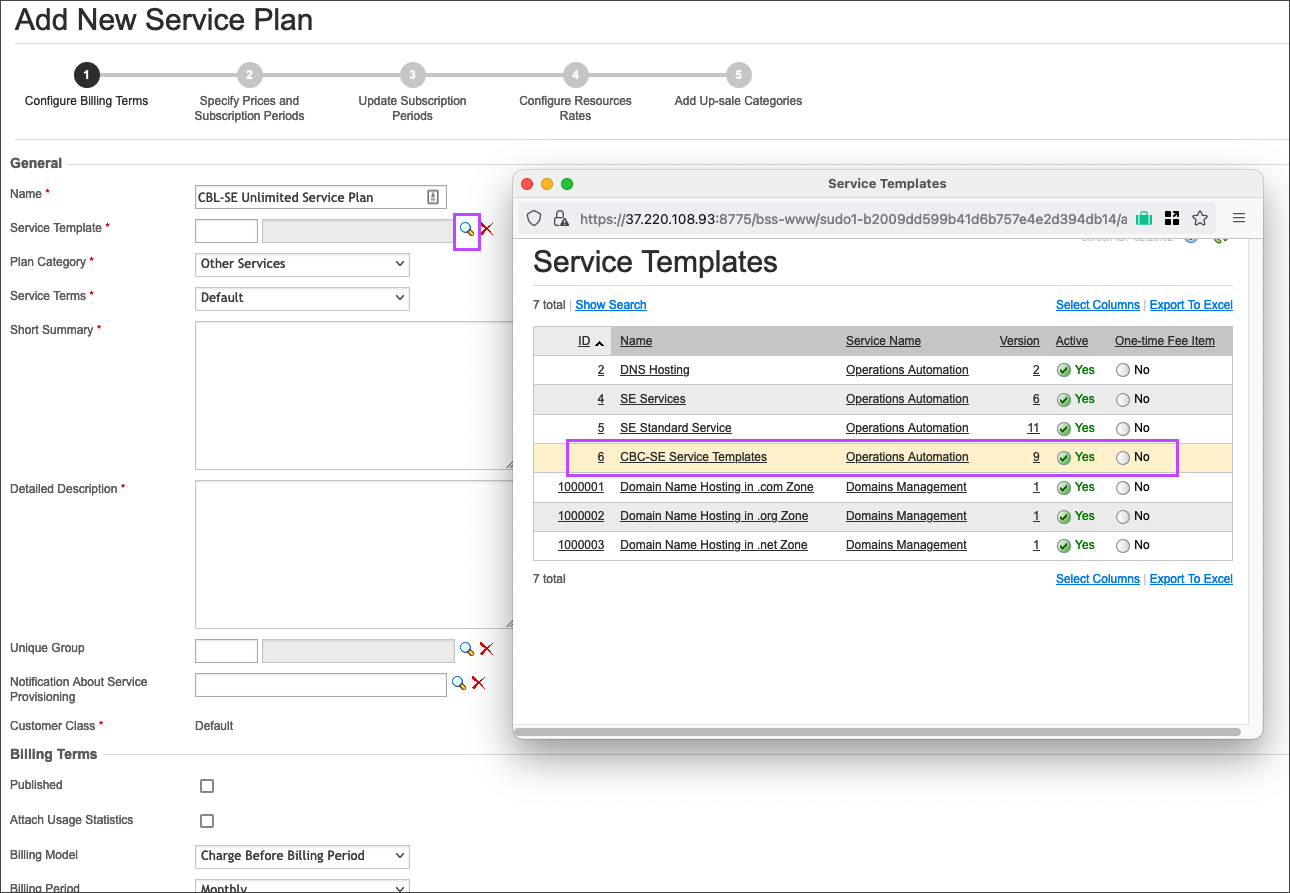
- Give the service plan an identifiable name in the Name field
- To select the Service Template from the ones made in Step 4: Add a service template click on the magnifying glass Search icon, and search for the service template by name
- To define the Plan Category field, select a category from the dropdown which your new service plan will belong to. The plan category defines how the plan will be taxed
- Select a service term from the Service Terms list
- Provide a short summary and a long description of the service plan into the Short Summary and Detailed Description fields respectively
- The Service Plan can also be included in a unique group. Unique groups restrict the combination of service plans in a single subscription: service plans belonging to the same group cannot be up-sales of each other
- Check the Published checkbox, to make the service plan available for sale
- Select a billing period from the Billing Period list. The Billing Period field differs depending on the billing period type. The following types are available:
- Fixed Number of Months - billing period in months
- Fixed Number of Years - billing period in years
- Configure any additional settings in here as required
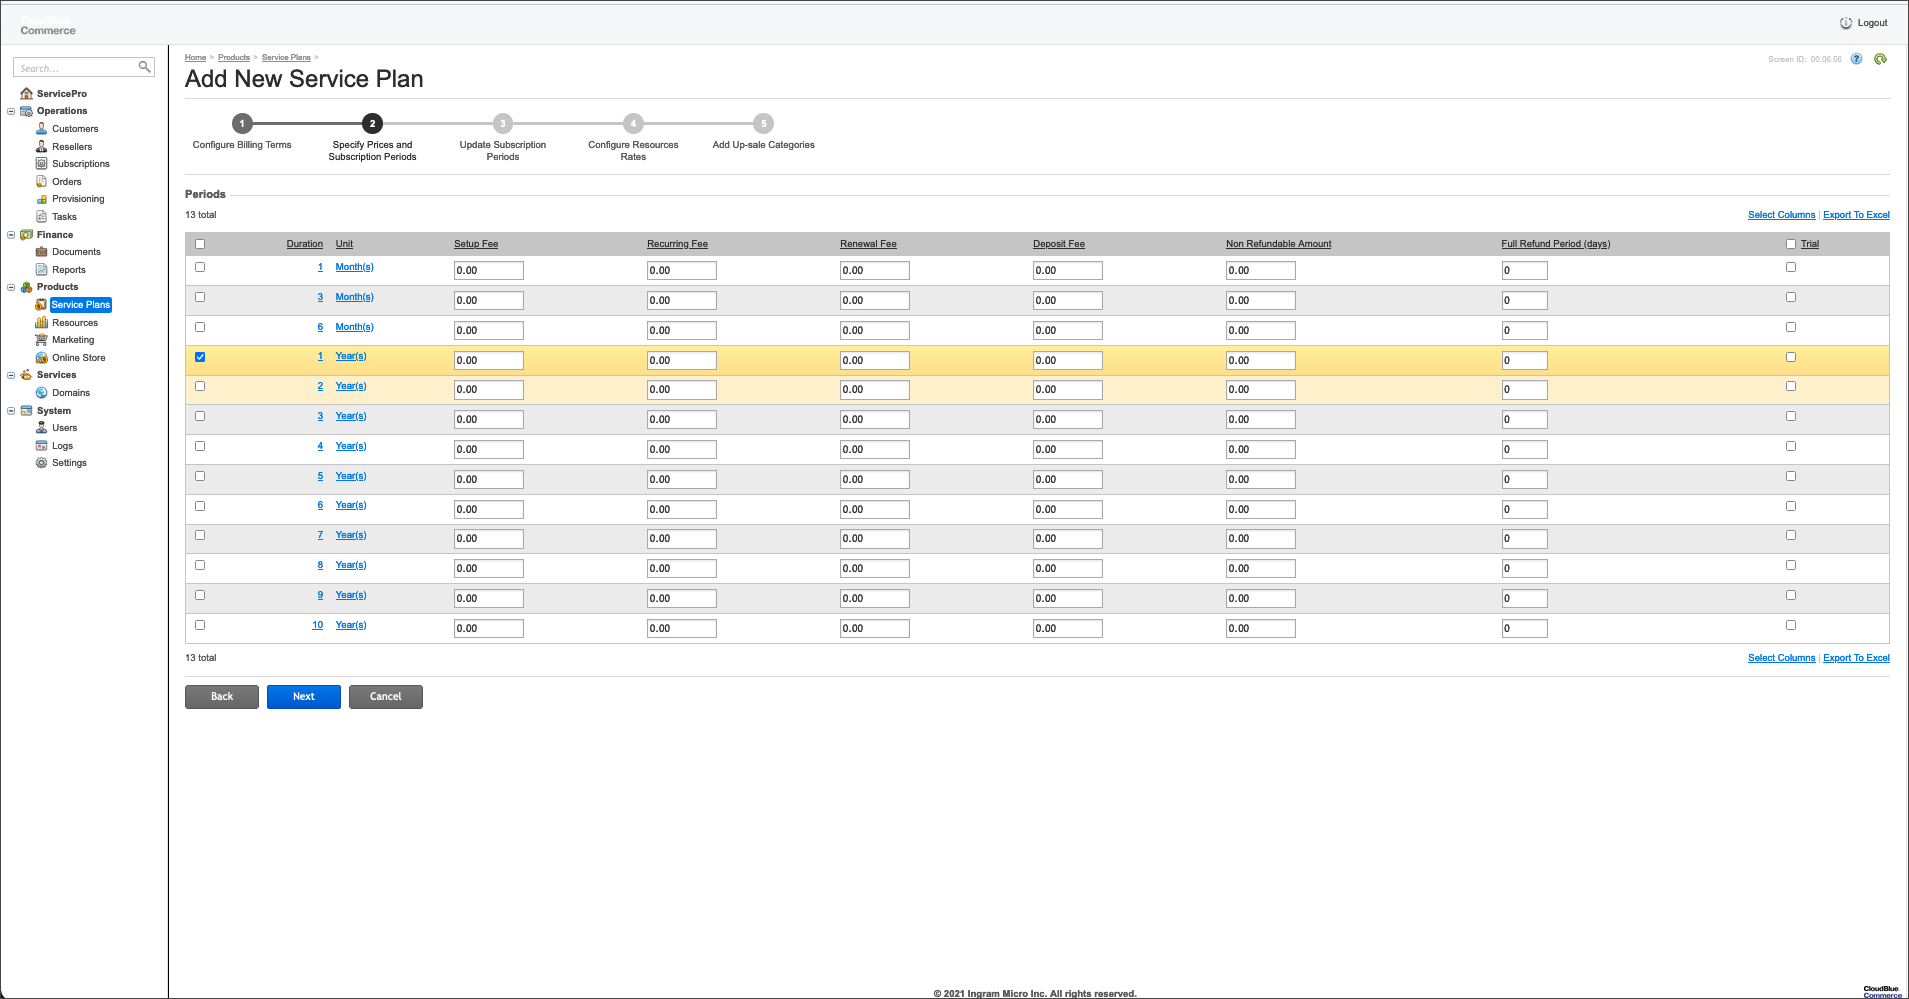
- Click Next to be taken to the Prices and Subscription Periods page
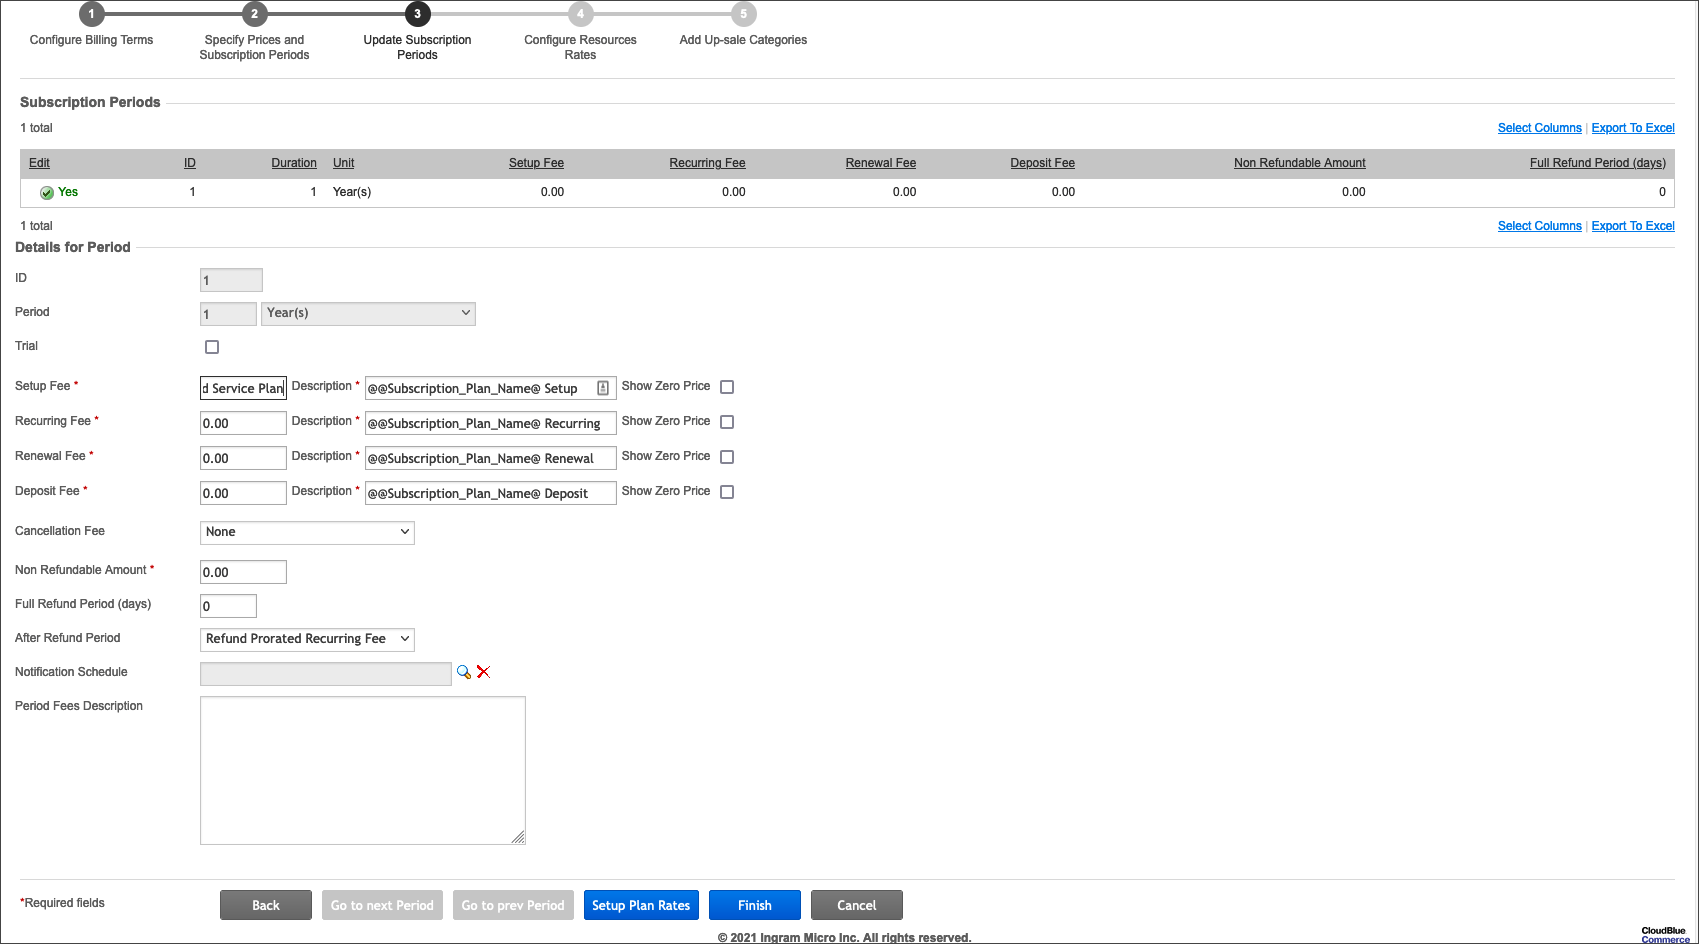
- Select the subscription period for the period you wish to set and click Next
- Check the Setup Plan Fees
- Click Finish and the Service Plan will be created

This is the name the customer will see in the shop.

The Service Template determines resources that are provided to the subscriber of the service plan.
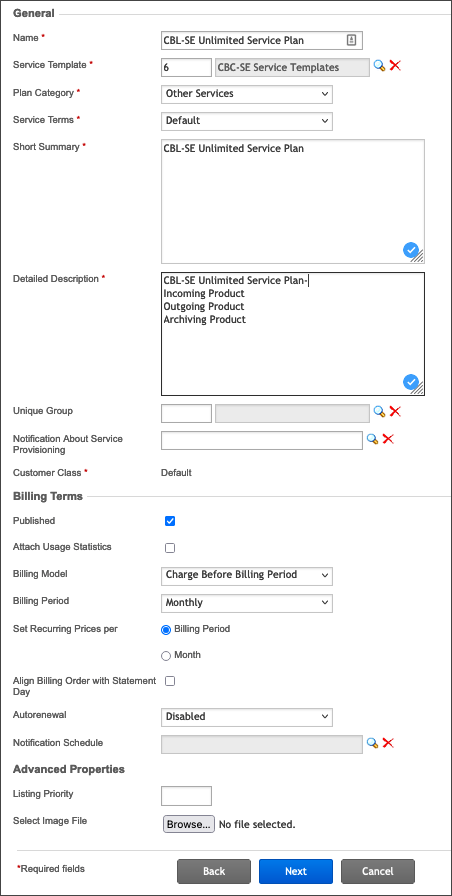
Both descriptions are shown to customer in the online store. Both descriptions can be input in HTML format.
Configure Service Plan Publication Settings
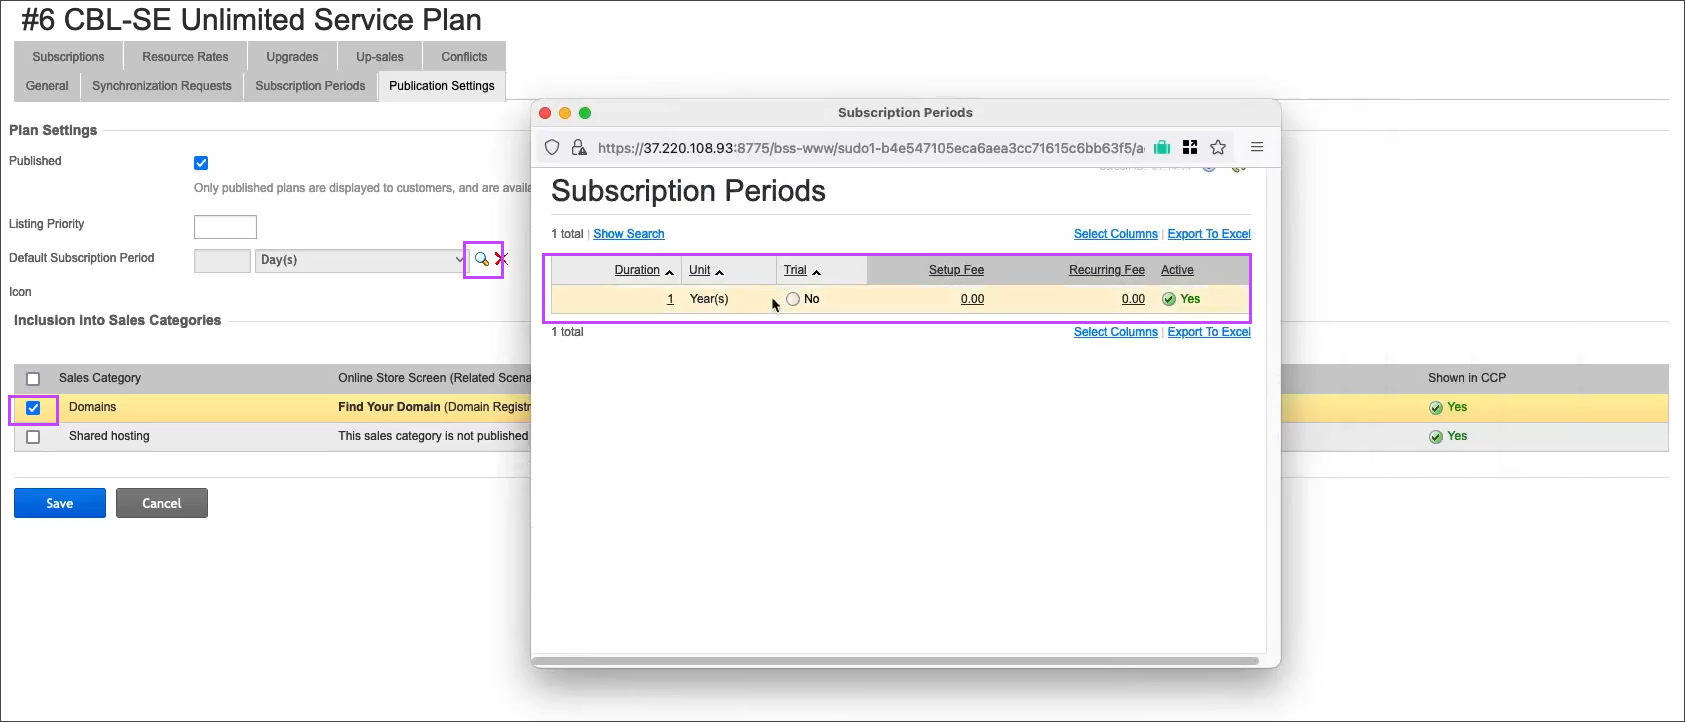
- Once the Service Plan displays on the list, click the plan name and navigate to the Publication Settings tab.
- Click Edit
- Check the Domains checkbox and then use the magnifying glass Search icon to find and select the plan
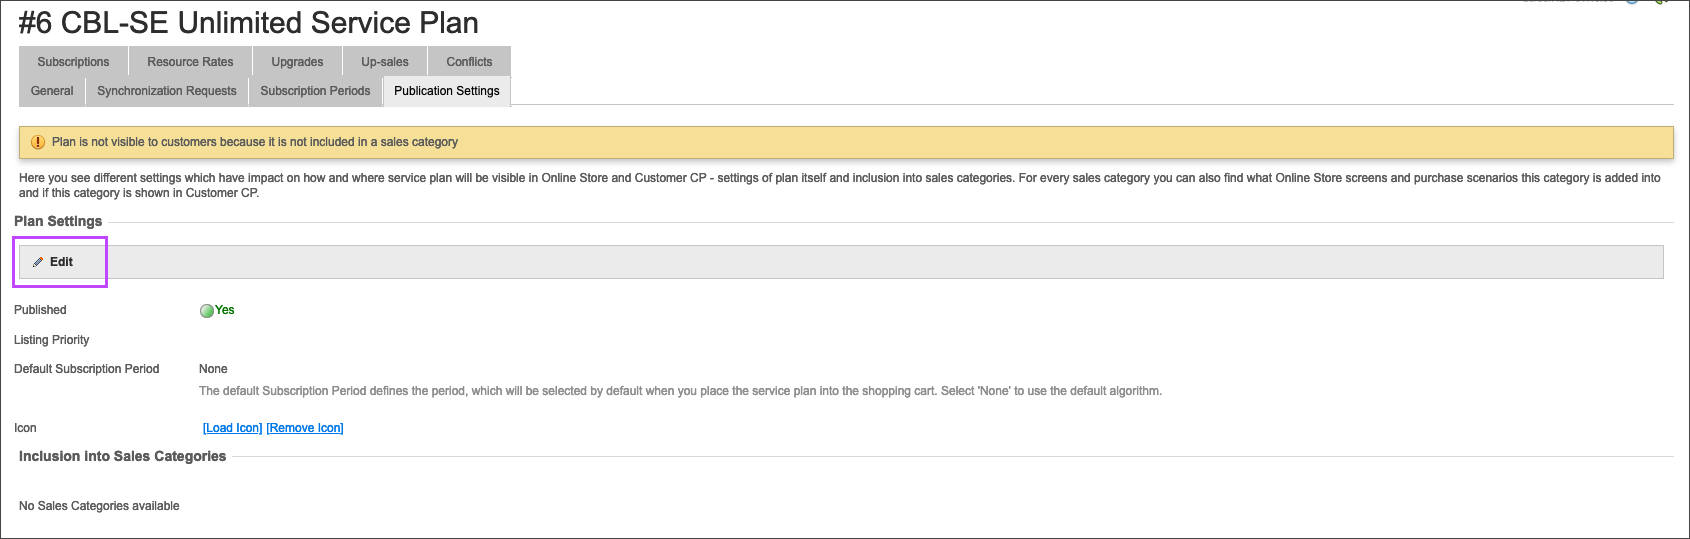
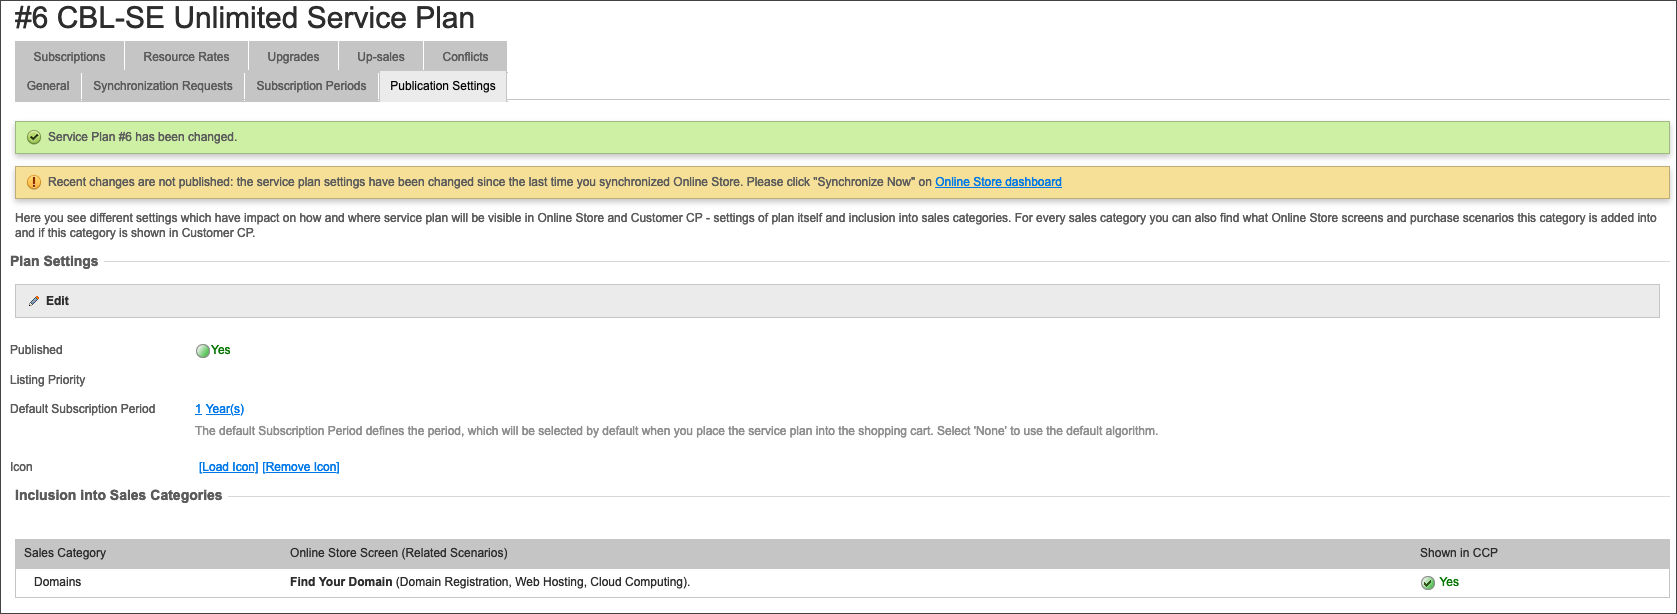
You will receive confirmation that the service plan has been changed
After completing the above steps, move on to Step 6: Create a customer.
Disclaimer: This documentation may contain references to third party software or websites. N-able has no control over third party software or content and is not responsible for the availability, security, or operation, of any third-party software. If you decide to utilize a release involving third-party software, you do so entirely at your own risk and subject to the applicable third party’s terms and conditions of the use of such software. No information obtained by you from N-able or this documentation shall create any warranty for such software.