
Configure SonicWall for SNMP Monitoring
To ensure Network Device Monitoring can retrieve detailed information from a device over SNMP, the device must have SNMP enabled and configured to accept local SNMP connections.
The below example covers the process for enabling SNMP and configuring local SNMP connections on a SonicWall,
For complete instructions on configuring your SonicWall products visit the SonicWall support website.
Information on the version of SonciOS in use on the SonicWall is available from How to check the current firmware version of your SonicWall.
1. Configure SNMP on the firewall
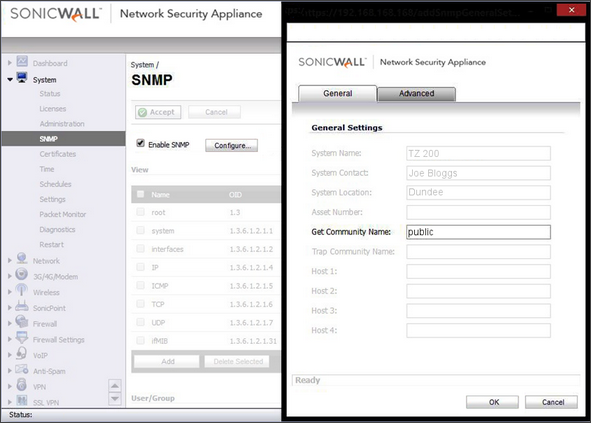
SonicOS 5.9 and later
- Log in to the SonicWall management console as admin
- Go to System > SNMP
- Check the Enable SNMP tick box
- Select Configure
- Populate the Get Community Name field in the SNMP Settings dialog. For example, enter public
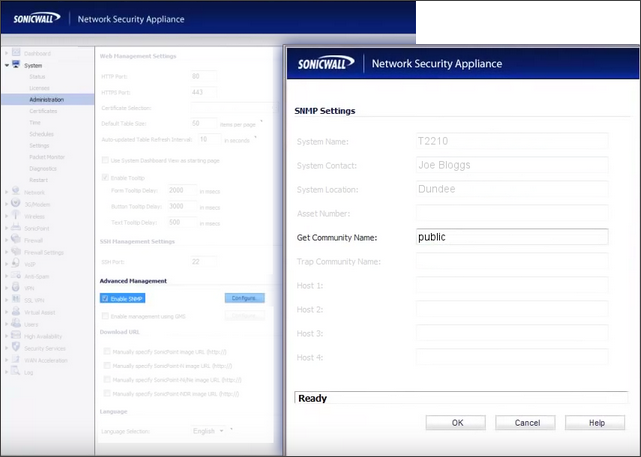
SonicOS 5.8 and earlier
- Log in to the SonicWall management console as admin
- Go to System > Administration
- Check the Enable SNMP tick box in Advanced Management
- Select Configure
- Populate the Get Community Name field in the SNMP Settings dialog. For example, enter public
Where entering a Community Name other than public in this field, please ensure these SNMP credentials are entered in the Network Discovery settings for this network. If these SNMP credentials are not entered in Network Discovery, the Discovery Agents are unable to query the device over SNMP.
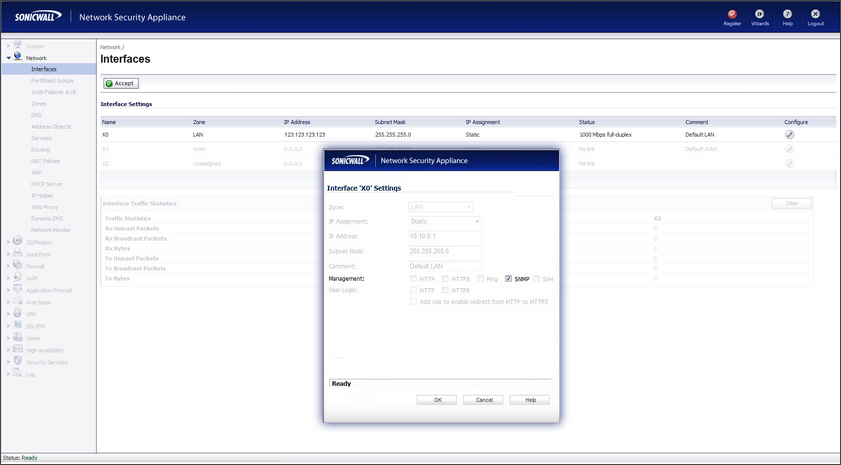
2. Allow SNMP Access to the firewall
All SonicOS versions
- Log in to the SonicWall management console as admin
- Go to Network > Interfaces
-
Click the Configure (pencil) button against the XO - LAN interface
-
Check the SNMP box in the Management section of the Interface 'XO' Settings dialog
-
Click OK to save
-
Click Accept to apply
Please note that we are not responsible for the content of external sites.