
Disk Encryption Manager Reporting
There are 2 dedicated reports available in N-sight RMM for Disk Encryption Manager:
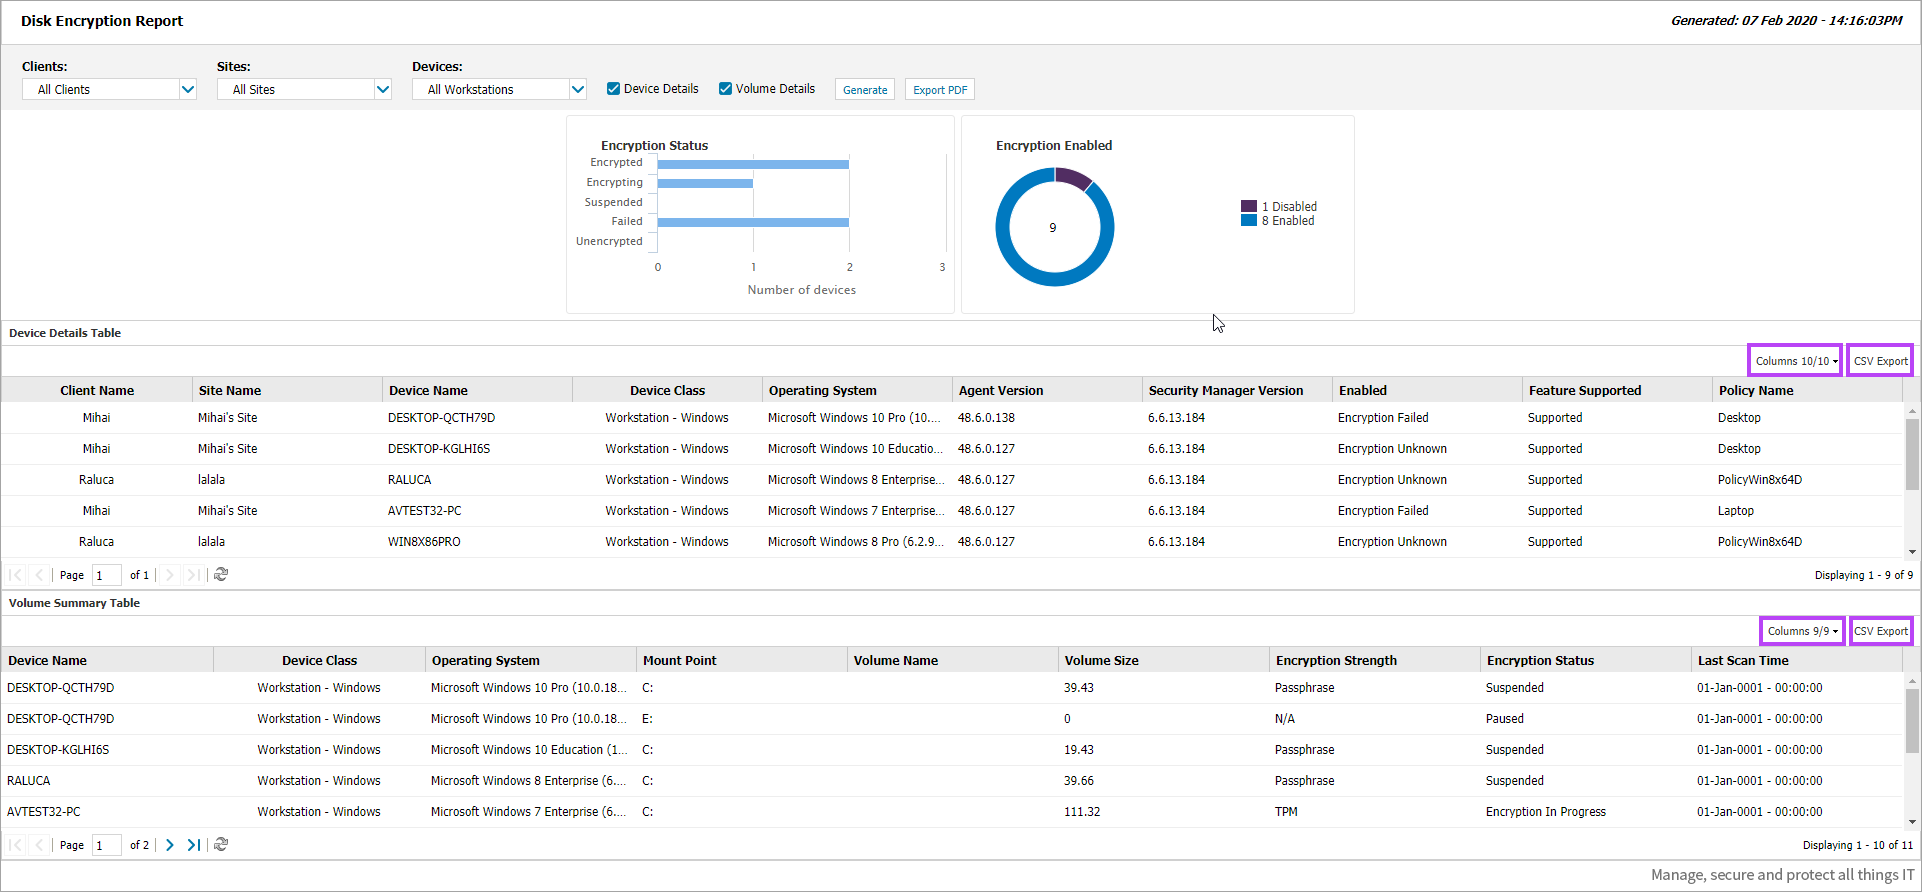
- Disk Encryption Report: Provides a graphical overview of Encryption Statuses and Encryption Enabled Vs Disabled by default. You can also opt to add Device and Volume details if required
- Recovery Key Report: Provides a list of ALL Recovery Keys and their associated Key ID / Protector ID / Recovery Key ID in one location. Often used when devices are removed/decommissioned from the dashboard, so that Recovery Keys are known for any drives still encrypted after turning off DEM. The report does not require the end-users to supply their Key ID / Protector ID / Recovery Key ID to be run. To provide a single Recovery Key to one end-user in the event they require it, please see: Provide a Recovery Key for an End-user
As the Recovery Key Report contains sensitive information and allows decryption of all listed devices, caution should be taken when assigning permissions to technicians to access and run the report.
Disk Encryption Report
To access the Disk Encryption Report:
- In the All Devices view, select Reports > Managed Antivirus Reports > Disk Encryption Report. The Disk Encryption Report controls open in a new tab in your browser
- Select the target Clients, Sites, and Devices using the drop-down menus
- Tick the check box for Device Details and/or Volume Details if required
- Click Generate to create the report
- Once the report has generated, click Export PDF to create a PDF of the report if required


If you selected Device Details, Volume Details or both, these sections of the report show beneath the graphs and can be filtered to show only the information required by selecting or deselecting which columns to show.
To change the shown columns on a generated report:
- Click Columns to the upper right of the report section
- Tick or untick the columns as required
You can also export the Device Details and Volume Details sections to CSV by clicking CSV Export next to the Columns button to the upper right of the required report section.
Recovery Key Report
- If you close your N-sight RMM account (trial or full), you must rely on the Recovery Key Report. Generate and save this report securely before closing your account. We do not store recovery keys after account closure.
- If you delete devices from N-sight RMM, the last known recovery key remains in the Recovery Key Report for 90 days only.
- If you remove Disk Encryption Manager but keep the device in N-sight RMM, you can still access the Recovery Key Report. This report includes the last known recovery key before the device returned control to the end user. The end user may have re-encrypted the device, which changes the recovery key.
- Recommendation: Run the Recovery Key Report and store it in a secure location before performing any other actions. Otherwise, you will not be able to access recovery keys from N-sight RMM or Technical Support.
To access the Recovery Key Report:
- In the All Devices view, select Reports > Managed Antivirus Reports > Recovery Key Report. The Recovery Key Report controls open in a new tab in your browser
- Select the target Clients, Sites, and Devices using the drop-down menus
- Tick the check box to Include removed devices (maximum 90 days) if required
- Click Generate to create the report
- Once the report has generated, click Export PDF to create a PDF of the report if required


If you selected to Include removed devices (maximum 90 days), this appears as a separate section within the generated report and both sections can be filtered to show only the information required by selecting or deselecting which columns to show. The Recovery Keys stored are the last known keys recorded by N-sight RMM – they could have changed as the end user has control of the removed devices and may have re-encrypted on their own.
To change the shown columns on a generated report:
- Click Columns to the upper right of the report section
- Tick or untick the columns as required
You can also export the Active Devices and Include removed devices (maximum 90 days) sections to CSV by clicking CSV Export next to the Columns button to the upper right of the required report section.
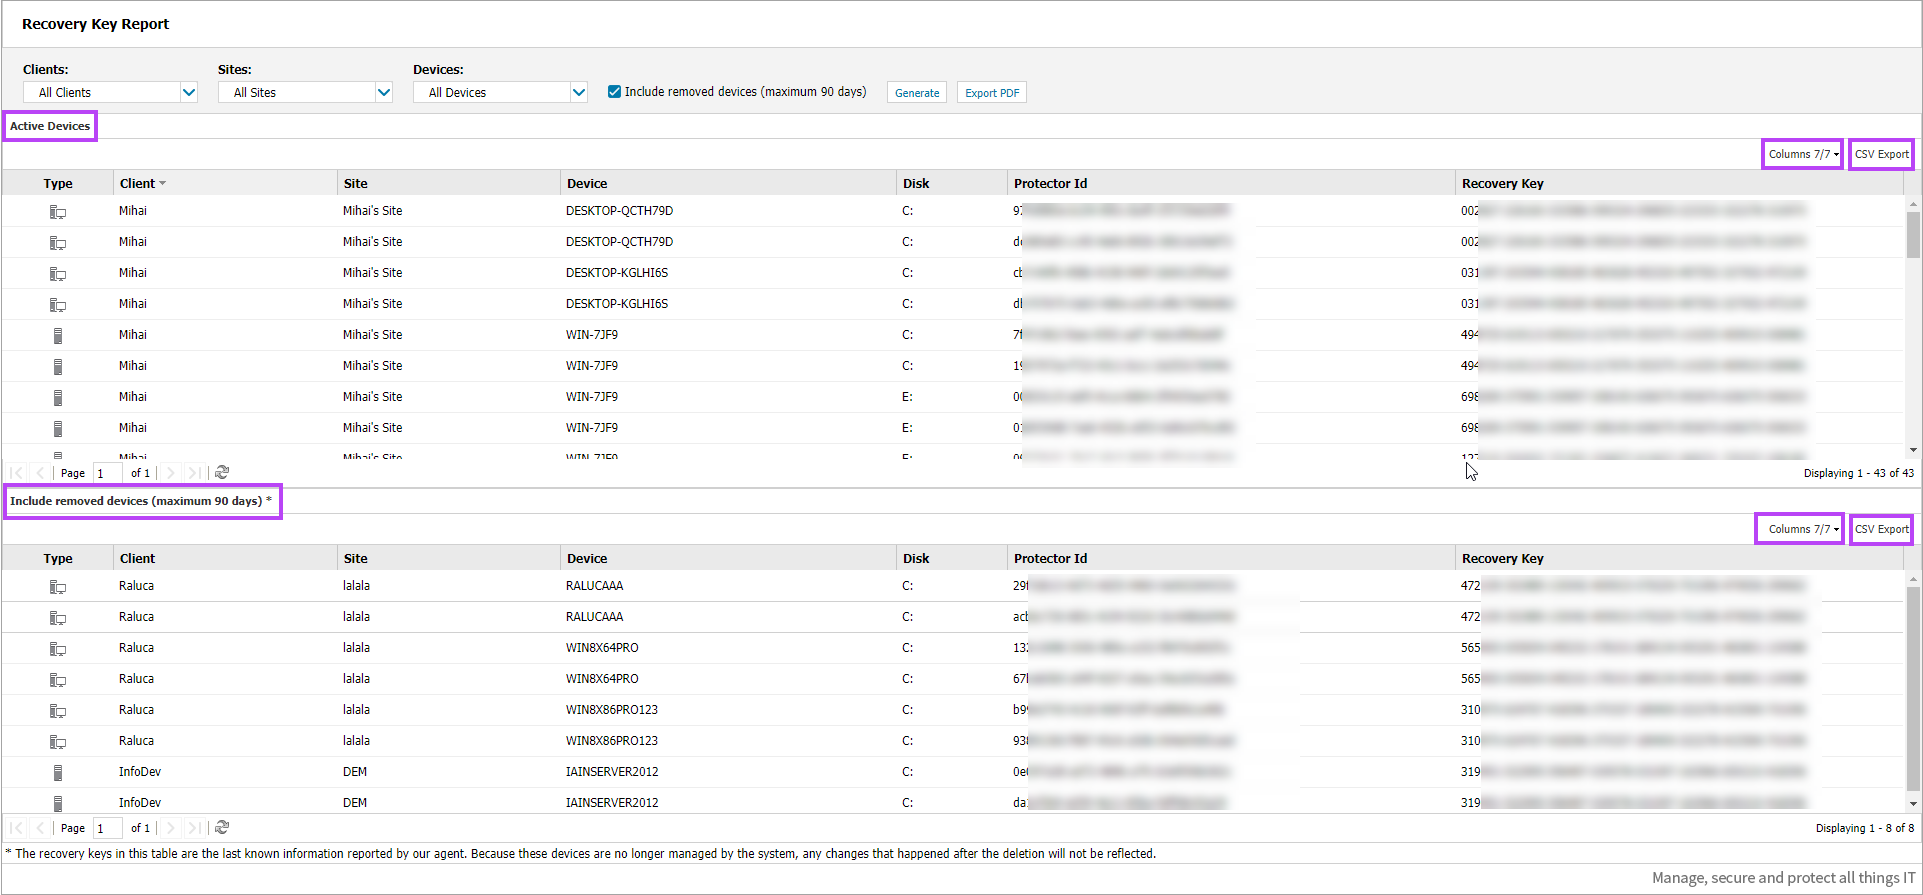
You will sometimes see multiple entries for the same device in this report, this happens due to the internal processes of BitLocker updating the encryption keys for a device (for example, in the event that the drive has been encrypted by BitLocker prior to implementing Disk Encryption Manager). As such, when a user needs the Recovery Key, the Protector ID offered by BitLocker during the boot will be one of any already used for the disk encryption on that device. To aid in this, the report lists all Protector IDs and Recovery Keys associated to the device.