
Setup Security Preferences
Before you invite your team to start storing and sharing their passwords, you will first need to configure three different types of security preferences.
Security Groups – What Users Can See
Security Groups are used to define which users are able to access and view particular Folders you have created to organize your passwords in the Company Vault.
Create New Security Group
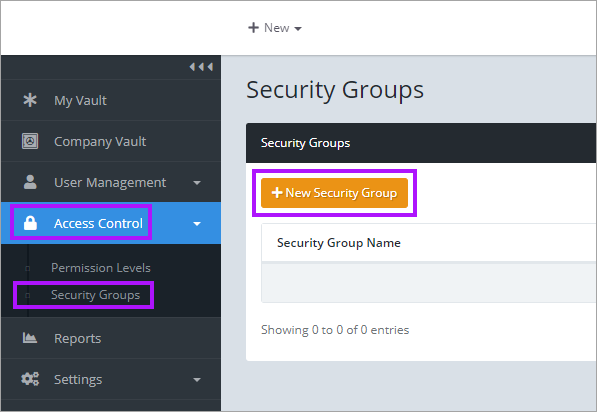
- Navigate the menu, Access Control > Security Groups.
- Select the + New Security Group button.
- The New Security Group dialog opens. Click into the Name field and enter a name for the new group.
- Click Edit for each of Assigned Users and Assigned Clients to set which users and clients are associated to the Security Group.
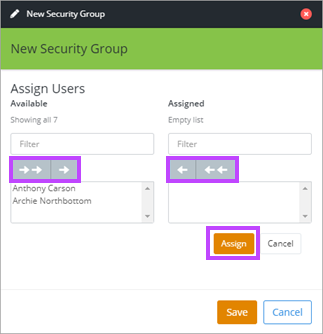
- Assign Users/Permissions by selecting them from the left pane and selecting the right arrow button above the column. The double arrows move all in the column.
- To remove Users/Permissions, select them to be removed on the right pane and select the left arrow button in the center.
- Click Assign once the required permissions are set to be taken to the previous screen.
- Click Save once Users and Permissions have been assigned.
- Security groups are applied to folders in the Edit Folder window by selecting or removing previously created/saved groups.

Edit Security Group
- Select Edit Security Group in the Actions column of the Security Group list, next to the relevant group.
- To assign or remove users or permissions, follow the same steps as above.

Delete Security Group
- Select Delete Security Group in the Actions Column of the list next to the desired security group.

Permission Levels – What Users Can Do
Permission Levels determine what actions a user can and cannot perform. See Permission Level Guide for details of the default levels available. You can also create your own levels if required.
Create a new Permission Level
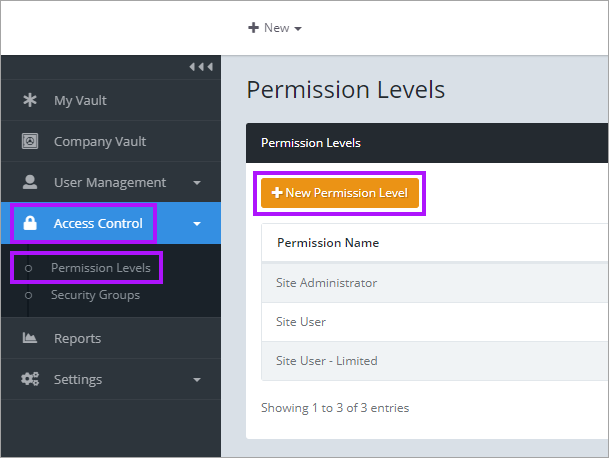
- Navigate to Access Control > Permission Levels.
- Click the + New Permission Level button.
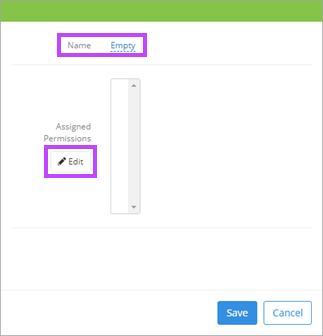
- Click Empty and enter the Permission Level name desired.
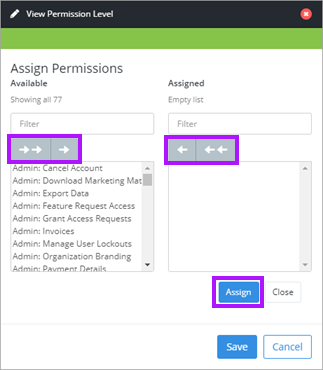
- Click Edit. This opens the Assigned Permissions dialog.
- Assign permissions by selecting them from the left pane and selecting the right arrow button above the column. The double arrow moves all in the column.
- To remove permissions, select the permissions to be removed on the right pane and select the left arrow button in the center.
- Click Assign once the required permissions are set to be taken to the previous screen, or Save to complete the permission level setup and close the dialog.
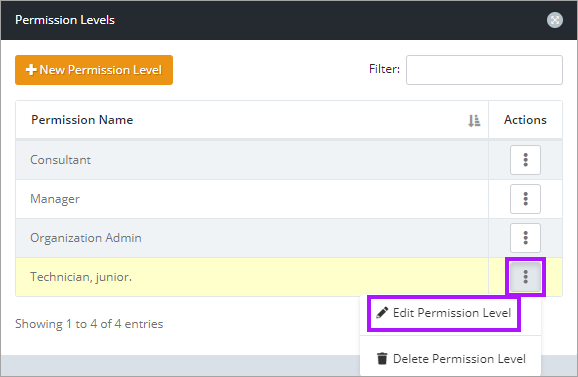
Edit Permission Level
- Select the Edit Permission Level icon in the Actions column of the Permission Levels list, next to the relevant custom permission level.
- To assign or remove permissions, follow the same steps as above.
- Default permission levels cannot be modified.
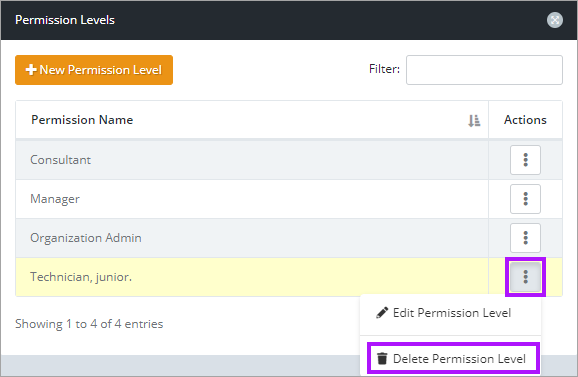
Delete a Permission Level
- Select Delete Permission Level in the Actions column next to relevant custom permission level.
- Default permission levels cannot be removed.
Two-Factor Authentication – How Users Are Protected
Two-Factor Authentication is optional, but highly recommended. This setting adds an extra level of protection, requiring your users to request an additional form of identification to access their passwords.
Please see Multi-Factor Authentication (MFA) for the available options and configuration details.