Create Folders and Passwords
You can create Folders in the Company Vault and My Vault screens, in order to organize the credentials into a structure suitable for your needs.
Create a Folder structure first to make it easier to create or import passwords going forwards.
To add a Folder to a vault:
- Click Company Vault or My Vault in the main menu.
- The root folder of the client is highlighted in grey, click the New Folder button to add a folder to the root folder.
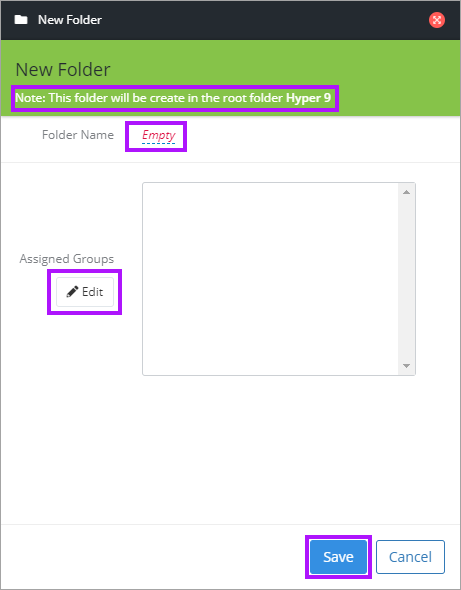
- The New Folder screen opens to the right. Click Empty and enter a name for the Folder.
- Click the Assigned Groups Edit button to assign Security Group access permission to the Folder.
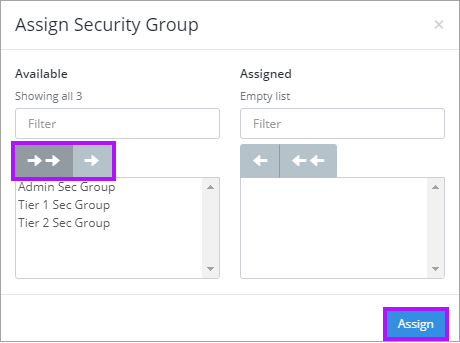
- Assign Security Groups by selecting them from the left pane and selecting the right arrow button above the column. The double arrows move all in the column.
- To remove Security Groups, select them to be removed on the right pane and select the left arrow button in the center.
- Click Assign once the required permissions are set to be taken to the previous screen.
- Click Save to complete the Folder creation.

It is also possible to add a Folder within another. To do so, select the containing Folder prior to clicking New Folder.
The New Folder screen advises which folder you are adding the New Folder to, in the green banner area.
Once the folders have been created, be sure to select the appropriate one prior to adding new credentials into it.
Creating Passwords
With Security Groups set, and a Folder structure created, you are now ready to begin adding passwords. Passwords can be added manually, or be imported.
Adding a Password Manually
To create a new password:
- Navigate to the My Vault or Company Vault screen.
- Select the target folder if required.
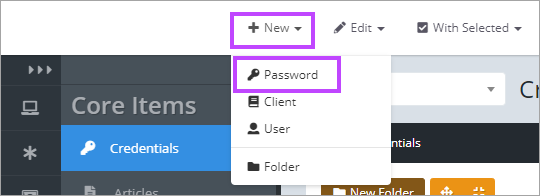
- Select New at the top of the dashboard, or click the +New Password button.
- Select Password.
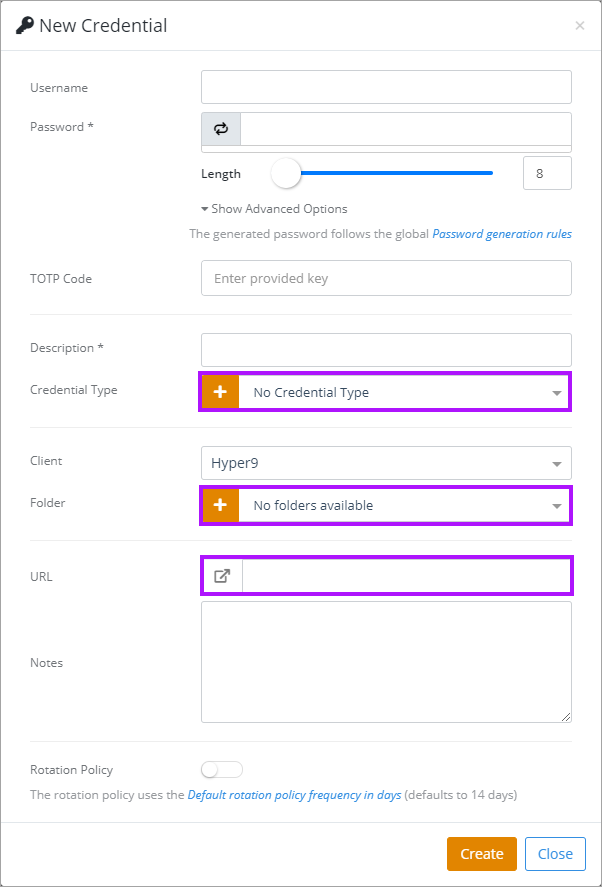
- Enter the username and password details in the appropriate fields.
- Select Credential Type, which designates the broad classification of the kind of credentials (i.e. Router, Domain Administrator, SQL Server). Create the Credential Type if required by clicking the + icon.
- Enter the URL if required. The Link icon will launch the URL allowing you to confirm it is correct.
- Notes are used to store additional information associated with the credentials such as login instructions, serial numbers, alternate URLs and user notes. Enter these if required.
- Click Create to save the new password.
Importing Passwords by CSV.
If you encounter an error when importing please try opening your CSV in notepad++ and check to see if there are any extra columns on the csv.
If you wish to import a particular password into your My Vault, navigate to the My Vault section and select the Quick Add + New button and then select Import to Vault from the drop-down. There is also a specific Vault Import Template available here.
- The downloaded files are CSV files and can be opened in any spreadsheet editor.
- To import passwords, use the Passwords Import Template.
- On each row input a different password entry.
Populating the CSVs for Import
All characters must match exactly.
The Passportal ID field is always blank. Typing in an existing passwords ID will cause the import template to create a new entry.
The Credential Type is the type of password and corresponds to the types listed on the Credential Types page. Examples include Router, Domain Administrator or Website.
Entering a Credential Type that does not currently exist in the Credential Types list will create that credential type. Like all other fields, this is case sensitive. Entering router will create that type, even if Router already exists. For more details, see Managing Credential Types.
The Description Field is displayed on any password list, ensure that it accurately describes the password.
Expires (Yes/No) is a toggle to determine whether the password will follow a rotation policy or not. Like all other fields this is case sensitive e.g. type Yes or No and not yes or no (lowercase).
The Notes section is for any additional information to be included with the password, including but not limited to; additional credential information, serial numbers, login instructions, alternate URLs, configuration information, etc.
The URL will store the URL for the password, and allow the website to be launched when viewing the password. This URL will also be used for our one-click login tools.
The Folder field will determine which folder the password will be imported into (if any) within the defined client. If the folder does not currently exist, it will be created. To add a subfolder add double forward slashes [ // ]. Admin//Firewall will create the folder Admin and the subfolder Firewall.
Like all other fields this field is case sensitive and for example, entering Tools in one password and tools in another password will create folders with matching names (one with an upprcase 'T' at start, and one all in lowercase).

When you are finished, ensure that all characters match exactly. The import isBlank space and case sensitive, improper white space and casings may cause undesired behavior.
- Select all cells where you want to remove or replace carriage returns.
- Press Ctrl+H to open the Find & Replace dialog box.
- In the Find What field enter Ctrl+J. It will look empty, but you will see a tiny dot.
- In the Replace With field, Press Alt+Enter. It will look empty, however, when you click Replace All you will see that changes have been made.
Performing the Import
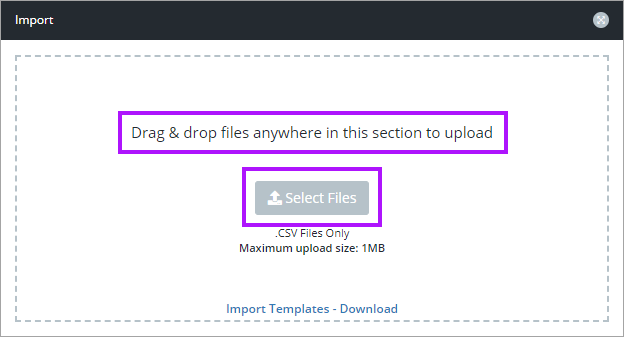
- Navigate to Settings > Import / Export in the main menu.
- Drag-and-drop your CSV into the Import section or click the Select Files button and choose the file to be imported.
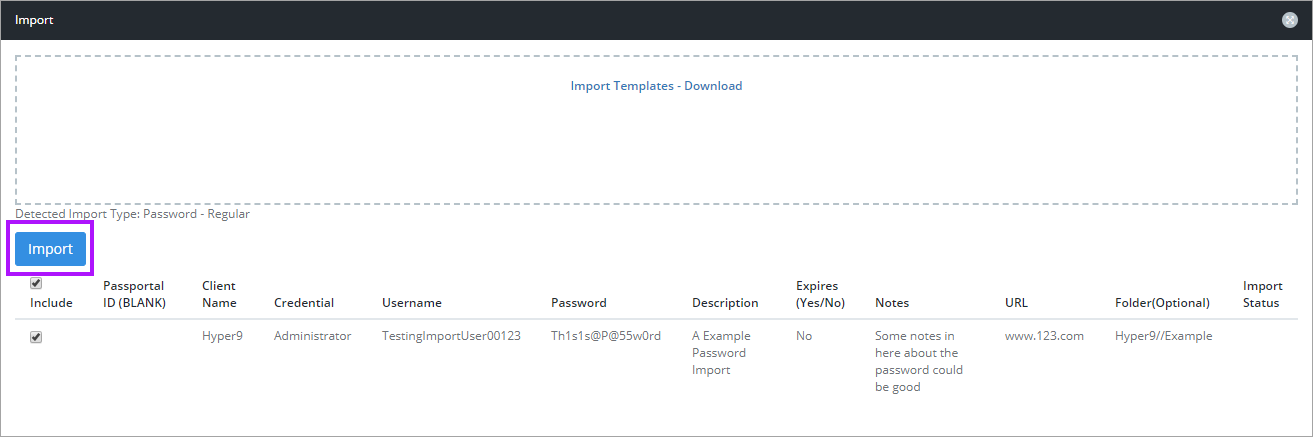
- If the file is correctly populated and has the .csv extension, it will show a list of the passwords that are to be imported.
- Review the data to be imported, then select Import.