Datto Autotask PSA Integration Configuration
Passportal can integrate with Datto Autotask PSA and import:
- Users
- Companies
- Configurations
- Contacts
- Locations
Passportal then updates each night so it can keep these lists up-to-date. Any records created in Datto Autotask PSA will become automatically created in Passportal.
You need to have Documentation Manager enabled in order to integrate with Datto Autotask PSA. Please contact your Account Manager if you are interested in enabling this feature.
Enabling Datto Autotask PSA Integration
Prerequisites
To setup the integration you will need:
- The Username and Password of a suitable Datto Autotask PSA user account. Please see Creating the Datto Autotask Integration User Account for full details.
-
Fields within Assets recorded in Autotask PSA required for the assets to sync into Passportal:
The user account being used to set up the Datto Autotask PSA sync needs to be assigned API User (system) security level permissions within Datto Autotask PSA.
| Datto Autotask PSA Fields | Requirement |
|---|---|
| Asset Type | Mandatory |
| Reference Name | Mandatory |
| Serial Number | Optional |
Integration
To integrate with Datto Autotask PSA:
- Select Settings.
- Select Configure Integration.
- Select Datto Autotask PSA.
- Enter the Username and Password of the Datto user in the appropriate fields. Toggle to enable the sync selections if required.
- Auto-create toggles become available when the corresponding Sync toggle is enabled. When toggled ON new entries created in Datto Autotask after the initial sync will be created in Passportal.
- Auto-Create new Clients
- Auto-Create new Users
- Auto-Create new Configurations
- Click Authenticate.
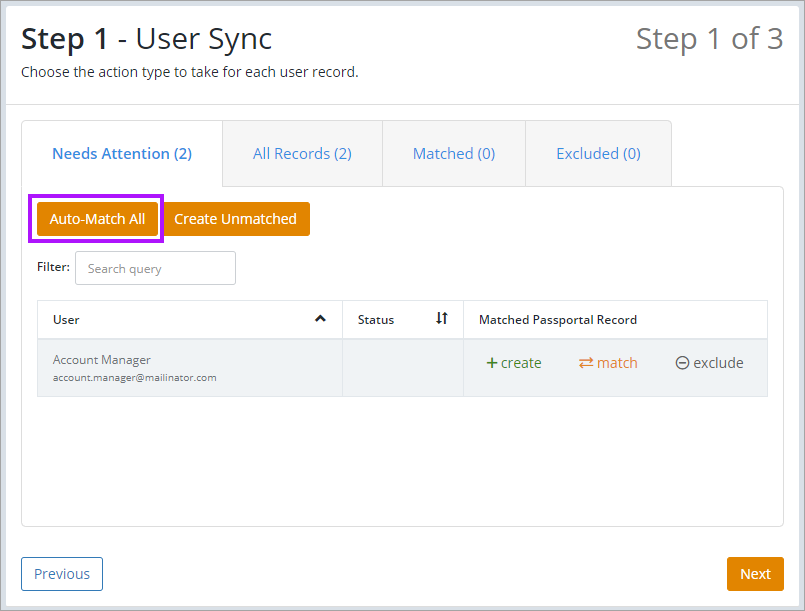
- If Sync Users has been enabled in the previous step, the User Sync screen is now displayed. Passportal will attempt to match all existing users set up in Passportal with their corresponding Datto Autotask PSA users, to ensure duplicates are not created. Users must have identical names for this to work. Select Auto-Match All to start this process.
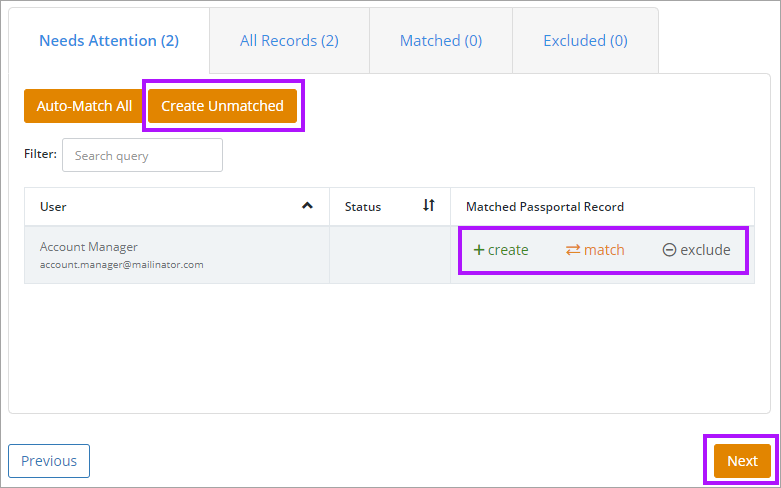
- If you would prefer to manually match the users, you can also do this by clicking on Match in the Matched Passportal Record column and clicking on the corresponding user in the drop-down.
- For the remainder of the users select either the Create or Exclude buttons in the Matched Passportal Record column. If you have a large list you can just exclude the users you don't want and select the Create Unmatched button to create the remaining users.
- If you excluded a user that you would like to later add, simply select the Excluded Records tab and select Create or Match.
- You will be able to revisit this page after the initial setup and change any of the settings or create any users you had previously left uncreated. Click Next to continue.
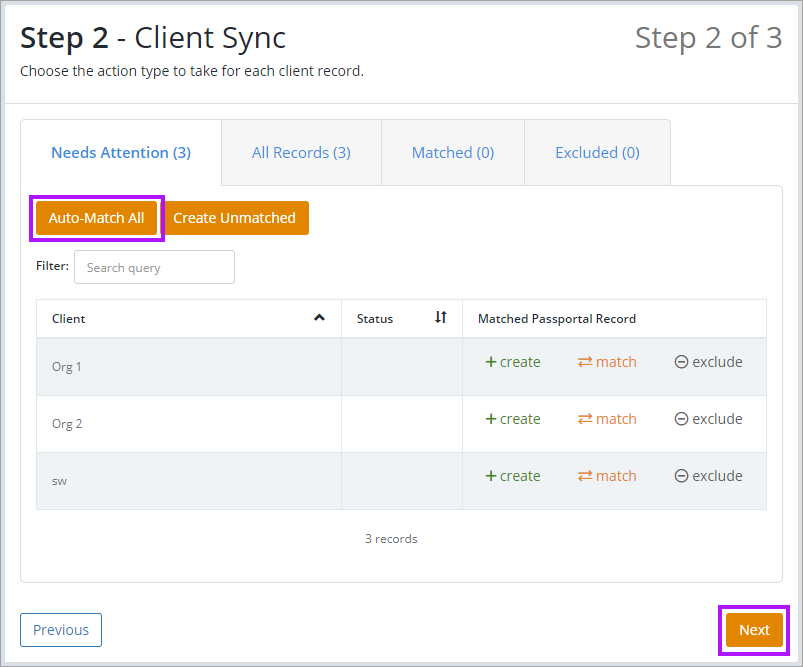
- If Sync Clients had been enabled in the previous steps, the Client Sync screen is now displayed. Passportal will attempt to match all existing clients set up in Passportal with their corresponding Kaseya BMS clients, to ensure duplicates are not created. Clients must have identical names for this to work. Select Auto-Match All to start this process.
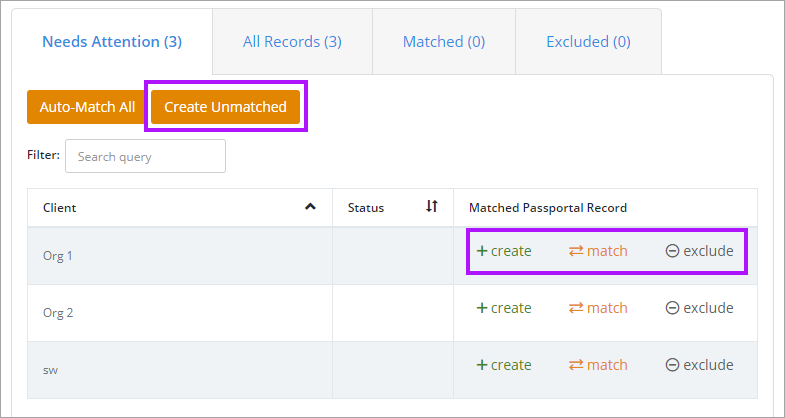
- If you would prefer to manually match the clients, you can also do this by clicking on Match in the Matched Passportal Record column and clicking on the corresponding client in the drop-down.
- For the remainder of the clients select either the Create or Exclude buttons in the Matched Passportal Record column. If you have a large list you can just exclude the clients you don't want and select the Create Unmatched button to create the remaining clients.
- If you excluded a client that you would like to later add, simply select the Excluded Records tab and select Create or Match.
- You will be able to revisit this page after the initial setup and change any of the settings or create any clients you had previously left uncreated. Click Next to continue.
- The Sync Preview Sync screen is displayed, which is an overview of records to be created, matched, or excluded.
- Review to ensure the expected actions will be taken. Click Finish to complete the integration process.
Once you have completed the process, it may take some time to allow the initial update of assets to occur. Depending on the number of items to sync, this can take several hours. All imported items will appear in their respective clients.


