Managing Permissions Levels
Permission Levels determine what actions a user can and cannot perform. Permission Level definitions are detailed in the Permission Level Guide.
To create or modify custom permission levels follow these steps:
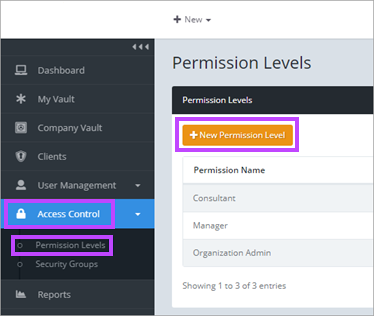
Create a new Permission Level
- Navigate to Access Control > Permission Levels.
- Click the + New Permission Level button.
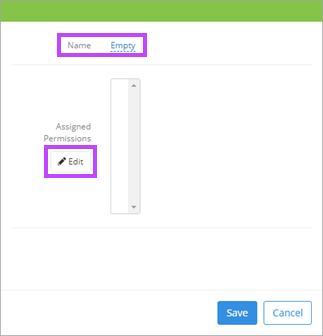
- Click Empty and enter the Permission Level name desired.
- Click Edit. This opens the Assigned Permissions dialog.
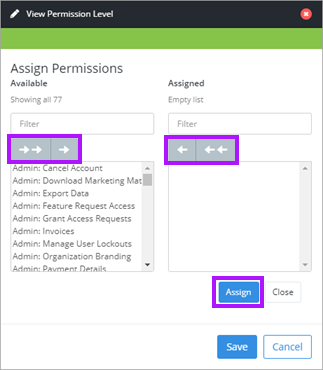
- Assign permissions by selecting them from the left pane and selecting the right arrow button above the column. The double arrow moves all in the column.
- To remove permissions, select the permissions to be removed on the right pane and select the left arrow button in the center.
- Click Assign once the required permissions are set to be taken to the previous screen, or Save to complete the permission level setup and close the dialog.
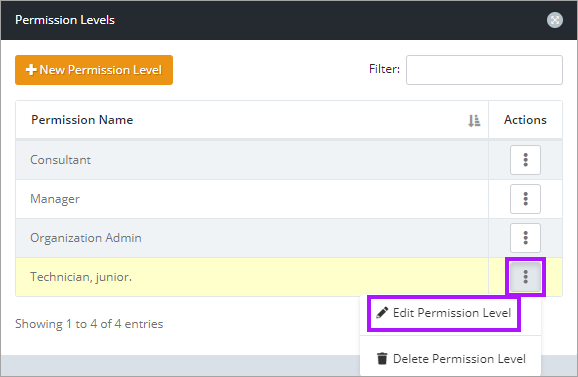
Edit Permission Level
- Select the Edit Permission Level icon in the Actions column of the Permission Levels list, next to the relevant custom permission level.
- To assign or remove permissions, follow the same steps as above.
- Default permission levels cannot be modified.
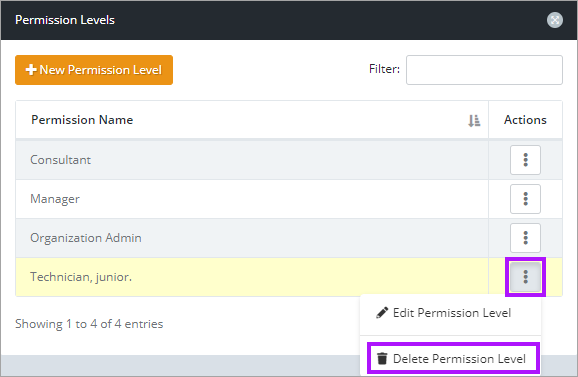
Delete a Permission Level
- Select Delete Permission Level in the Actions column next to relevant custom permission level.
- Default permission levels cannot be removed.