
Private Portal is a tool used to set policies that apply at the Admin, Domain, and Email user levels to place mail which matches the criteria of any active policy into the Private Portal App.
At the Domain level, the policy will apply to all outgoing mail for the domain, regardless of which outgoing authenticating user method is used.
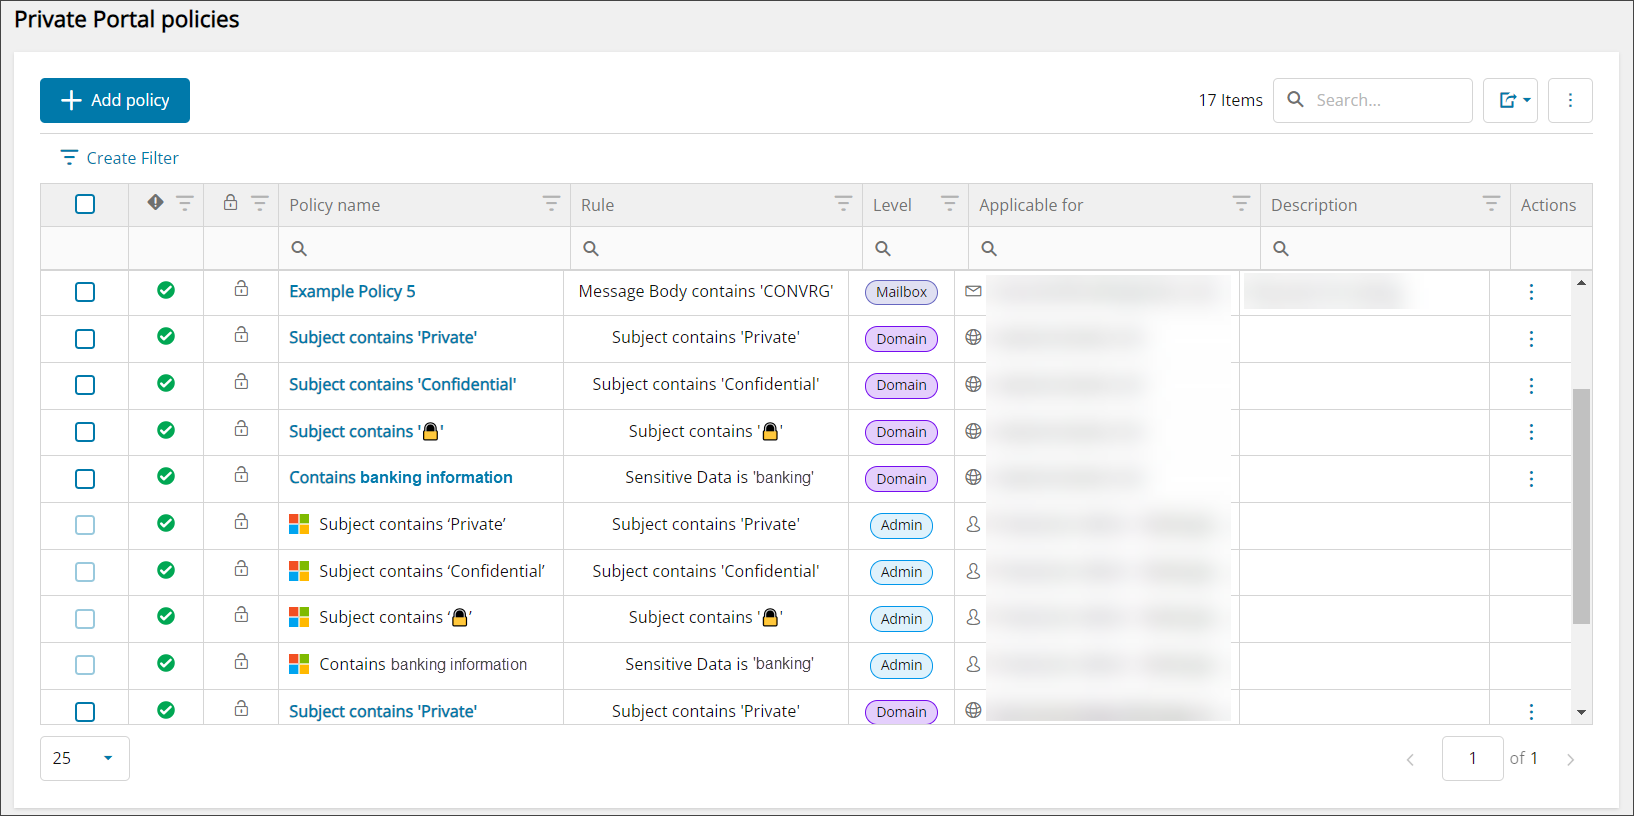
The default policies created when the domain is added using the Microsoft 365 Add Domain wizard are marked with the Microsoft logo
Add a Policy
To add a Private Portal policy:
- Log in to Mail Assure using SSO
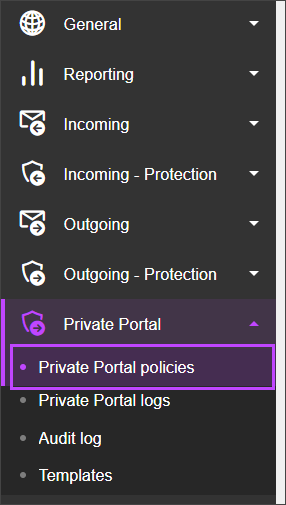
- Using the left hand menu, navigate to Private Portal > Private Portal Policies
- Select + Add Policy at the top of the page
- You will now see the Add Policy window. In here, provide the:
- Policy Name - Give the policy a clear name that can be used to identify the policy
- Policy Description (optional) - A brief description of the policy
- User level - Select the user level where the rule will be applicable
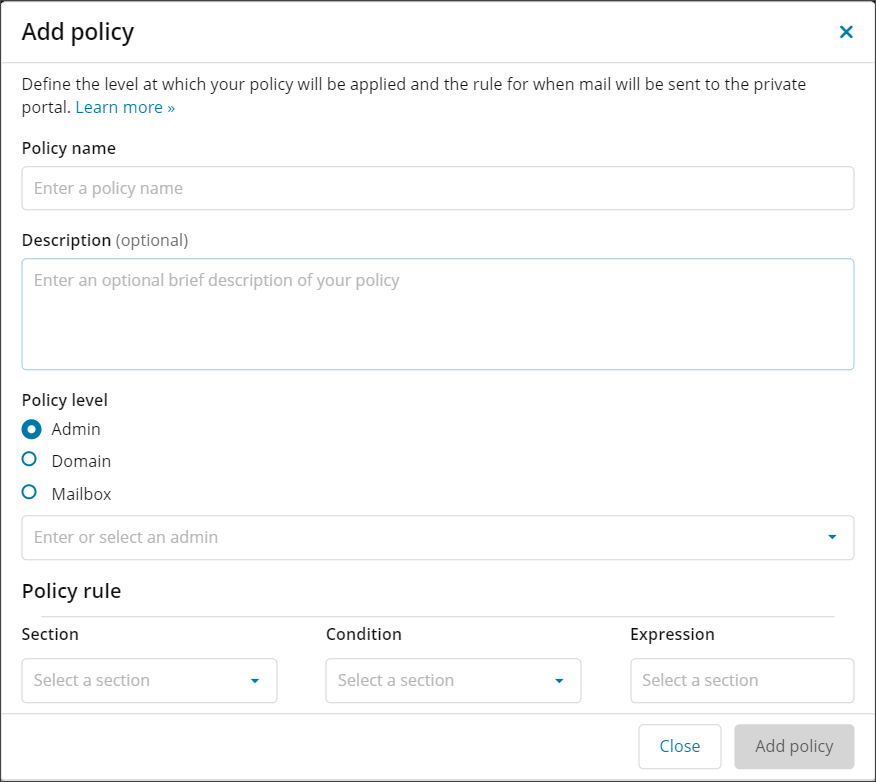
- Now create the Policy Rule based on the criteria the message should meet in order to be sent to the private portal:
Section Condition Expression Message Body - Contains
- Does not contain
- Is
- Is not
- Starts with
- Ends with
Enter the text that should be detected in the selected section of the message Recipient Sender URL Attachment Name Subject To CC From Sensitive Data - Is
The message body is checked for any Sensitive Data, not the subject
Chose one of five available data types to match:
- credit-card
We will match against the most common formats of these types of data – for example, a VISA credit card might be “4012888888881881”, or “4012-8888-8888-1881”, or “4012 8888 8888 1881”. However, it will always be possible for someone determined to bypass these checks to do so, e.g. with “my credit card is 4012 then eight eights in a row then 1881”. This functionality is intended to protect against accidental exposure rather than malicious intent.
- bank-account
- personal-identifier
- health-identifier
- banking
- any
Exclusion rules (e.g. “all messages apart from”), rules with logic (e.g. “if X and Y or Z”), and rules using regular expressions are not permitted.
- Click Add Policy

The policy will now be displayed on the page
Searching and Filtering
Searching
From the Private Portal policies page, you can search by all columns, or by the Policy Name, Rule, Level, Applicable For or Description columns specifically to find policies from the full list that meet your required criteria.
- The top row of the policies list is the search bar, click into the cell with the magnifying glass icon to search the data in that column or search any column using the search bar above the policies list
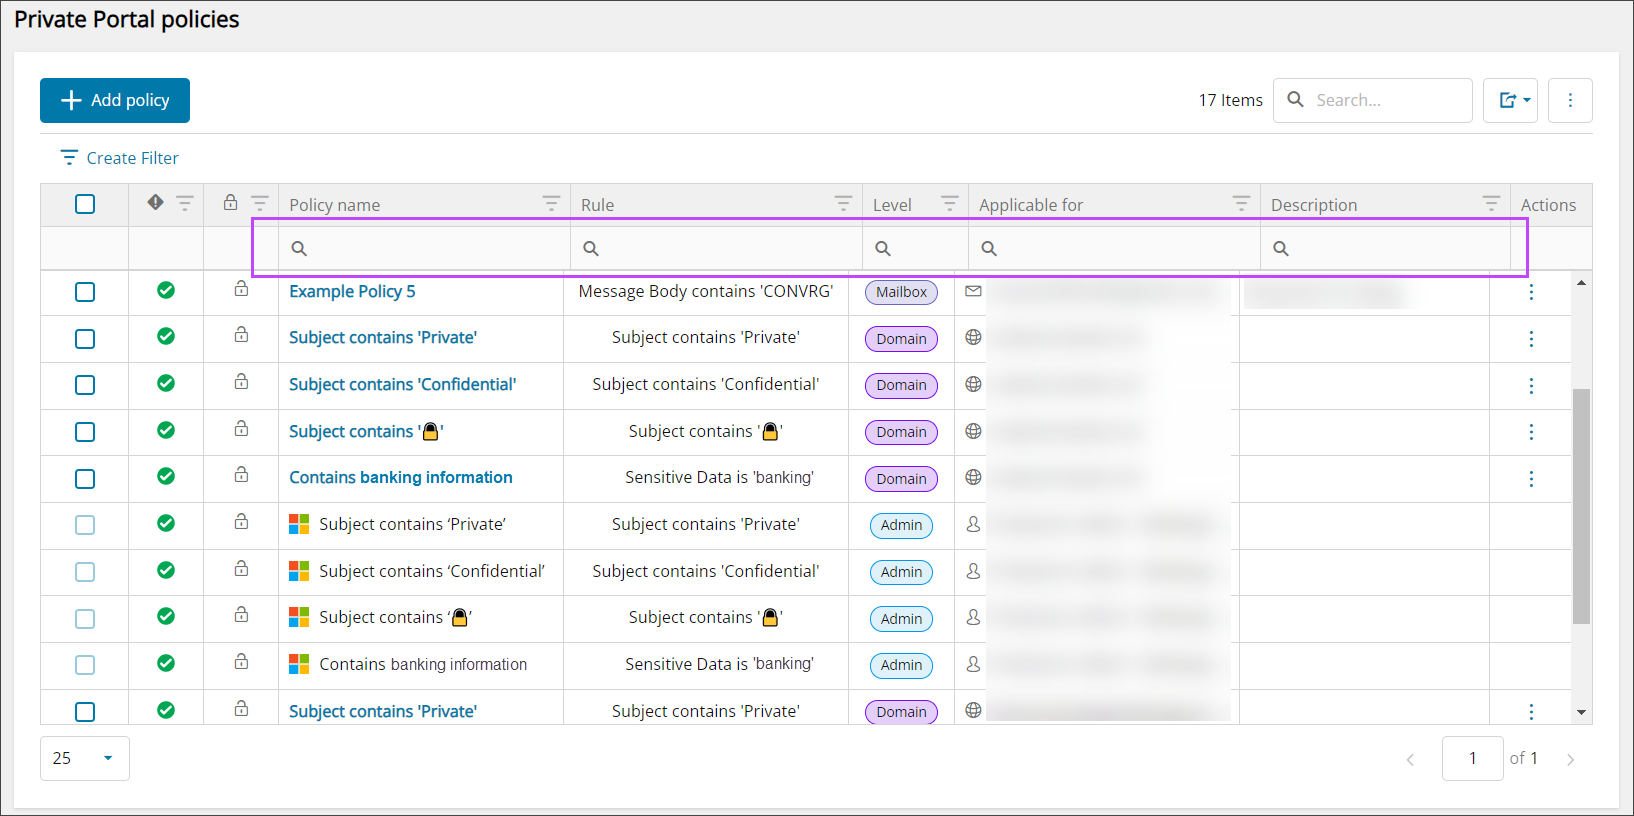
- Enter the search term: the list of policies will update automatically to display results
Searches can be layered, e.g. policy name contains 'sensitive' and rule is 'any'
Any search you place will be displayed above the policy list as a filter.
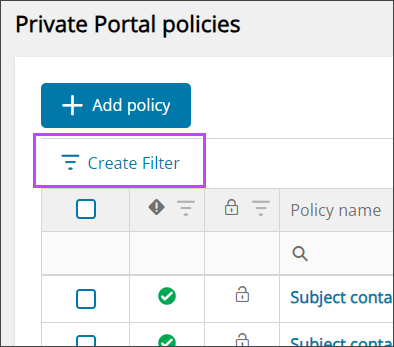
Filter
From the Private Portal policies page, it is possible to create custom filters using the Filter Builder to find specific policies from the list.
- Click Create Filter
- In the Filter Builder window, create the filter using the following selections:
- And/Or
- Enabled
- Locked
- Policy Name
- Rule
- Level
- Applicable for
- Description
- And/Or
- Contains - Text box to enter the filter text
- Does not contain - Text box to enter the filter text
- Starts with - Text box to enter the filter text
- Ends with - Text box to enter the filter text
- Equals - Text box to enter the filter text
- Does not equal - Text box to enter the filter text
- Is blank - No text or selection option
- Is not blank - No text or selection option
- Is any of - Select from the list of values
- Is none of - Select from the list of values
- Use the + icon to add more layers to the filter
- Click OK
For all of the above filters, the following can be applied:
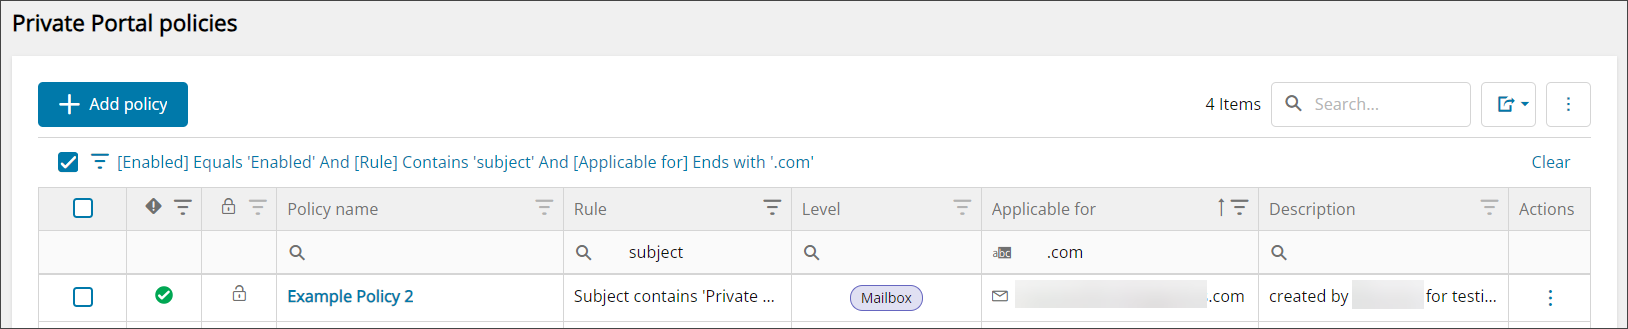
Searches can be layered, e.g. Enabled equals 'Enabled', Rule contains 'subject' and Applicable for ends with 'dev'. Once the filter is created, this will appear as a filter above the updated list similar to:[Enabled] Equals 'Enabled' And ([Rule] Contains 'subject' And [Applicable for] Ends with 'dev')
Edit Filters
Filters can be edited by clicking the filter string at the top of the Private Portal policies page:
Clear Filters
Filters can be cleared by clicking the Clear button at the top of the Private Portal policies page, next to the filter string:
![]()
Manage Policies
Policies can be managed in several ways:
Disable Policy
Disabling a custom policy can be done by either:
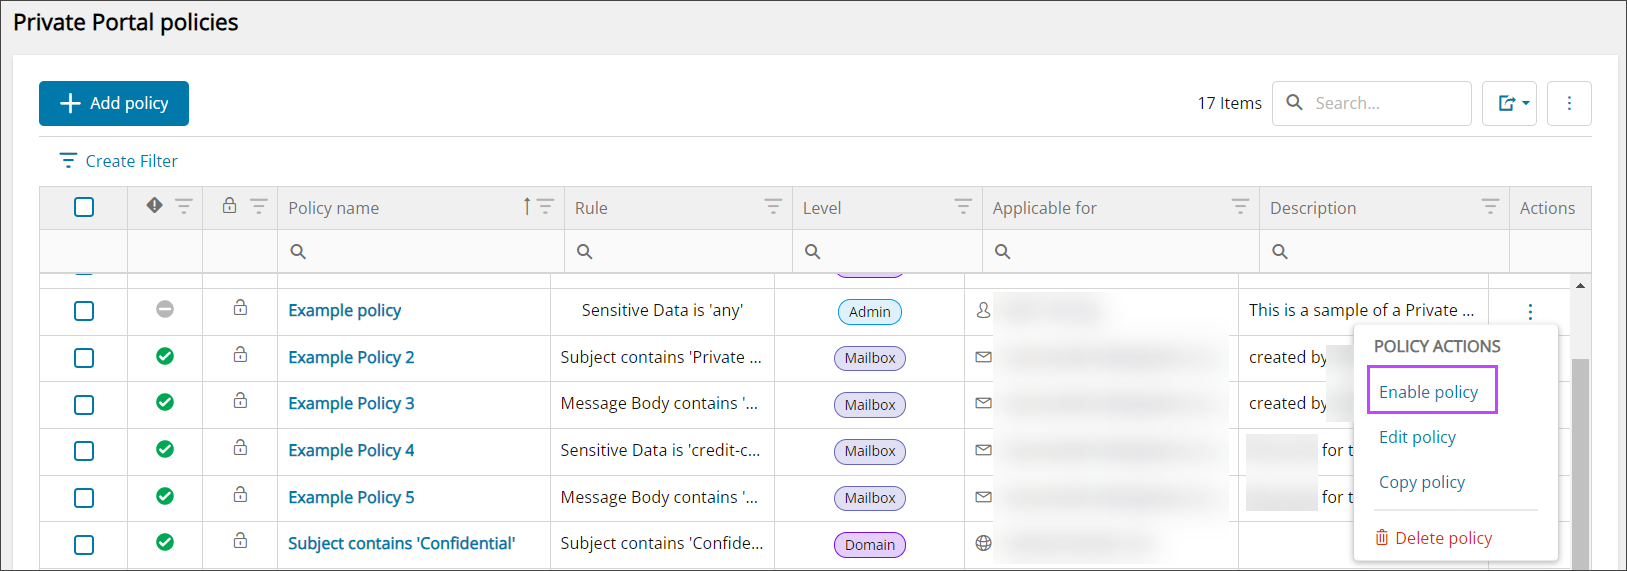
- Selecting the policy (or policies) on the list and choosing Disable policy/policies at the top of the page
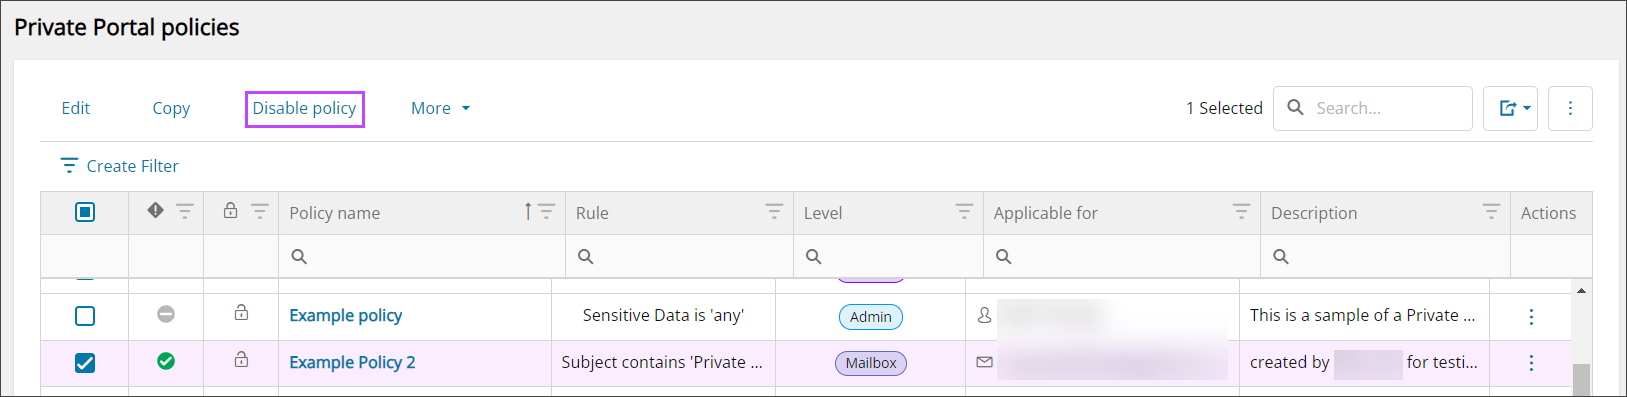
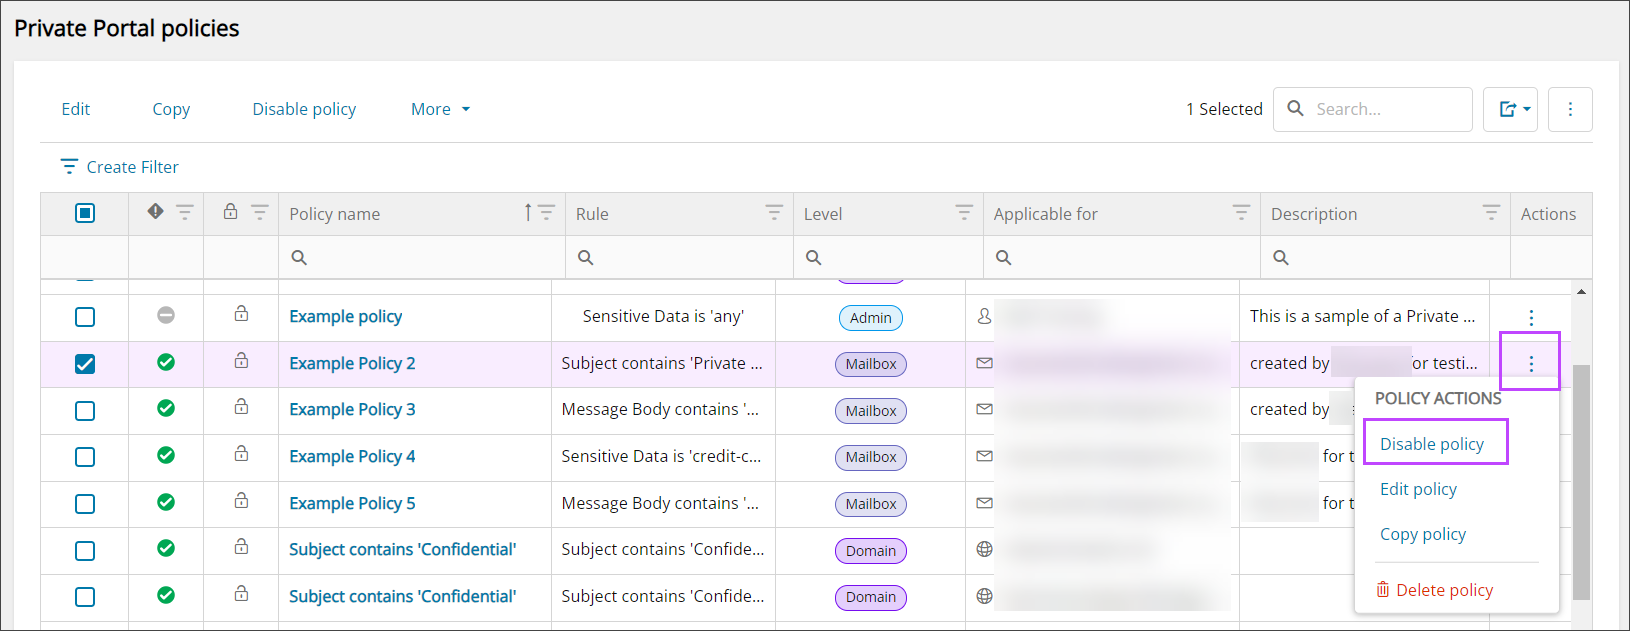
- Selecting the three dots to the right of the description of a single policy and selecting Disable policy
or
Once disabled, the policy will be remain in the list, but the status symbol will change from the green Active icon, to a grey Inactive icon.
Disable Default Policies when using Microsoft 365 Sync
Disabling default policies that were created when using Microsoft 365 Sync can be done by:
- Log in to Mail Assure using SSO
- Run through the Microsoft 365 Sync for the domain(s)
- Turn off the Private Portal setting
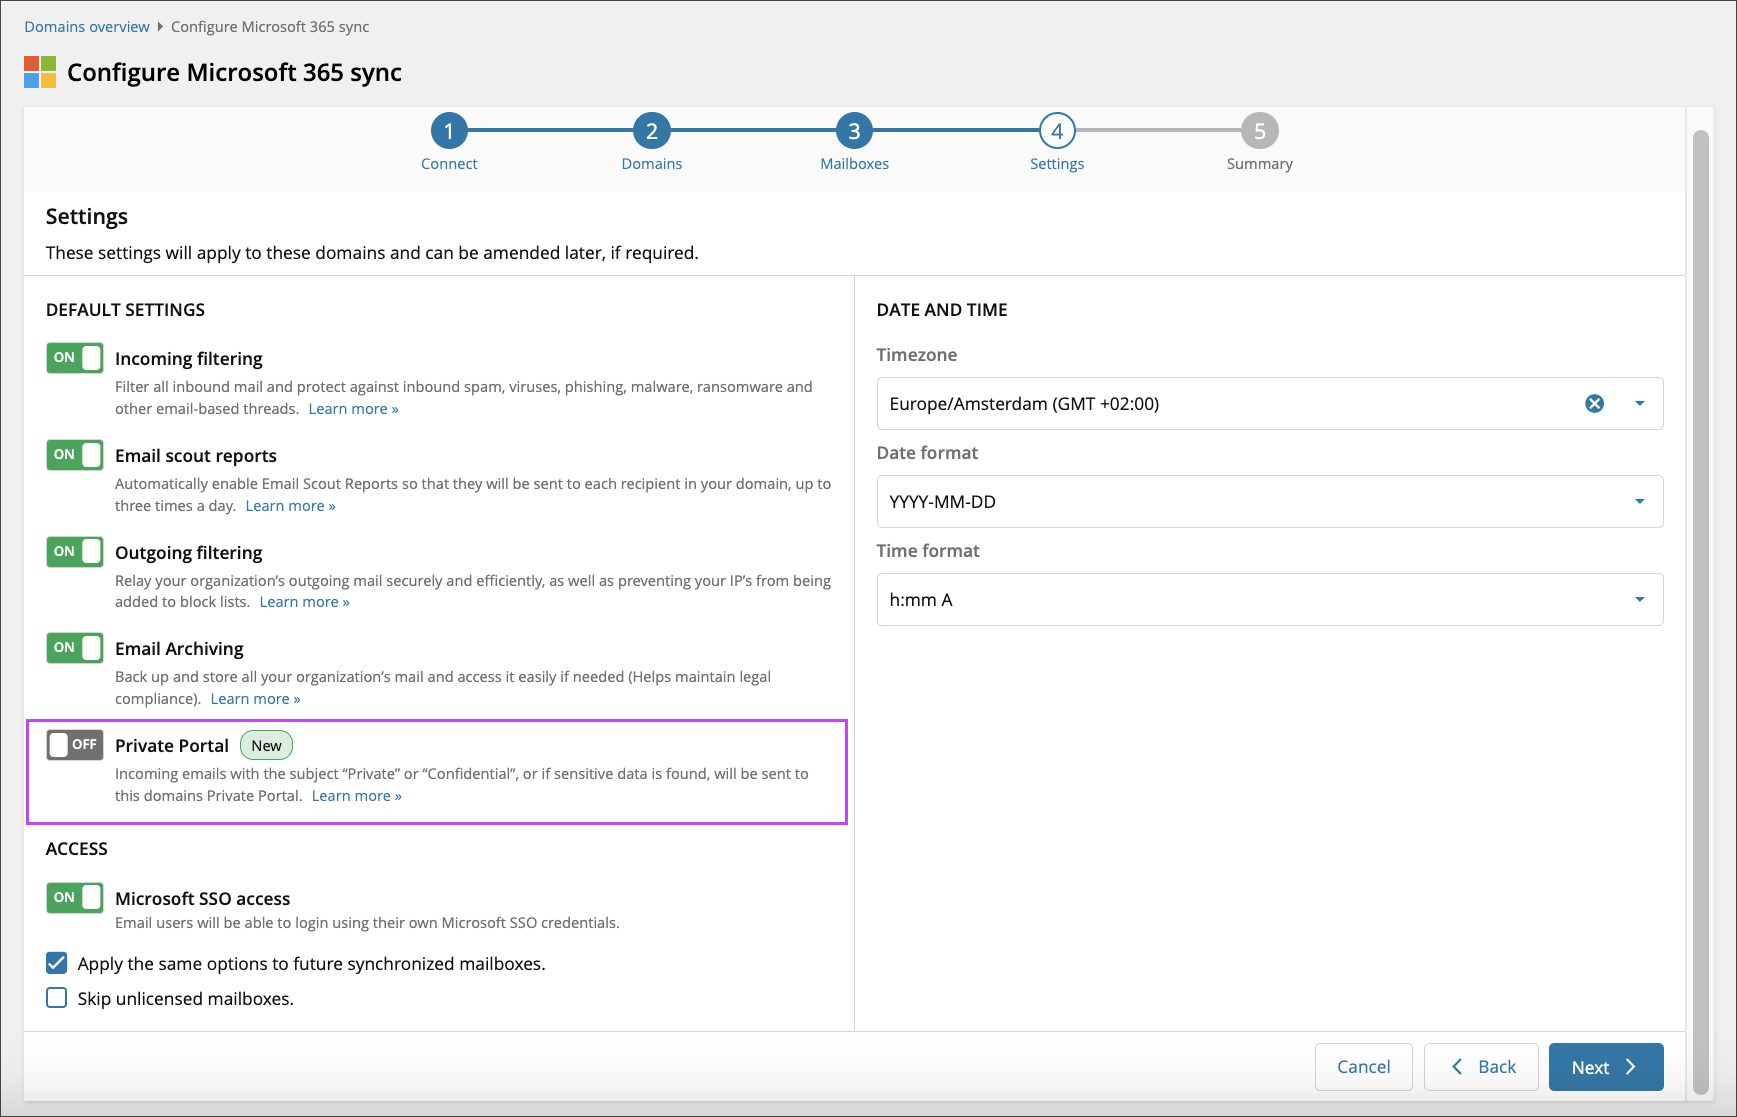
- Complete the sync setup
Enable Policy
Enabling a policy can be done by either:
- Selecting the policy (or policies) on the list and choosing Enable policy/policies at the top of the page

- Selecting the three dots to the right of the description of a single policy and selecting Enable policy
or
Once enabled, the status symbol will change from a grey Inactive icon to the green Active icon.
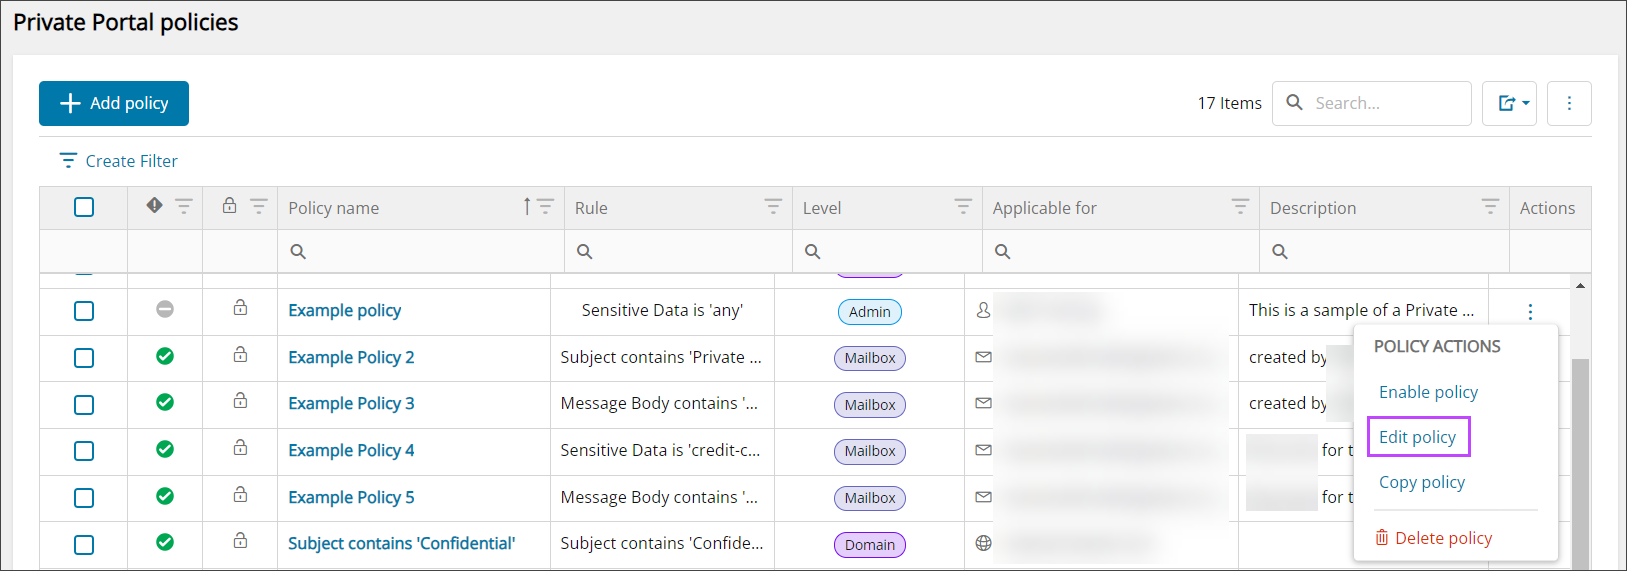
Edit Policy
Editing policies can only be done one at a time, by either:
- Selecting the policy on the list and choosing Edit option at the top of the page

- Selecting the three dots to the right of the description of a policy and selecting Edit policy
or
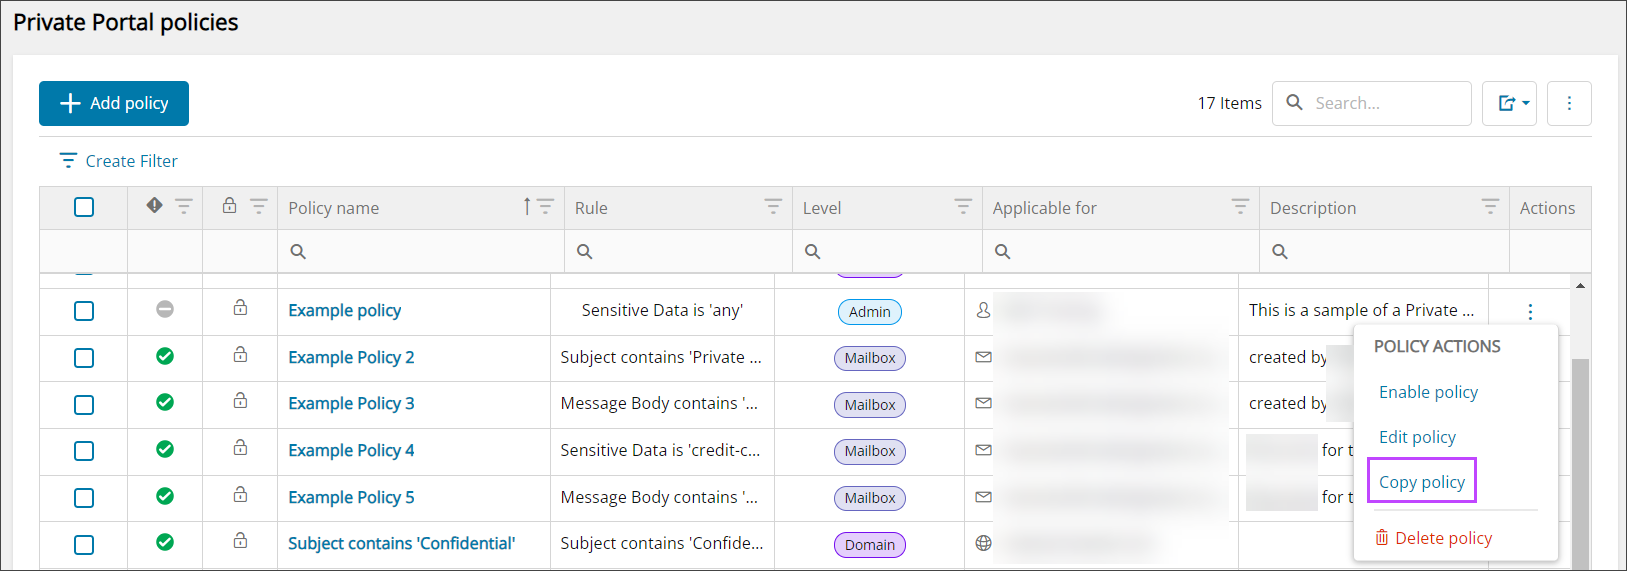
Copy Policy
Copying a policy can be done by either:
- Selecting the policy on the list and choosing Copy at the top of the page

- Selecting the three dots to the right of the description of a policy and selecting Copy policy
or
Delete Policy
Disabling a policy or policies can be done by either:
- Selecting the policy (or policies) on the list and choosing Delete at the top of the page
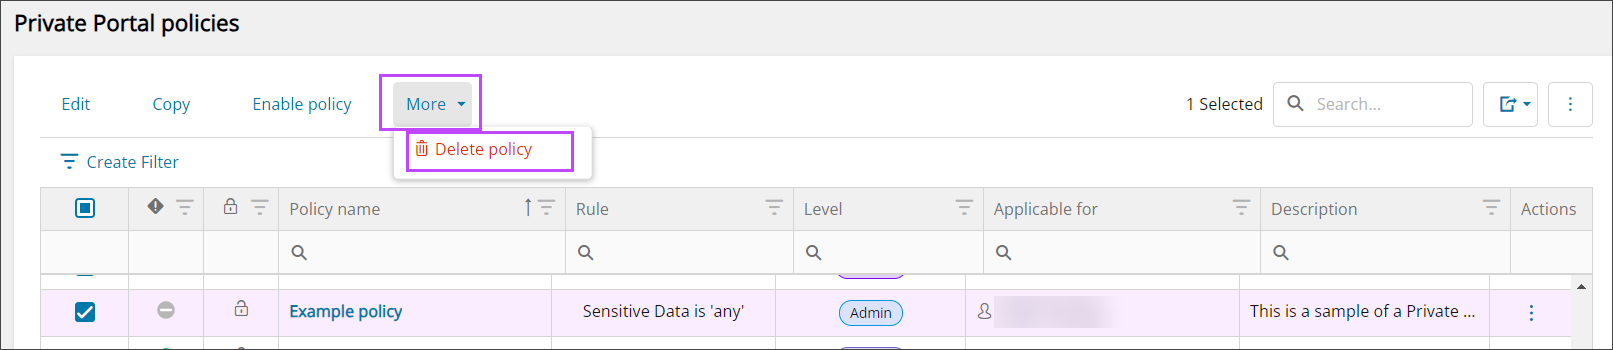
- Selecting the three dots to the right of the description of a single policy and selecting Delete policy

or
Once a policy has been deleted, there is no way to recover this. If you need this policy, but it has been deleted, it must be added again like any new policy