
For general information on OAuth and how you can get your Single Sign-On (SSO) with working with Mail Assure, see Configure OAuth/Single Sign-On (SSO).
- Step 1 - Mail Assure Configuration
- Step 2 - Configure Entra ID Application Settings
- Step 3 - Configure Microsoft Details in Mail Assure
Step 1 - Mail Assure Configuration
- Log into your Mail Assure Control Panel using your branded URL (this is set up in the Hostname field in the Branding Management page. See Create a Custom Control Panel URL)
- In the Admin Level Control Panel, select Branding > Branding Management
- Ensure that SSO/OAuth login for email users is enabled
- Add the label text that will be displayed on the branded login button below the local credential login box e.g.:

- Click Save Settings
- Navigate to the domain, by selecting General > Domains Overview and click on the relevant domain
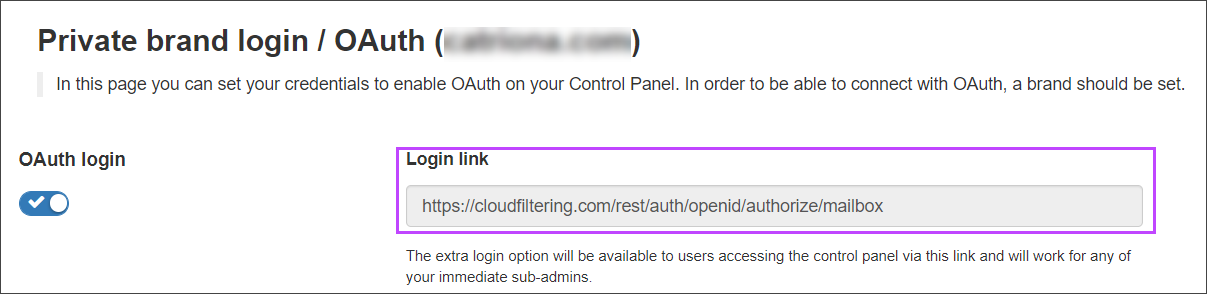
- Select Users & Permissions > OAuth Settings and make sure that OAuth login is toggled on
- Manually format the URL using the following format to be used in Step 2 - Configure Entra ID Application Settings:
Do not copy the text displayed in the Login Link field as this may not be correct.
- For Admins or Technicians:
https://<branded.fqdn>/rest/auth/openid/authorize
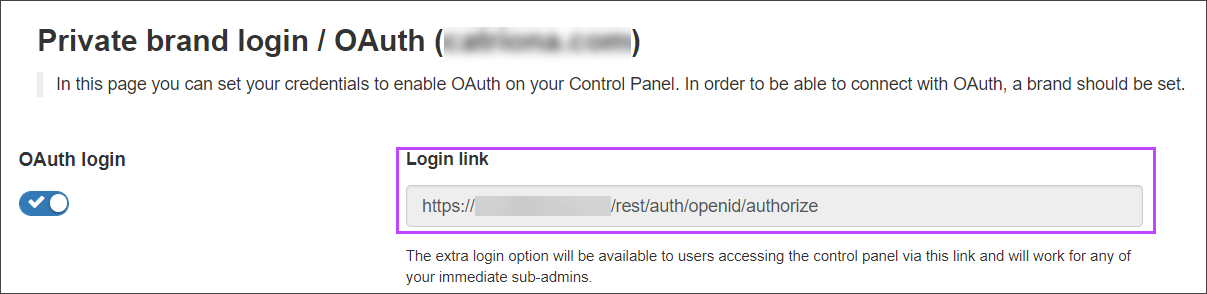
- For Email Users:
https://<branded.fqdn>/rest/auth/openid/authorize/mailbox
- For Admins or Technicians:
- Click Save settings

Step 2 - Configure Entra ID Application Settings
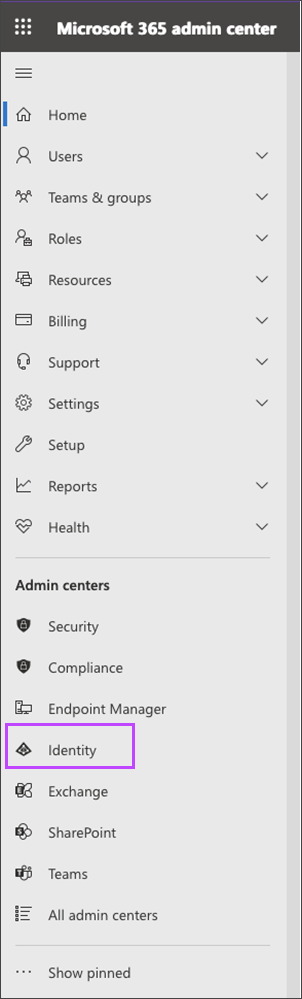
- Login to the Microsoft 365 Admin Center
- Navigate to entra.microsoft.com
- Using the left-hand menu, navigate to the Admin Centers section
- Select Identity to view the Microsoft Entra Admin Center
Or
- By selecting Microsoft Entra from the All Admin Centers page
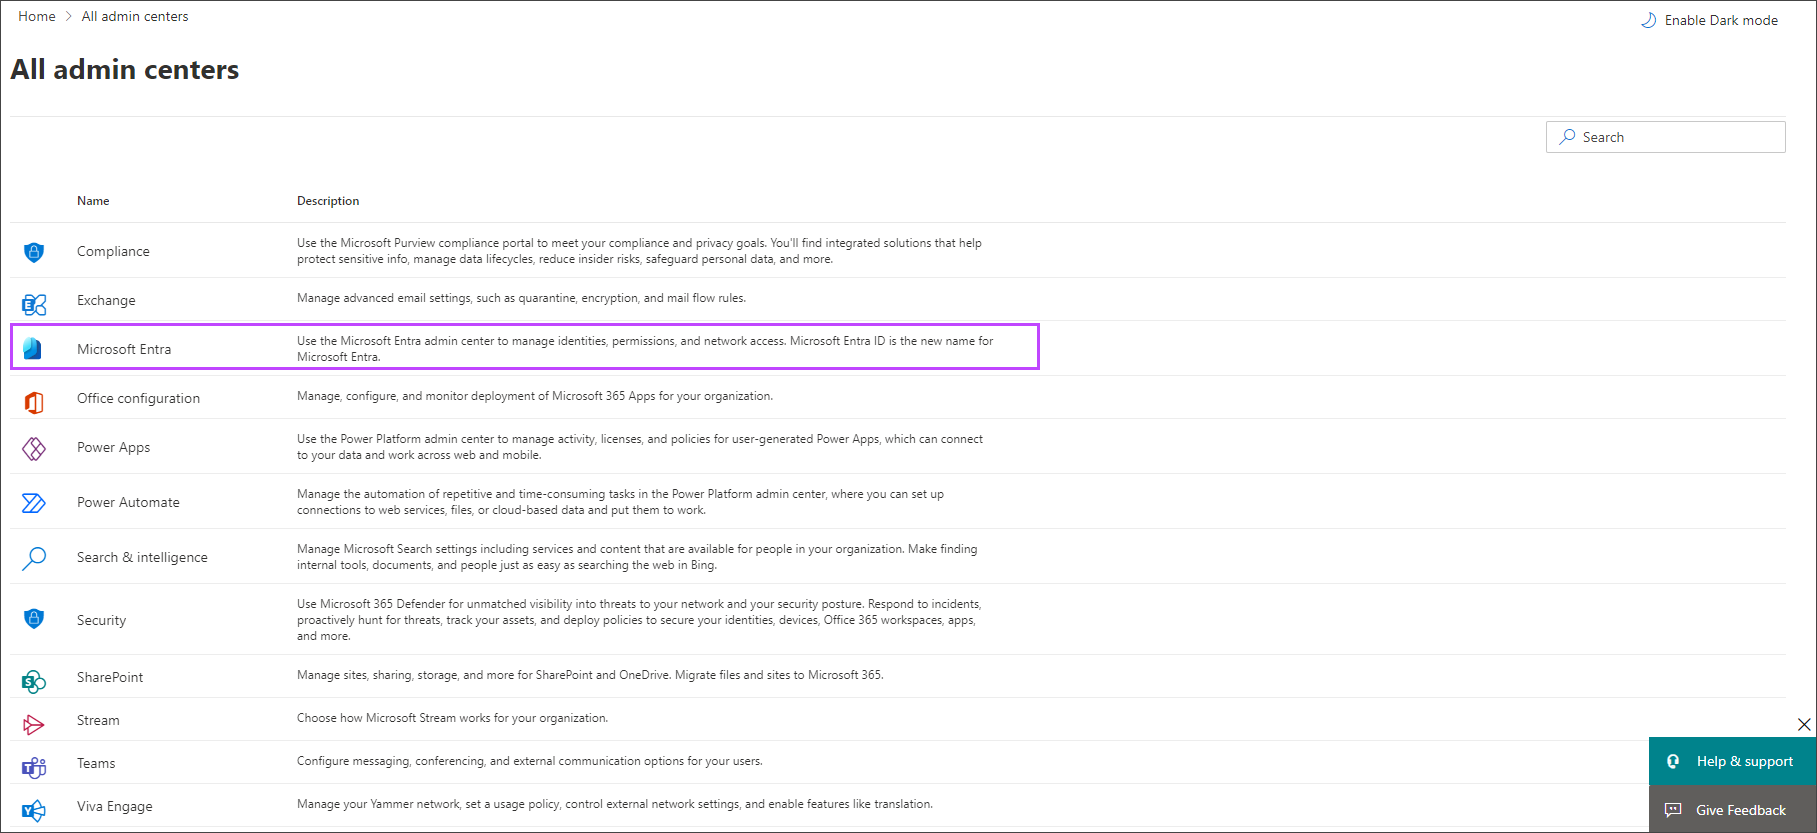
- Select Identity to view the Microsoft Entra Admin Center
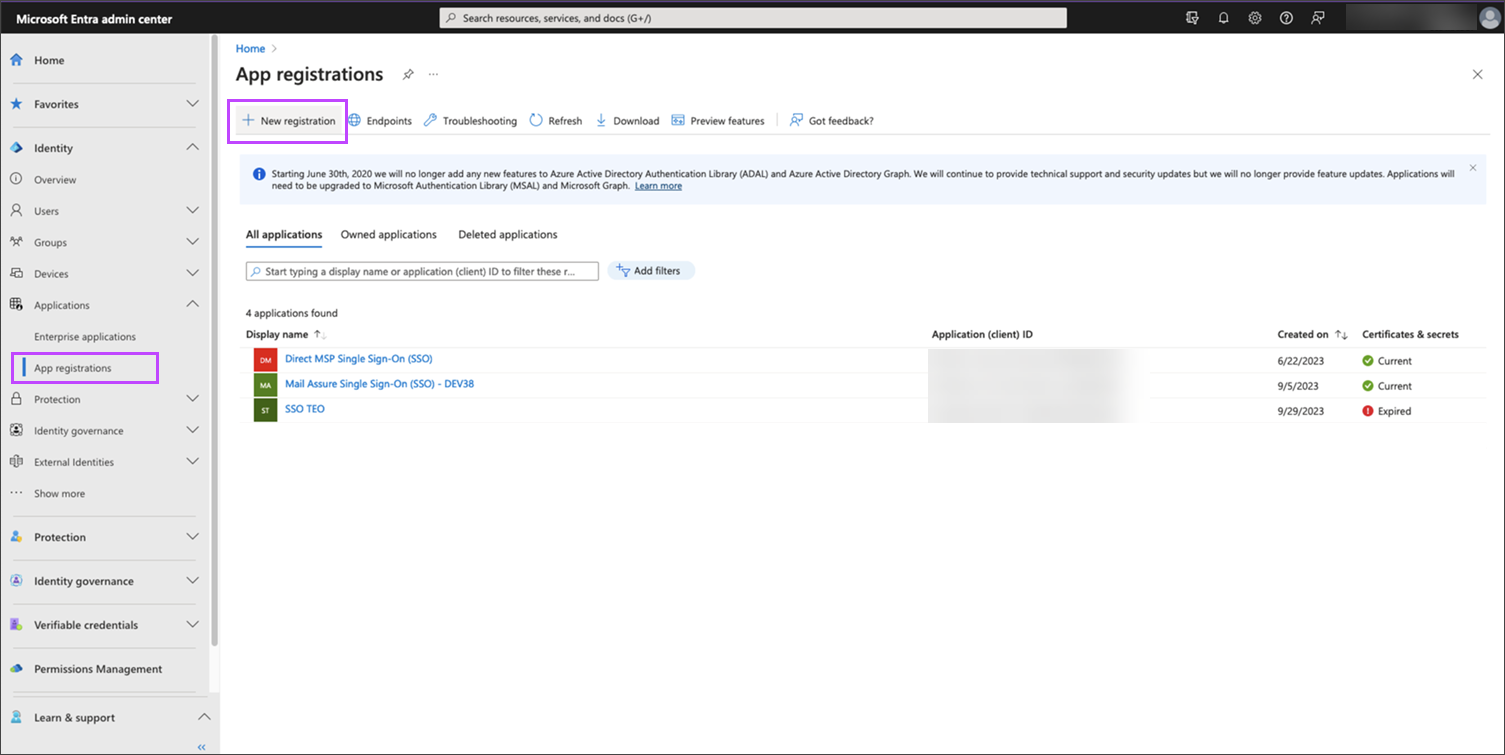
- Navigate to Applications > App Registrations
- Select New registration
- In the Register an Application page, be sure to fill in the sections as follows:
- Name: The display name for the App being registered e.g. Mail Assure Single Sign-On (SSO)
- Supported Account Types: Who can use this application, set this as required, but we recommend Accounts in this organizational directory only
- Redirect URI: Using the Platform dropdown, select Web, then enter the address in the format:
- For Admins or Technicians:
https://<branded.fqdn>/rest/auth/openid/authorize
- For Email Users:
https://<branded.fqdn>/rest/auth/openid/authorize/mailbox
The address to enter here is the one formatted in Step #1:8 above
- For Admins or Technicians:
- Click Register
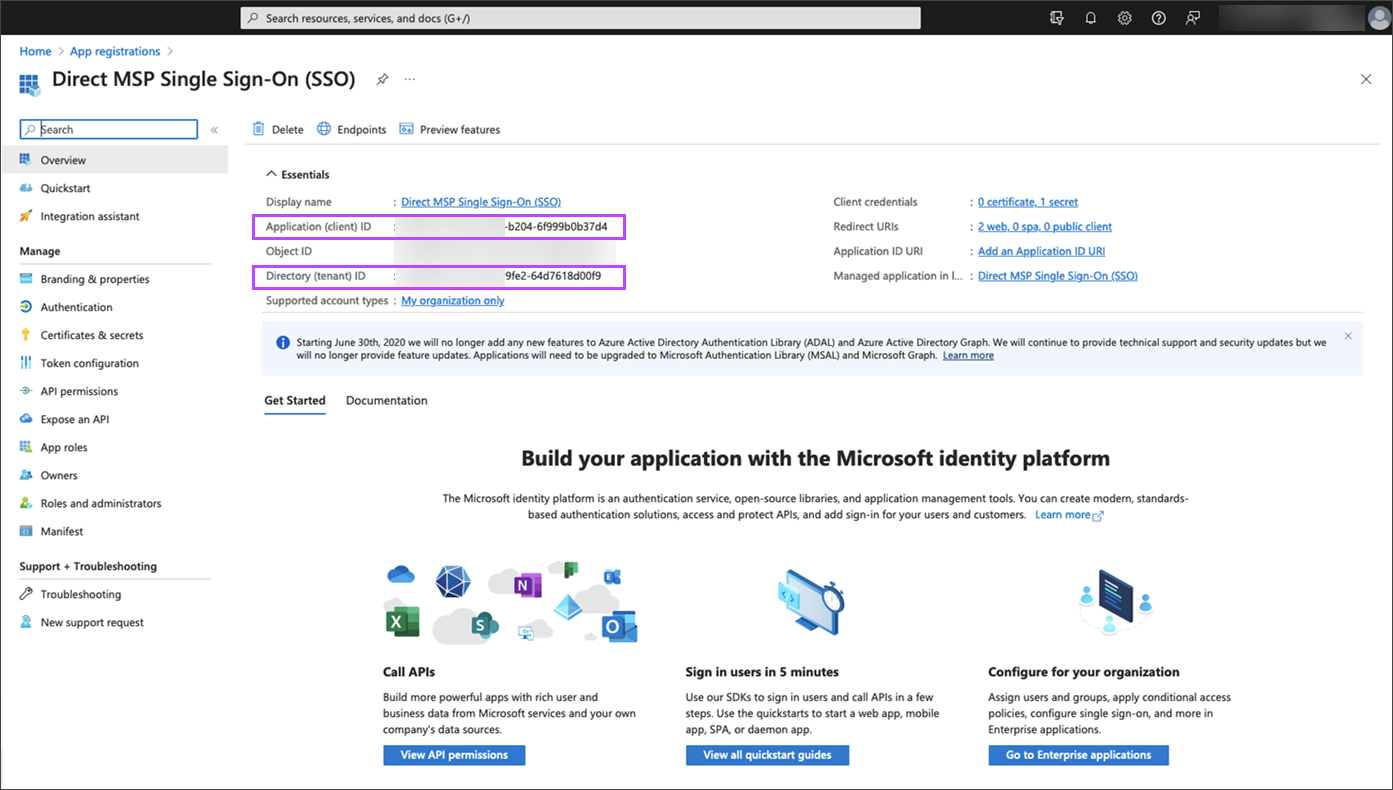
- In the Overview page, take a note of these two ID's as you will need them later:
- Application (client) ID
- Directory (tenant) ID
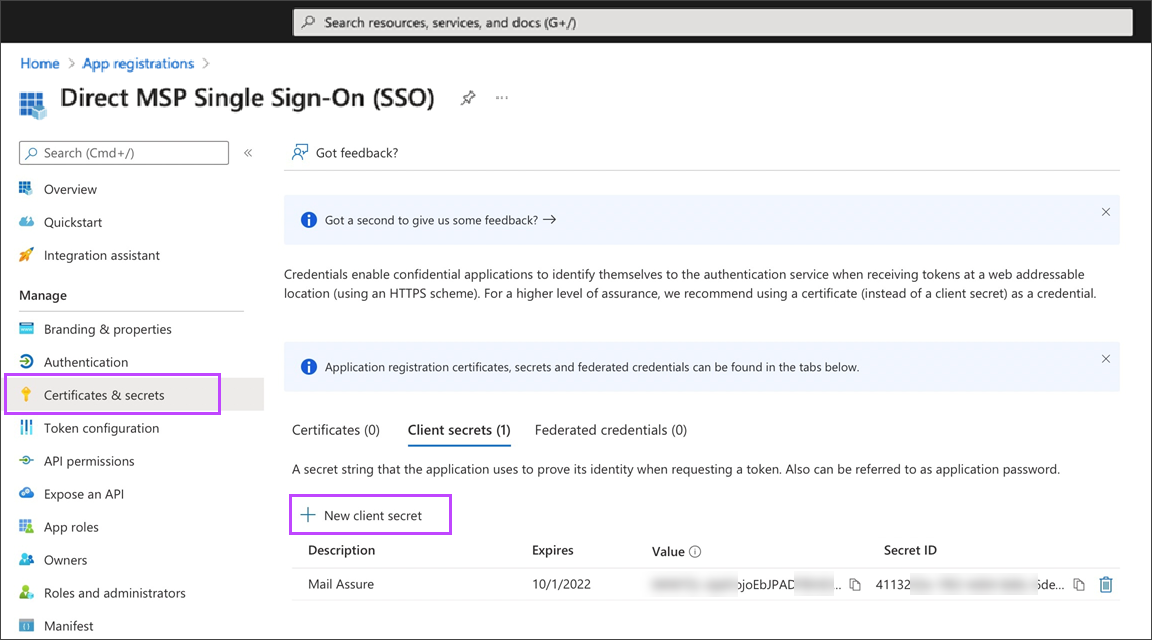
- Under Manage > Certificates & Secrets, generate the "Client Secret" by clicking New client secret
- Give the Client Secret a description and an expiry period for the key
It is important that you save the Value now as it will not be visible once the page is refreshed or loaded again.
- Keep your Entra ID Admin Center open as you will need to return to this screen in Step 3 - Configure Microsoft Details in Mail Assure
Or
Be sure you take a note of the Value, not the Secret ID, as this is what will be required in Step 3.3
Step 3 - Configure Microsoft Details in Mail Assure
- In the Mail Assure Control Panel, return to the OAuth Settings page for the domain by selecting Users & Permissions > OAuth Settings
- Ensure that OAuth Login is enabled
- The fields should be filled in as below:
- Login link:
- For Admins or Technicians:
https://<branded.fqdn>/rest/auth/openid/authorize - For Email Users:
https://<branded.fqdn>/rest/auth/openid/authorize/mailbox
This setting cannot be changed, and is will not impair SSO logins.
- For Admins or Technicians:
- Provider URL:
https://login.microsoftonline.com/Directory (tenant) ID/v2.0 - Client ID: Application (client) ID
- Client secret:xxxxxxxxxxxxxxxxxxxxxxxxx - This is the Value generated in the "Certificates & secrets" section of Azure AD
- Token Endpoint:
https://login.microsoftonline.com/Directory (tenant) ID/oauth2/v2.0/token - Authorization Endpoint:
https://login.microsoftonline.com/Directory (tenant) ID/oauth2/v2.0/authorize - User Info Endpoint:
https://graph.microsoft.com/oidc/userinfo - Jwks URL:
https://login.microsoftonline.com/common/discovery/v2.0/keys - Change Password URL: Not required
- Logout URL: Not required
- Use Nonce validation: yes
- Identification Method: Verified email address
The user must have a Microsoft Exchange license.
- Login link:
- Click Save settings
If the page title does not display the Domain name after Private Brand Login/OAuth, you need to navigate to the domain level settings by selecting the domain in Domains Overview to complete the following steps.
Although we strive to provide the most up-to-date information, the instructions covered in the Microsoft configuration may change without our knowledge. To ensure you have the correct up-to-date information, please refer to Microsoft's website.
If you have any issues relating to SSO configuration or logging in with SSO,
please contact our support team by