
Before beginning the Bare Metal Recovery (BMR), all requirements must be met including Disk size.
Cove Data Protection (Cove)'s Backup Manager utilizes third-party recovery tool Relax-and-Recover (ReaR) to address Bare Metal Recovery for Linux. ReaR is the leading recovery solution for Linux based on the GPLv3 license and developed entirely in Bash.
Steps to take:
- Step 1: Obtain the rescue ISO image
- Step 2: Boot a device from the rescue ISO image
- Step 3: Begin Recovery
- Step 4: Select a Recovery Point and Restore
- Step 5: Reboot the Device
The boot menu images may appear different for your target device depending on your distribution.
Step 1: Obtain the rescue ISO image
There are two ways to obtain the rescue ISO image:
- Download the Linux Rescue Media file (Linux .iso or Linux .vhd) directly from the Management Console downloads page.
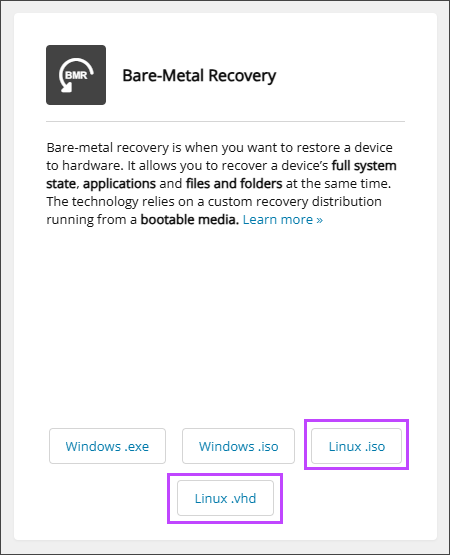
This is useful if your source device is broken or you want to get general ISO image that can be used to recover any Linux device.
- Restore a session-specific rescue ISO image from the Restore tab on the Backup Manager. Session-specific rescue images are built specifically for your source device and include system state information from the device's System State backup session. Session-specific images provide additional level of automation.

- Launch the Backup Manager for the device
- Navigate to the Restore tab
- Select the System state data source from the left-hand column
- Using the Session date and time picker, select a specific backup session, cove-rear.iso
- Set the restore location where the cove-rear.iso file will be restored
Or
Step 2: Boot a device from the rescue ISO image
If the target device is a virtual machine:
- Connect the cove-rescue-media-linux.iso or cove-rear.iso to the CD/DVD drive
- Reboot the device from the CD/DVD drive
If the target device is a physical machine:
- Create a bootable USB drive from the cove-rescue-media-linux.iso or cove-rear.iso:
- Open the terminal on the machine
- Identify the USB device name using the
lsblkutility - Unmount the USB drive if it is mounted using:
# umount /dev/sdX
- Write the ISO to the USB:
# dd if=path/to/cove-rescue-media-linux.iso of=/dev/sdX bs=4M status=progress
or
# dd if=path/to/cove-rear.iso of=/dev/sdX bs=4M status=progress
Ensure you replace
path/to/with the correct filepath to the location where the ISO file is stored. - Eject the USB:
# eject /dev/sdX
- Reboot the device from the USB
Once the device is started from the rescue ISO, the Linux Rescue Media boot menu will open automatically:
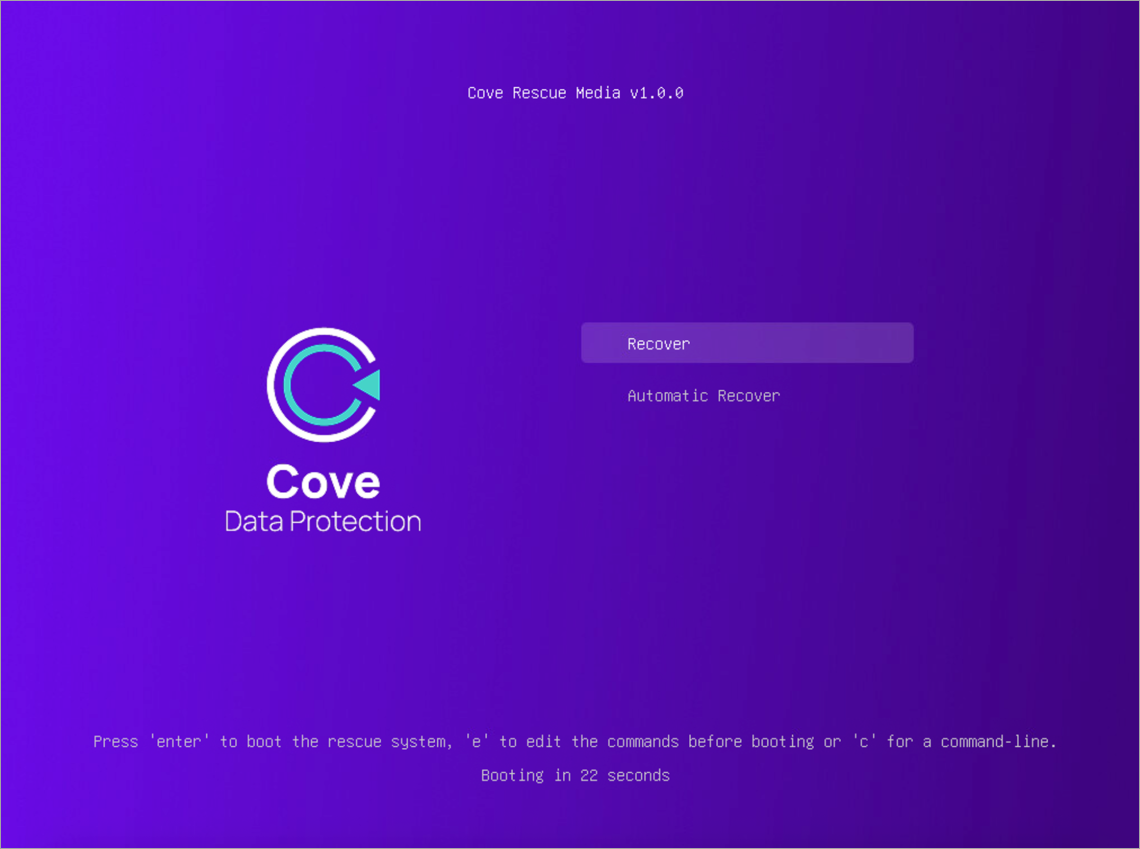
Step 3: Begin Recovery
- Select one of the recovery options:
- Recover - Select Recover if you want to set up the rescue system before the recovery process begins or if you want to connect to the rescue system via SSH
- Automatic Recover - Select Automatic Recover to perform the cove recovery automatically after the system finishes booting
- Press Enter to boot the rescue system
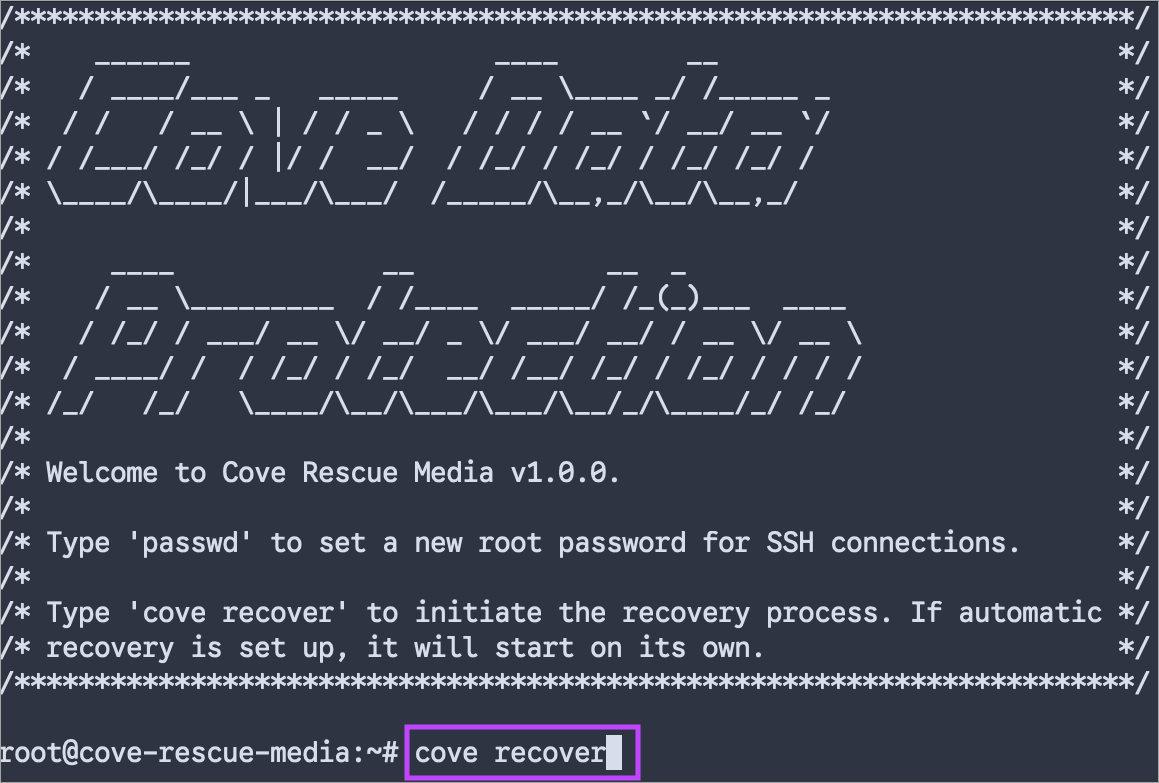
- If Recover is selected, you can connect to the rescue system via SSH by running the
passwdcommand to setup the root password. - Run the following command to initiate the recovery process:
cove recover
- Once the Backup Manager installer has been downloaded, enter the installation token and press enter
The installation token can be generated by a Security Officer on the device's settings tab in the Management Console.
- After the installation has completed, enter the Encryption Key/Security Code or Passphrase for the device

If using Self-managed encryption, you must enter the Encryption Key set for the device when initially installed. If using Managed encryption, generate the passphrase for use here.
Step 4: Select a Recovery Point and Restore
This step is skipped in session-specific rescue ISO images as the recovery point was selected at the time of creation: Step 1:2 Session-specific recovery
Only system state backup sessions made on version 25.9 and above are displayed during this step. System state backup sessions made on versions before 25.9 are not compatible with the Linux Rescue Media.
- Select the recovery point to restore the system from using the arrow eys
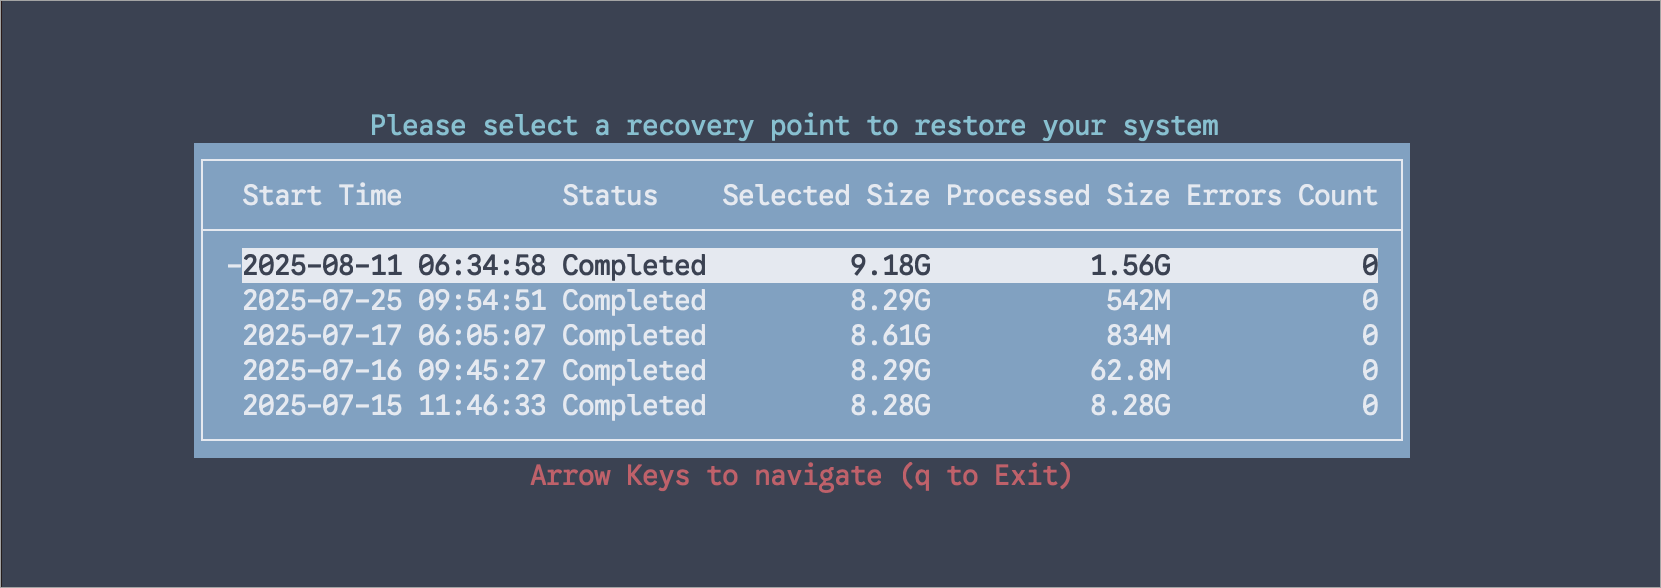
- Once the appropriate recovery point is highlighted, click enter
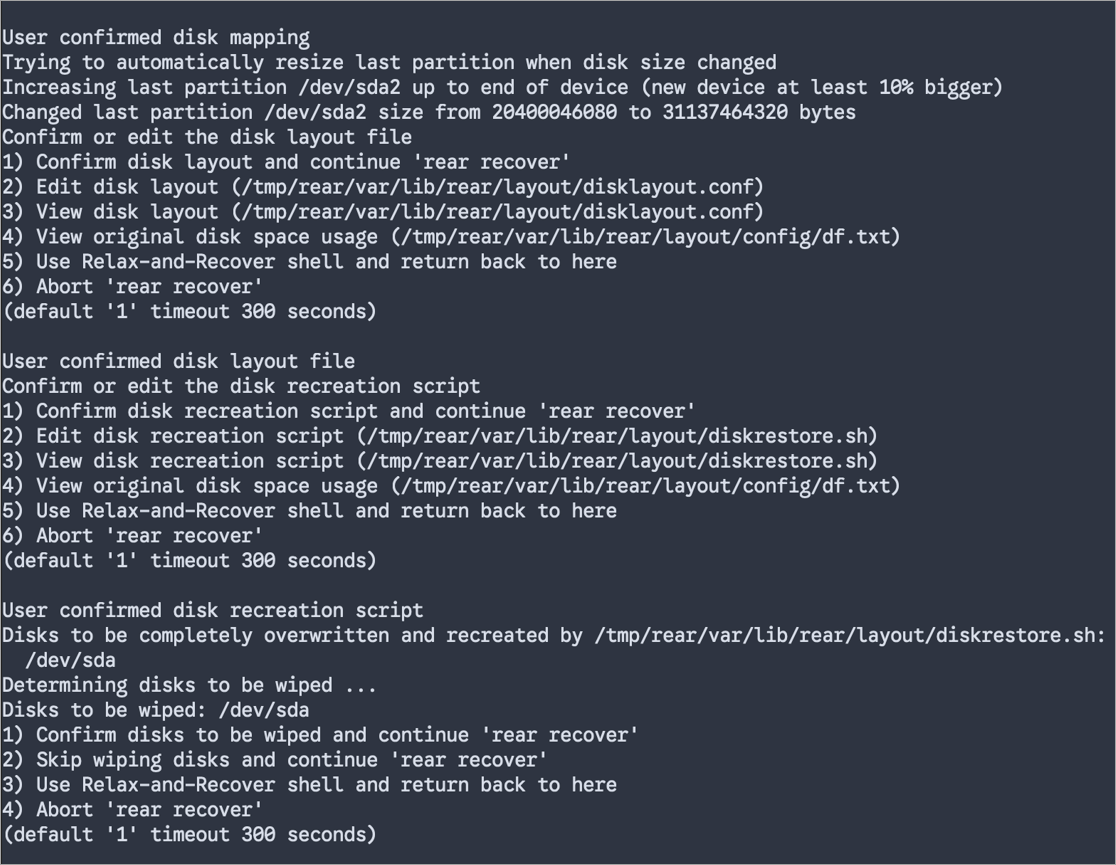
- Recover the partitions and filesystems
Follow the prompts to recover the partitions and filesystems. For more details, refer to the Relax-and-Recover documentation related to Layout configuration.
- Restore the File System
Please wait for the file system recovery to complete

Step 5: Reboot the Device
Once the restore has completed, Relax-and-Restore will run some checks and set up the bootloader.
- Reboot the system by running the
rebootcommand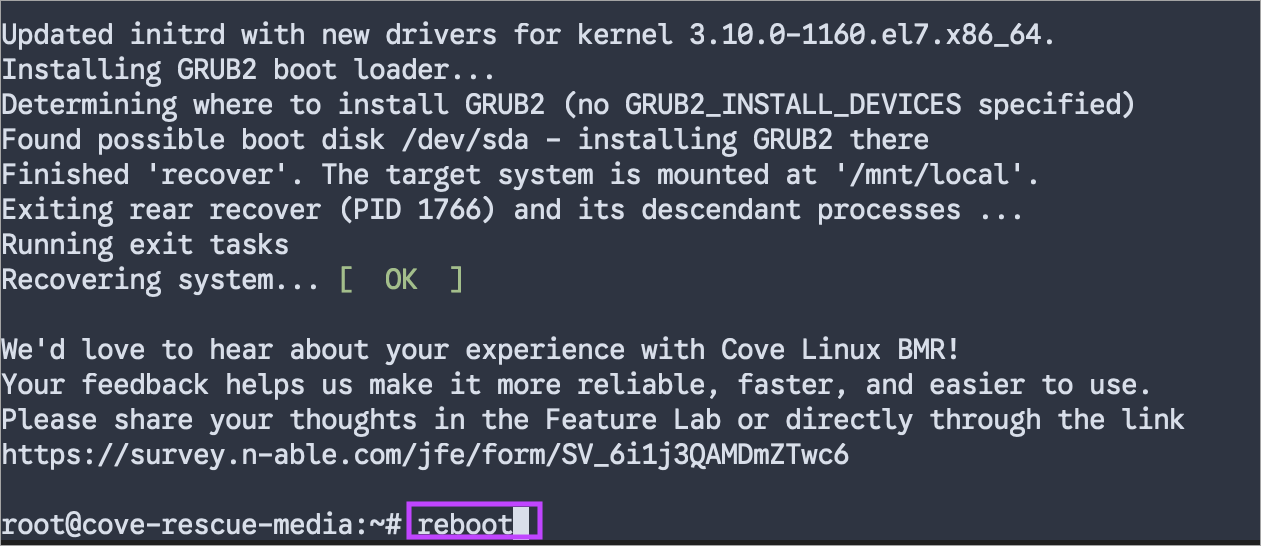
-
Boot the device from the hard drive
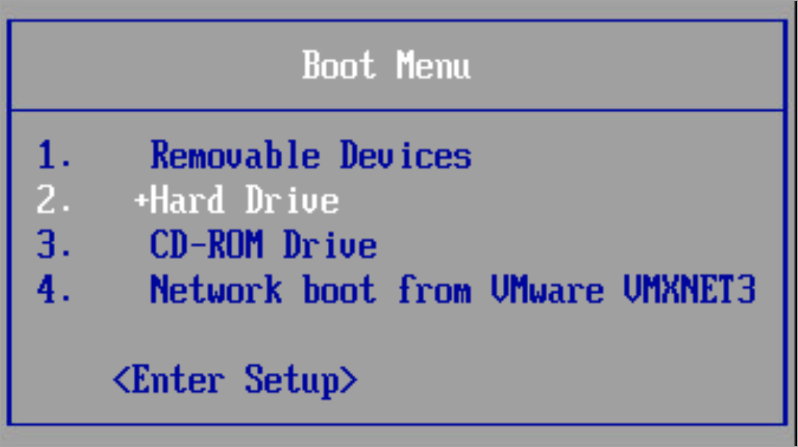
The recovered system will then boot and the device recovery is complete.
The Backup Manager must be checked for updates and ensured it is running in restore-only mode to check all relevant data has been recovered successfully before switching it back to backup and recovery mode.