
In order to use Cove Data Protection (Cove)'s Disaster Recovery as a Service (DRaaS), you must ensure the correct configuration of VPN Connections.
Before beginning with configuration, ensure you have met the Requirements.
VPN configuration is completed by following these steps:
- Step 1: Download VPN Appliance
- Step 2: Deploy and configure VPN Appliance VM
- Step 3: Configure VPN Connections
Step 1: Download VPN Appliance
- Sign in to the Cove Management Console using a SuperUser or Manager account.
- Navigate to Continuity > DRaaS > VPN Connections
- Select the inactive VPN Connection Name for the customer/tenant or highlight and click Configure VPN connection
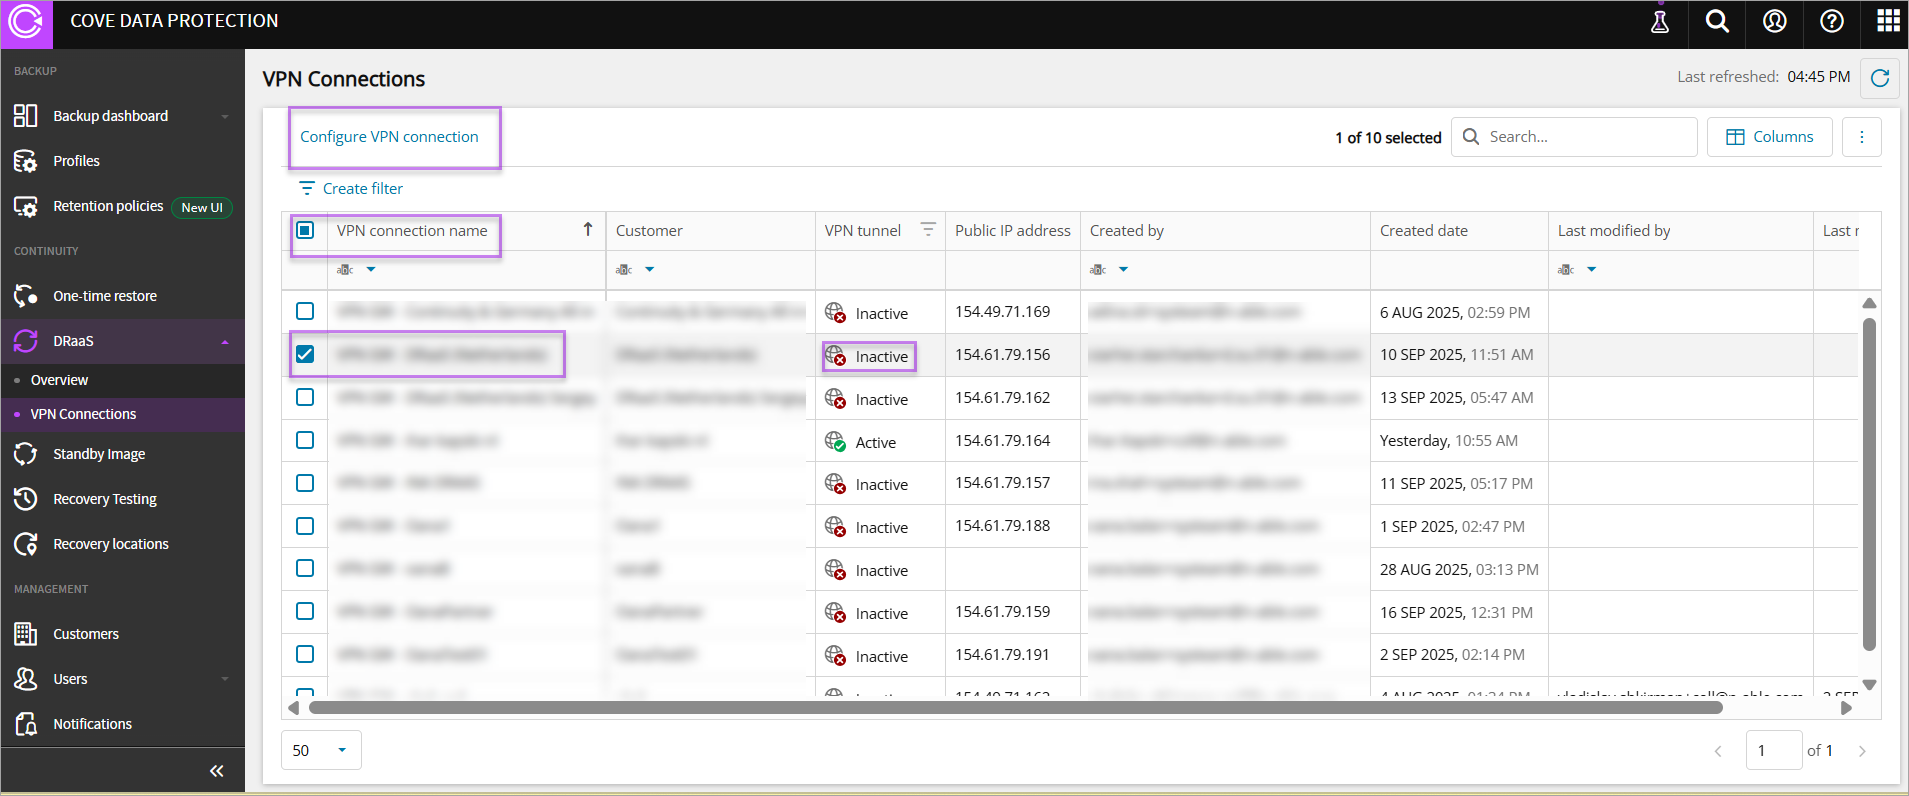
- In the Download and deploy VPN appliance section, click Download appliance
- Select the VPN appliance of either:
- Hyper-V appliance
The .zip file that is downloaded includes the Virtual Hard Disk containing the Hyper-V Virtual Machine image
- VMware appliance
The .ova file that is downloaded is the VMware virtual machine image
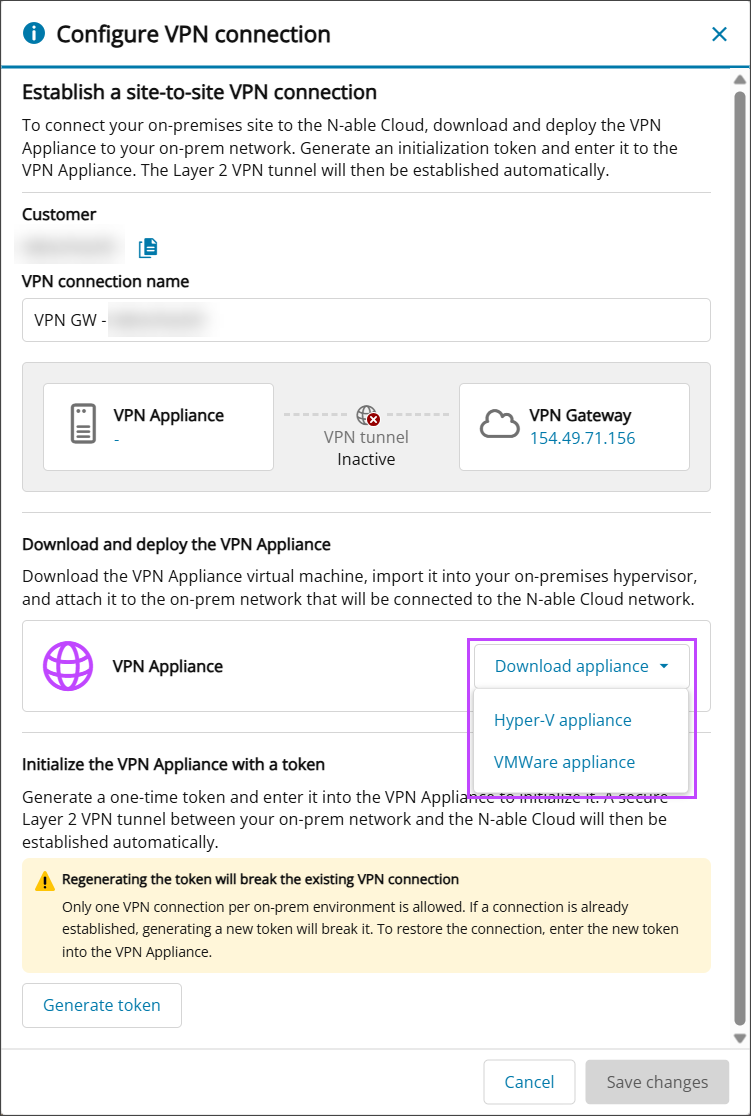
- Hyper-V appliance
- Click Generate token
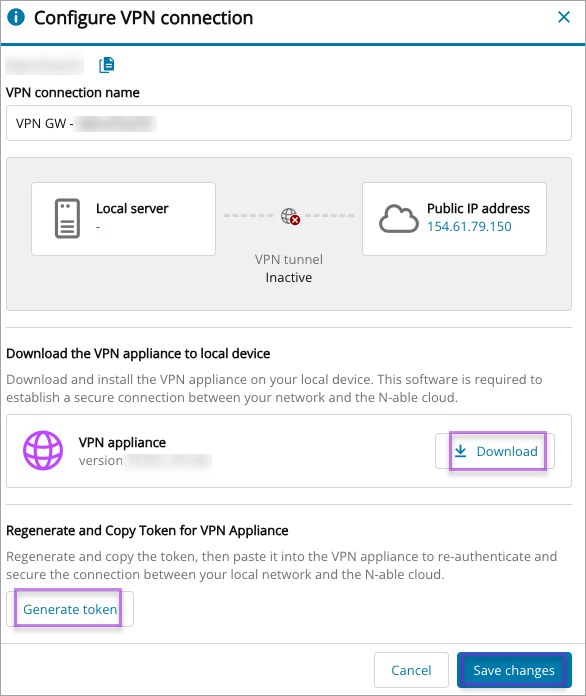
A token cannot be reused. If you have lost the token or it has expired, to generate a new one you need to go to VPN connection settings and click the Generate token button.
Regenerating the token will break the VPN connection. To restore access, update your appliance with the new token.
- Take a copy of the token to be used in Step 3.
- Click Save Changes to close the window.
If renewing the VPN connection, the Save Changes button is only active when a change is made to the VPN Connection Name.
Step 2: Deploy and configure VPN Appliance VM
Extract the files from the VPN appliance download folder to create or import the Virtual Machine on your on-premises host using the instructions below:
Hyper-V (Recommended)
- Open Hyper-V Manager.
- Select New > Virtual Machine.
- Specify the VM Name and Location.
- Select Generation 2.
- Set Startup Memory to 4094 MG (recommended).
Dynamic Memory is optional
- Select the virtual switch that should provide VPN connectivity to restored Cove DRaaS devices.
- Select Use an existing virtual hard disk, then choose the disk file from the VPN Appliance download folder.
- Finish and close the wizard.
After the Virtual Machine is created:
- Open the VM Settings
- Go to Security, then enable Trusted Platform Module.
- Change the Template from Microsoft Windows to Microsoft UEFI Certificate Authority.
- Navigate to Network Adapter > Advanced Features, and enable MAC address spoofing.
- If required, change the number of virtual processors to 2.
Dynamic Memory is optional; if enabled, set minimum RAB to at least 1024 MB.
- Select OK to save changes and close Settings.
Now Configure VPN Connections.
VMware ESXi
Before beginning, ensure that your ESXi network is configured with Promiscuous Mode, MAC Address Changes, and Forged Transmits all set to Accept.
- Log in to the ESXi web interface.
- Right-click on your host name and select Deploy OVF Template.
- Upload the
.ovafile from the extracted archive when prompted. - Continue through the wizard, specifying the VM name, storage location, and other configuration details.
- Assign the VM to the network adapter corresponding to the segment you intend to stretch toward DR.
- Click Finish and wait for the deployment to complete.
- Navigate to the VPN appliance VM then click Actions > Edit Settings > Add New Device > Trusted Platform Module.
- Click OK and wait for the VM to be reconfigured.
vTPM on ESXi requires a configured Key Provider. If TPM cannot be added, verify your key provider setup and VM compatibility level.
Step 3: Configure VPN Connections
- Login to the Hyper-V Manager or ESXi web interface
- Start the Virtual Machine
- When logging in to the VPN appliance VM for the first time, use the temporary credentials:
- Username:
vpn-agent - Password:
vpn-agent
- Username:
- If you do not use DHCP in your network, or wish to change the settings automatically assigned by your DHCP server:
- From the appliance console, select 2. Configure Network Settings
- Select 2. Use Static Settings mode and configure:
- IPv4 address with prefix
- Default gateway
- DNS Servers (separated by a space)
- Confirm the static settings by entering Yes or No
- From the appliance console, select 3. Initialize VPN Agent
- Enter the token taken from Step 1.6 as the initialization token
- Press Enter to complete initialization
- Return to the VPN Connections Dashboard in Cove's Management Console
- After configuring and starting failover, check the VPN tunnel status. If successful, the VPN connection status is changed to Active
You are prompted to reset the credentials after successfully logging in the first time.
For all subsequent times logging on to the VM, login using your custom password.
A VPN connection tunnel status of Inactive is the default status until a failover has been started
If the tunnel is showing as inactive, check that the VM appliance has internet access and firewall allowance.
For test failover, ensure that you use different IPs from your real production workload to avoid conflicts.
To disconnect the VPN connection, you can power off the VPN appliance on your production side, keeping it available for future recovery tests.
Optional: Switch to DHCP Settings
If you have previously configured Static Settings, but wish to switch back to using your networks DHCP automatically assigned settings:
- Login to the VPN appliance VM
- From the appliance console, select 2. Configure Network Settings
- Select 1. Use DHCP mode:
- Switch to DHCP: Yes or No
- Hit Enter to confirm the change and exit the network settings configuration