
The Backup Dashboard lists all devices together with usage statistics for them.
Device definition
A device (aka "backup device") is client software installed on a server or workstation to provide backup and recovery services. This applies to the data actually located on the current computer as well as remote resources accessible through this computer (network shares, virtual machines, databases and others).
A device can be installed on several computers: the primary computer where data backup takes place and any number of other computers in the restore-only mode.
Access permissions
All types of users can view the module. Editing permissions are available to the following types of users:
- SuperUser
- Manager (all features except for the automatic device deployment)
The automatic device deployment feature is available only to the SuperUser accounts belonging to the customers of a certain type (Reseller or end-user).
See User management for a list of user types.
Adding Devices
To enable backups, you need a device. Backup Manager device types differ depending on the intended installation method.
- Managed - This method (previously known as Automatic Deployment, or Quick Installation) uses the Cove Data Protection (Cove) managed encryption method, allowing administrators to quickly install the Backup Manager on multiple machines using the a software distribution system
- This installation method becomes available if the Reseller or End Customer Customer type is selected and works for both Servers and Workstations
- Self-Managed - This method (previously known as Manual, or Legacy Installation) uses a unique Encryption Key/Security Code that you must set and store to encrypt backed up data and is used when triggering a restore. It allows for the installation of Backup Manager on devices one at a time. This can be performed through the wizard, or through the command line in silent mode
- This installation method works for both Servers and Workstations
You must store the Encryption Key/Security Code somewhere secure as we do not store this for devices that use self-managed encryption.
- Documents - This is a purpose-built data protection solution for Windows and macOS Workstations and Laptops only. It provides highly automated data protection of key office files (every Word doc, spreadsheet, presentation, text file, .pdf, .csv) at a price point similar to antivirus software
This option can be found by selecting the Documents Installer toggle at the top right of the window
Re-installing Devices
Full details on re-installation for devices can be found on the Re-installation page.
Adding Cloud Tenants
Cove also support protection for cloud-based tenants:
- Microsoft 365 - This service enables the protection of Microsoft 365 domains for full Exchange, OneDrive, SharePoint, and Teams protection. This option lets you recover emails, messages, calendar items, files and contacts from protected accounts long after they were cleaned or lost from Microsoft databases.
- Google Workspace - This service enables protection for Google Workspace workloads for protection of Gmail, My Drive, Shared Drives, Calendar, Contacts, and Tasks.
Download Installer Files
- Login to the Cove Data Protection (Cove) Management Console
- Find the device in to re-install from the Backup Dashboard
- Click the device name to open the device properties
- Open the Action Menu by clicking the three vertical dots on the right-hand side of the device properties window and select Re-install software
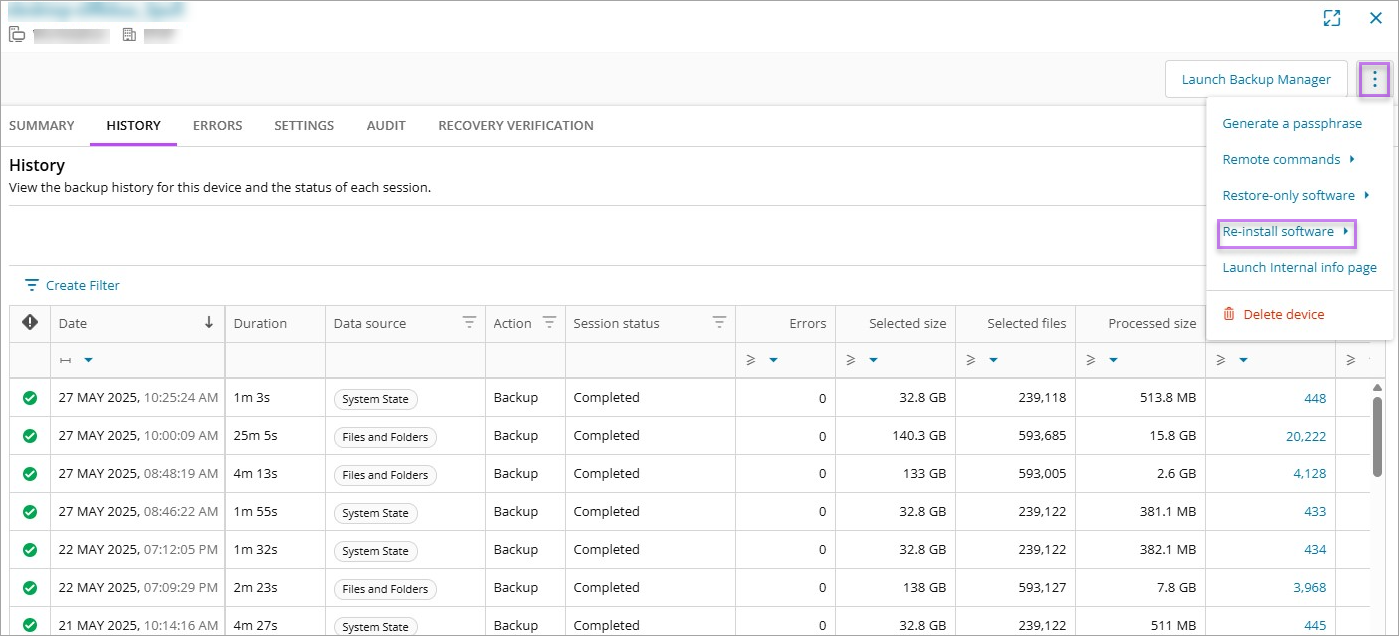
This is only available from Enhanced Device Properties. If you have turned this off in the Beta Features window, please enable it to see this option
Moving Devices and Cloud Tenants
You can move devices and cloud tenants from one customer to another using the Move function on the Management Console.
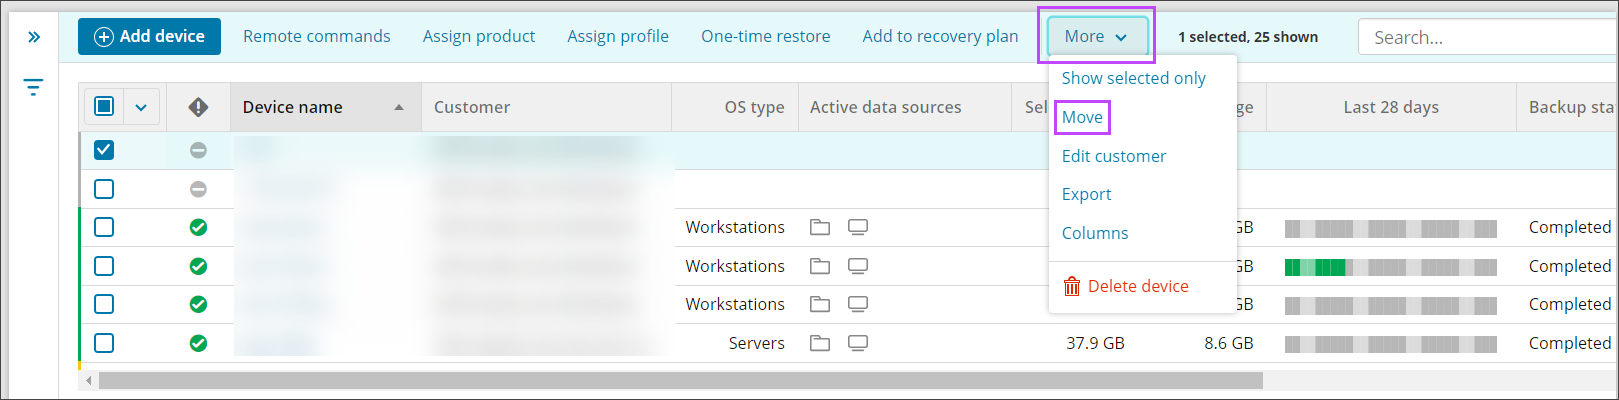
- In Backup Dashboard, select the device(s) to move
- Click More > Move on the toolbar
- In the Move window, select the new Customer to assign from the dropdown
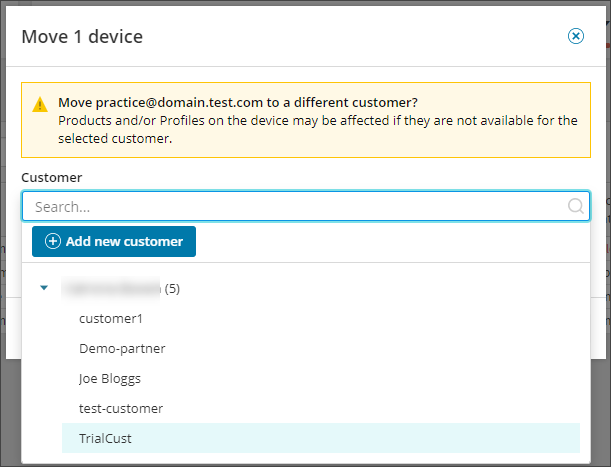
- Click Save
If Products or Retention Policies (New or Classic) are assigned to the device that are not available for the selected customer, these will be removed upon save. You will need to create them at the appropriate customer level and re-assign to the device.
Editing devices
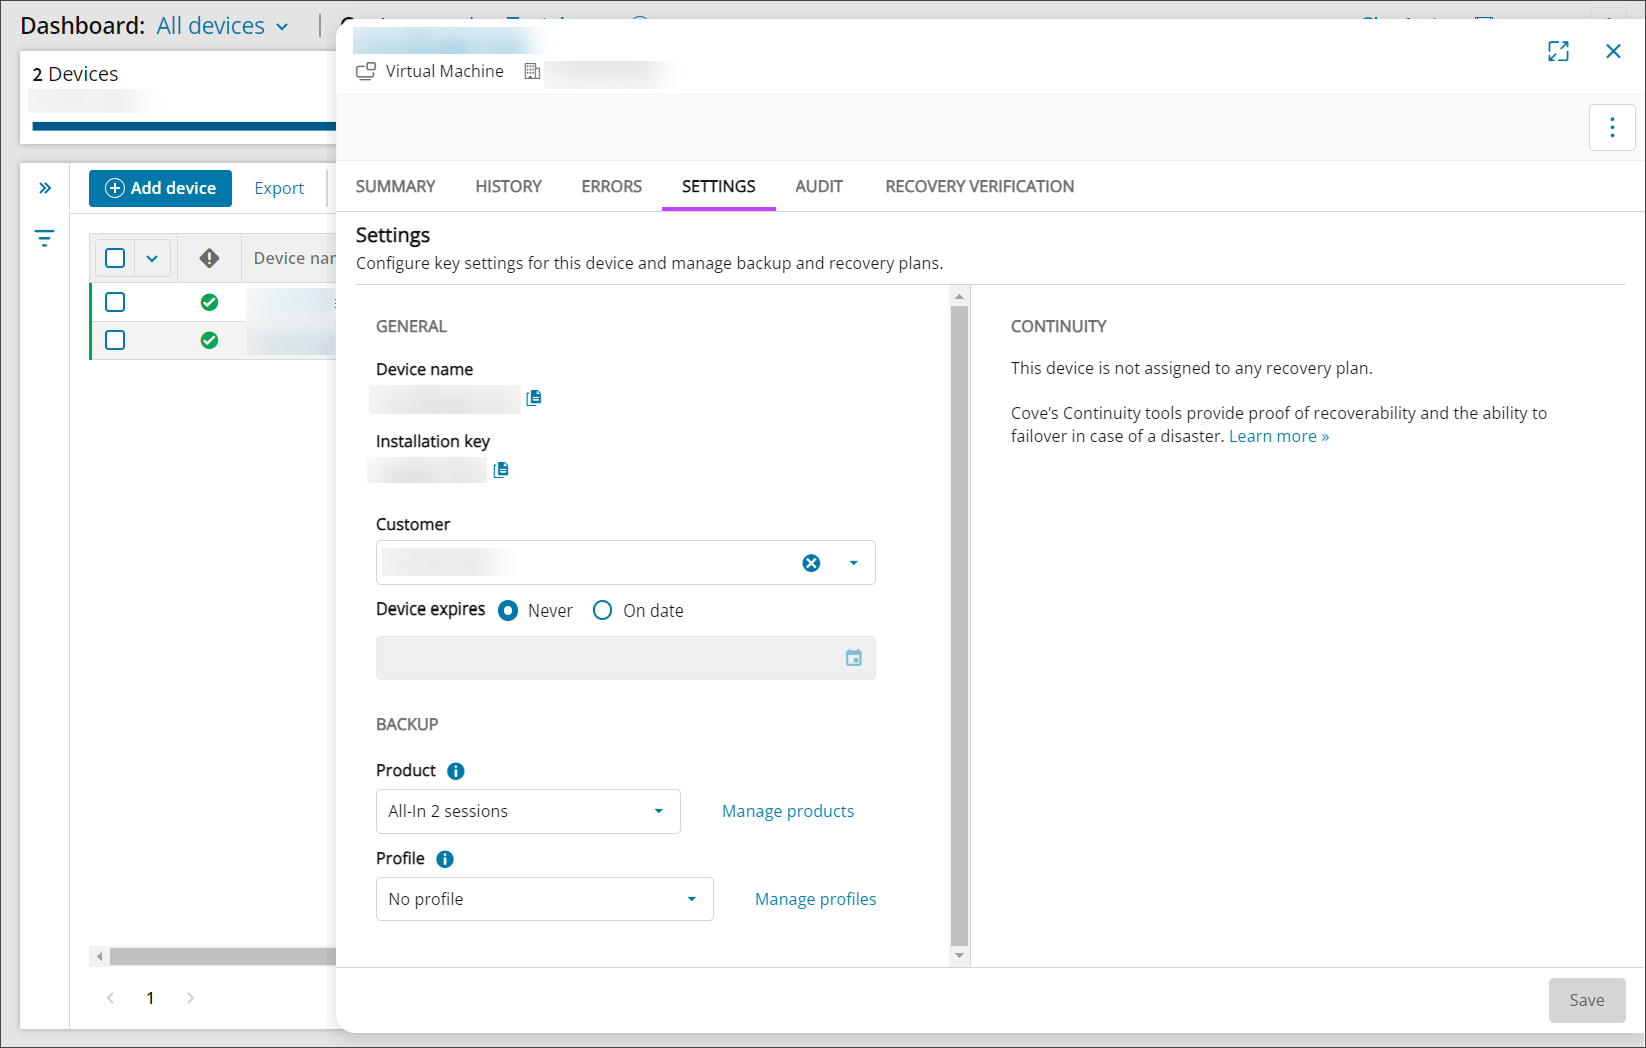
- To edit an existing device, click the device name to view the device properties
- Navigate to the Settings tab. The following options are available to edit:
- Assign the device to another customer
- Change the Expiry date, or set the device to No expiration
- Change the Retention Policy assigned to the device
- Change the Profile assigned to the device
- If compatible, assign the device to a Recovery Testing plan
- Add or edit the Recovery report email address
- Save any changes made
Enhanced Device Properties:
Classic Device Properties:
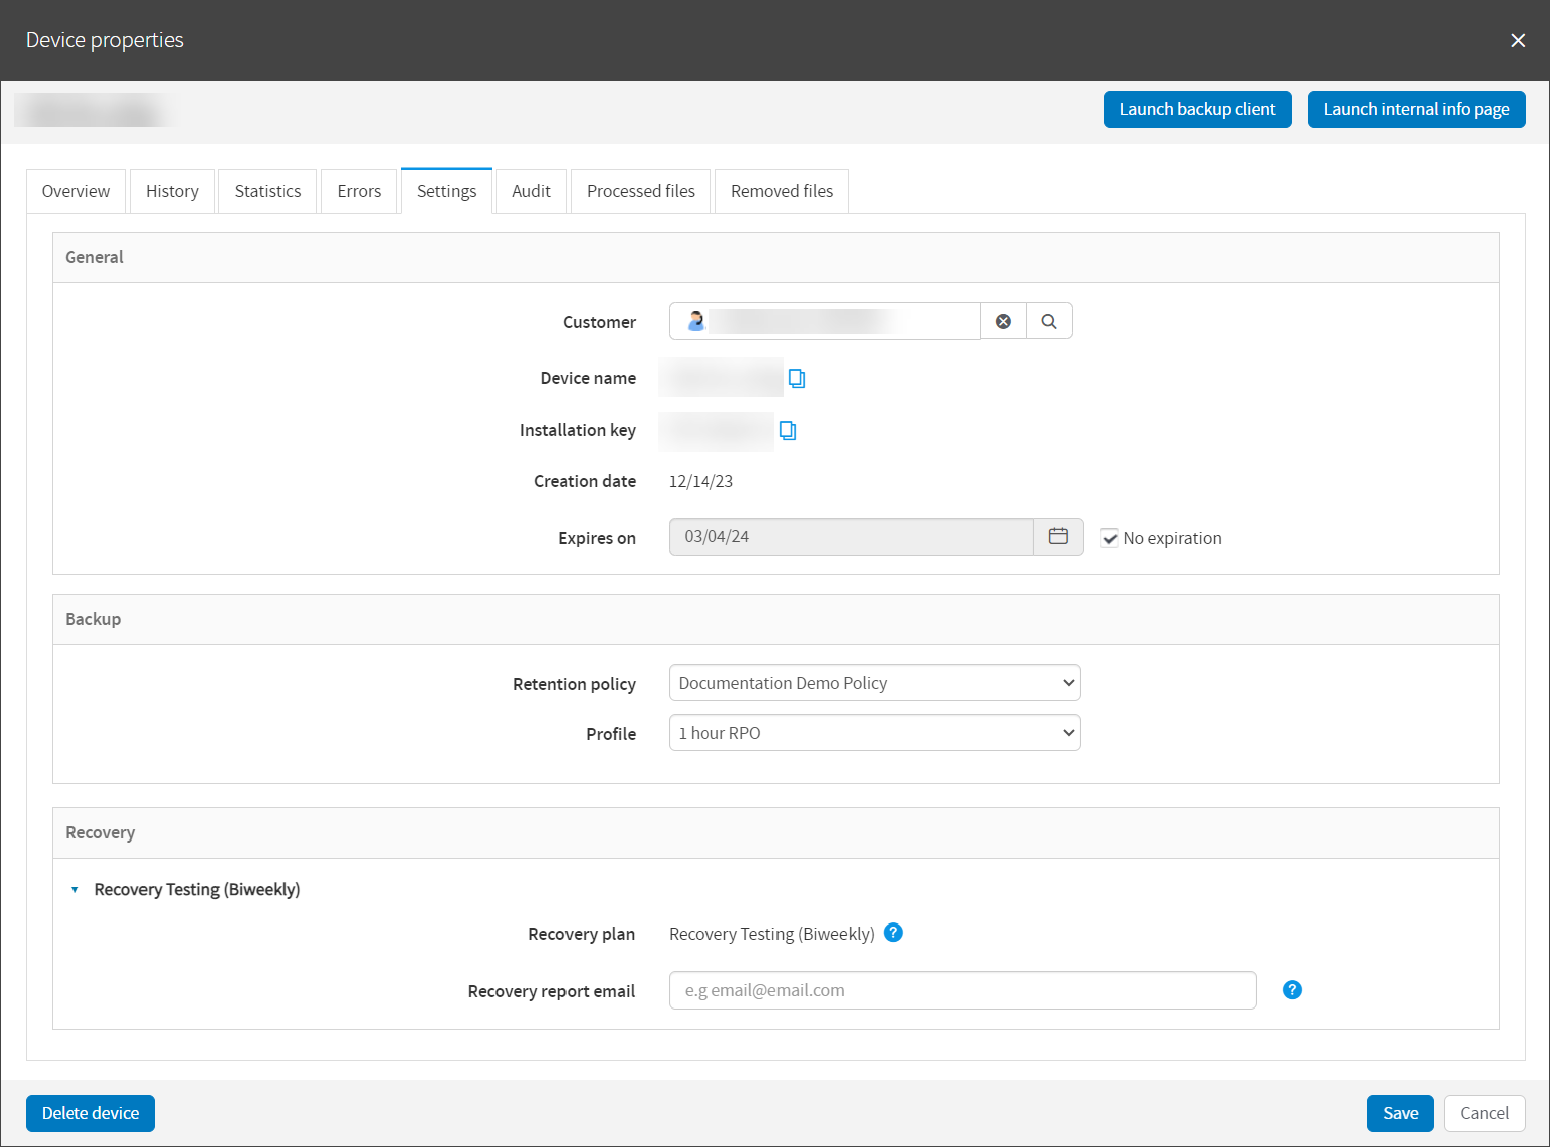
You cannot edit device names and installation keys/passwords.
Full Screen Mode
The option to open the enhanced device properties side panel to a full page view is available using the full screen button in the upper right-hand corner of the panel:

To exit full screen mode, click the back arrow, or Dashboard view from the top bar:

Re-size Side Panel
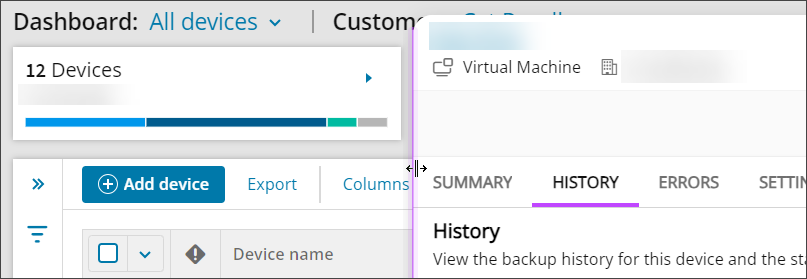
The enhanced device properties side panel can be re-sized, making it possible to display more of the underlying Dashboard view, or more of the device properties by hovering over the edge and dragging left or right as required:
Navigate Device Properties with Side Panel Open
While the enhanced device properties side panel is open, it is possible to navigate through the list of devices from the underlying Dashboard view, and to filter devices using the Widgets at the top of the page or filters list.
Viewing statistics for devices
The most important device statistics appear right in the Devices widget. To get all details for a device, click on its name.
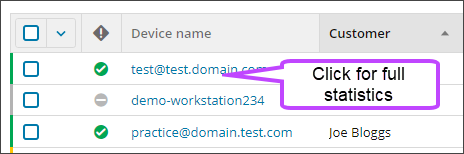
The Device Properties dialogue will open. Use the tab bar to switch between different views.
Enhanced Device Properties:
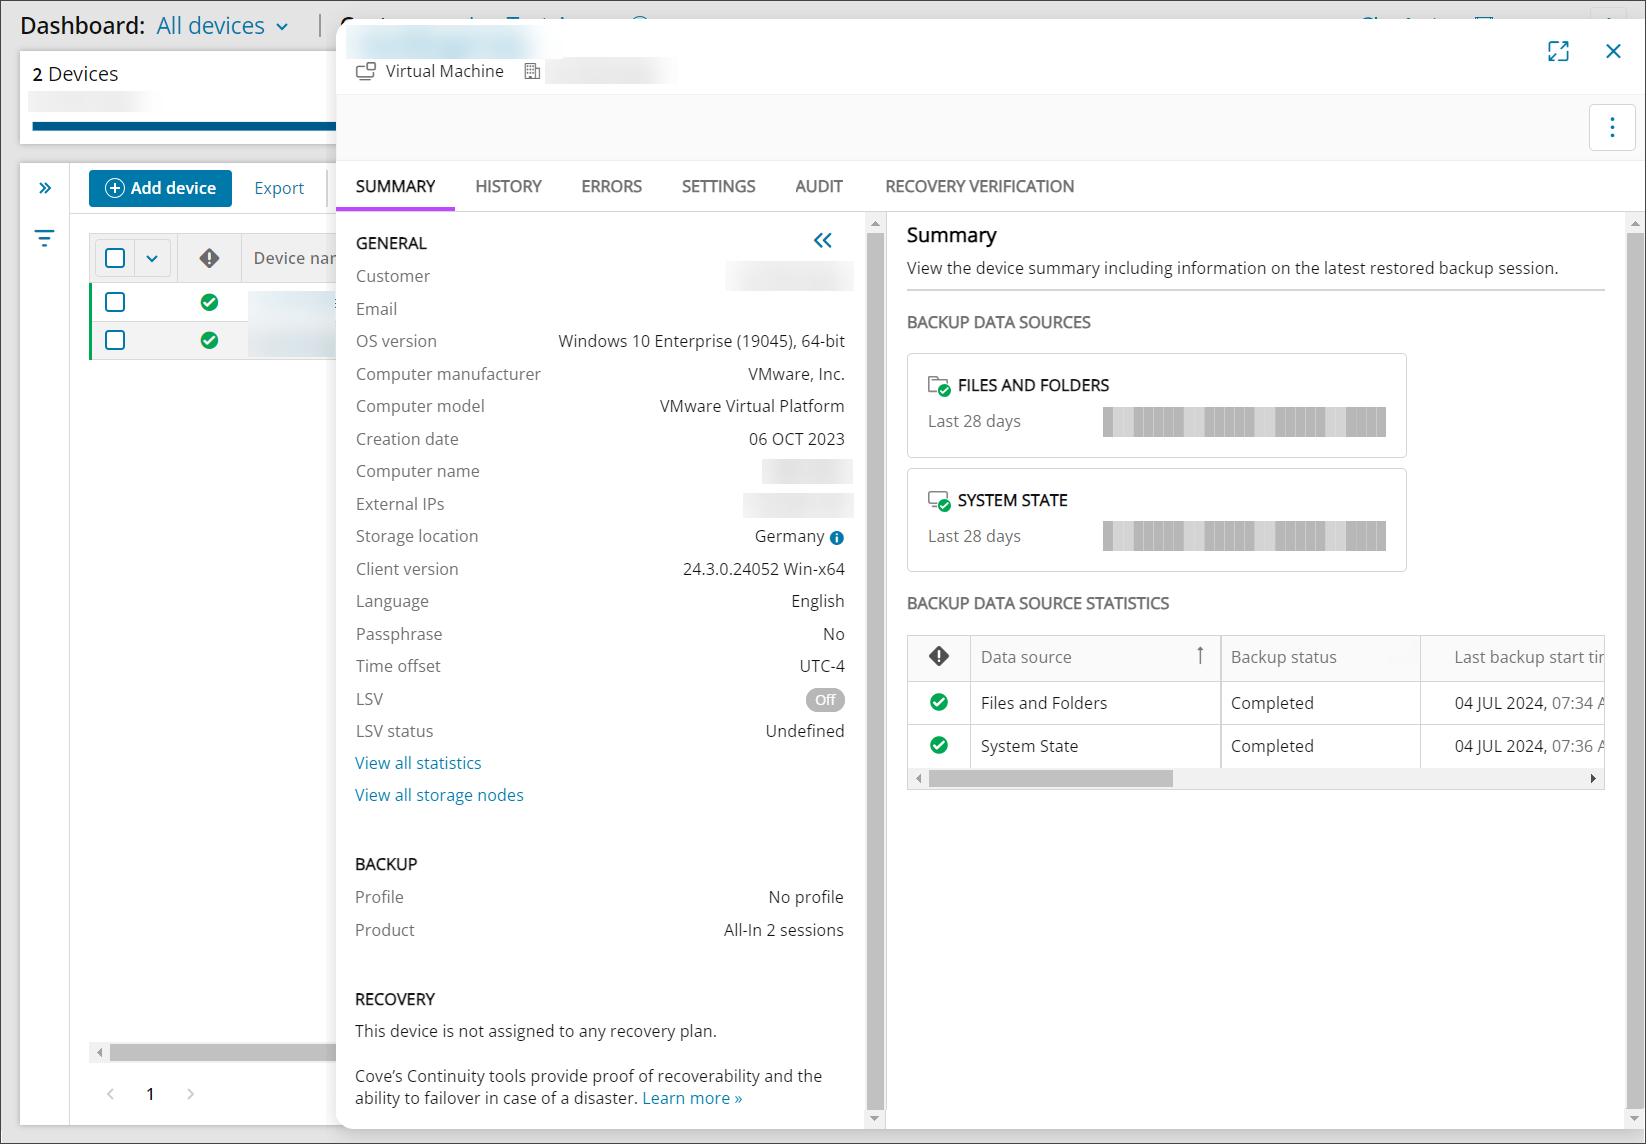
Classic Device Properties:
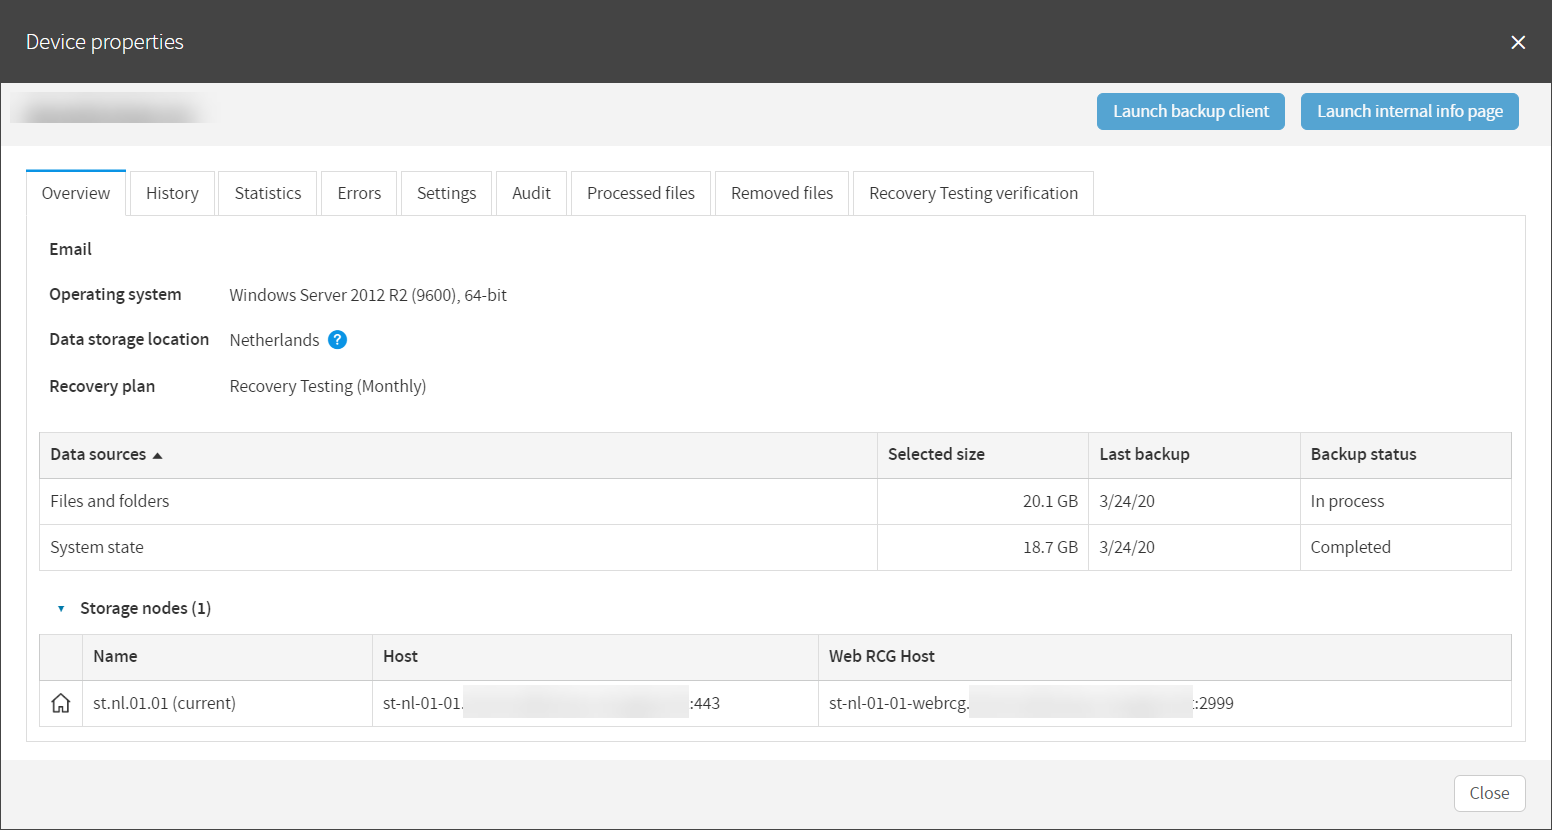
Each tab within the Device Properties dialogue contains different information. The tab selection you see may differ depending on the user account type or the device type.
| Tab Name (New) | Tab Name (Classic) | Description |
| Summary | Overview |
A general overview of the device, including:
On the Enhanced Device Properties, this also includes all information that was previously contained on the Statistics tab:
|
| History | History | Recent backup session history showing the time the jobs started for the device, the duration, data source that was ran, action taken, backup status, number of errors, the selected size of the job, number of files scanned for the job, the processed size of the job, number of files backed up or recovered, the transferred size of all files once compressed, number of files removed after clean and any flags against the session - all of which can be filtered on |
| - | Statistics |
Information about Backup Manager on the device, including but not limited to the version of the client installed, amount of storage spaces used, make and model of the device and LocalSpeedVault settings. On the Enhanced Device Properties, this information has been moved to the Summary tab. |
| Errors | Errors | Any errors that have occurred during the backup, gives you a breakdown of what has happened and when. |
| Settings | Settings |
Broken into sections, this tab contains:
|
| Audit | Audit | This tab shows you what operation was carried out against the device, when, by which user account and any additional details to the action. |
| - | Processed Files | In here you will see a breakdown of each file that was processed during the backup, how long scanning and backup took and the size of the file before and after compression |
| - | Removed Files | This tab details the file name and path of each instance of the filed that are no longer within the retention period and so have been cleaned from the storage account. |
| Recovery Verification | Recovery Testing Verification |
This tab will only be available if the device is assigned to a Recovery Plan, e.g. Recovery Testing Monthly, or Bi-weekly, or Standby Image Hyper-V, Azure or ESXi. This tab is then split into sub-tabs for the restore format selected. You can view the screenshot, the recovery session status, time and duration as well as the System Log information. |
Session Flags
You can find flags within the History tab of the Device Properties dialogue box.
| Flag Letter | Flag Name | Description |
| A | Archived |
This backup session will be kept in storage even after the retention period expires and will not be deleted unless you do so manually. |
| S | Synchronized | This backup session is synchronized with the cloud storage, any changes made are instantly updated and maintained across the system. |
| C | Cleaned | This backup session has been removed from cloud storage because it is outside the retention period and is no longer available for recovery. |
| L | LocalStorage | The backup session has not yet synchronized to the cloud storage |
Deleting device(s)
Devices are removed together with all data that has been backed up for them.
The previously backed up data is permanently deleted 30 days after the device is deleted.
There is no way to restore the data after the device has been deleted from the system.
To delete one or multiple devices:
- Select the three vertical dots to the right of the device and click Delete device on the action menu
- Select the checkbox next to each of the devices, select More from the toolbar then Delete Device
- Confirm the number of devices to be deleted by typing the number in the text box
- Click Delete
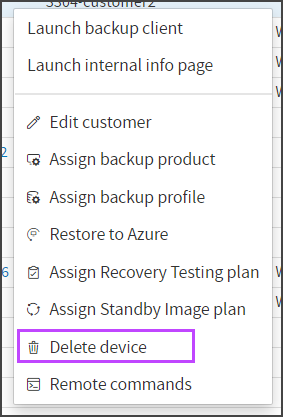
Or
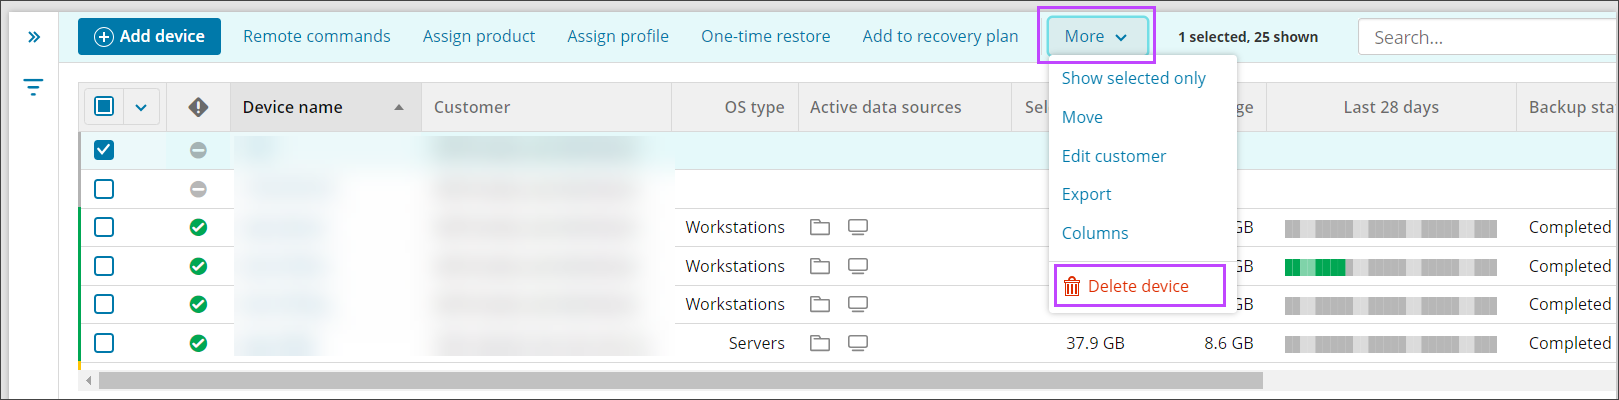
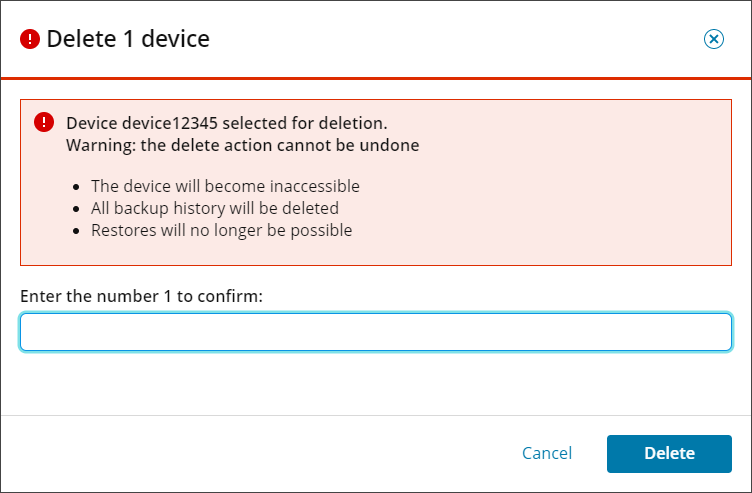
It is also possible to delete devices individually from the Device Properties > Settings tab.
 Related Topics