
Configure Restore To Azure
Before starting a restore to Azure, ensure you have checked all requirements and limitations, including setting up an Azure recovery location.
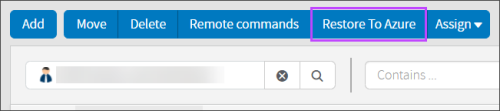
- Log in to the Management Console under a SuperUser account
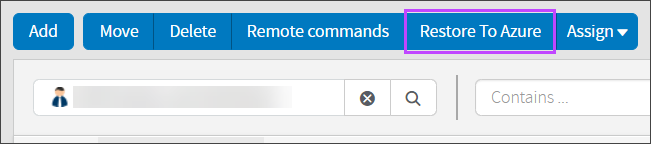
- In the Backup Dashboard, tick the checkbox to the left of the device(s) to restore
- Click Restore to Azure

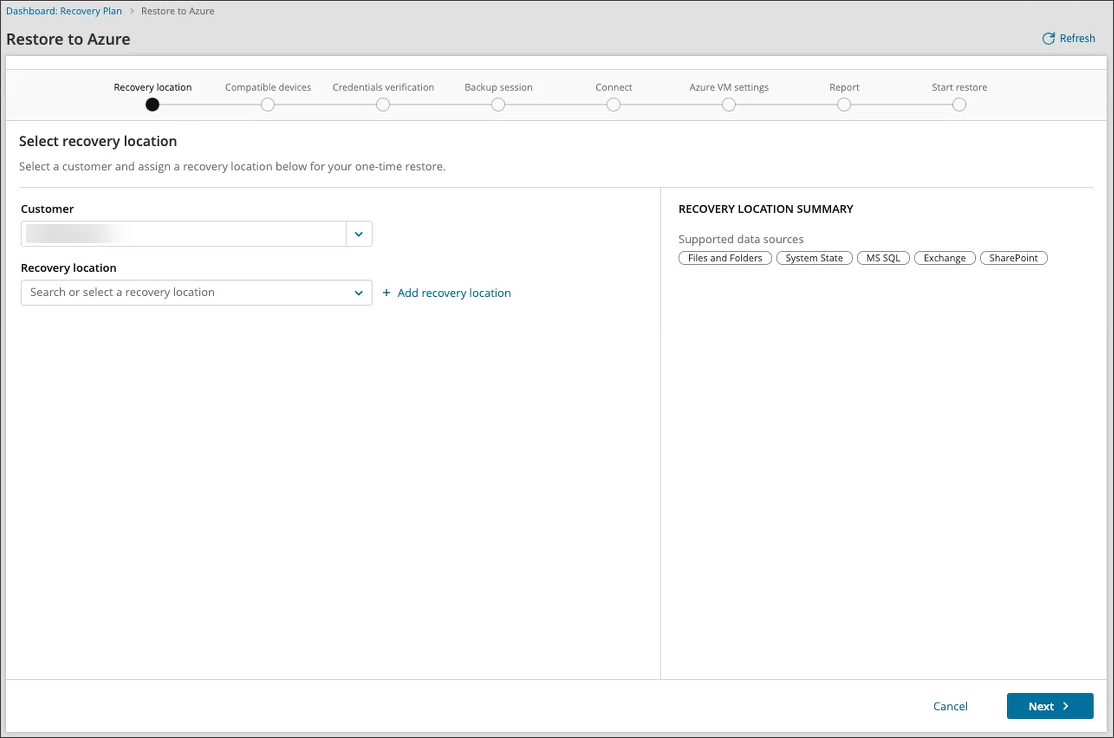
- Select the Customer
- Select the Azure Recovery Location for the restore or click + Add recovery Location to follow the steps to create a new Azure Recovery Location
If adding a recovery location from here, you will be taken to the Add Azure Recovery Location wizard, where Azure will be automatically selected as the recovery type. Follow the Azure Recovery Location installation instructions from Step #4 onwards.

- Click Next
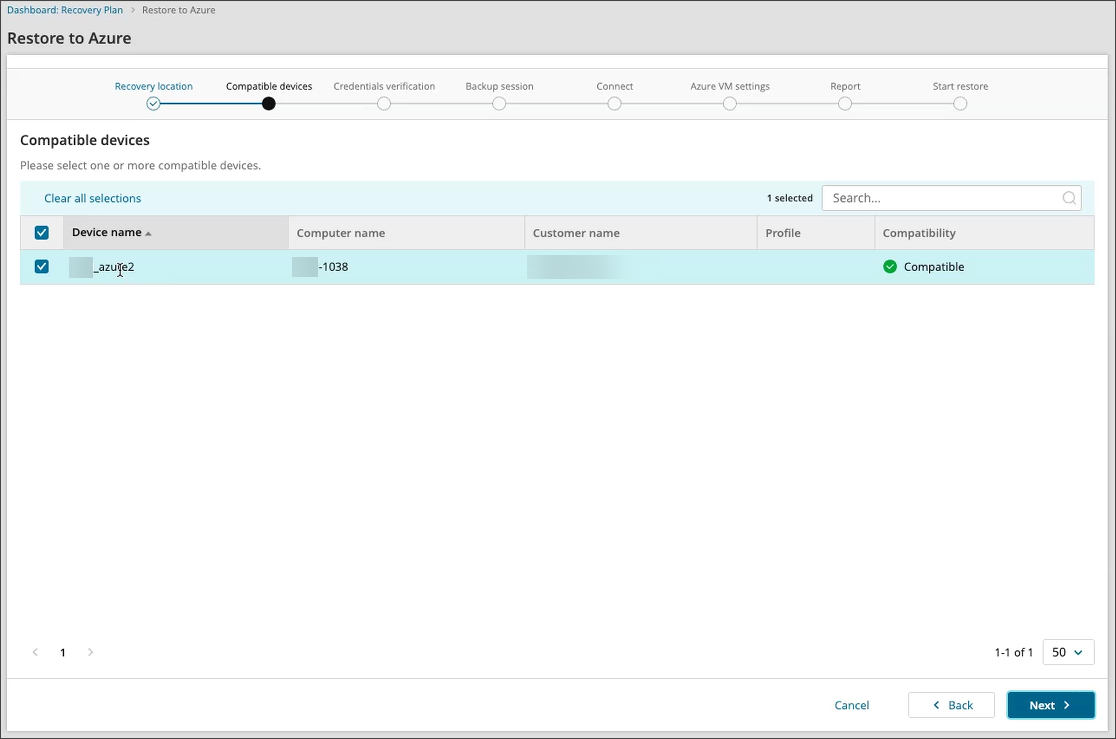
- Confirm compatibility of device(s) and click Next

- Enter the security code/encryption key or passphrase for the device(s). This can be either:
- Private encryption key - Created by yourself when installing Backup Manager on the device. If you have lost the encryption key/security code for the device, you will need to Convert devices to passphrase-based encryption
- Passphrase encryption - These are generated on demand for automatically installed devices. You can find information on this here
If you are logged in as a security officer, this will be detected automatically.
- Click Next
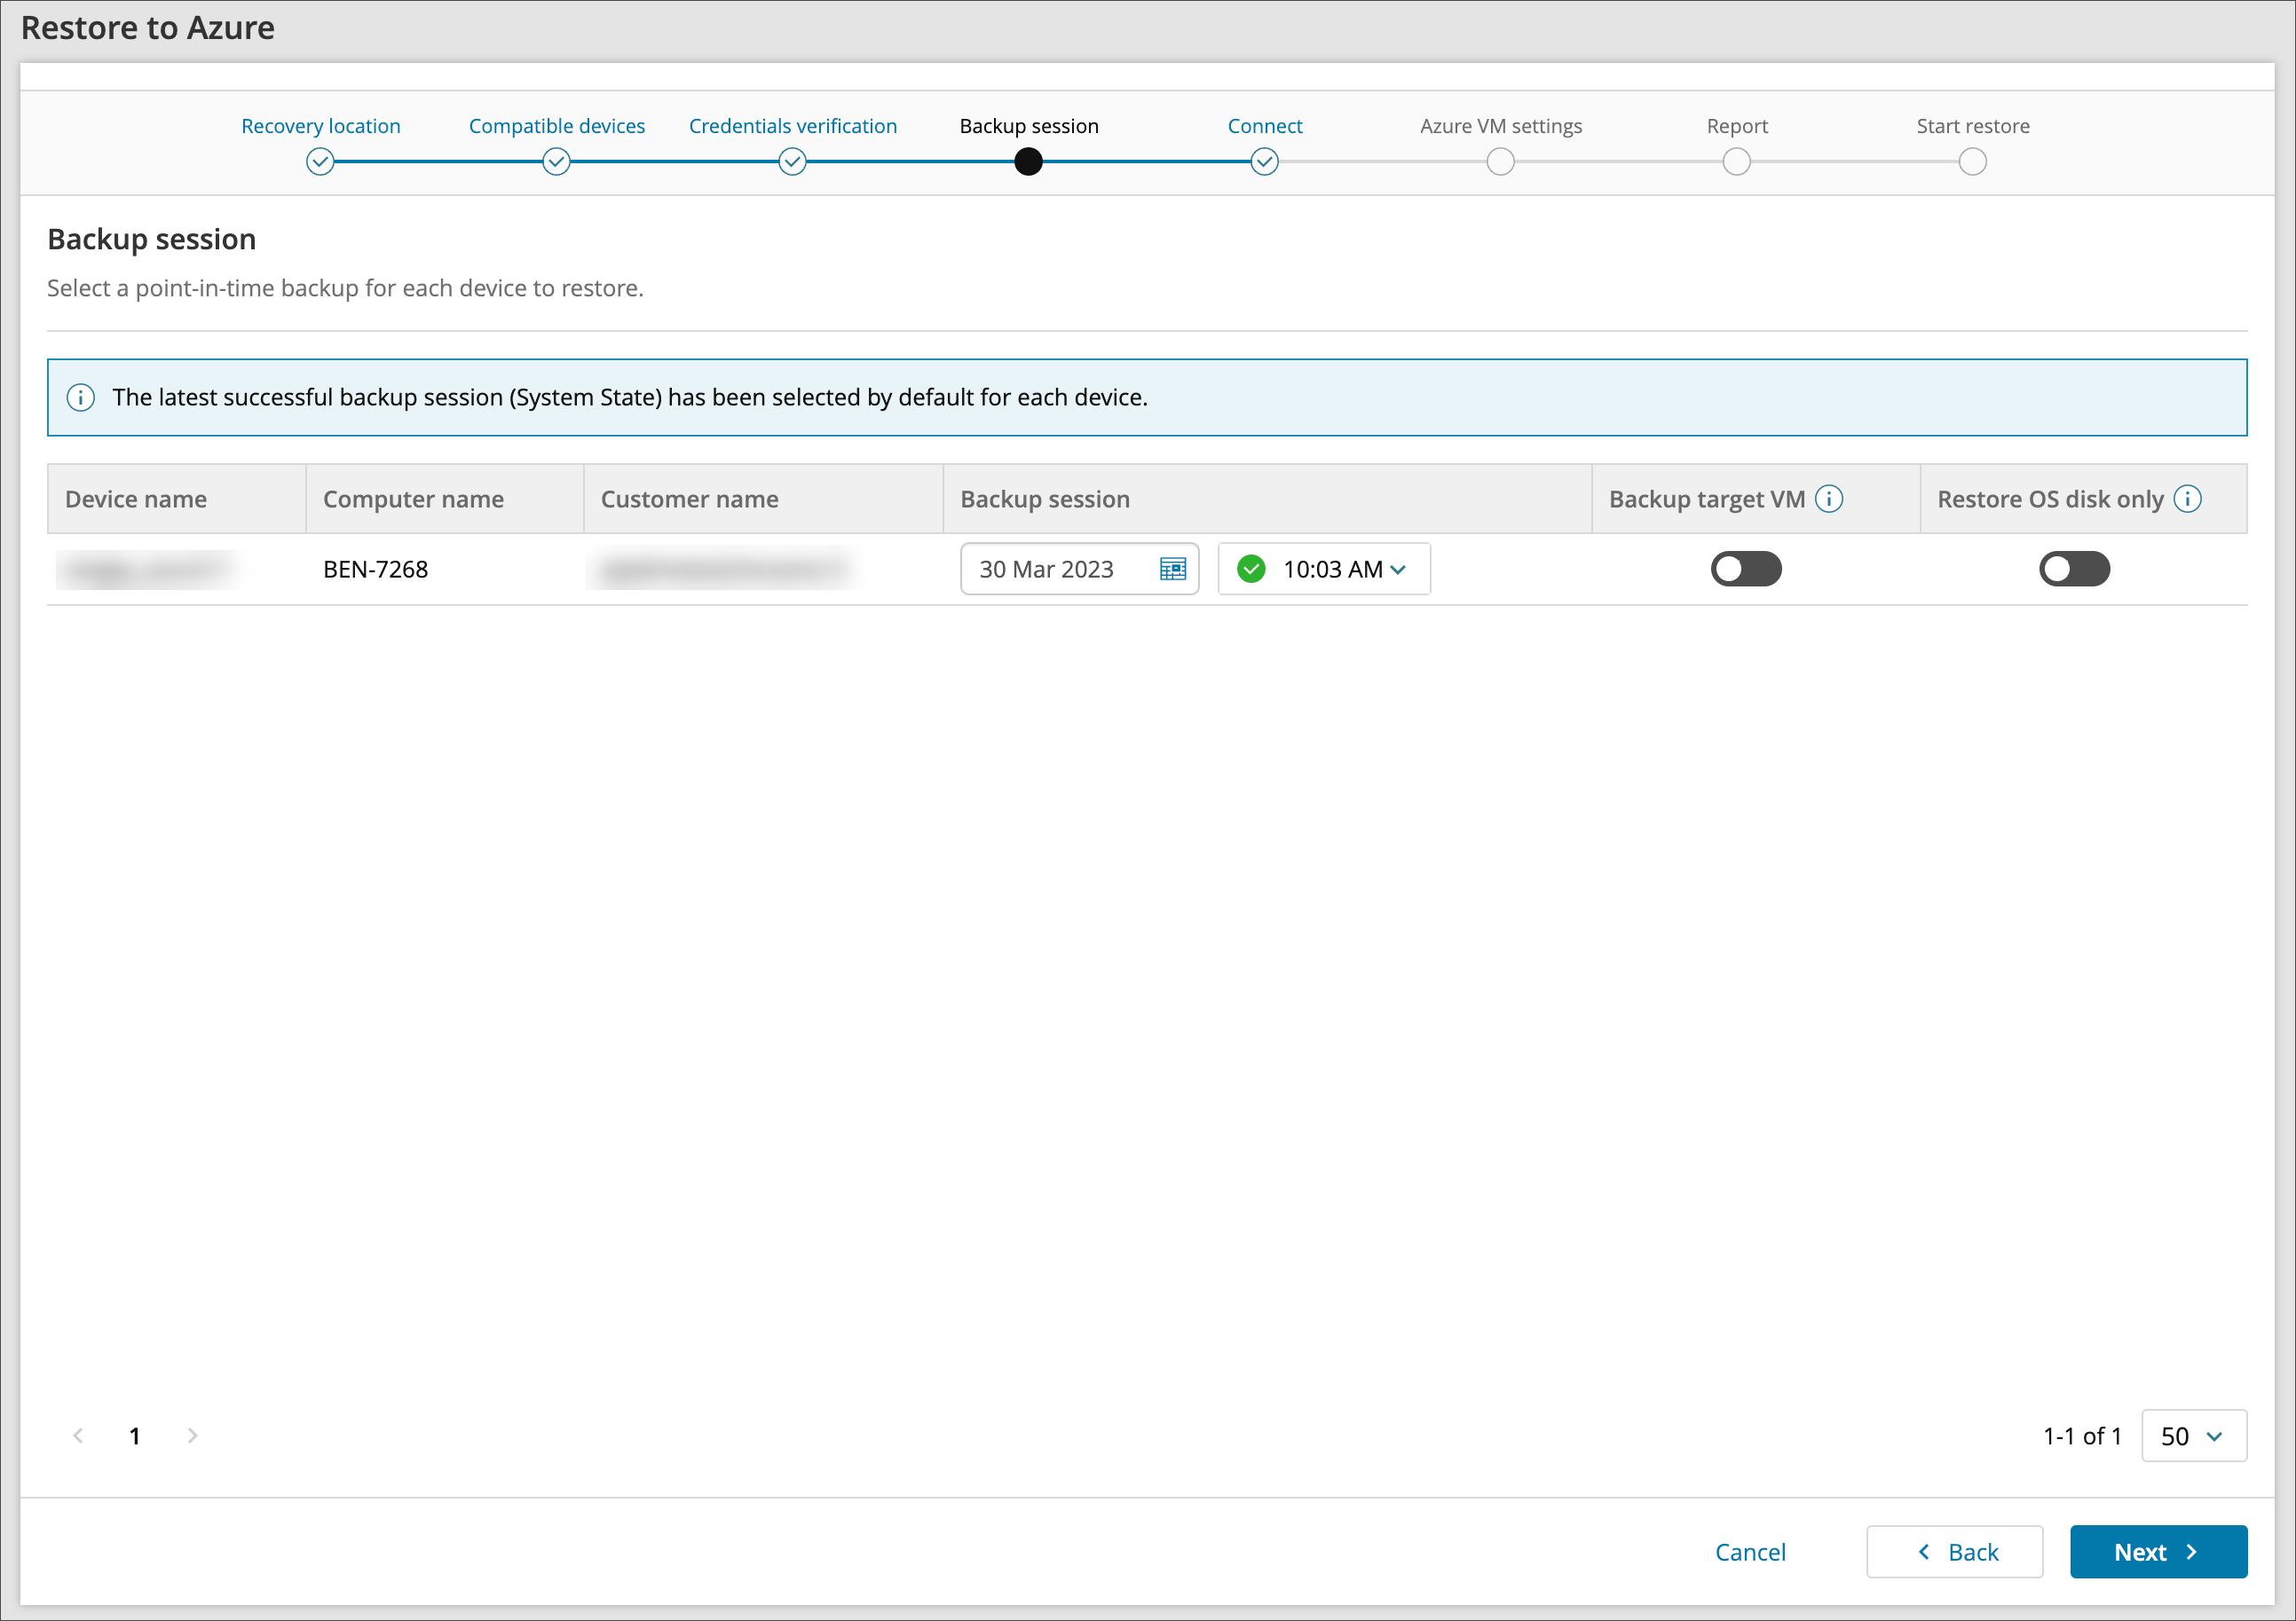
- Select the date and time of the backup session to restore

During this step, all available sessions for all devices listed will be loaded in the backup session column. Please allow time for these to load, if the load of sessions fails, a message stating so will be displayed with a refresh button to try again.
- If you wish to protect the device according to its existing backup schedule, enable Backup target VM
- If you wish to skip all data drives, enable Restore OS disk only
Enabling Restore OS disk only will help to speed up restores as the only thing being restored is the Operating System
- Click Next
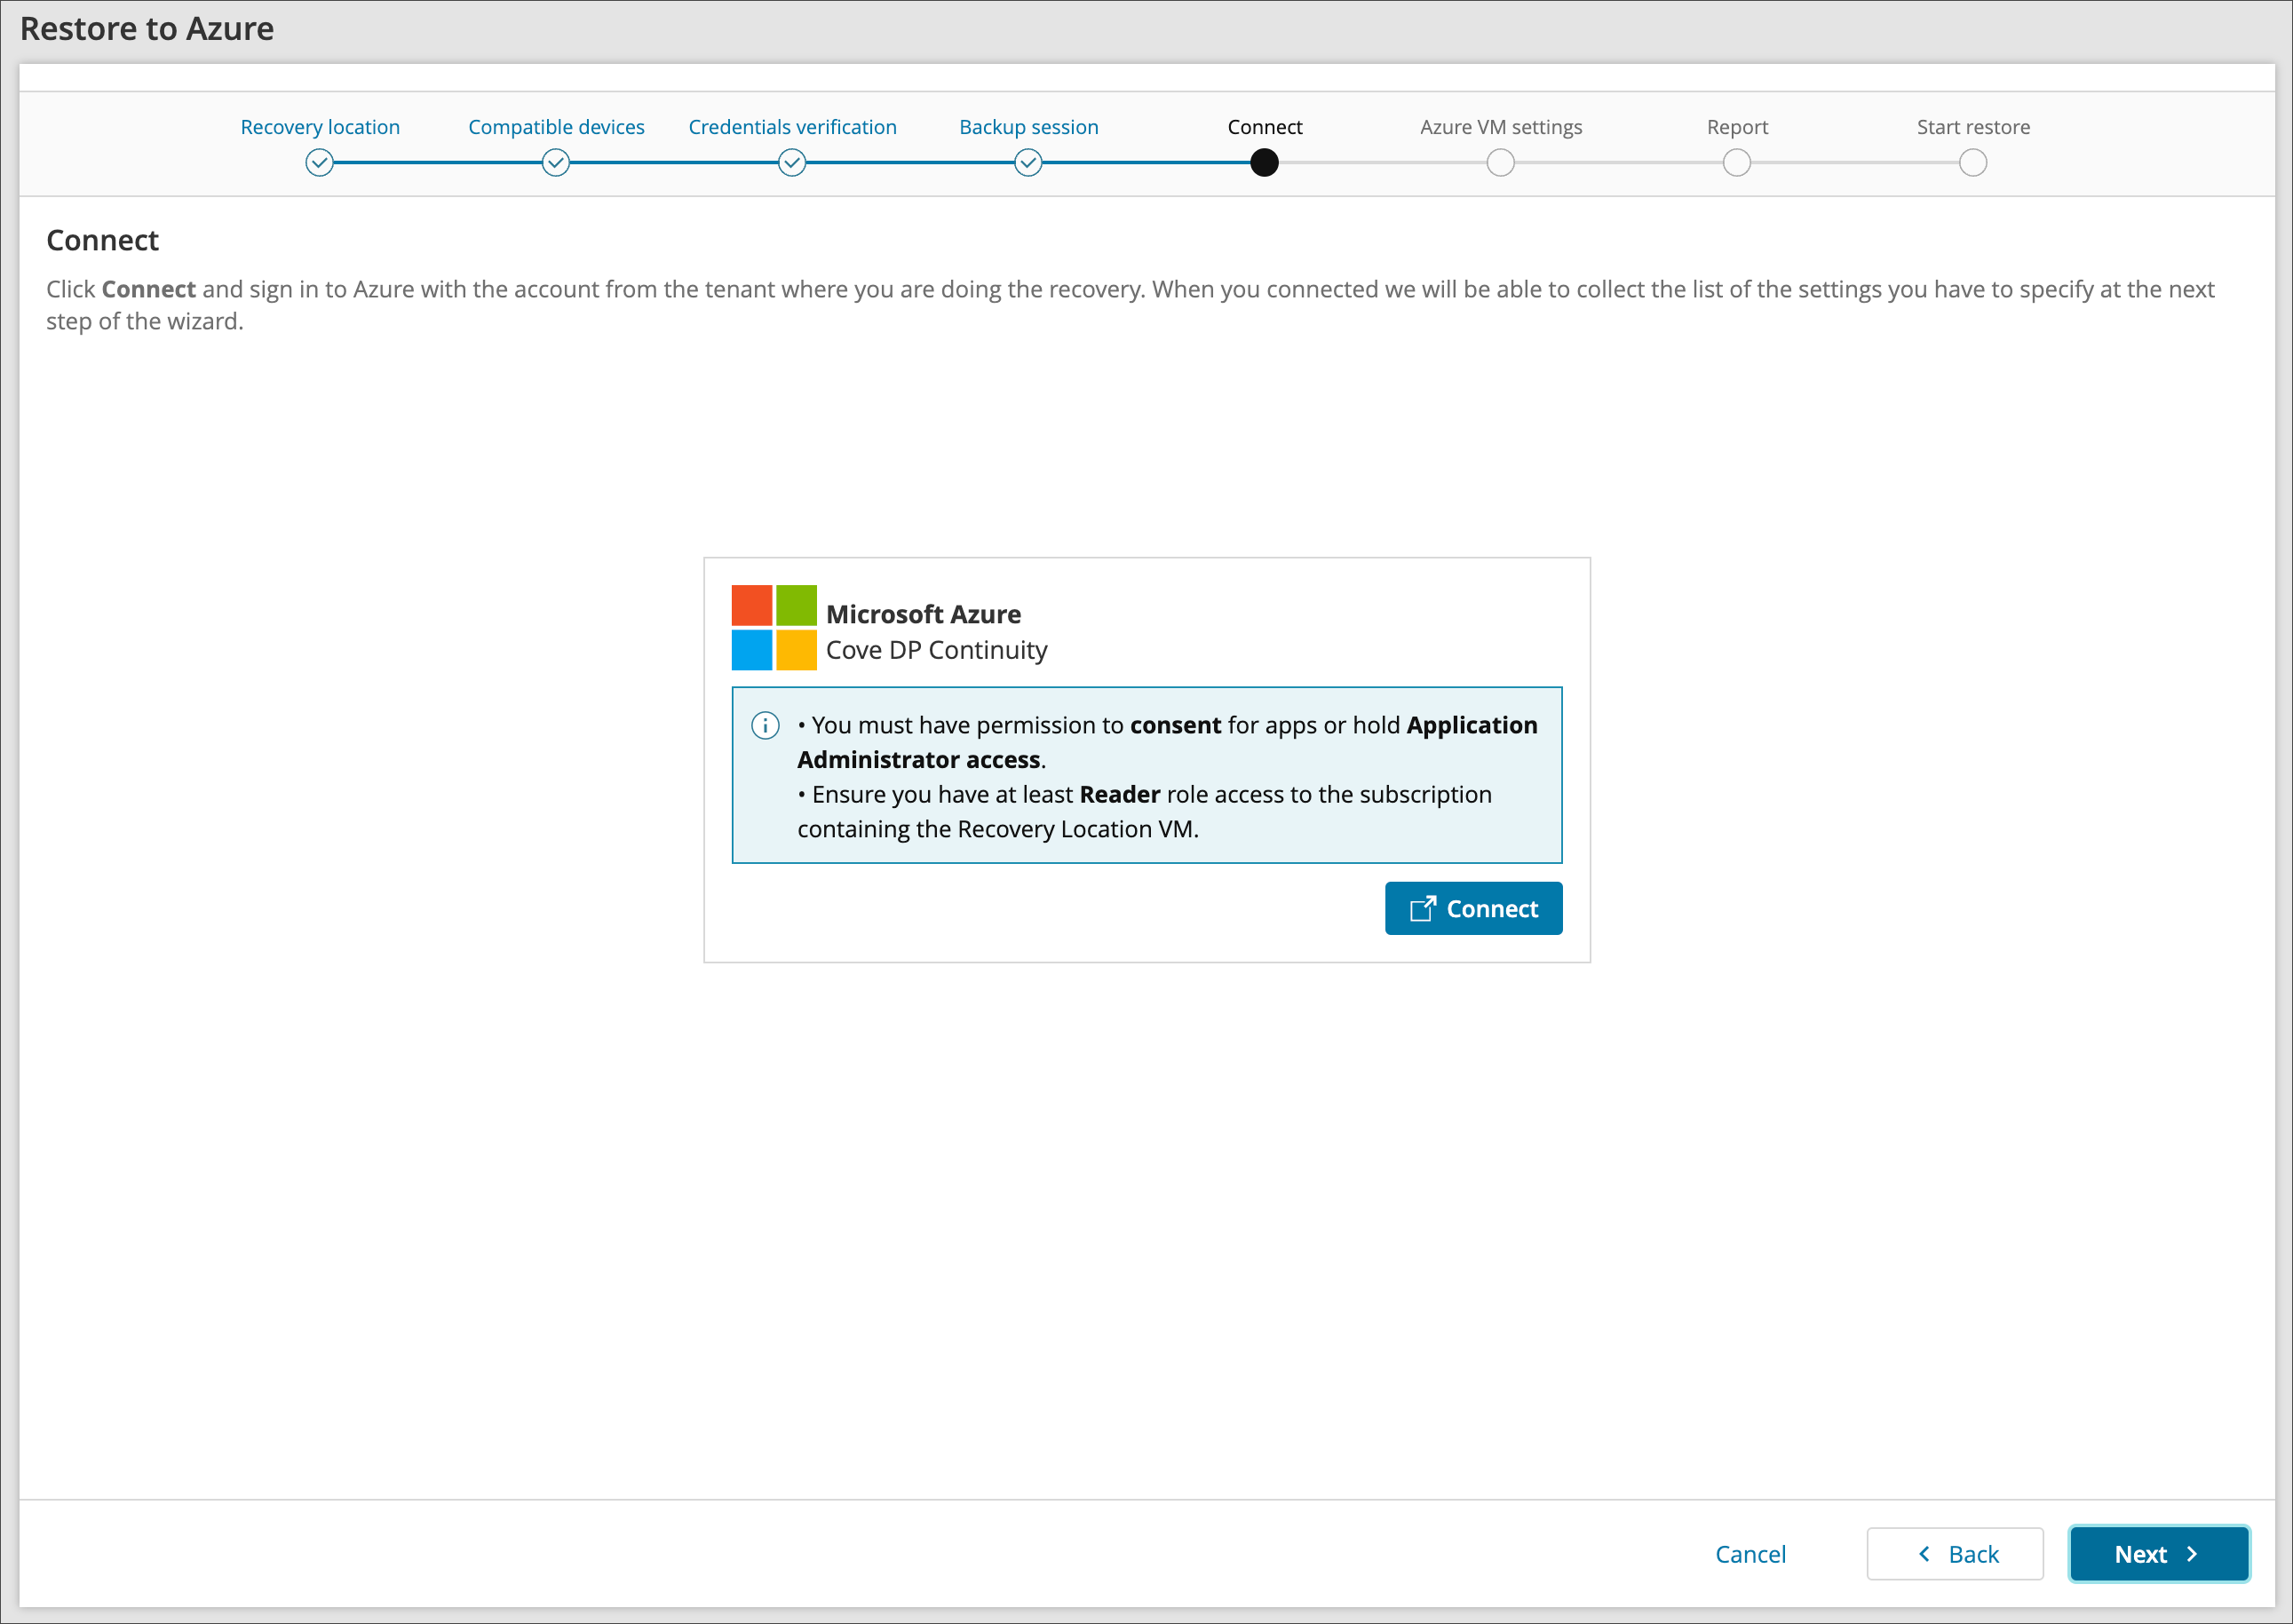
- Connect to Microsoft Azure by either:
- Allow permissions to the Azure user account to consent for apps access,
or;
- Login using Application Administrator access
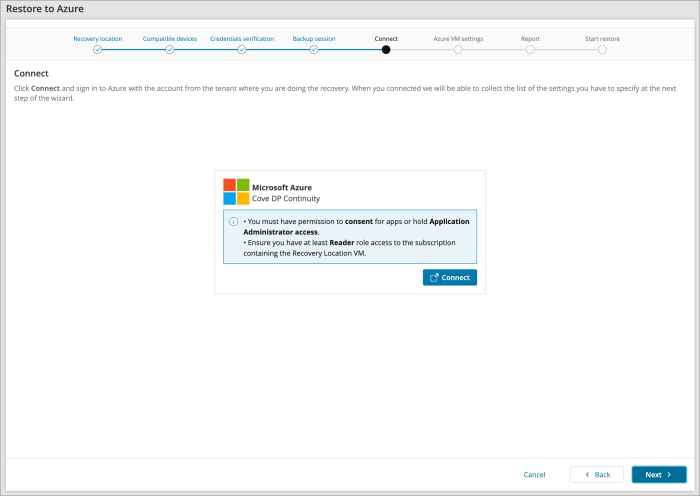
Ensure you have at minimum Reader role access to the subscription containing the Recovery Location VM
- Accept the required permissions

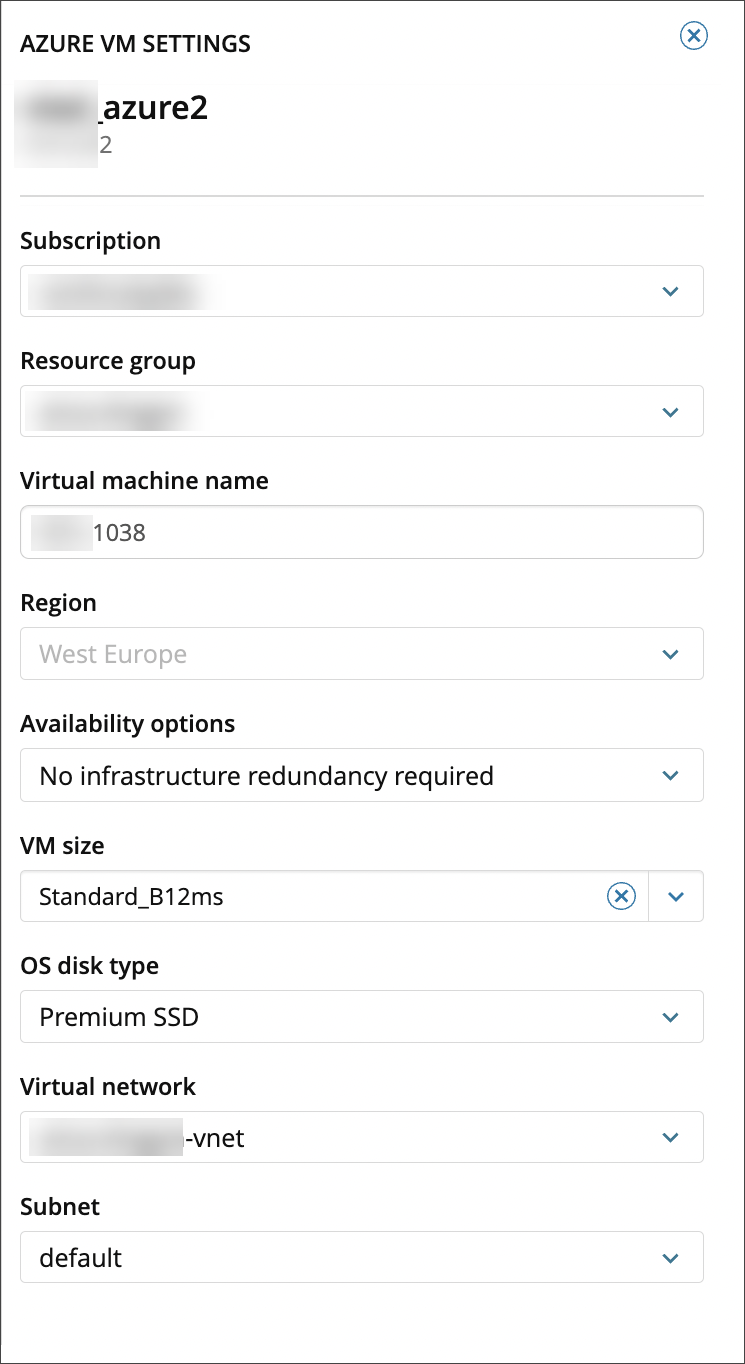
- Supply the Azure VM settings:

- Subscription
This cannot be changed as the subscription is set in the Recovery Location configuration
- Resource Group
- Virtual Machine name
- Region
This cannot be changed as the subscription is set in the Recovery Location configuration
- Availability options
- VM size
- OS disk type
- Virtual Network
- Subnet
- Subscription
- Click Next
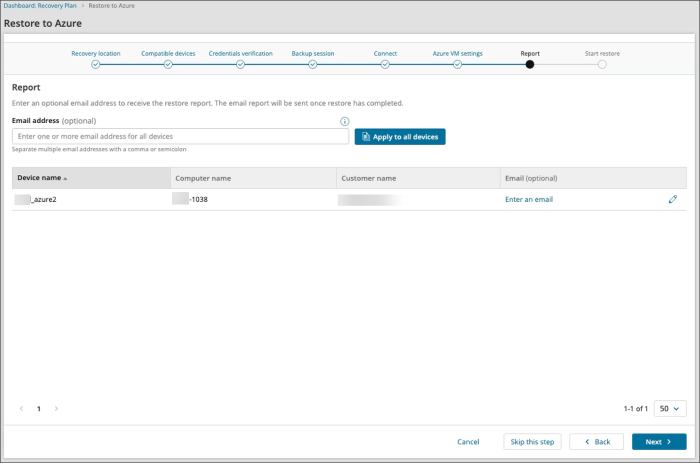
- Add an email address to receive the restore report email and click Next
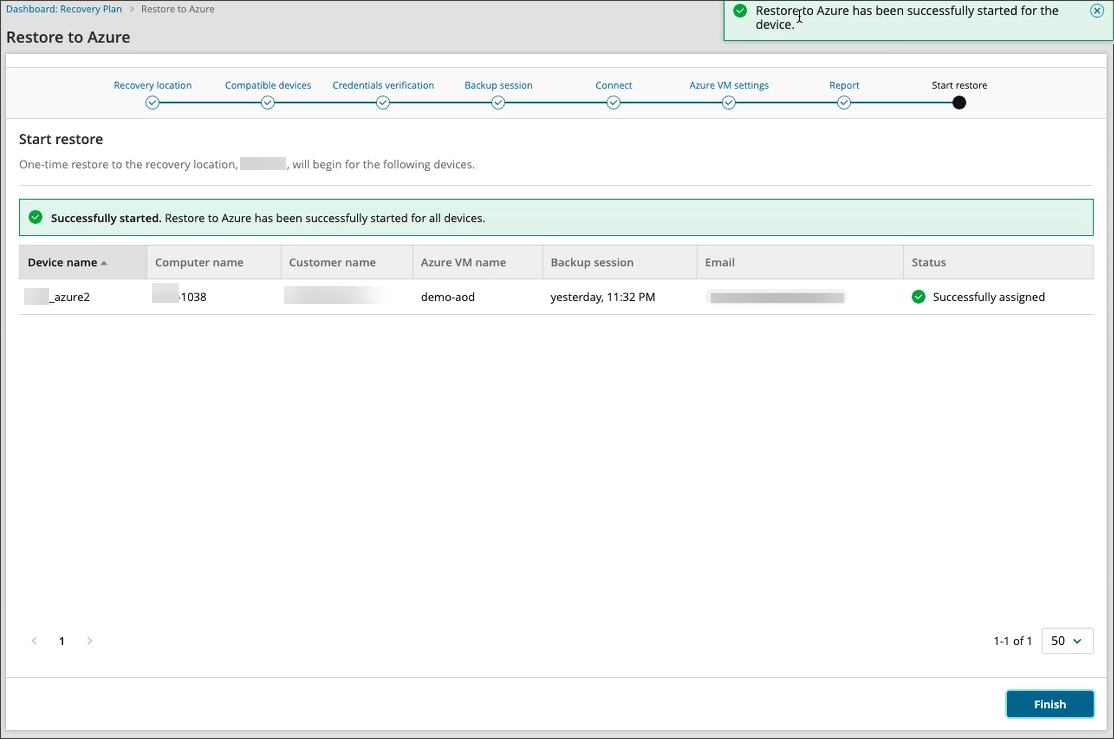
- Review and confirm the restore details for each device and click Confirm
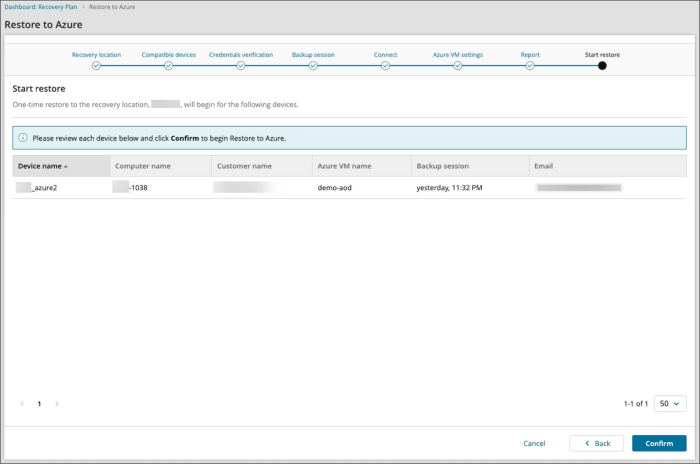
- Once the restore has been started, a green banner will be displayed and a notification in the top right-hand corner of the screen to confirm. Click Finish to close the restore wizard and return to the Dashboard


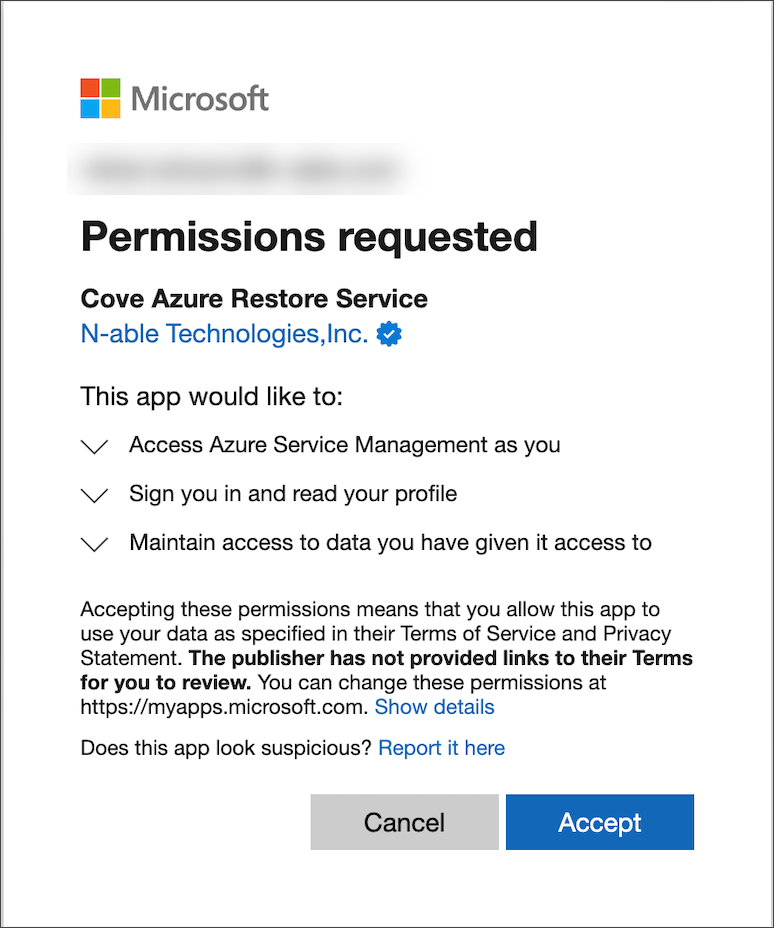
If you do not see the authentication page, make sure your browser is not blocking pop-up windows.


Recovery Report
Where the plan has report recipient email address(es) configured, once the test has completed those recipients will receive the report in their email in-box. Below is an example of a successful test email:
