
Cloud Commander connector configuration
To use the Cloud Commander connector, ensure you meet the requirements below and create a connection to Cloud Commander in Power Automate.
Prerequisites
To use the Cloud Commander connector for Power Automate, you must have:
- A fundamental understanding of how to build and use flows in Power Automate. See the Microsoft documentation.
- A Microsoft Power Automate premium subscription.
- A Cloud Commander account that is assigned the platform roles for the actions you want to use in a flow, scoped for the customers you want to run the flow for.
Your end customers with Cloud Commander logins cannot access the Power Automate Cloud Commander connector.
Create a connection to Cloud Commander in Power Automate
Power Automate uses connections to make it easy for you to access your data while building flows. When you create a connection, you authenticate your credentials for the application.
There are two ways to create a connection between a connector and the Cloud Commander application in Power Automate: before beginning a flow or while in a flow.
Option 1: Connect before beginning a flow
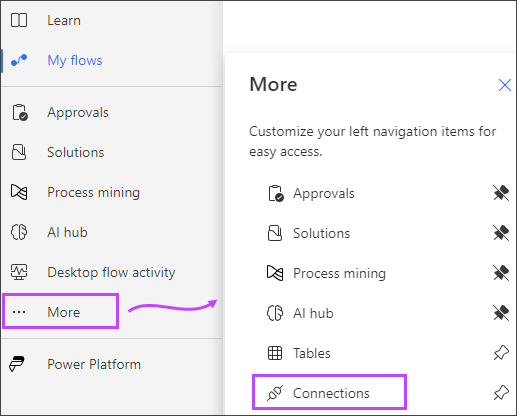
- In the Power Automate left navigation, select Connections. If you don't see Connections in the left navigation, select More to see more options.
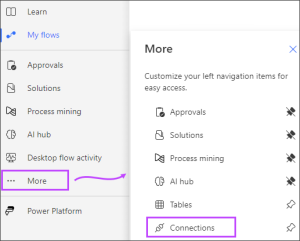
- At the top of the page, select New connection and then search for N-able.
- Select the N-able Cloud Commander connector.
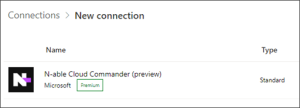
An information window displays.
- Select Create.
- Follow the steps to enter the credentials for your Cloud Commander account.
Connections in Power Automate have a limited lifetime. You may need to periodically re-enter your credentials to refresh the connection.
The Cloud Commander connector is now available to use in your flows.
Option 2: Connect while in a flow
- In the Power Automate left navigation, select Create.
- Select Instant cloud flow.
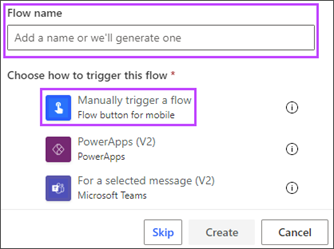
A window displays to build a new flow.
- Enter a Flow name.
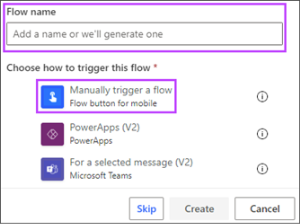
- Select Manually trigger a flow and select Create.
The flow creation page displays.
Flows can begin with different types of events, called triggers. For example, triggers can be from Microsoft SharePoint, Gmail, Planner, and Microsoft Excel. For more information, see the Microsoft documentation.
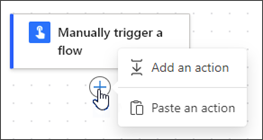
- Under the manual trigger, select the + icon and select Add an action.
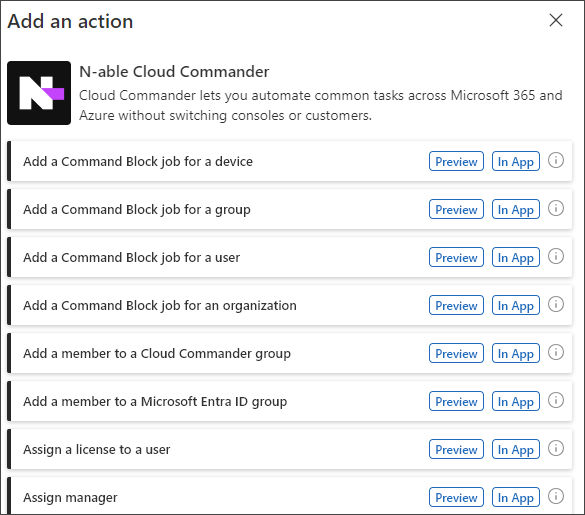
- In the Add an action pane, search for N-able Cloud Commander to see the Cloud Commander actions.
For the complete list of available actions and their parameters, see N-able Cloud Commander | Microsoft Learn.
- Select the target action.

- In the connection dialog, sign in with the credentials for your Cloud Commander account.
The Cloud Commander connector is now available to use in your flow.
Import templates to Power Automate
We provide two templates you can import and use with the Cloud Commander connector.
- Download and save one of the template zip files:
- In Power Automate, select My Flows > Import > Import Package (Legacy).
- Select Upload.
- Navigate to the location of the template and select the zip file.
- Choose your import options to set up the import:
- Click Update, select Create as new from the Setup drop-down menu, give the template resource a name, and select Save.
- Click Select during import to select the connector and select Save.

- Select Import.

The imported flow is now available for use.
Next steps
Related articles
- Power Automate and Cloud Commander (Preview)
- Cloud Commander templates
- Display names with technical identifiers
Updated: Apr 08, 2025