
How to Create an Executive Summary Report with Hardware Inventory
Report Parts not SupportedBeginning with Release 5.0, new installations will not include Report Parts. All references from the reports are removed including datasets, structure, tables, and branding. If you have upgraded to Release 5.0, Reports Parts remain but will not be supported. |
Report Parts are tables, charts, graphs, and images that have been created and formatted from existing reports. They contain datasets, structure, tables, and branding. They have the same dependencies and configuration details as the parent reports. Using Report Builder 3.0, you can drag and drop report parts to create a custom report. For more on N-able N-central dependencies, refer to N-able N-central Dependencies.
These instructions describe creating an Executive Summary report by adding the Hardware Inventory report part, and illustrates more fundamentals of creating a custom report.
Before creating this custom report, make sure you have set up an account and accessed Report Builder, and reviewed creating a CPU and Disk Utilization Report.
- Use the following workflow for all reports using Templates and Report Parts:
- Open Report Builder.
- Open a Template.
- For each Report Part that you would like to add to the report layout:
- Locate the section, Name to search on in the Report Part Gallery.
- Record the name that you use in a list.
- Copy the name into the search window of the Report Part Gallery.
- Click and drag report parts into the report layout and format them.
- Save the report locally, record the name of the report for your records and a few details to describe it.
- Upload the report to Report Manager.
- Configure the UI controls.
- Follow through the list of Report Parts that you have kept and configure the UI controls.
- Open the Template and save it locally:
- Open Report Builder.
- Close the Getting Started page. The work surface is displayed with a blank report in the design area.
- In the upper left-hand corner of Report Builder, click the icon and click Open.
- Navigate to your Report Manager server.
- On the Report Manager server, click Templates.
- From the list of Template files, select the Executive Summary Custom.rdl.
- Open the Template. The Executive Summary Report Template opens.
- Re-title the report.
- Save the new report locally or to a location to which you have write access, renaming the report as you do this. This is the name that will appear as the title of the report throughout Report Manager.
Example: ExecutiveSummHardwareInv
- Insert a Report Part into a Template:
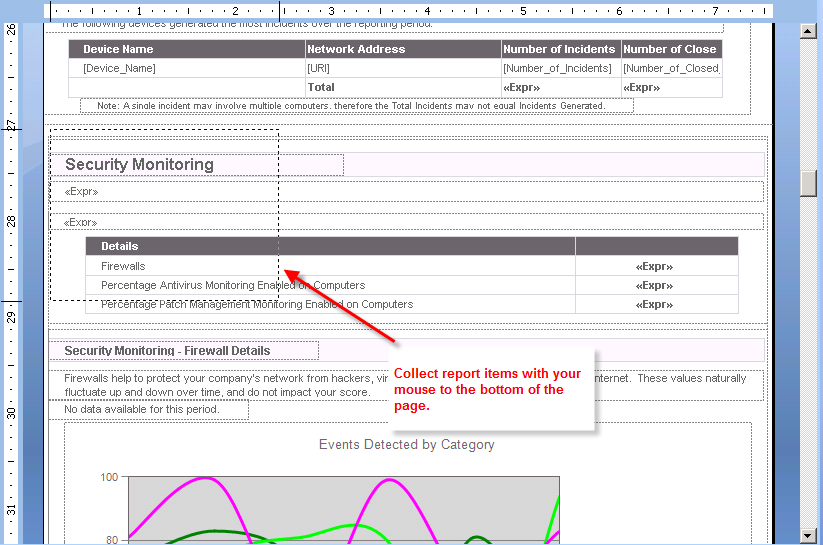
- Scroll to the end of the Managed Devices section, until Security Monitoring appears.
Do not click in the report before you scroll. This may select items and move them with the scroll.
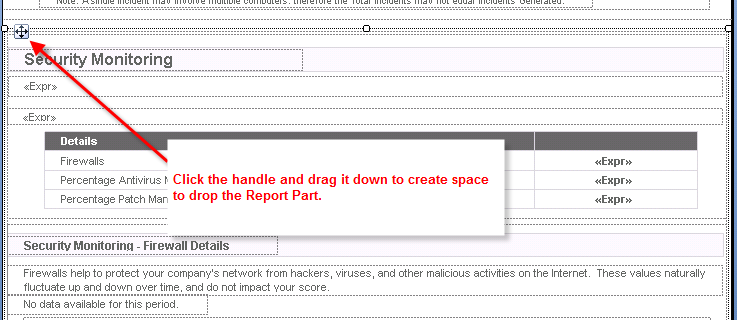
- Select report items starting with Security Monitoring to the bottom of the report. Use the anchor in the left corner to drag the that section of the report down and make room for the report part we are going to insert into this spot.
Before you can select items on the page, you have to be able to place your mouse cursor between items.


- Open the Report Part Gallery. Click Insert > Report Parts.
- Go to Hardware Inventory Report Parts, and locate the Name to search on in the Report Part Gallery: HardwareInventory_Table_HardwareInventoryDetails_Model.
You can use partial names to search and then select the Report Part from the search results. In this case, you could type "hardware" and click the search icon to display any report parts with hardware in the name.
To view all Report Parts in the Gallery, clicking the search icon will populate the Report Part Gallery.
- Select the Hardware Inventory Report Part and drag it into the space you've just created.

In the left-hand Report Data pane, expand Datasets and observe that the Hardware Inventory dataset "dsHardware" has been added to the report.
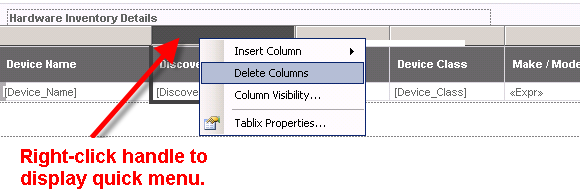
- In the Design Pane, trim the Hardware Inventory table. Click into the table to display the table handles, and right-click to delete one column at a time. Delete the following columns:
- Discovered Name
- Location
- Asset Tag
- OS Installation
- Expected Replacement
- Warranty Expiry
- Lease Expiry
- Purchase Date
- Cost
- First Discovery
- Last Discovery
- Fix your view by scrolling horizontally to the right margin of the rectangle containing the Report Part and drag it in to fit the newly reduced table.
- Adjust the column widths and the font sizes so that the table fits within the report width of 7.5 inches.
- Select the header row.
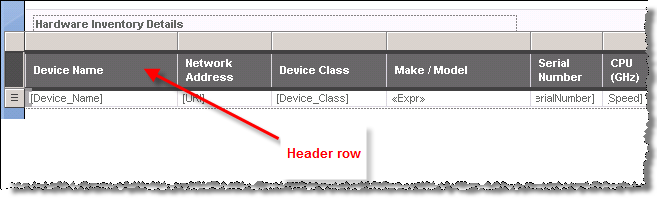
- With the header row highlighted, select the Home tab in the main menu bar at the top, and adjust the font size to 6.
- Do the same for the body row.
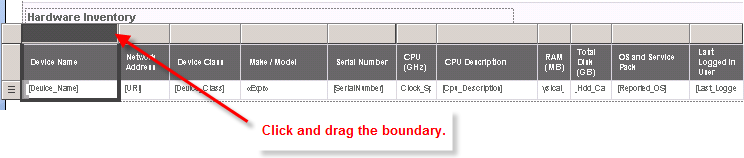
- Reduce the table size to 7.5 inches width. Adjust the columns by clicking and dragging from the right of each column.
- Adjust the width of the rectangles around the title (Hardware Inventory Details) and the tables by selecting the rectangles and dragging them in to 7.5 inches.
- Adjust your view of the report page by scrolling to the far right, clicking and dragging it back to 7.5 inches. (The insertion of the report part expanded the report design view.)
- Optionally, after reformatting the Hardware Inventory Report Part, you can publish it to the server for reuse:
- Click the icon in the top left of the ribbon menu and select Publish Report Parts.
- Select Review and modify report parts before publishing.
- Select the check box next to Report parts to clear all check boxes.
- Select the check box next to the Hardware Inventory report part (HardwareInventory_Table_HardwareInventoryDetails_Model).
- Click the report part name and rename the report part to something meaningful.
- Click Publish.
To change report properties, such as the orientation of a report right-click the blue background of the report design surface and select Report Properties from the quick menu that appears.
- Scroll to the end of the Managed Devices section, until Security Monitoring appears.
- Preview a report in Report Builder:
- Click Run in the left-hand side of the ribbon menu. The report appears in the Run mode.
- Drag the bottom edge of the portion of the UI control parameters screen until all the UI control parameters are displayed.
- For the purposes of previewing the new custom report before uploading it to Report Manager, provide a Start Date, an End Date and a Customer (use the Customer ID #).
- Preview the report in Report Builder.
- Upload the report to Report Manager.