Add a DNS Filtering site
The integrated DNS Filtering feature in N-central is no longer available for new activations. Existing partners who already have it enabled, can continue using it until it's removed after March 31, 2026.
To use DNS Filtering, we recommend using the standalone version. See the DNS Filtering User Guide for details.
If you're currently using the integrated version, contact an N-able representative with your account name and contact information to begin your migration. For details, see Migrate to standalone DNS Filtering.
Adding a site is the fastest and most comprehensive way protect a network using DNS Filtering. Each site can have one profile assigned, unless it uses the NAT IPs feature (which allows you to assign separate policies by LAN subnet).
Dynamic IP Addresses / Dynamic DNS. If your site has a dynamic IP address, which is common with consumer-grade internet connections, you must use a Dynamic DNS to ensure that DNS Filtering always has the correct IP address for your network. So if the IP address changes and Dynamic DNS is not used, it causes DNS downtime because DNS Filtering does not serve DNS requests to unknown IP addresses for security reasons.
IP Subnets / CIDR Blocks. The dashboard accepts IP subnets up to /24. You may blocks directly into the IP address field (ex: 45.66.23.0/24). For larger blocks, contact support and we can add them to your account on the backend.
Activate DNS Filtering
Before you can add a DNS filtering site, you must have activated DNS Filtering.
Add your DNS Filtering site
You can use the default DNS Filtering profile or a custom profile to define DNS Filtering settings.
- From the Customer level, go to Integrations >DNS Filtering > Sites.
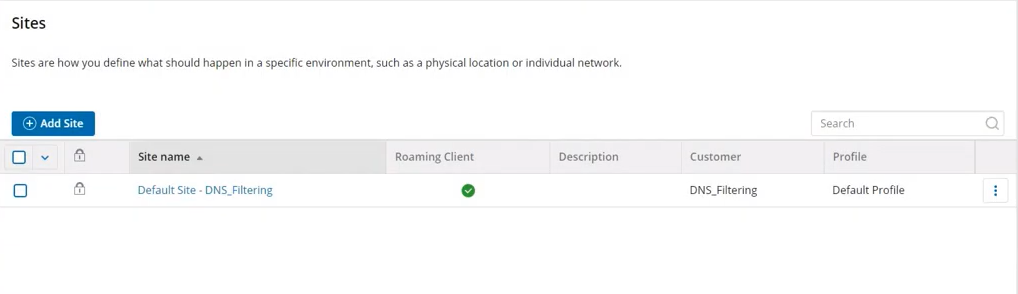
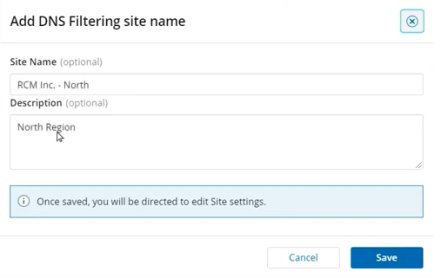
- Click Add Site, enter a name and description for the site, and click Save.
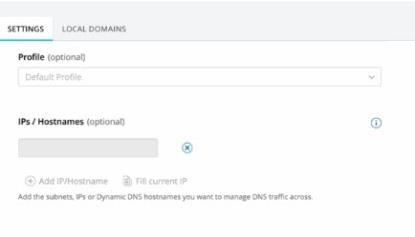
- Select the profile for the site. Enter your DNS hostnames, IPs, or subnets for the site. If the site has additional IPs, add them as well:
-
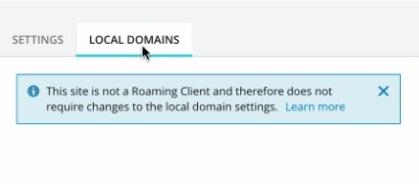
If you have set up a Roaming Client, click LOCAL DOMAINS and enter you local domains and domain resolvers.
- Click Save.
IP addresses: At the moment, only IPv4 addresses are accepted.For example: 01.102.103.104
Subnets/CIDR notation: DNS Filtering accepts subnets up to /24, for example: 45.66.23.0/24
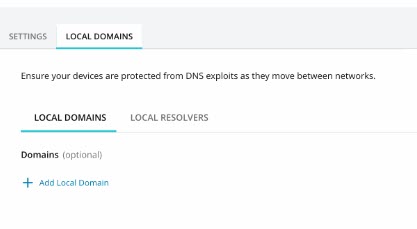

If you have set a Roaming Client, you do not need to add local domains.
Test the connection
After you add your site to the DNS Filtering dashboard, it is a best practice to test DNS servers on one computer, in order to test your profile settings and check for conflicts. When the test is successful, you can feel confident rolling out the change on your entire network.
Test the domain
Use test domains to confirm that the categories you blocked in your DNS Content Filter are working as expected, without using real-world examples. They are helpful when creating a new profile or for service monitoring.
You can add a DNS Filtering profile and assign it to your site. Adding a profile determines what determines what is allowed and blocked on your network, as well as what the users on that network see when they access a blocked website.
-
Add the DNS Filtering site
-
Test the connection
-
Test the domain
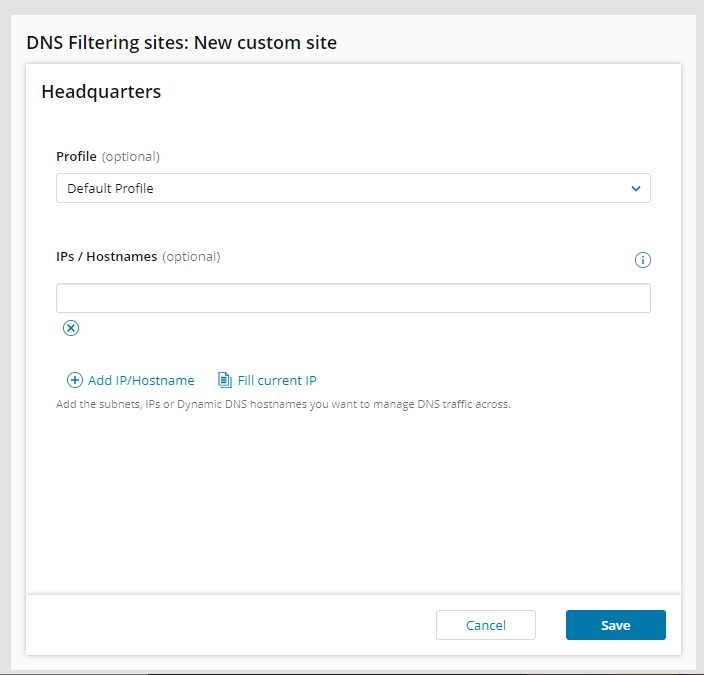
You can use the default DNS Filtering profile or add a custom profile to define DNS Filtering settings.
- Go to Integrations >DNS Filtering > Sites.
- Click Add DNS Filtering.
- (optional) Select a DNS Filtering profile for the site.
- (optional) Enter your DNS hostnames, IPs, or subnets for the site.
- Click Save.