
View and edit registration tokens
You can view and perform minor configurations on the registration tokens you generate. This includes setting the expiry time and revoking tokens.
- Click Administration > Defaults > Agent & Probe Settings.
- Click the Registration Tokens tab.
-
A table appears with a list of all tokens that have been generated. The filterable table provides information on what customer the tokens are for, their size, who created them, when they were created, and their expiry date.
Note that filter searches are case-sensitive.
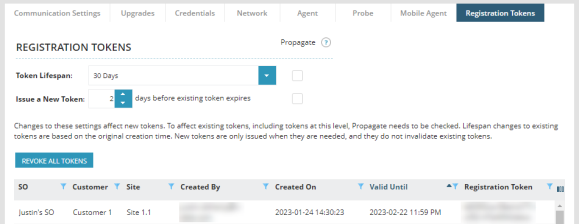
You can set the lifespan of the token by selecting a value in the Token Lifespan drop-down menu. The selection becomes the default expiration date for newly generated registration tokens.
The Issue a New Token option sets the minimal time-to-live for a token.
For example, if the lifespan is seven days, and the new token option is set to two days, for the first five days the token will be used. For the last two days the token will be considered old and it will be regenerated. In this example, if the Issue a New Token value is set to zero, the token is valid for the full seven days before being regenerated. This is useful when performing discovery jobs, and you want to ensure that the token will not expire before the agent token expires. This ensures the token remains fresh.
The expiration of a token expires at midnight of the N-able N-central server of the final day.
When setting the token lifespan to Unlimited, the token will never expire.
These changes only apply for new tokens created. To apply changes to existing tokens, click the Propagate check box and click Save. The date changes will update based on the token's original created time.