
Set up DKIM
If your sending domains already sign with DKIM, then this should not be changed. We will simply forward the DKIM signed messages along to the recipient.
If there is no DKIM signing, you can decide to either sign this on your sending MTA, or sign with Spam Experts. It is not compulsory to sign with DKIM, however it often helps to "authenticate" your senders as much as possible.
For further information on DKIM including why we recommend using it and how it works, see .
Generate a DKIM certificate in the Spam Experts Control Panel
- Login to Spam Experts to the Domain Level Control Panel
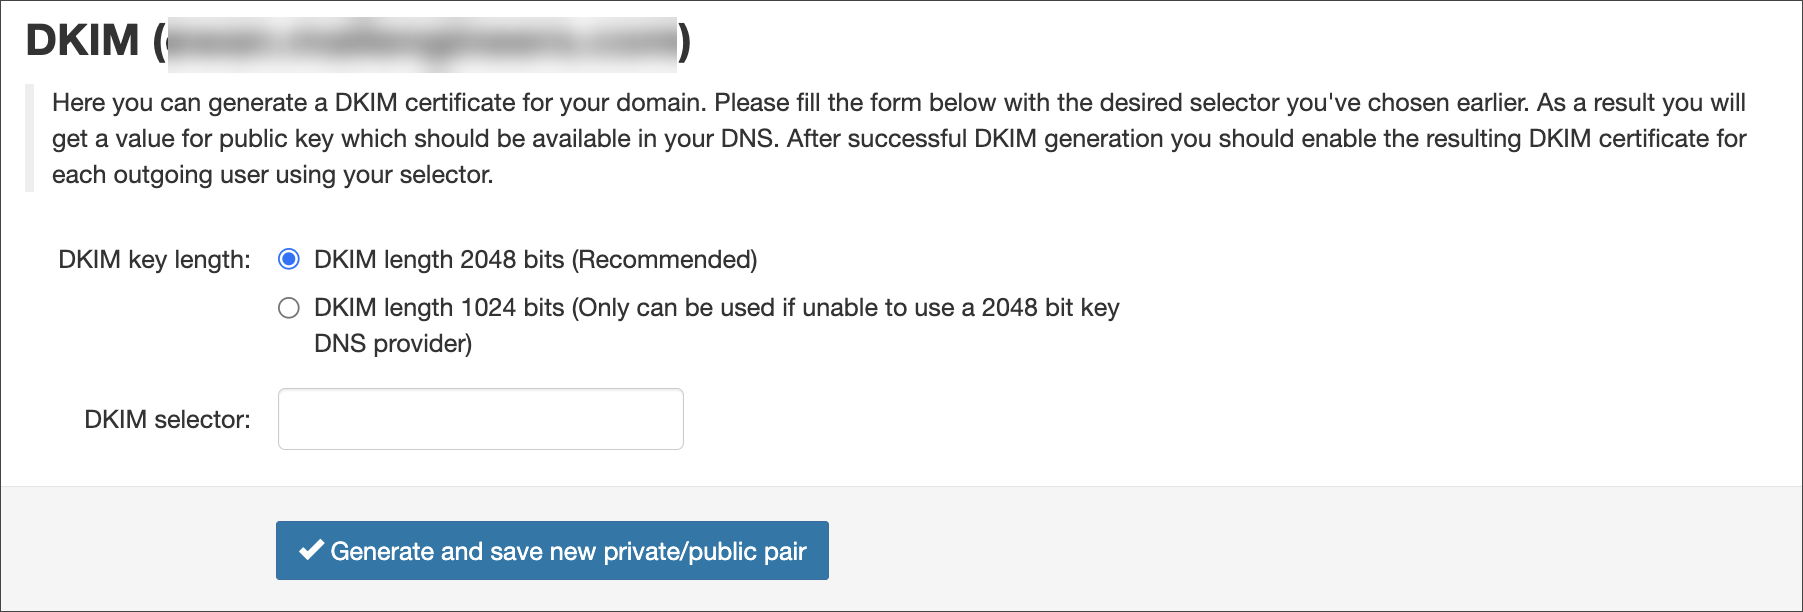
- Select Outgoing > DKIM

- Choose the DKIM key length
The recommendation is to use 2048, if your DNS accepts it
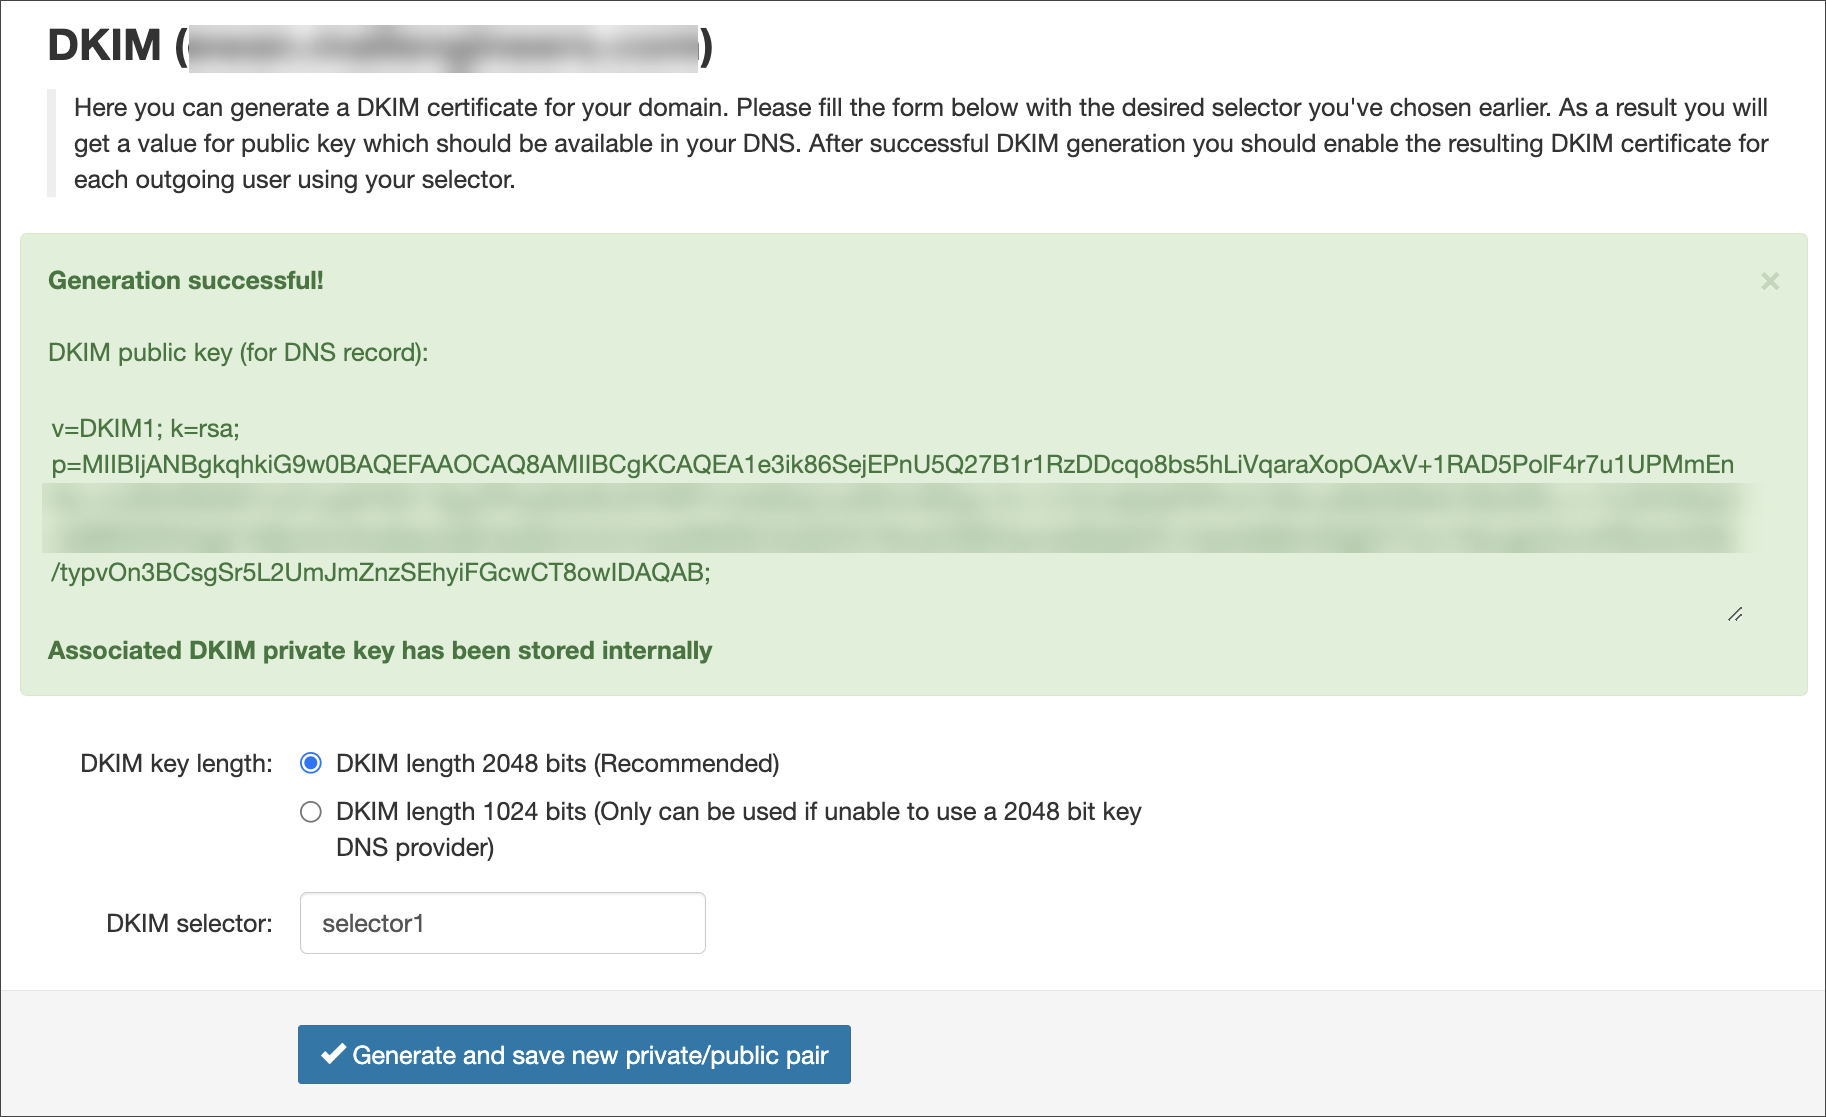
- Enter the DKIM selector and click on Generate and save new private/public pair
- Once the key has been generated, create a TXT DNS record on the hostname, for example for:
selector1._domainkey.example.invalid
Where:
selector1is what was entered into the DKIM selector field in Spam Experts_domainkeyremains as it isexample.invalidis replaced by your domain name
And enter value of this DNS record equal to the key given in the green box in Spam Experts e.g.
v=DKIM1;
	k=rsa;
	p=MIIBIjANBgkqhkiG9w0BAQEFAAOCAQ8AMXXXXXXcqo8bs5hLiVqaraXopOAxV+1RAD5PolF4r7u1UPMmEnBo+ncGRxRN5W7vc01yeePr5D118gJPIFaeWz0fLKFORPYr44dWqCJuWhVz/BOg/+ih+1z1kCu6pfqP3Fkvh10ALsv8bDQRsfLY62s2Rc+r+1hJlVH5KpOxQ9BNDWO2g51iMjIJ4xCSnaNavZqEHyQSUmmi/mtJa/8tNRZ/ZxQOOh76mz2/9tlKHynns58cjfeVD+OszAdMjVxWigDCYIuv1XeLqjwZcrroPBJ4o/KAS/typvOn3BCsgSr5L2UmJmZnzSEhyiFGcwCT8owIDAQAB;
- In the Spam Experts's Outgoing > Manage Outgoing Users/Authentication page for your Outgoing User/Authentication Method (see Outgoing Users/Authentication Methods), edit this to enter what was used in step #4 in the DKIM Selector field
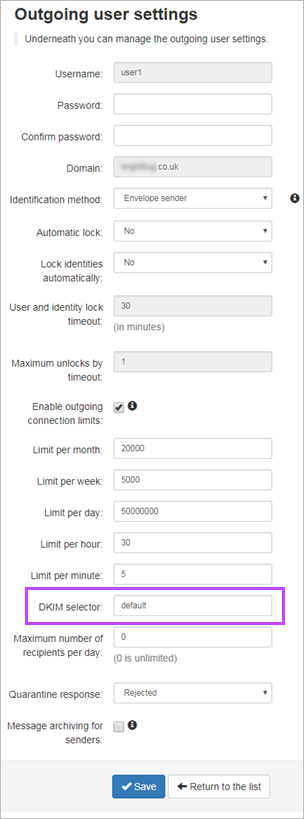
If you do not change the DKIM selector in the Outgoing Settings page to the one used in the DKIM key generation page, no DKIM signing will be done by the filter.
The DKIM selector can be whatever you want it to be.

Any domain that sends using outgoing authentication that has this selector, should sign with this (assuming they do not have their own DKIM).
For further information on DKIM, see http://dkim.org/info/dkim-faq.html
How can I set DKIM up via command line?
If you have our Local Cloud product, you can set up DKIM via the command line.
Prerequisites
- Python
- OpenSSL
- Access to your DNS
- Spam Experts Outgoing Filtering enabled on your cluster
Create keys
DKIM uses a pair of public and private keys - the private key is known only to you (and Spam Experts, since we are signing the mail on your behalf) and is used to create the signature. The public key is available to anyone, and can be used to verify that the correct private key was used.
Use the below commands to:
- Generate a private key:
openssl genrsa -out domainname.invalid.key 2048
- Generate a public key:
openssl rsa -in domainname.invalid.key -out rsa.public -pubout -outform PEM
Create a DNS record
In order for the receiving mail server to obtain your public key, you must create a DNS record for the specified domain.
selector._dkim TXT "k=rsa; p=[public key in one line];"
The name "selector" can be anything and you can use it to have different keys with the same domain. Make sure you use the same name in the next steps.
Configure the keys
In order to use the keys for all outgoing mails for a certain user, there are a few steps to take to implement this in your Spam Experts Filtering Cluster.
- Create a file "makepriv.py" and enter the following content:
s = """-----BEGIN RSA PRIVATE KEY-----
	YOUR KEY HERE
	-----END RSA PRIVATE KEY-----
	"""
	import urllib
	print urllib.quote(s)
- Replace YOUR KEY HERE with the contents of your private key
- Execute this with the following code:
python makepriv.py
Your key will be returned in a single line
- Input the name of the selector into the api. To do so, you should replace a few values in the URL:
https://SERVERNAME/cgi-bin/api?call=api_set_dkim_certificate&domain=DOMAINNAME&certificate=VALUE&selector=SELECTOR
- Replace SERVERNAME with the hostname of your primary server or the used CNAME
- Replace DOMAINNAME with the domain name you want to be using DKIM
- Replace VALUE with the value the makepriv.py script from step 2
- Replace SELECTOR with the desired selector chosen earlier
- Ensure the desired outgoing user should be DKIM enabled:
https://SERVERNAME/cgi-bin/api?call=api_set_dkim_selector&domain=DOMAINNAME&selector=SELECTOR&username=USERNAME
- Replace SERVERNAME with the hostname of your primary server or the used CNAME
- Replace DOMAINNAME with the domain name you want to be using DKIM
- Replace SELECTOR with the desired selector chosen earlier
- Replace USERNAME with the username of the outgoing user
Outgoing emails being sent through the Outgoing Filter will now be signed with your DKIM key