
SmarterMail Integration Setup
This section covers the SmarterMail configuration settings for integration with Spam Experts. This information is split into three areas:
Incoming Filter
Add your domain in Spam Experts, and point the route to the SmarterMail server. After that, you can change your MX records to point to the Spam Experts MX records. Spam Experts will then filter your incoming email and deliver the not-spam messages to your SmarterMail environment.
To ensure Spam Experts can deliver to the servers, and that the messages bypass spam checks, the Spam Experts IP addresses should also be allowed on the SmarterMail server by following the below steps.
- Log into SmarterMail as the Administrator and click the 'Settings' icon in the top toolbar
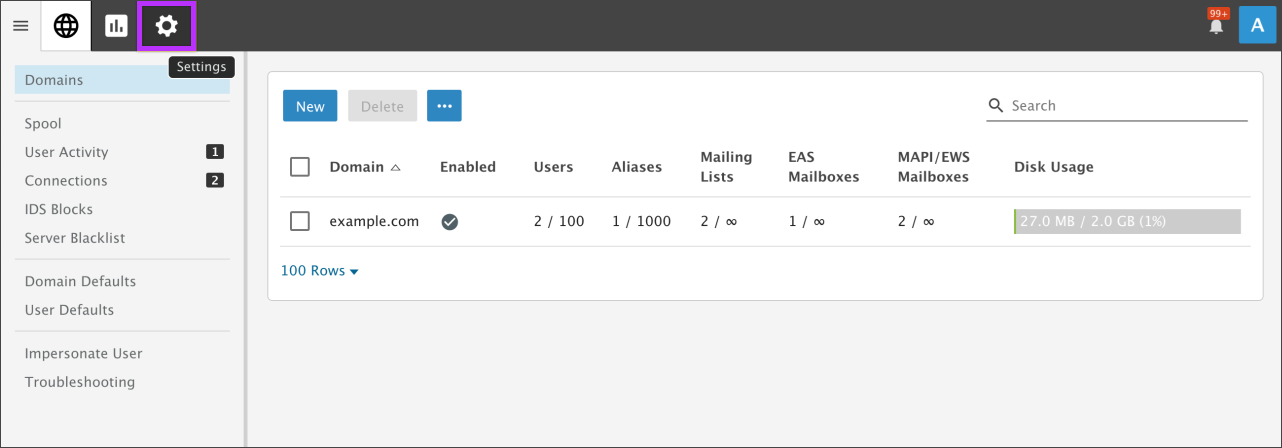
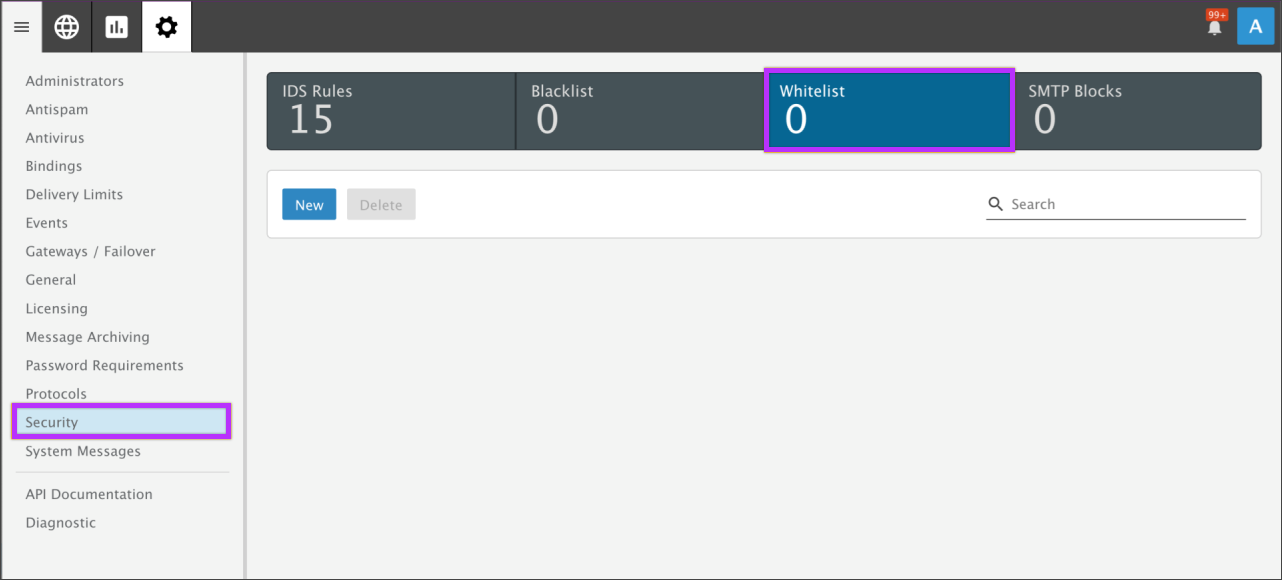
- In the navigation pane, go to Security
- Click on the Allow list tab
- To add an allowed entry click the New button then complete the following information
- In the IP Address (single, range or CIDR block) textbox, enter the delivery.antispamcloud.com IP range which can be found on Hosted Cloud Delivery IPs
- For identification, enter "Spam Experts Incoming Filter" in the Description field
- Enable the SMTP and SMTP Spam Bypass options

- Click Save once complete
Outgoing Filter
To configure your outgoing filter through SmarterMail:
- Log into SmarterMail as the Administrator and click the 'Settings' icon in the top toolbar
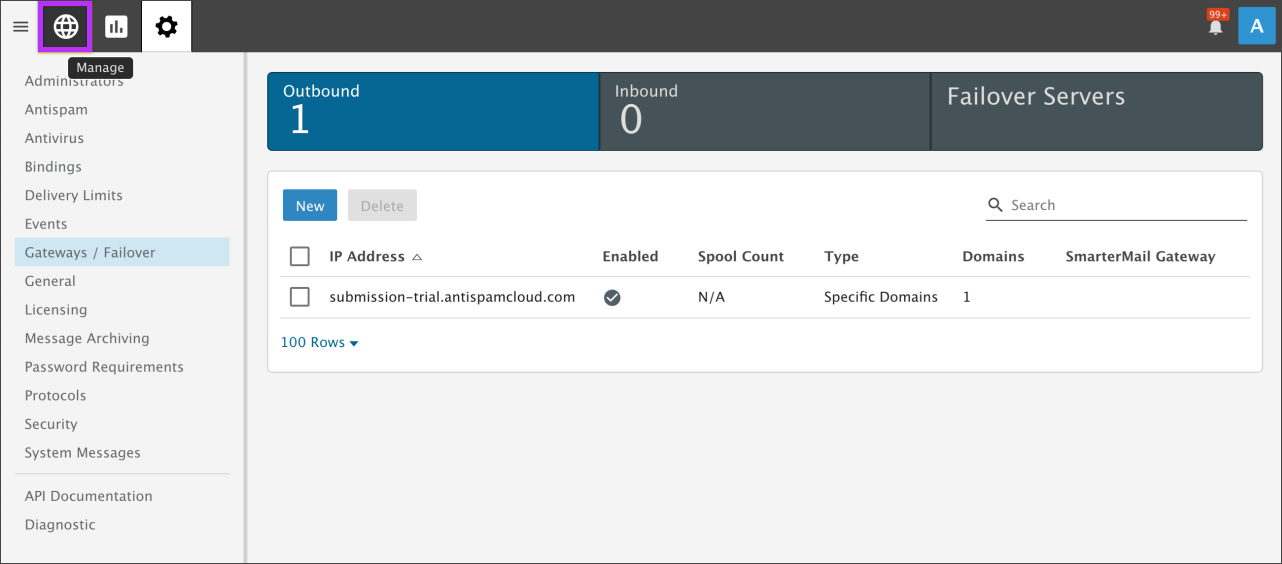
- In the navigation pane, click on Gateways / Failover. The Outbound tab will load by default

- Click the New button to open the "Options" card
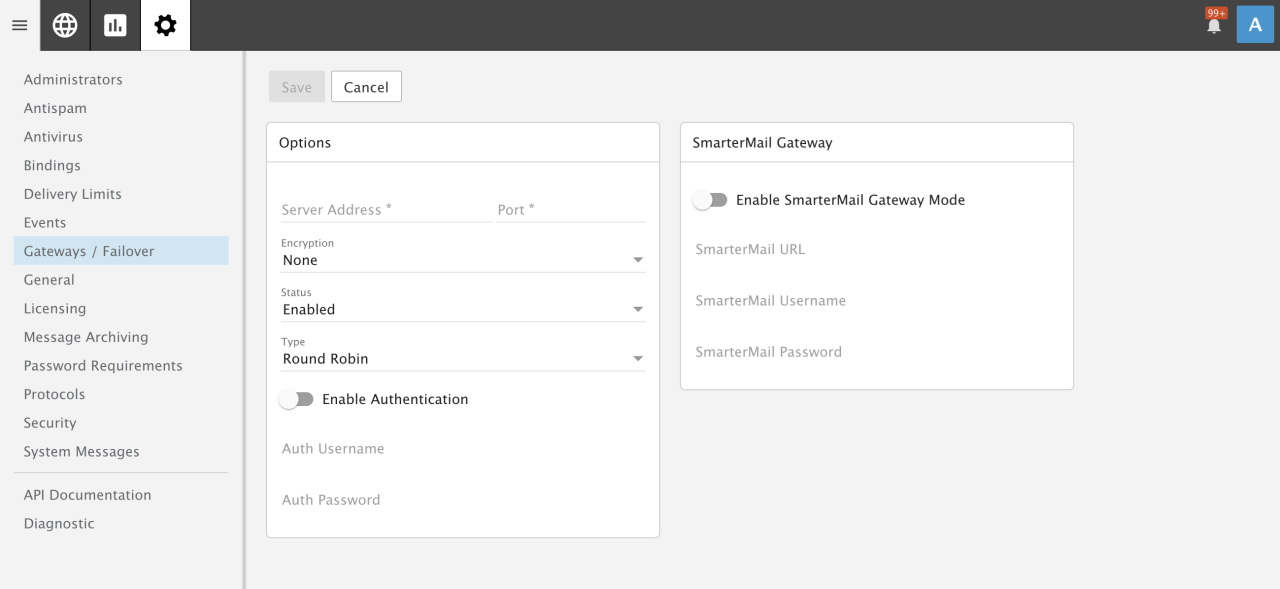
- Enter your Spam Experts outgoing server details
- Ensure Status is set to "Enabled", Type is set to "Specific Domains" and Enable Authentication is enabled and configured
- Server Address: submission-trial.antispamcloud.com
- Port: 587
- Encryption: TLS
- Status: Enabled
- Type: Specific Domains
- Enable Authentication
- Auth Username: outgoing@demo-domain.invalid
- Auth Password: xxxxxxx (enter the password used when creating your outgoing user in the Spam Experts interface)
- Click Save when complete
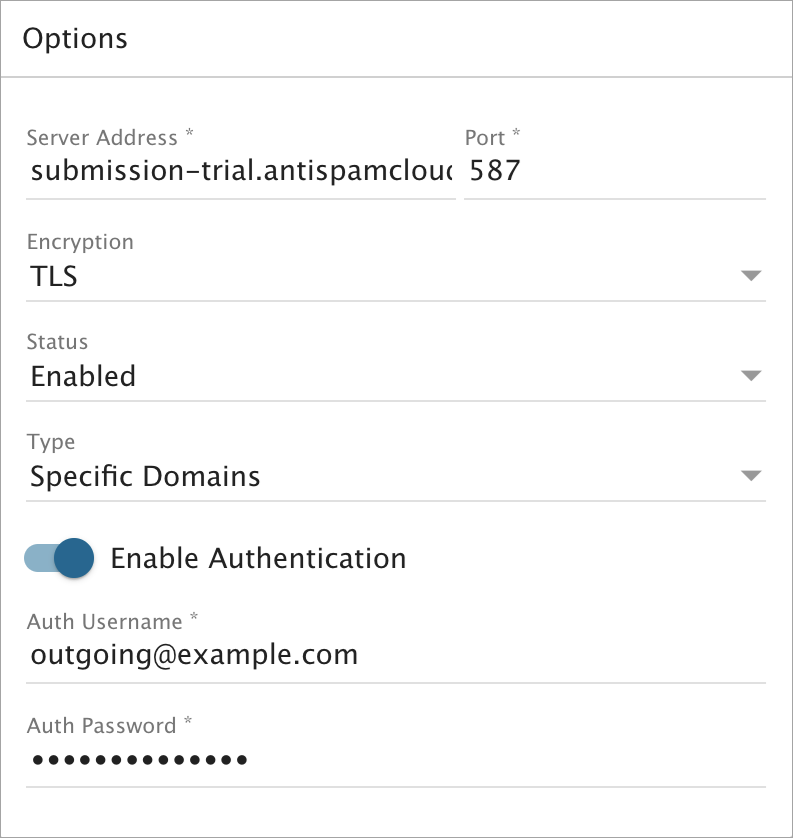
An example setup for Spam Experts Hosted Cloud would be:
After configuring the Outbound Gateway, the next step is to specify the domains that should use this setting.
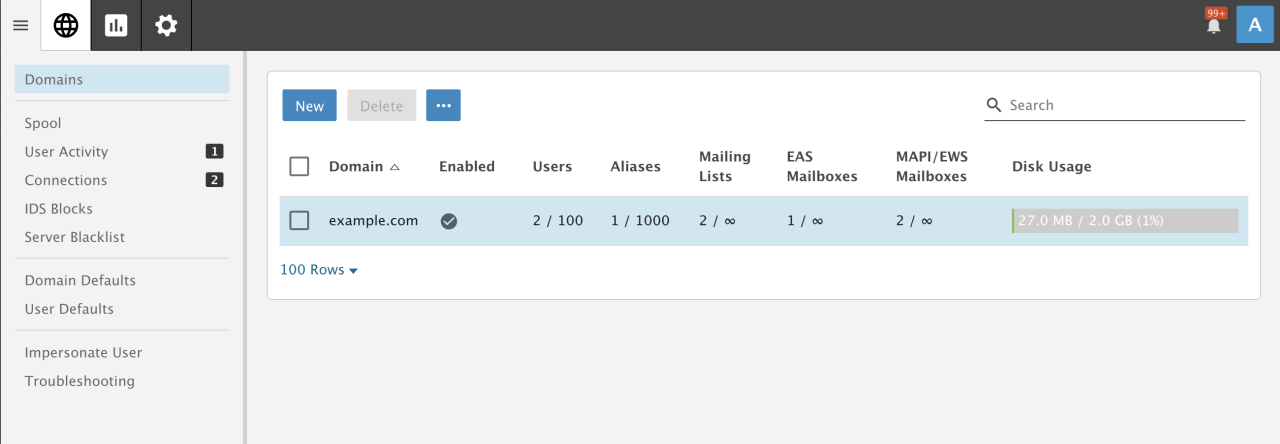
- Click the Manage icon in the top toolbar
- In the Domains grid, click on the SmarterMail domain to load the domain configuration settings
- On the Options card, change the 'Outbound Gateway' to use the Spam Experts outbound gateway you just created (in this example, submission-trial.antispamcloud.com)
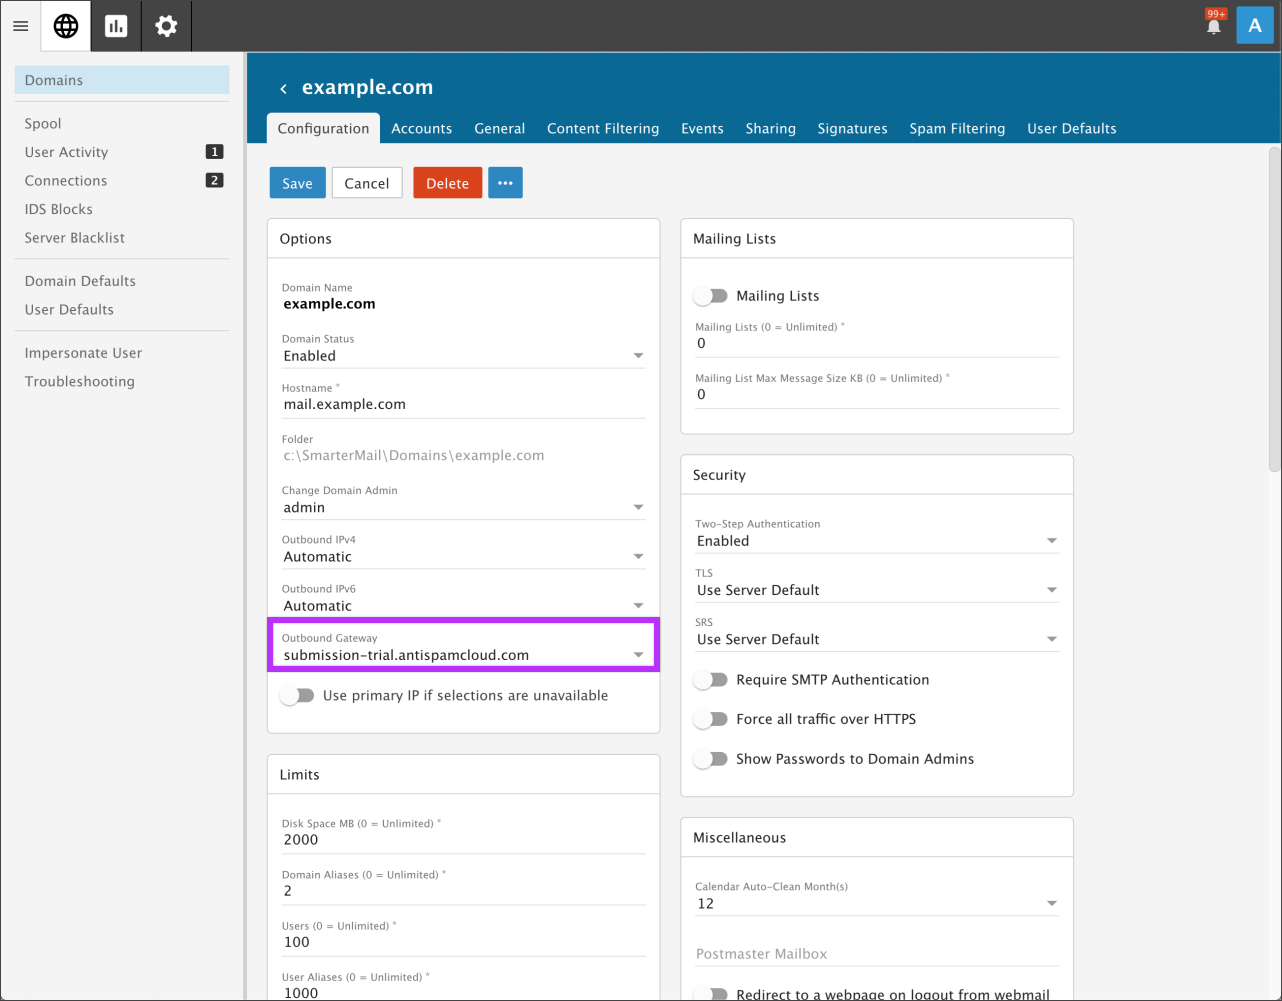
- Click Save to apply
Outgoing Server Domain Defaults
If there is a requirement that all existing and new domains should be configured to use the Spam Experts outgoing server, SmarterMail's Domain Defaults may be modified and the Outbound Servers settings applied to all existing domains.
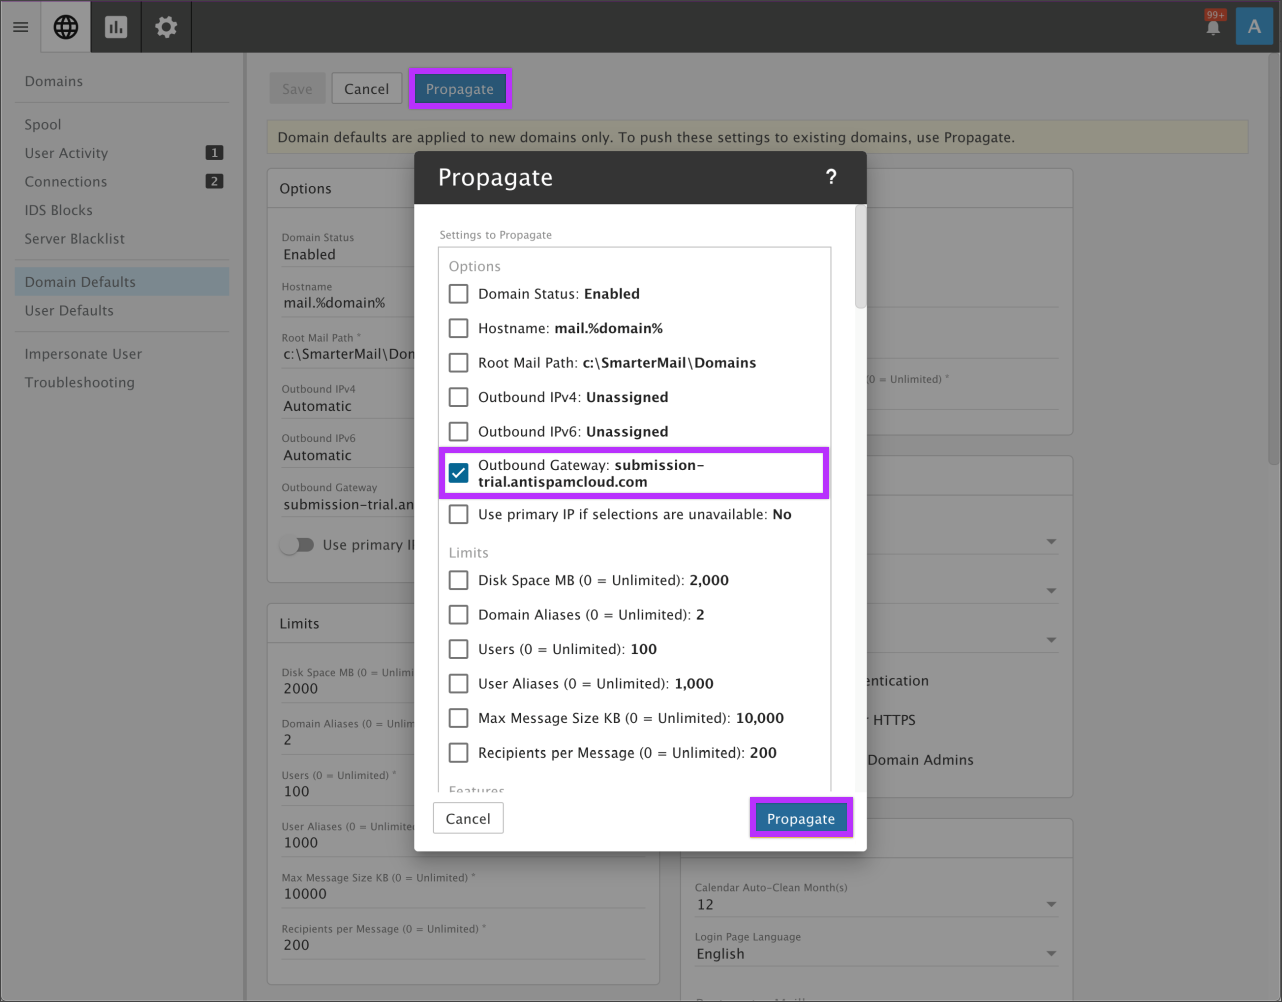
To modify the Domain Defaults and propagate the Outbound Gateway setting to existing domains, follow the below steps:
- Click on Domain Defaults from the navigation pane. The default domain configuration settings will load
- On the "Options" card, change the "Outbound Gateway" to use the Spam Experts gateway
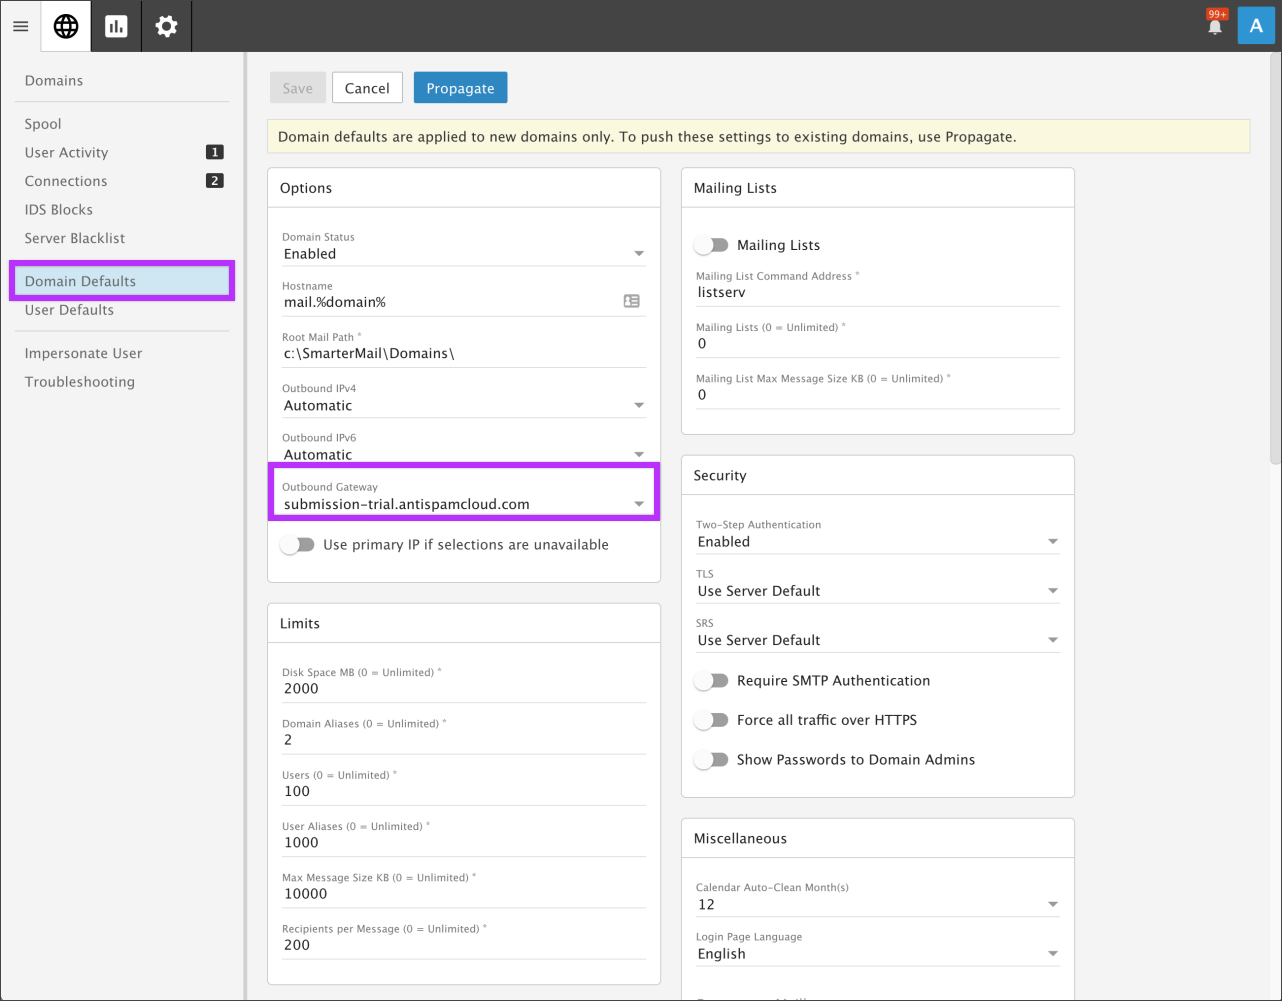
- Click Save
To propagate this change to all existing domains, click on the Propagate button. In the returned Propagate modal, check the 'Outbound Gateway' setting and click the Propagate button. All existing domains will be modified to use the specified outbound gateway.
Filtering on headers
If you have disabled the quarantine system in Spam Experts, spam and phishing that would normally be quarantined will get delivered to the SmarterMail environment. If you wish to filter based on classification, you can use the following header:
X-Recommended-Action: reject
To add a domain-level filter that looks for this header in SmarterMail, follow the below steps:
- Click on the Manage icon
- In the Domains grid, click on the SmarterMail domain. The domain configuration settings will load
- Click on the Content Filtering tab
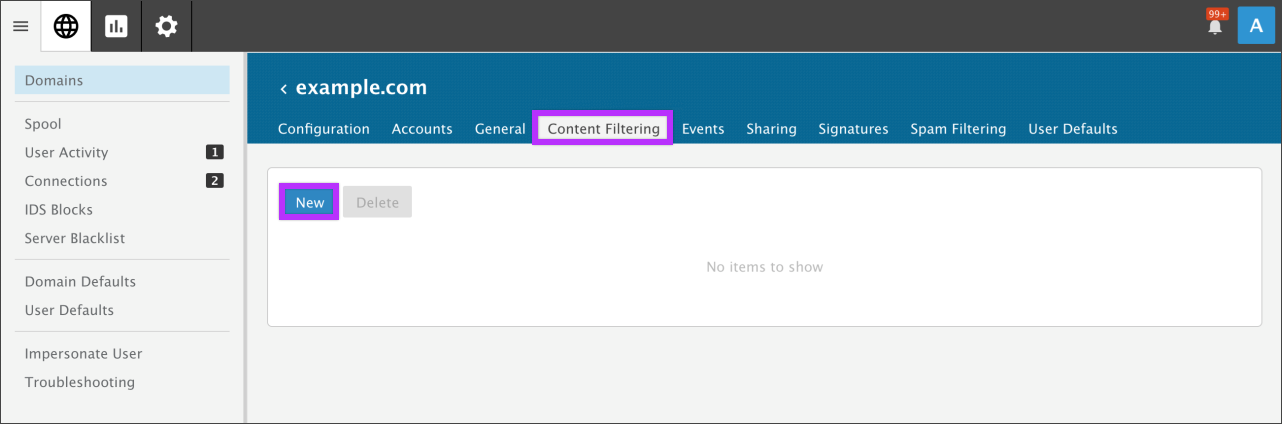
- Click the New button. You should be presented with the "Content Filtering" options
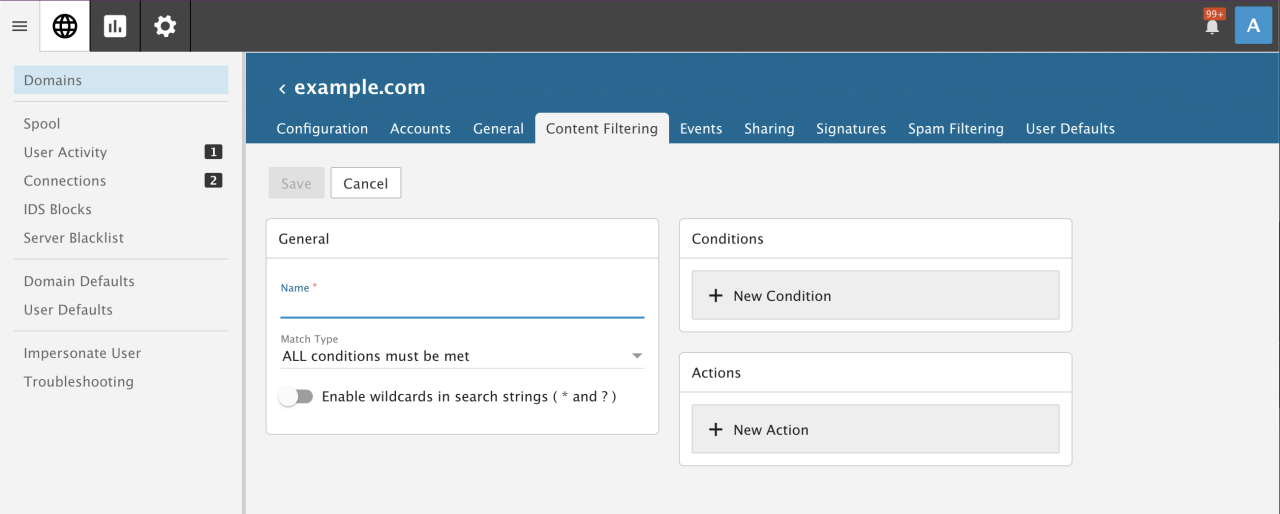
- Add a name for the content filter. Then click on the New Condition button

- In the Condition Type dropdown list, choose 'Contains specific words or phrases'
- In the Field dropdown list, choose 'Email header'
- In the Comparison dropdown list, choose 'Contains'
- In the Email header (one per line) textbox, enter:
X-Recommended-Action: reject
- Click Save
- Once back in the Content Filtering dialog click on the New Action button
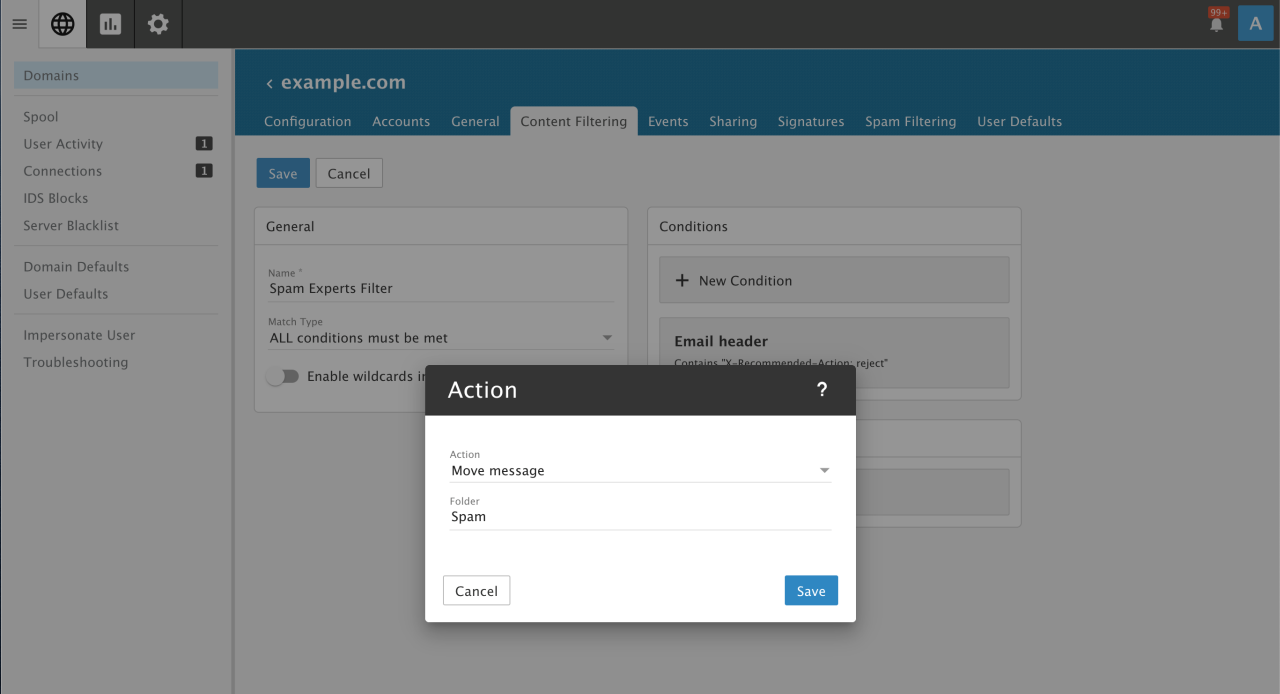
- In the Action dropdown list, select 'Move message'
- In the Folder textbox, enter "Spam"
- Click Save
- When both the Condition and Action have been configured, click Save to save the content filter
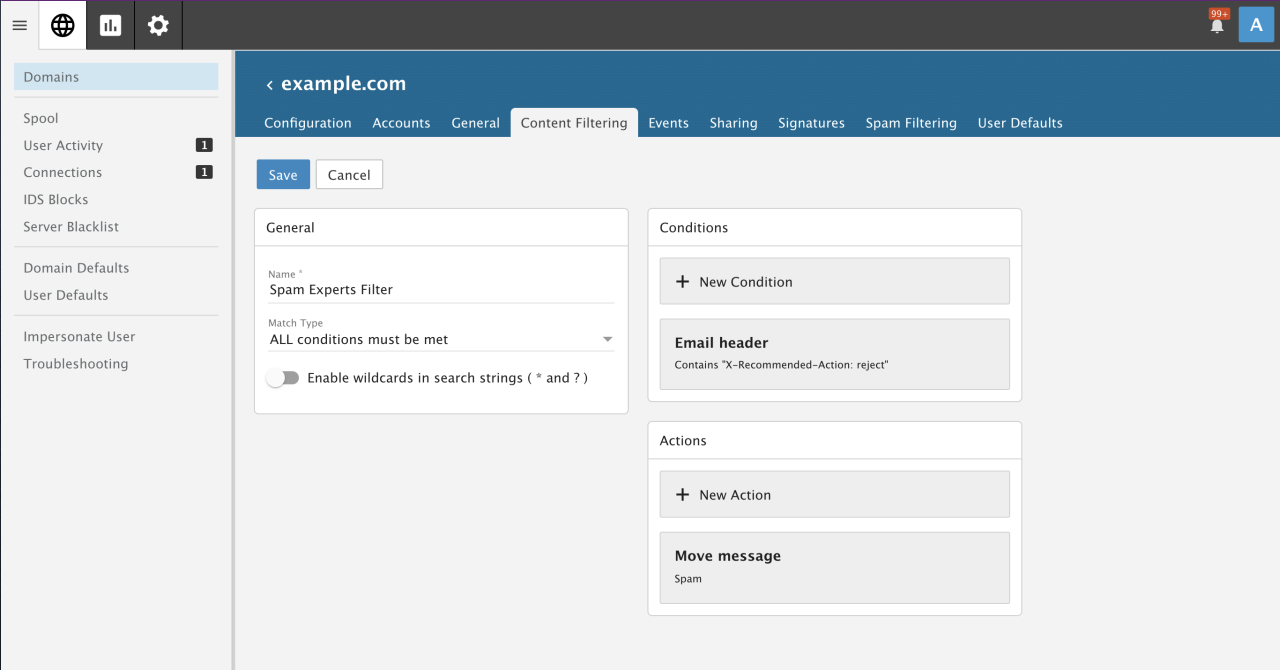
- Once set, all emails with this header will be directed to a user's 'Spam' folder
Repeat these steps, as needed, for every domain that uses the Spam Experts gateway.
Disclaimer: This documentation may contain references to third party software or websites. N-able has no control over third party software or content and is not responsible for the availability, security, or operation, of any third-party software. If you decide to utilize a release involving third-party software, you do so entirely at your own risk and subject to the applicable third party’s terms and conditions of the use of such software. No information obtained by you from N-able or this documentation shall create any warranty for such software.