Spam Experts add-on for DirectAdmin is a module which allows you to manage the Spam Experts account directly from your DirectAdmin.
Supported Versions
The add-on supports the following versions:
- DirectAdmin stable version
- PHP 7.4, PHP 8.0.30 and PHP 8.3.3
This add-on works on the Evolution skin.
Download
This can be downloaded from two different locations:
- Directly from our download server
- Via GitHub
Installation
To install the DirectAdmin module follow these steps:
- Download and unpack Spam Experts Module For DirectAdmin file named latest.tar.gz from one of the locations above
- Open the directadminapi.conf.new file in a text editor and fill it in with your DirectAdmin IP address, used port and API access details
Additionally, type 1 next to
secure=if your API connection uses SSL. - Pack the following files and folders into a .tar.gz file:
- Admin folder
- Assets folder
- Hooks folder
- Images folder
- Lib folder
- Reseller folder
- Scripts folder
- User folder
- build_dev.sh
- configuration.conf.new
- directadminapi.conf.new
- plugin.conf.new
- README.txt
- .github folder
- pax_global_header
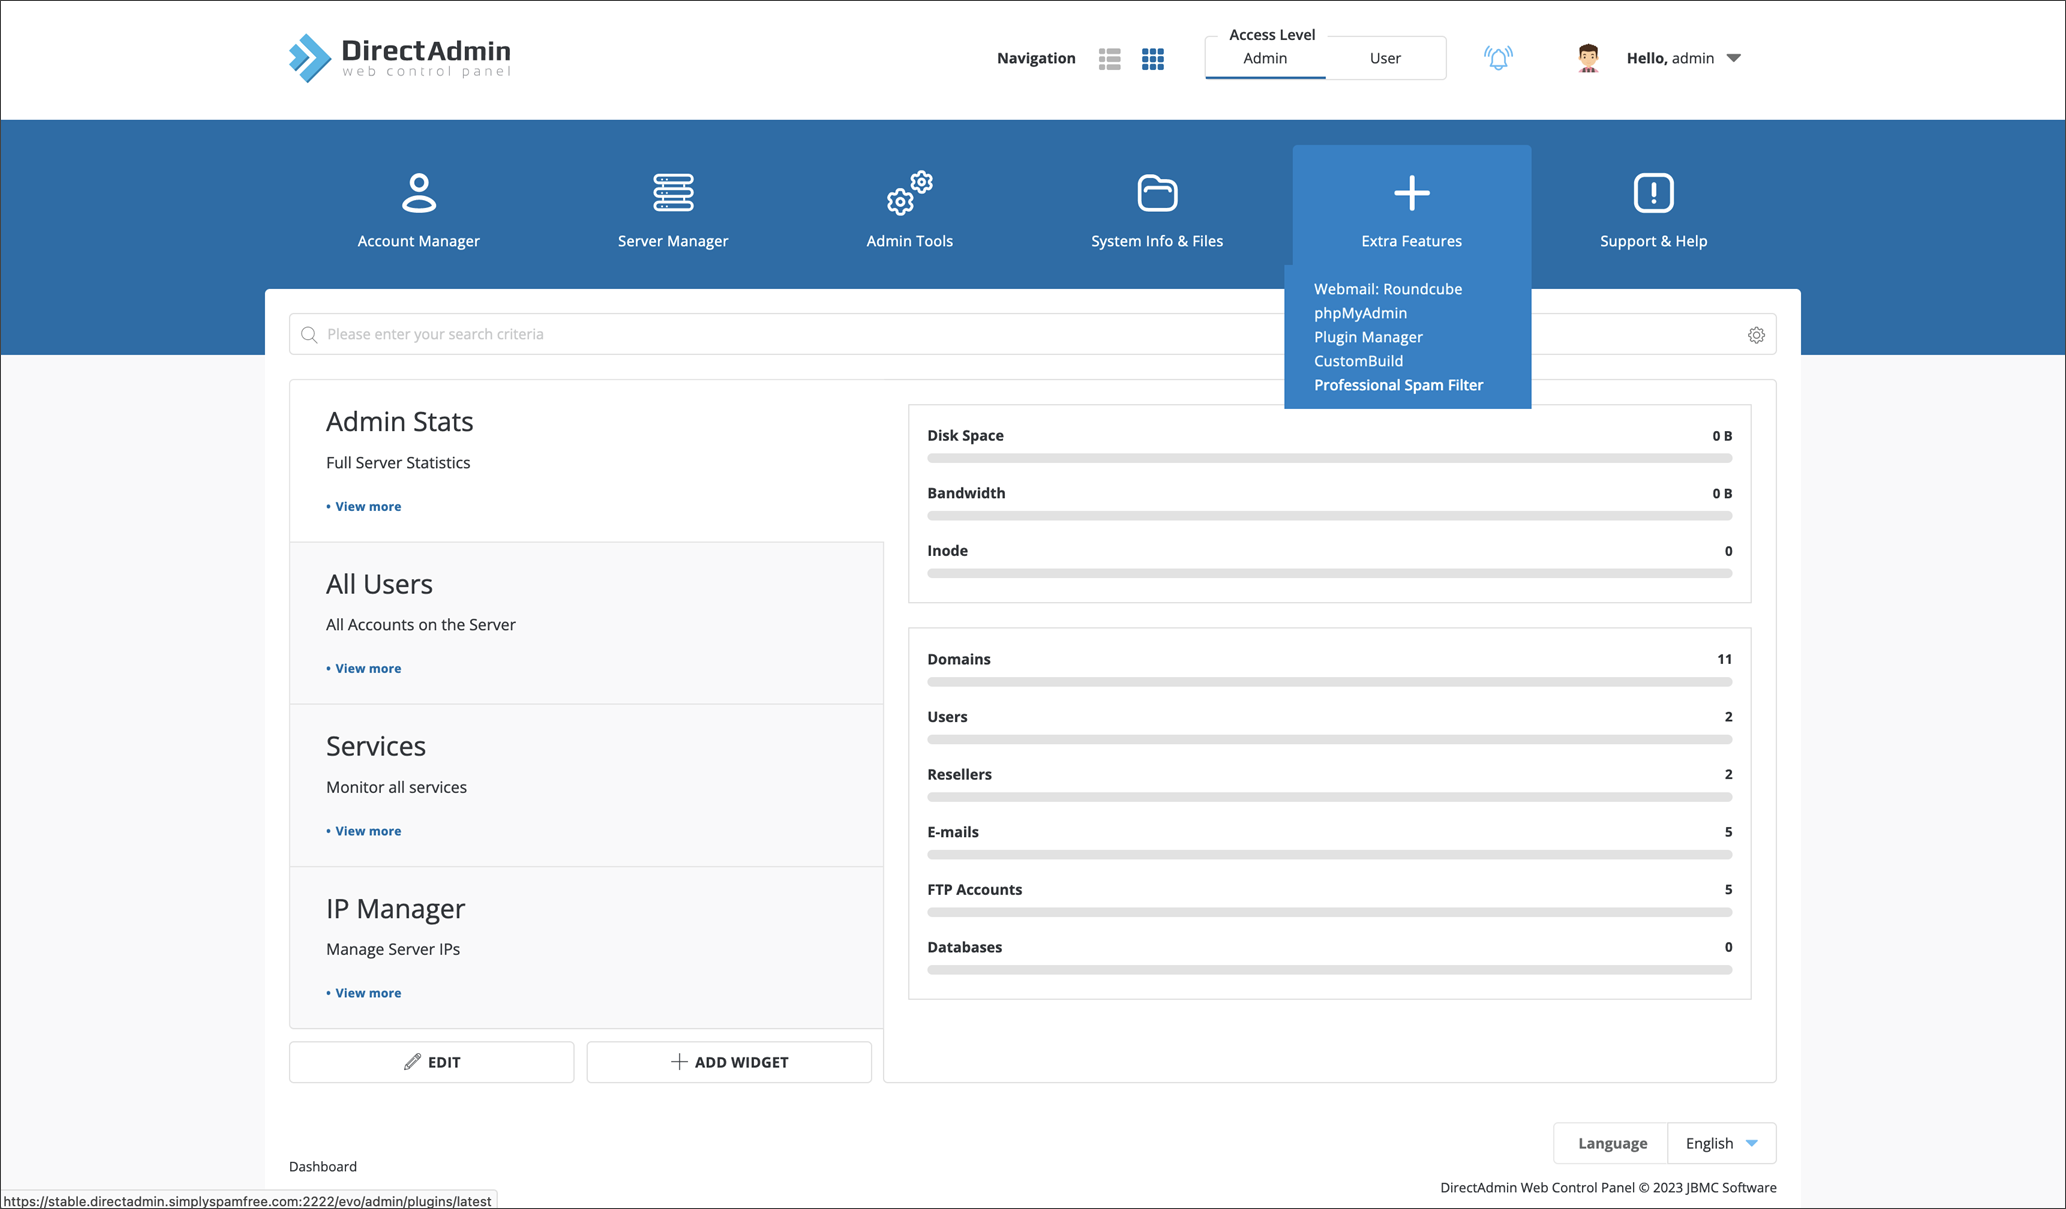
- Log in to the DirectAdmin server as an Admin and go to the Home tab
- Under Extra Features select Plug-in Manager
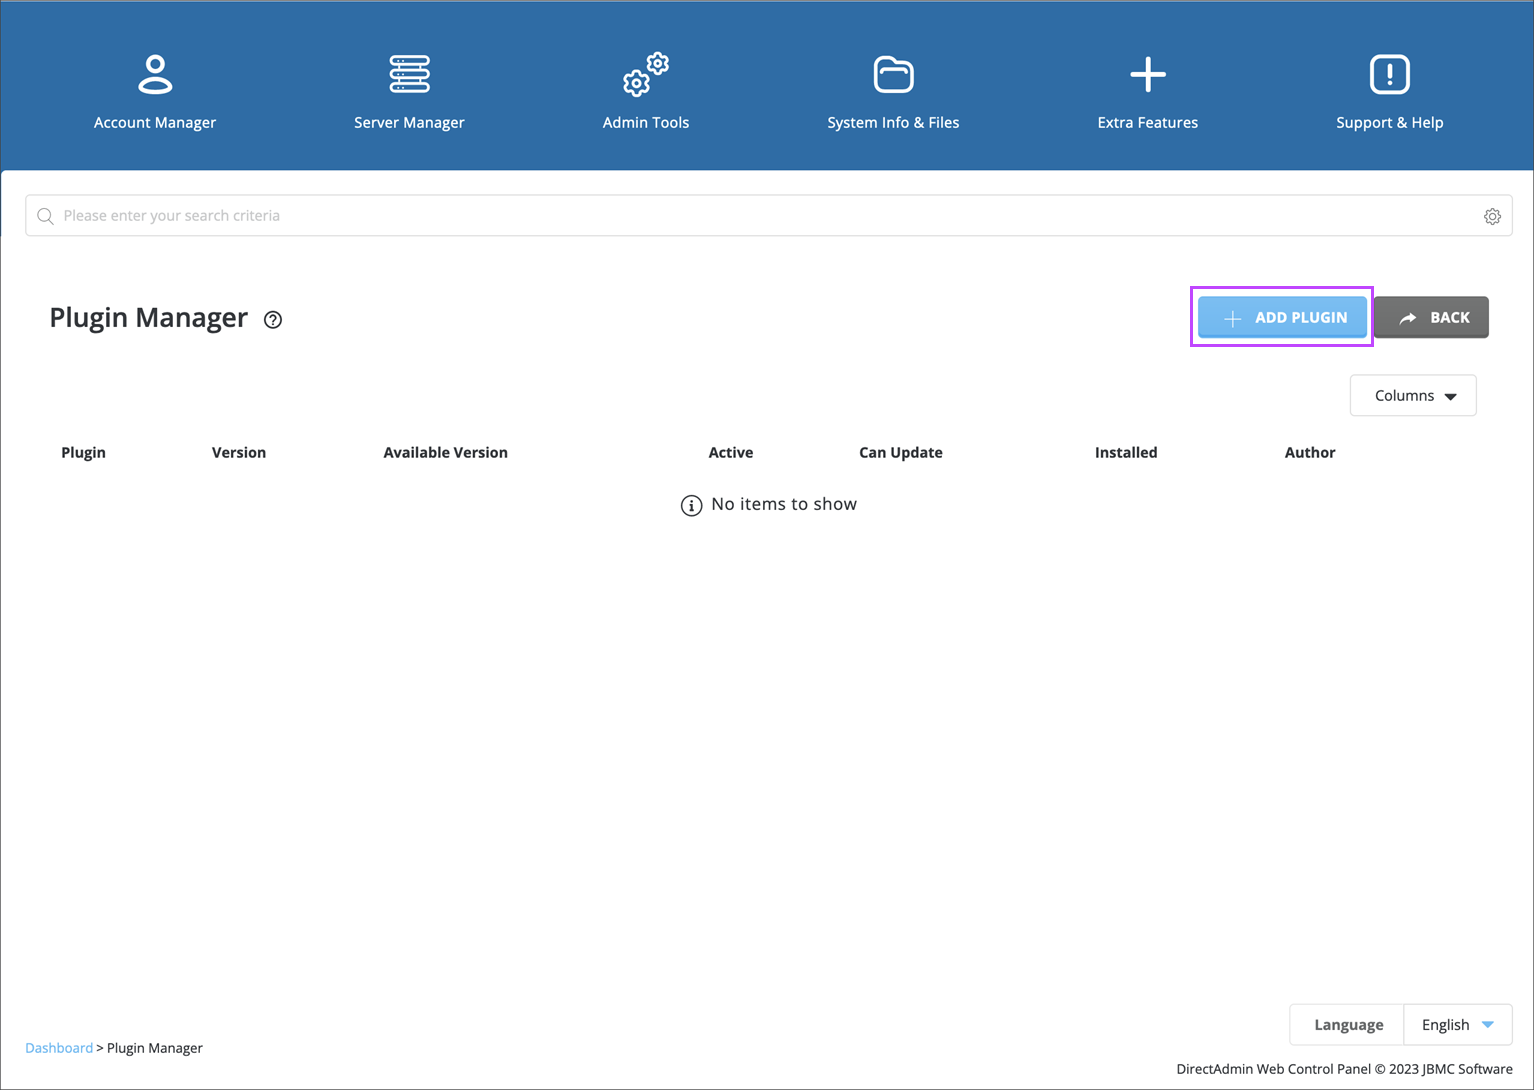
- Click Add Plug-in
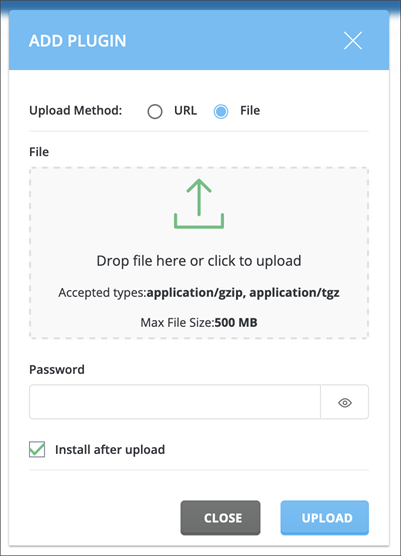
- Select the .tar.gz file you created in step #3 above
- Fill in the Password
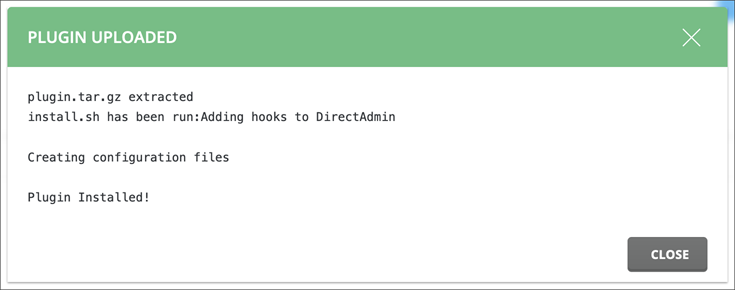
- Upon successful installation you will see a confirmation message:
Example:
; Setup values needed to DirectAdmin API
host=127.0.0.1
port=2222
; 1 or 0
secure=0
username=admin
password=xxxxxx
The only files and folders that are not needed are:
The name you use for the .tar.gz package must be unique as it will be used as the module ID. If you already have a module with the same name the existing module's files will be destroyed by DirectAdmin's Plug-in Manager.
Configuration
For configuration of DirectAdmin, you must have completed the Installation steps detailed above.
- Log in to your DirectAdmin server as an Admin and go to the Home tab
- Under Extra Features select Professional Spam Filter
- Switch to the Configuration tab
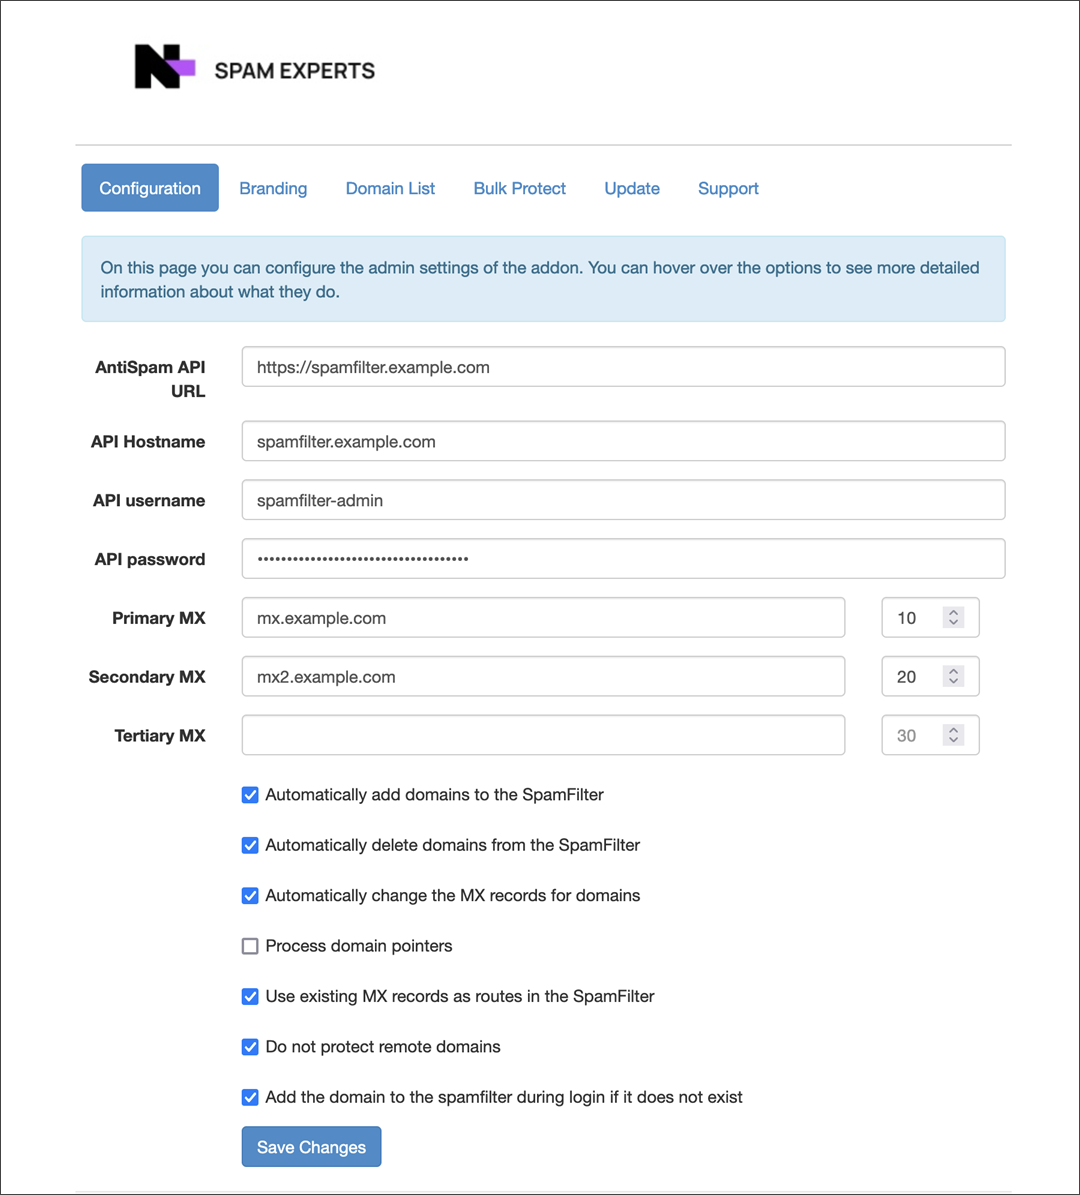
- This is the configuration of the add-on so that it can communicate with the Spam Experts filtering system. Please fill in these fields as required:
- AntiSpam API URL: Enter the Spam Experts SpamPanel URL
- For Hosted Cloud customers, this is
https://master.antispamcloud.com - Your branded URL
Or
- For Hosted Cloud customers, this is
- API Hostname: Enter the hostname of the API Master server, for Hosted Cloud enter
master.antispamcloud.com - API username: Enter your Spam Experts Admin username
- API password: Enter your Spam Experts Admin password
- Primary MX: Enter the Primary MX record that should be used for your domains. See Hosted Cloud MX Records for the appropriate MX records
- Secondary MX: Enter the Secondary MX record that should be used for your domains. See Hosted Cloud MX Records for the appropriate MX records
- Tertiary MX: Enter the Tertiary MX record that should be used for your domains. See Hosted Cloud MX Records for the appropriate MX records
- Automatically add domains to the SpamFilter: With this option enabled all domains will be automatically added to the SpamFilter. If a domain is added to the DirectAdmin server then it will also be added automatically
- Automatically delete domains from the SpamFilter: With this option enabled any domain that is deleted from the DirectAdmin server will be removed from the SpamFilter automatically
- Automatically change the MX records for the domains: With this option enabled any domain added to the SpamFilter will automatically have it's MX records changed to the values set above in Primary, Secondary and Tertiary MX above
- Process domain pointers: With this option enabled the domain pointers will also be processed
- Use existing MX records as routes in the SpamFilter: With this option enabled we will look at the current MX records of any domain added
- Do not protect remote domains: With this option enabled remote domains will not be protected
- Add the domain to the spamfilter during login if it does not exist: With this option enabled when logging into Direct Admin we will check to ensure that all domains in DirectAdmin are in the SpamFilter
- AntiSpam API URL: Enter the Spam Experts SpamPanel URL
- Click Save to process the changes
Management
To manage your Spam Experts Module for DirectAdmin, you must have completed the Installation and Configuration steps detailed above.
- Log in to your DirectAdmin server and go to the Home tab
- Under Extra Features select Professional Spam Filter
- Navigate to the appropriate tab as required:
Branding
You can adjust how the branding of the add-on appears to both yourself and your customers from the Branding tab.
Under the Current Settings you will see:
- Current Logo: this will display a preview of the logo used at that time
- Current Branding: this will display the current name configured for the add-on
This is the name of the add-on that is shown in the Homepage. The default is Professional Spam Filter.
Setup New Branding
Under the New Settings section, you will see:
- Branding Logo: you can upload a new logo to use in the add-on here using the Choose File browser
- Branding Name: Changing the Brand Name will change the name of the add-on viewed from the Homepage > Extra Features
The new logo must be a .jpeg or .jpg file type and cannot have a width more than 600px and a hight of more than 150px.
Domain List
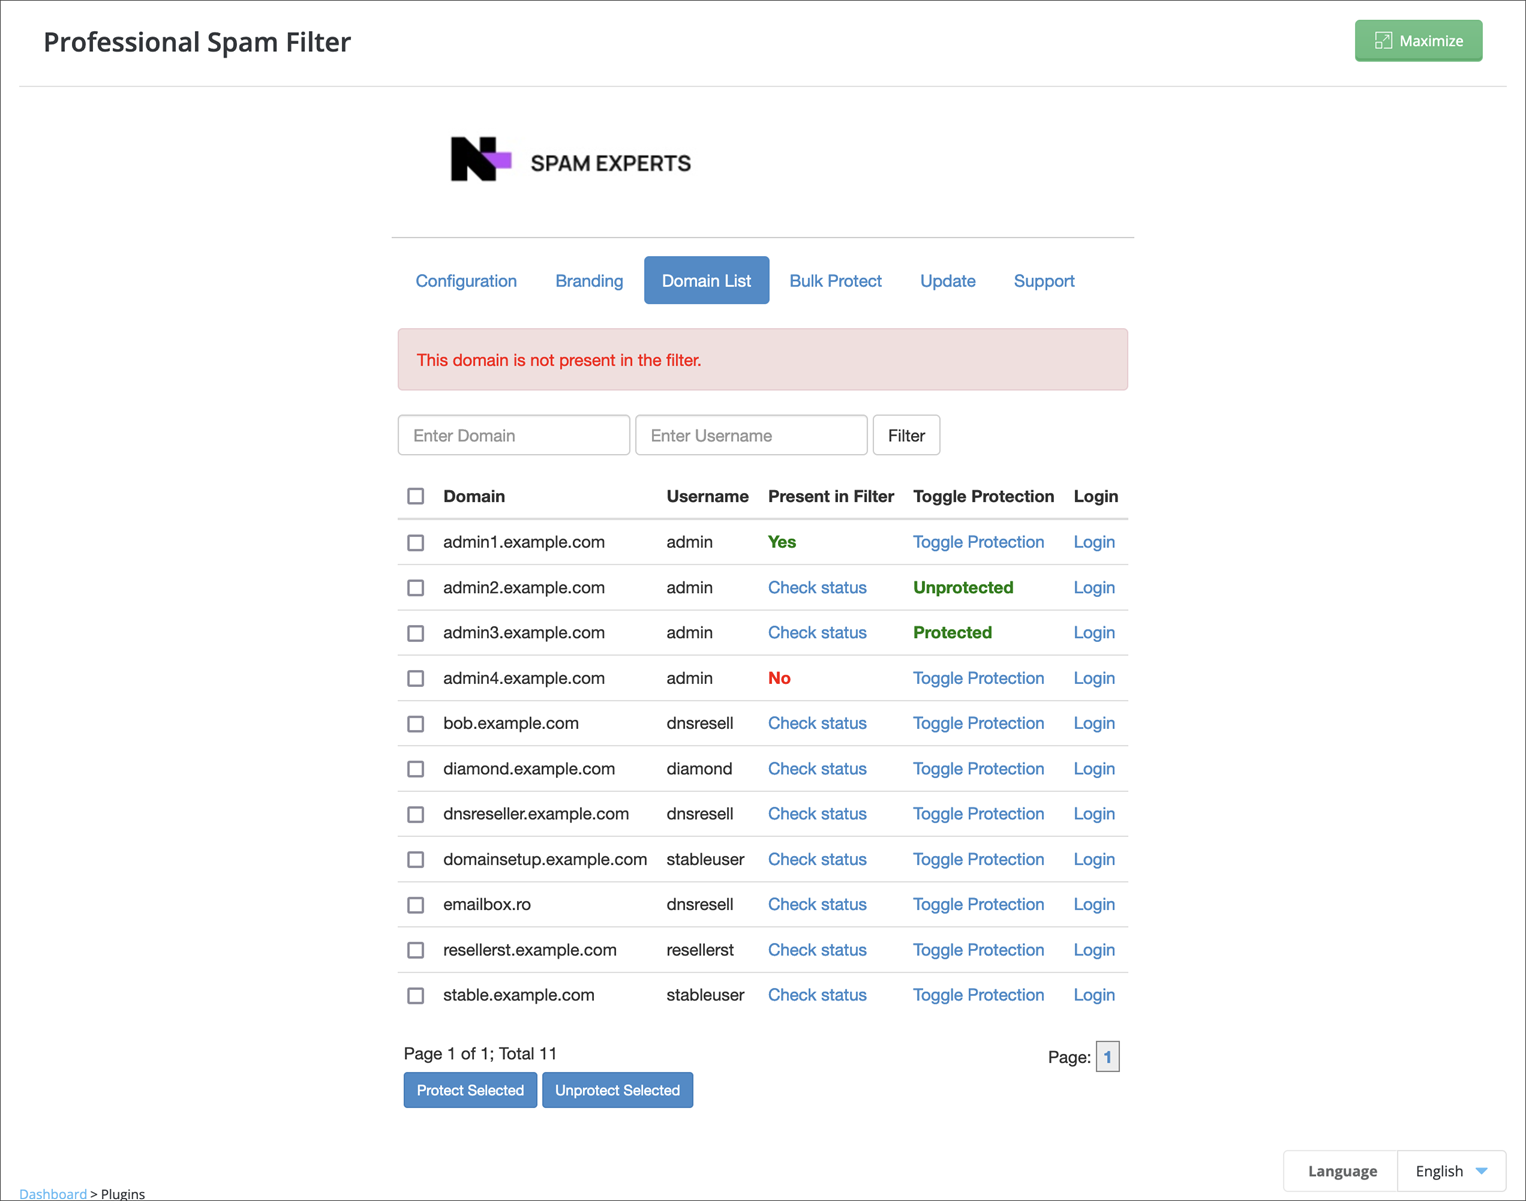
In the Domain List tab you can view and manage all your domains.
In here you will see a table, providing you with the following information:
- Domains: the domain name added
- Username: the Spam Experts Admin Username used when adding the domain
- Present in the Filter: Is the domain present in the SpamFilter (Yes or No)
- You must click Check Status so the Add-on can check into the SpamFilter to determine the status
- Toggle Protection: Enable or Disable Spam Filtering protection for the domain
- Login: Click Login to open the Spam Experts Spam Panel
Bulk Protect
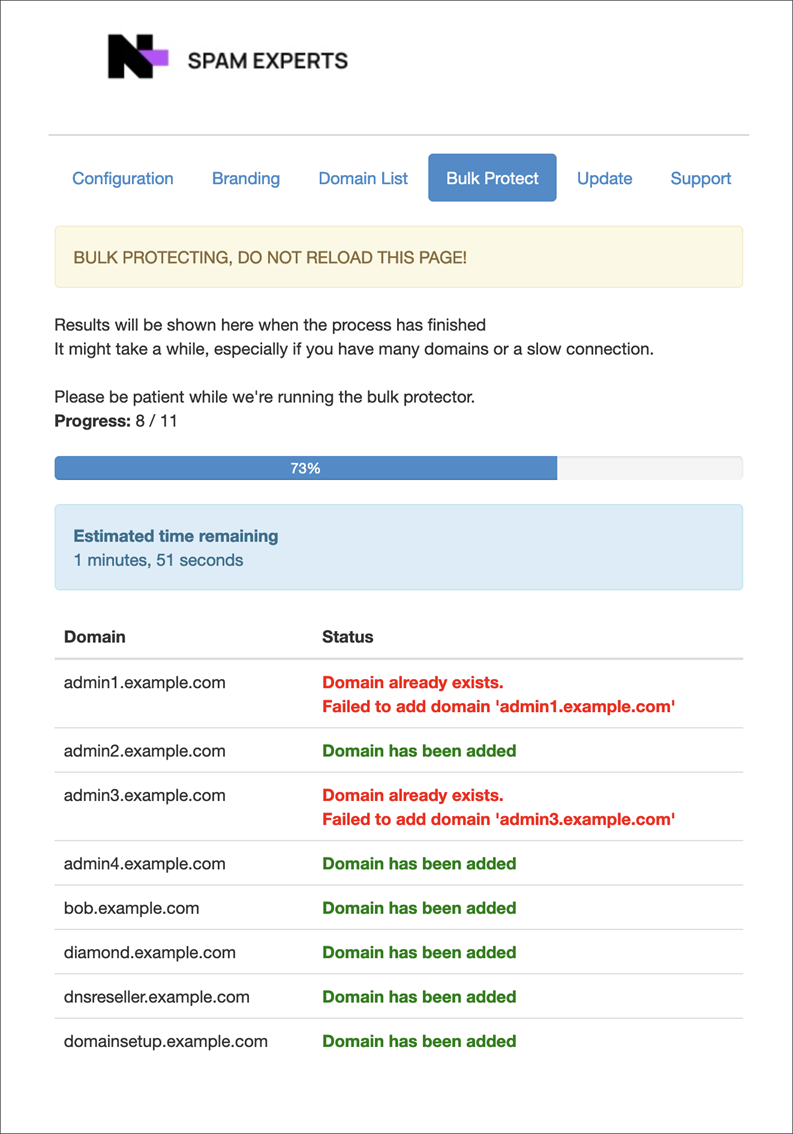
This tab allows you to select all your domains and enable protection for them all at once.
This must be run manually by clicking the Execute Bulk Protect button.
You can check when the last bulk protect was ran by checking in the Bulk protect has been executed last at: section.
This page also gives the status of each domain after the bulk action is completed so you can see if there are any domains that have already been added, or some that cannot be added.
Update
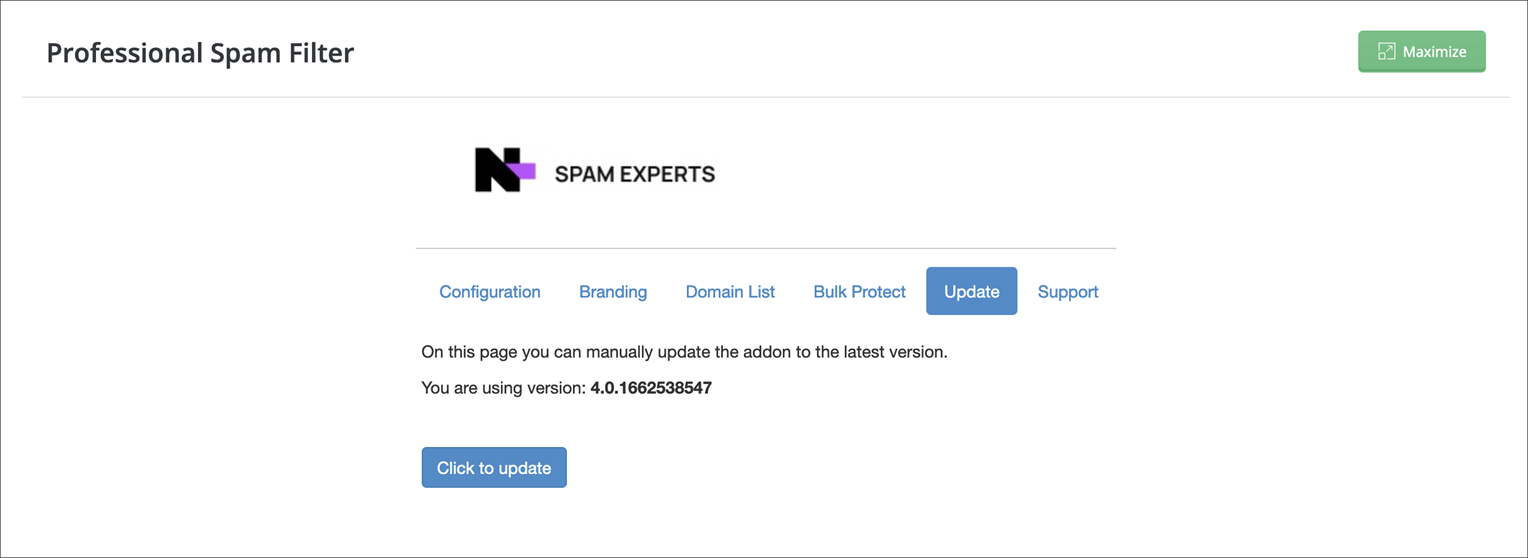
On the Update tab, you have the ability to force update the add-on.
You can also see the current version of the add-on being used. This is useful when contacting Technical Support for any issues that you have not been able to fix yourself.
Support
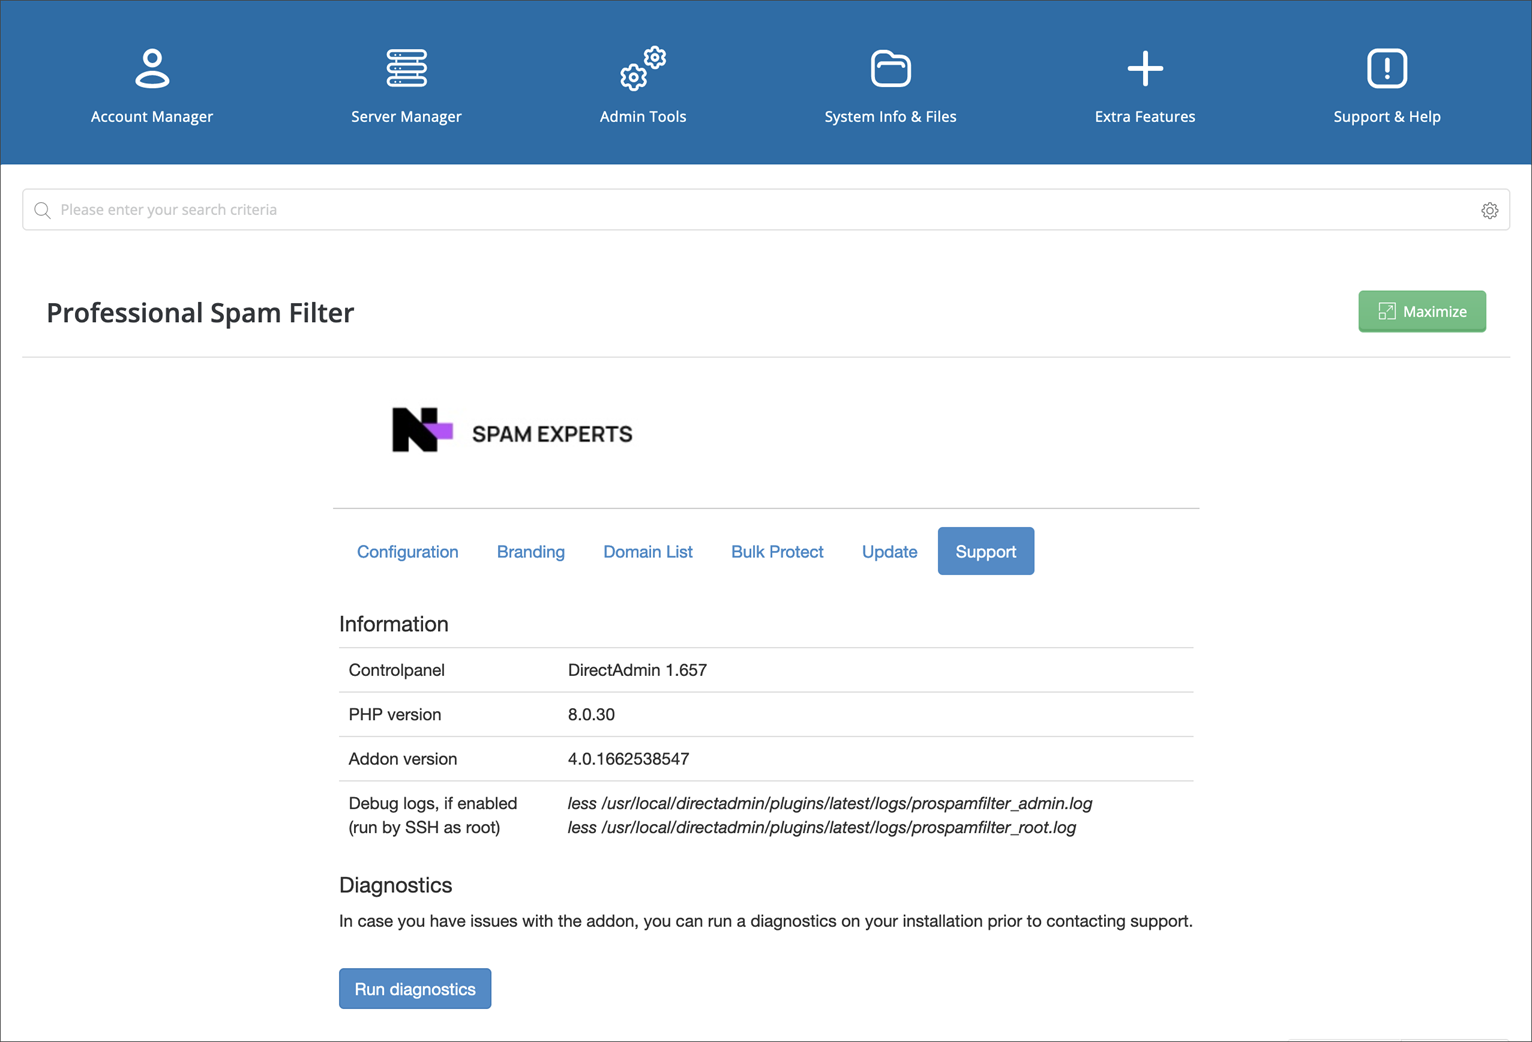
On the Support tab you can find technical information on the DirectAdmin ad-on such as:
- DirectAdmin version
- PHP version
- Add-on Version
- The location of the Debug Logs
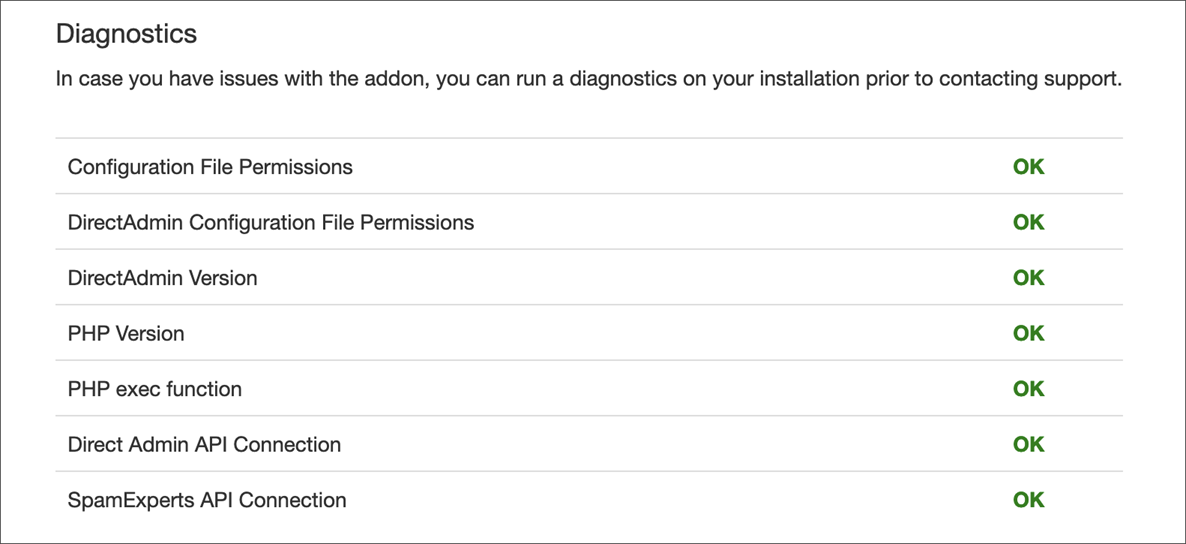
On this page you also have the option to run diagnostics. This will run a set of checks to see the state of the add-on and its configuration with the SpamFilter.
If you are having issues with the SpamFilter it is always best to run this diagnostic first to ensure everything is as it should be.
If everything is working correctly, you should see something similar to the following after clicking Run Diagnostics:
Please contact Spam Experts support for further assistance if you are having issues and running the diagnostics has not provided a solution.
Enable Debug Logs
To enable debug logs for the Spam Experts DirectAdmin add-on, please follow these steps:
- Find the location of the debug logs by:
- Open the SpamFilter in the DirectAdmin Control panel
- Click on the Support Tab
- The directory will be shown under the Debug Logs section
- Login to your DirectAdmin server via SSH
- Navigate to your plug-in root directory found above and create a file named "debug":
- View the debug log:
- To disable the debug logs, remove the "debug" file from the root directory, by issuing the following commands:
The file locations should be similar to these:
/usr/local/directadmin/plugins/PLUGINNAME/logs/prospamfilter_admin.log
/usr/local/directadmin/plugins/PLUGINNAME/logs/prospamfilter_root.log
$ cd /usr/local/directadmin/plugins/PLUGINNAME/
$ touch debug
$ cd /usr/local/directadmin/plugins/PLUGINNAME/logs/
$ cat prospamfilter_admin.log
$ cat prospamfilter_root.log
$ cd /usr/local/directadmin/plugins/PLUGINNAME/
$ rm debug
As this feature should only be enabled when you are experiencing issues with our DirectAdmin add-on, we recommend that you enable it only when needed. The debug logs store a lot of information in the log files and can consume valuable resources if it is kept enabled constantly.
Disclaimer: This documentation may contain references to third party software or websites. N-able has no control over third party software or content and is not responsible for the availability, security, or operation, of any third-party software. If you decide to utilize a release involving third-party software, you do so entirely at your own risk and subject to the applicable third party’s terms and conditions of the use of such software. No information obtained by you from N-able or this documentation shall create any warranty for such software.

