
To accept and filter mail for a domain it must first be added to Spam Experts.
- Login to Spam Experts as an Admin Level user
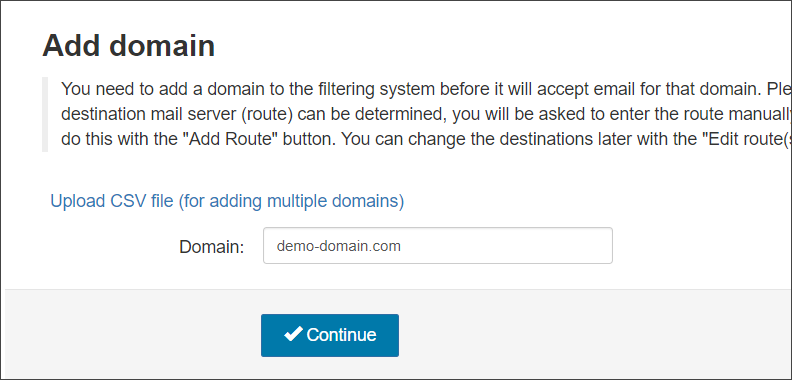
- Navigate to General > Add Domain
- Enter your fully qualified domain name and click Continue
- Add your Destination Route hostname where incoming mail is being routed through after filtering
- To keep message logs and quarantine storage within a specific geographic region, choose the territory from the Region dropdown:
- Global
- Europe
- APAC
This does not affect the mail-flow into and out of the domain. Specific Geographic MX records and relay servers must be used to alter mail-flow locations.
We recommend using the default Global region to make optimal use of our globally distributed cloud and infrastructure redundancy. When selected, our Global data centers are used for email filtering, logging and quarantine.
- Choose to enable Email Scout Reports - This will automatically enable Email Scout Reports so that they are sent to each recipient in your domain, up to 3 times a day
- Click Next
- Confirm the details of the domain to add and click Add and configure, which will take you into the domain to continue configuration, or Add and go to overview, which will take you to the Domain Overview page where you will see the new domain added to the Domains list
If you do not have a specific destination server route to add from the start, Spam Experts will automatically fill in a suggested destination route for you (this route is detected from the domain's existing MX records if present), with a default destination port 25.

For more information on how to find your Destination server address, see Find Destination Server Hostname
Add multiple routes here for load balancing purposes.
Once you have set your destination route(s) here, they will be displayed in the Incoming > Destinations page -
Import from CSV
Requirements
- Each line in the CSV file must contain at least a domain and destination column entry
- Domain aliases may be added through a third column (optional)
- Only one CSV file can be uploaded at a time
- The CSV must be less than or equal to 9MB in size
CSV File Format
| Domain | Routes | Aliases |
|---|---|---|
| domain1.example | mail.domain1.example | |
| domain2.example | mail.domain2.example:2525 | |
| domain3.example | 192.168.0.1 | |
| domain4.example | mail.domain4.example,fallback.server4.example | alias4.example |
| domain5.example | mail.domain5.example:2525,fallback.server5.example | alias5.example,alias6.example |
File Upload
After populating the CSV file it is ready for import into Spam Experts.
- Login to Spam Experts as an Admin Level user
This should be the domains parent admin (the admin to which the domain is assigned)
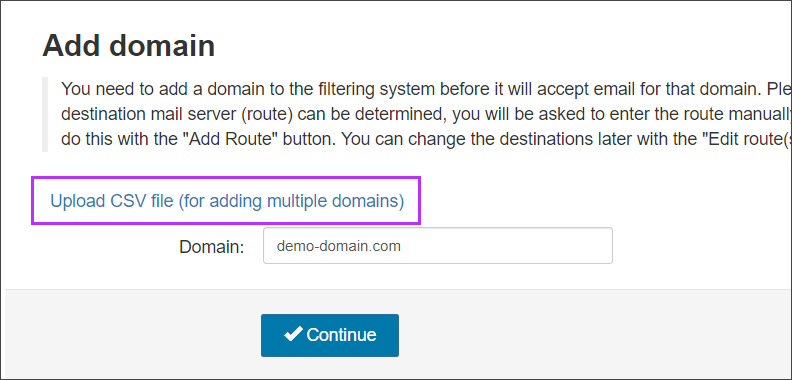
- Click on General > Add Domain
- Select Upload CSV file
- You will now be taken to the Upload CSV file page. From here, use browse to navigate to the files location on the local computer
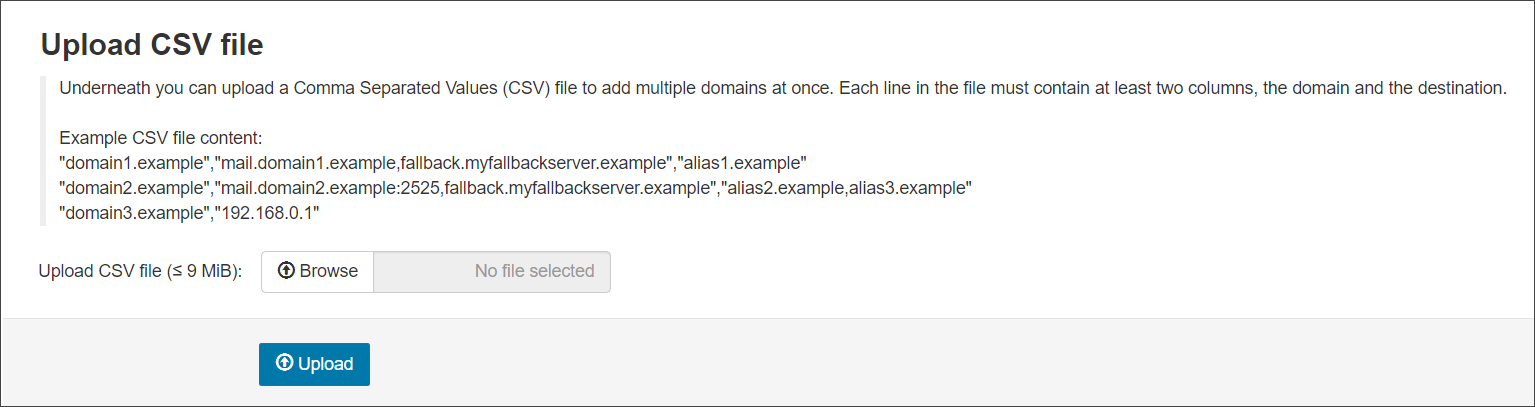
- Select Upload to import the domains
Any issue identified with the file are reported in the "Upload CSV file" section. For example it was not a CSV file.
Check your New Domain can Communicate with the Mail Server
To ensure Spam Experts can communicate with the mail server, carry out a Protection status check:
- Login to Spam Experts as an Admin Level user
- Navigate toGeneral > Domains Overview to display all your domains
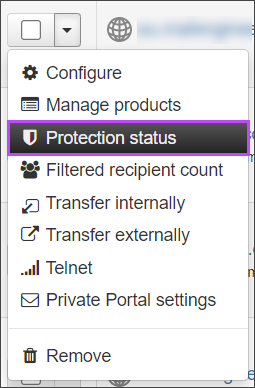
- Click on the dropdown alongside the domain you want to check
- Select Protection status to check the routes you have set:
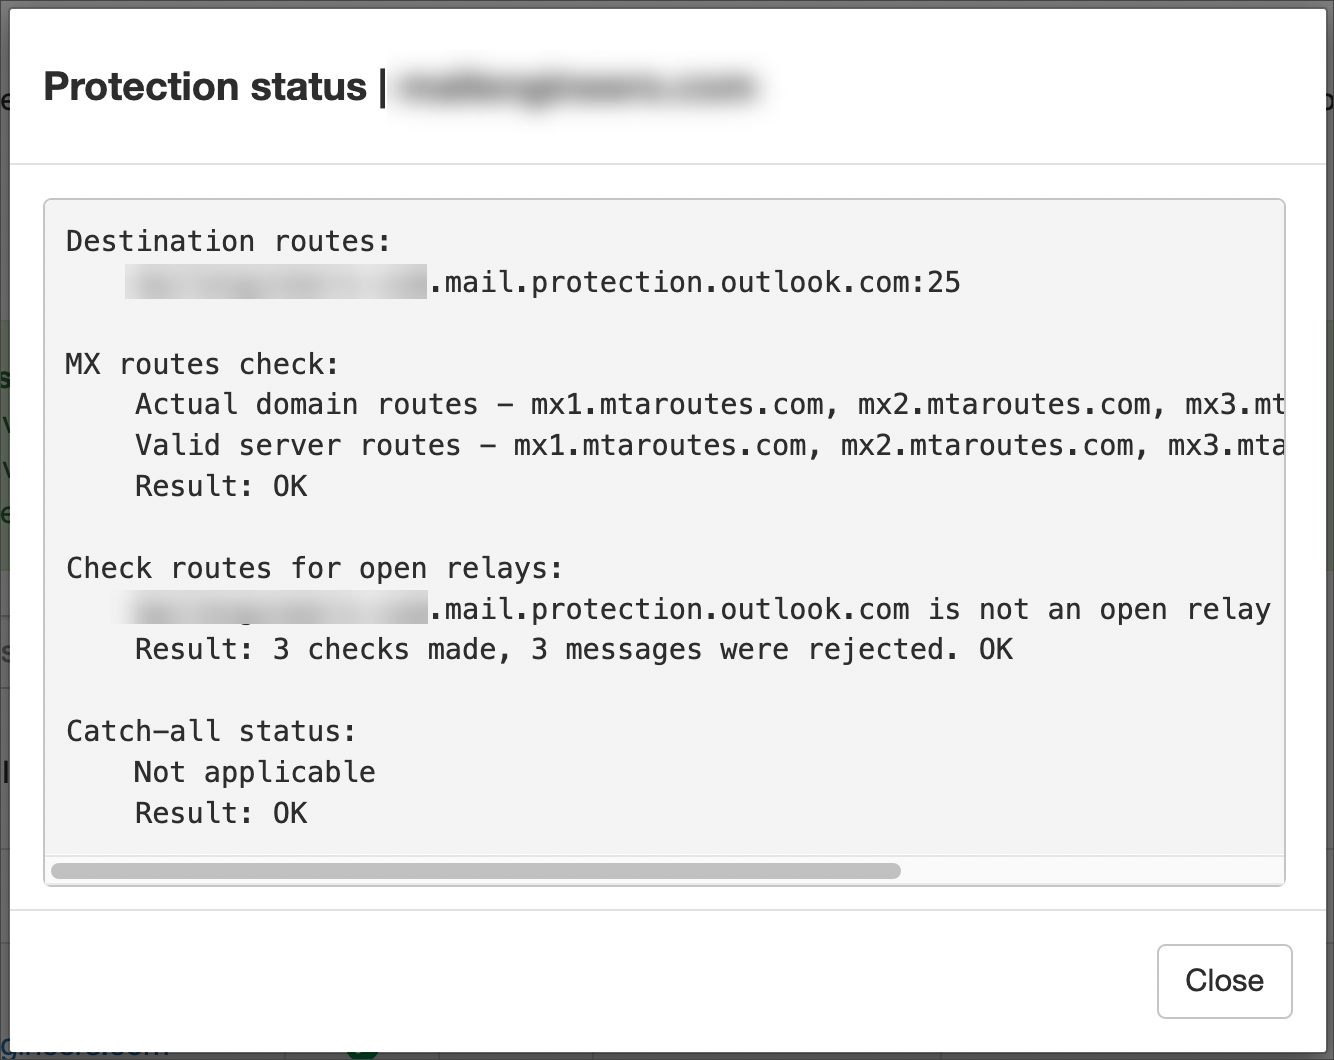
The Protection status dialog should display connection details. If connection failed, a series of 'Connection timed out' responses are displayed.
Now that your new domain is set up you need to modify your MX Records in your domain provider's DNS Settings, in order to point to the correct Spam Experts routes - see Hosted Cloud MX Records.