
Odin Automation APS 2.0 Add-on
SpamExperts no longer supports CloudBlue integration. This will be deprecated shortly.
What is the SpamExperts APS 2.0 add-on?
The application integrates SpamExperts' advanced email protection system with Odin Automation, offering flexible and automatic protection of domain and email resources as well as a one-click login option to our dedicated SpamExperts control panel for managing specific settings, viewing detailed statistics and enhanced user control.
APS2.0 add-on was tested and confirmed working with OA 7.4 and lower. The APS2.0 was not yet tested with OA 8.0 which is the latest version of OA.
Differences between APS 1.2 & APS 2.0
- The major difference is that, in APS 2.0 you can make one resource per domain, rather than include a list of domains in one resource. This has many advantages, for example there can be a separate entry point per domain, each domain can have specific features turned on by default, etc.
- Installation steps have been modified: when importing the package, it's now required to Install an Instance and afterward create the Resource Type.
- The User Interface view has been changed for the Application interface in POA Control Panel.
Features
- Allows the provider to manage the available/enabled products for a domain (Incoming, Outgoing, Archiving).
- Automatically adds or removes domains to and from the Hosted/Local Cloud.
- Configures the email address for the user.
- Allows the user to login to the control panel without having to enter a username/password.
- Allows the provider to "upsell" access to the control panel, but still apply protection to the domain.
- Creates one resource per domain, rather than include a list of domains in one resource.
System Requirements
To set up the endpoint for the application, you need to make sure your system meets the minimum requirements by having the following installed:
- Apache 2.0
- PHP 5.4
- ('date.timezone' must be set in php.ini)
- aps-php-runtime 2.1
Provider Deployment Guide
Deployment steps in order of succession:
Application Endpoint
The recommended way to deploy the application endpoint, is to use the install script provided by Odin:
The APS package can be found here.
- Copy the APS package to the endpoint host (using 'scp' or a method of your choice):
- ex: scp SpamExperts-2.0-19.app.zip root@endpoint.demo-domain.invalid: (the colon at the end is necessary, please do not leave it out)
- You can 'wget' the endpoint.sh script from the address provided above by issuing the following command in the endpoint host terminal:
- ex: endpoint.sh spamexperts SpamExperts-2.0-19.app.zip
- It will print the endpoint URL (e.g.: https://*endpoint_host*/spamexperts). Keep this URL on hand.
- Restart the 'Apache' service with:
- service httpd restart, service apache2 restart, or the equivalent on your system
You can also check the official APS Documentation for more details on deployment.
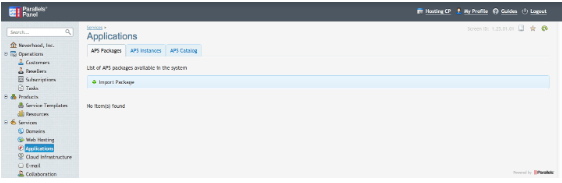
APS Package Import
Navigate to Applications > APS Packages, as the provider and click the Import Package button as shown below:
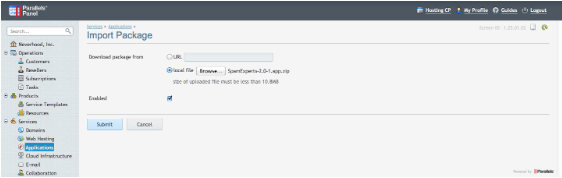
Select the local file option and search for the package to upload in your file browser. Once selected, submit the form:
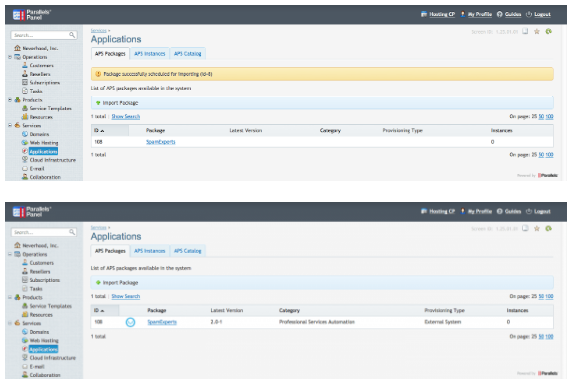
The APS package should now be available and will be validated in a few seconds
Application Instance
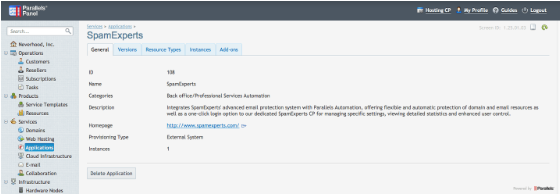
Click on the package name highlighted in blue, to enter the Application. This will redirect you to the following screen:
Go to Instances tab and click Install:

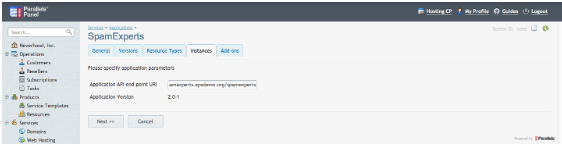
In the field for Application API end-point URI, type the URI of the endpoint configured in the previous section and click Next
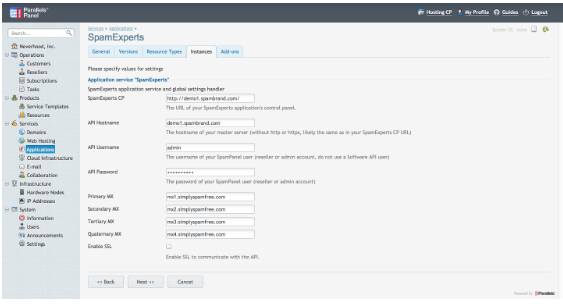
This action will redirect you to the settings configuration screen below. Once there, fill in the information for your SpamExperts account. Note that you should specify the username and password of a Control Panel "Administrator" account and ensure the given user is allowed to create sub-admins.
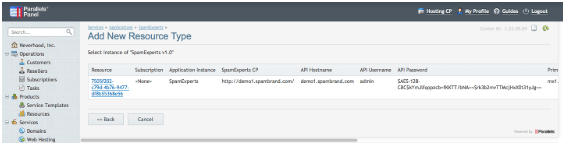
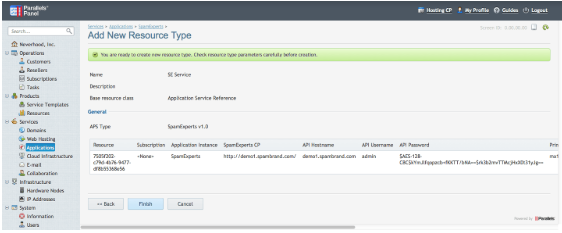
Click Next and verify the information on the following screen:

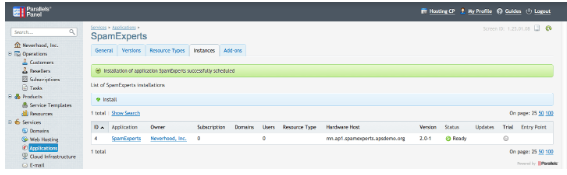
Click Finish and the instance will be created as shown below:
Click on the application name and verify that the instance Status is Ready (Green):
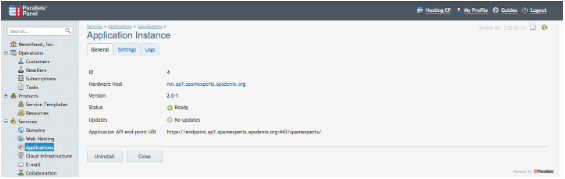
If the status is not green, it's most likely because of an issue with the endpoint. Try reinstalling the endpoint and pay close attention to the steps, also remove the existing endpoint directory first.
Resources
The application requires one Application Service Reference resource, for the application instance you've just created, and an Application Service resource for each of the following: Context, Domain and Email. The Context will be the only automatically provisioned resource. Application counters are optional, they allow more control over the application, users and resource administration/billing.
These are the minimal requirements you need to satisfy:
| # | Name | Service Name | Default Limit | Auto-provisioned |
|---|---|---|---|---|
| 1 | Application Service Reference | N/A | 1 | N/A |
| 2 | Application Service | Context | 1 |
|
| 3 | Application Service | Domain | Unlimited |
|
| 4 | Application Service | Unlimited |
|
Key
The following icons indicate availability:
| Key | Status | Description |
|---|---|---|
|
|
Available | Is available for all |
|
|
Available if additional criteria met | Is available for all, so long as an additional criteria is met (see * for additional information) |
|
|
Not Available | Is not available |
Please follow these Initial Steps in order to create each resource:
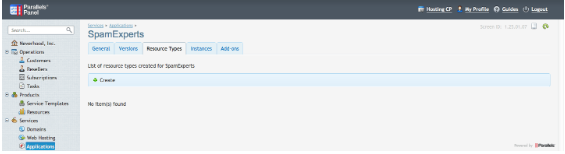
In the application page, select Resource Types and click Create:
Select one of the following (please respect the order): Application Service, Application service Reference, Application Counter (KB), Application Counter Unit
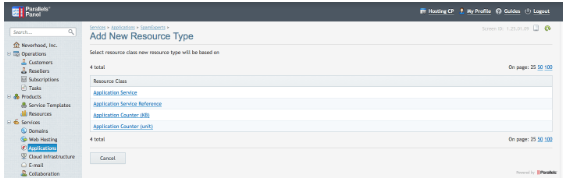
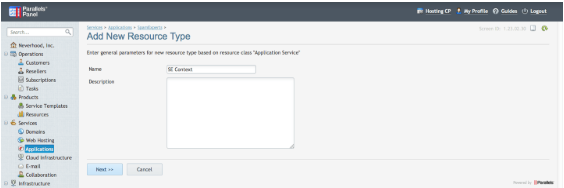
We’ll start by selecting the Application Service Reference Resource Type
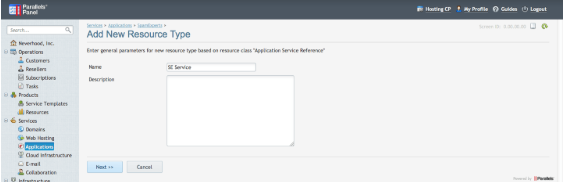
Enter a name, in the screen below (ex: SE Application) and click Next
Select the APS Type, ex: SpamExperts:
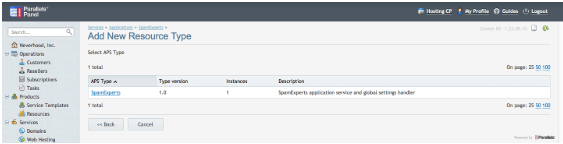
Then select the Application Instance created earlier:
Click Finish once you see the text highlighted in green, in the screen below:
Now to the second Resource Type: Application Service
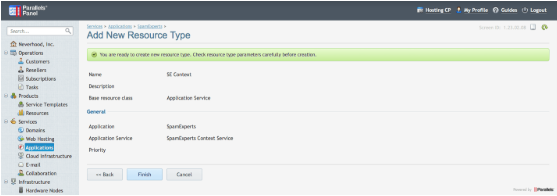
Go back to the application screen and select Application Service. You’ll be redirected to the screen below once more. Do this for each of the following names in turn, ex: SE Context, SE Domain, SE Email, and click Next
Select a resource handler for the service you chose (Context, Domain, and Email):
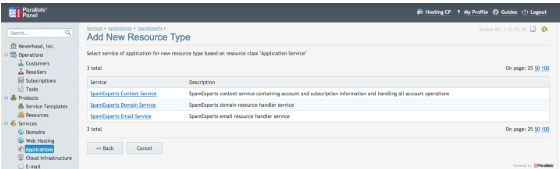
Once selected click Next

Click Finish once you see the text highlighted in green, and you’ve verified all the details are correct:
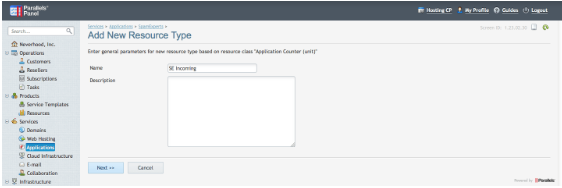
For the last step, go back to the application screen and select Application Counter
Enter a name for the counter and click Next (ex: Incoming):
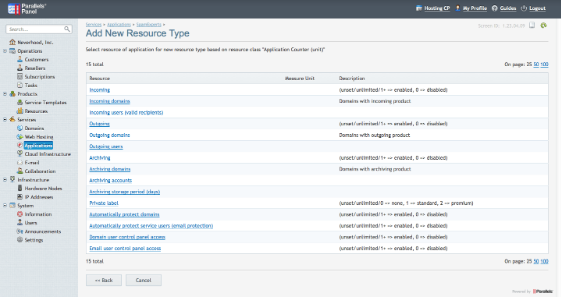
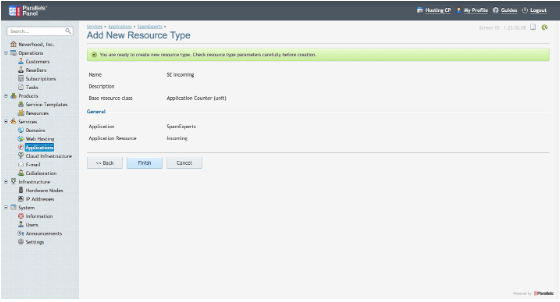
Select the respective counter from the list:
And click Finish, once you see the text highlighted in green:
Product counters
As seen in the image before the last, these are: Incoming, Outgoing and Archiving.
If marked in the Description column as created (set), unlimited or if the limit is greater than 0 (i.e. 1 or greater), the product is considered enabled for the customer and their domains. If it's unset or created and set to 0 in the template then it's disabled. The usage will tell you if these products are actually available in your SpamExperts account.
Private Labels
This counter has different limit rules: unset/unlimited/0 => none, 1 => standard (Private Label), 2 => premium (Premium Private Label).
Counters for domains with a certain product enabled
To track or restrict the number of domains, which have a specific product enabled, you have to create counters for these as follows: Incoming domains, Outgoing domains and Archiving domains. The limit value should be an integer, the minimum is 1 (1 domain), and 0 means unlimited. The Control Panel domain limit is set and updated according to the domain limit set in POA for the SpamExperts Domain resource.
User Counters
These are: Incoming users (valid recipients) and Outgoing users. With these you can track the number of users per customer.
Automatic Resource Protection
By default, automatic domain protection is enabled even if the counter isn't created, added to the template and set. This means that every newly added domain will be Protected as per SpamExperts standards. Already existing resources can be protected with Total Protection in the Operations menu, from the sidebar in the Customer Control Panel, or by selecting and protecting them in the domain/email lists. To disable automatic protection, create and add the respective counter to the template and set the limit to 0.
Control Panel Access
By default, customers can click the Login button for a Protected resource, and be logged into the respective domain/email user account directly in the SpamExperts Control Panel. To disable this button, create the respective counter and set it to 0 in the template.
Other counters
Counters that are not explained here are placeholders for future functionality. They will be documented when fully implemented.
Service Template
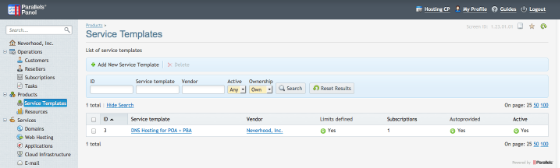
To access the Service Templates first open the Products menu in the sidebar and select Service Templates, then click the button Add New Service Template at the top of the screen, as shown above.
Next, specify the general parameters of the Service Template:
- Name - The name of the Service Template (ex: SpamExperts)
- Description - The description of the Service Template (optional)
- Auto-provisioning - Make sure it's selected
- Account-Wide Services - Make sure it's selected (POA 6.0)
- Type - 'Custom' should be selected
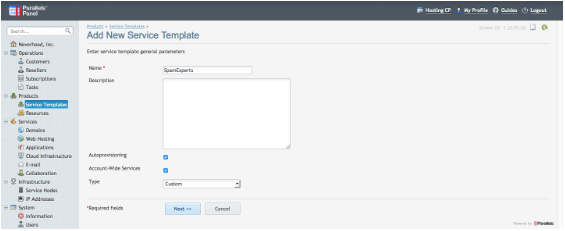
Click Next to proceed to the list of Resources Types.
Type for example: 'SE*' in the search bar to get the resources you've created:
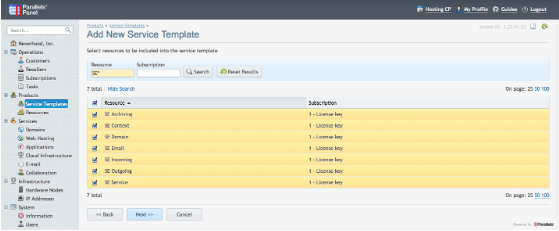
Select the SE resources you've created and click Next.
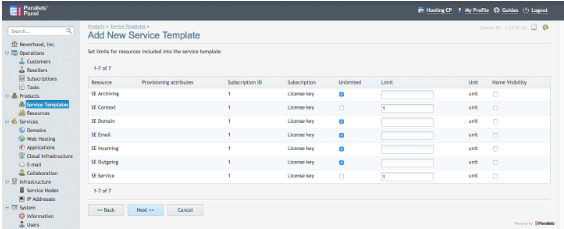
Specify the default template limits and click Next as shown above.
The Application Service Reference (SE Service) and the Context Service (SE Context) limits must be set to 1, the rest can be Unlimited by default or customised as required.
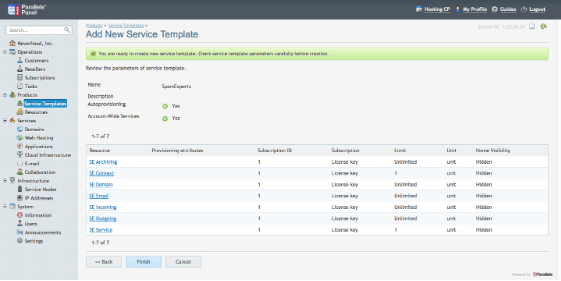
Review the resources and limits on the final page and click Finish.
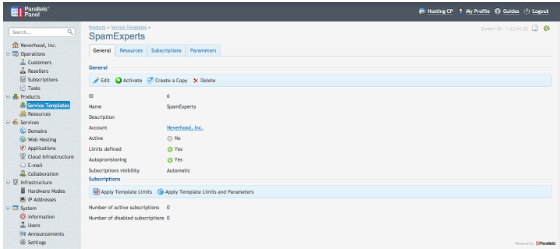
Now, select your newly created Service Template:
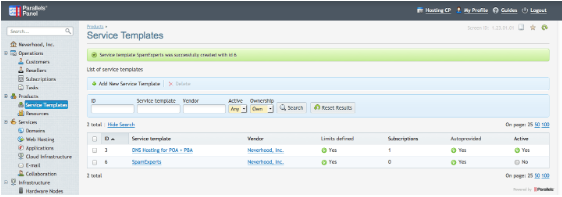
And click the button labeled Activate at the top of the page, to activate it:
Service Plan
If you wish to create a service plan, please follow these steps:
- Go to the Billing panel, open Products and choose Service Plans
- Click on the button labeled Add New Service Plan
- Select the Generic Service Plan option
- Type a service plan name into the Name field. This is the name the customer will see in the shop so use a good one
- To select the Service Template click on the right icon, and search for the service template defined before, by name. The Service Template determines resources that are provided to the subscriber of the service plan
- Type both short and long descriptions of the service plan into the Description and Extended Description fields respectively. Both descriptions are shown to customer in the online store. Both descriptions can be input in HTML format
- To define the Plan Category field, select a category which your new service plan will belong to. The plan category defines how the plan will be taxed
- Select a service term from the Service Terms list
- Check the Published checkbox, to make the service plan available for sale
- The Service Plan can also be included in a unique group. Unique groups restrict the combination of service plans in a single subscription: service plans belonging to the same group cannot be up-sales of each other. Select a billing period type from the Billing Period Type list. The Billing Period field differs depending on the billing period type. The following types are available:
- Fixed Number of Months - billing period in months
- Fixed Number of Years - billing period in years
- Click Next
- Select the subscription period checkbox and click Next
- Click Setup Plan Rates
- To add Plan Rates, each one must have the checkbox at the left side of grid checked. Plan Rate limits must be the same as in the Service Template, for example: the SE Service and SE Context must be set to a limit of 1, while the others can be set as desired
- Click Finish and the Service Plan will be created
Subscription
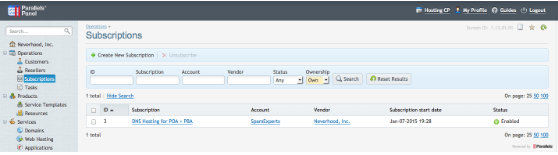
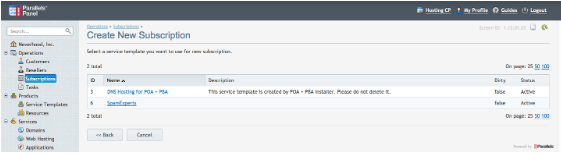
To make a Subscription, navigate to the Operations menu, choose Subscriptions and click the Create New Subscription button:
Select the account you wish to subscribe:

Select the SpamExperts Service Template:
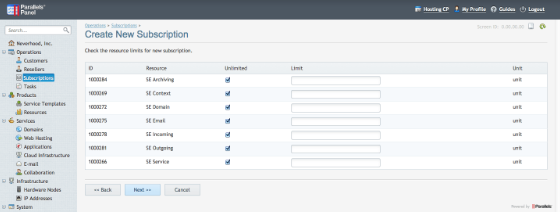
Set the default limits and click Next:
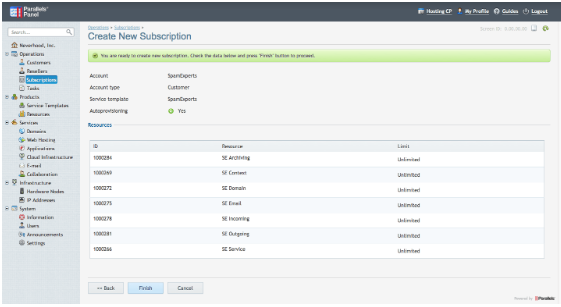
Review and click Finish:
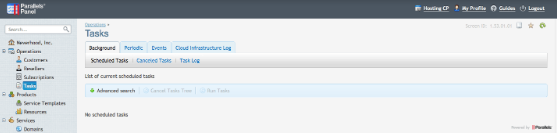
Navigate to Tasks and check that all the tasks related to the SpamExperts subscription are completed successfully:
To protect all the customer's domains and emails, navigate to the Customer Control Panel, Login as Customer, click on “SpamExperts”, click on the Operations side menu, and click Total Protection.
If an error occurs, cancel the failed tasks in the Tasks area and ONLY afterward unsubscribe the customer.
We also advise that you click the failed task and take a screenshot or two, of the displayed information, in case this happens again and you are sure the instance information is correct. You can try again if you've solved the issue, otherwise please contact our support team by raising a support ticket through N-AbleMe.
Unsubscribing
To unsubscribe, navigate to the Customer Control Panel, Login as Customer, select “SpamExperts”, go to the Operations menu and click Uninstall. Only after you have done this, navigate to Subscriptions in the Provider Control Panel, select the subscription and click Unsubscribe.
If you choose not to Uninstall first, the MX Records added to domains by the application will remain attached and cannot be removed manually. They can be disabled, but if you forget to do this and you want them removed, you have to re-subscribe the customer and hit Uninstall.
Subscriber Guide
We have taken care to expose our protection system in the simplest way possible to the end user and with the least amount of manual intervention.
After subscribing, the only priority a customer has, is to ensure resources (domain and email) are Protected. This is done very easily with just one action for multiple items and can be automated for domains by the provider. More details below.
Domains & Emails
In the SpamExperts tab, from the Customer Control Panel, you will find a list of your domain and service user (email) resources. You can perform a number of actions on one or more of these resources as described below.
Resource Actions
Check
Check a resource's protection status. The status will be updated in its respective column.
Protect
Protect a resource with SpamExperts. Resources will have special SpamExperts users created, the Login button will take you to the SpamExperts User Control Panel if that feature is enabled by the provider and domains will have their MX records changed.
Unprotect
WARNING: Please use this action with caution. You will generally not need it in most cases, as the only reason to use it is when you are limited in the number of resources you can protect at a time, and want to swap protection between an old and a new resource. Otherwise, you will want your resources Protected at all times!
Unprotect a resource. Users will be removed from SpamExperts, domains will be removed if unprotected and MX records will be reverted.
Misc actions
These are: Login, which allows you to log in the SpamExperts web interface as the respective domain or email user, and the Search functionality, which you can use to find domains and emails.
Operations
The operations page contains several global operations that are described there. In short, you can: protect all your resources, remove protection from all your resources and refresh the SpamExperts container, which updates customer account information in our systems If for any reason there's a problem with it, re-creates the SpamExperts administrator account if not present.
Service User
When creating a service user, you may choose to add SpamExperts protection by checking the SpamExperts checkbox when the subscription is enabled. This is optional, as you can skip it and Protect your service users from the Email list in the SpamExperts tab or by using the Total Protection operation. The final result is the same, as the resource is protected.
Service users protected with SpamExperts can log in to the SpamExperts Control Panel as email users by using the button available in their OA web interface:
Debugging and support
When you encounter an issue, check the logs located in '/var/www/html/spamexperts/logs'. The application stores up to 30 days of logs, with detailed information about the application's activities and the reason(s) it failed in case of an error.
To enable the logging of more extensive information (API calls and results), open /var/www/html/spamexperts/Logger.php and add a '#' where indicated. Run the steps to reproduce the issue after you've enabled advanced logging and turn it off afterward.
Our support team is always happy to help you with any issue. Please save relevant logs when contacting support.
Resource counters
By default all counters update every hour. However, since there are many counter in the APS package, there is the possibility now to schedule the counter update for a certain day.
Upgrading the Add-on
To upgrade the application to a new version:
- Import the new version of the application in Applications
- Upgrade the endpoint scripts. For this you can use the automatic installation script: endpoint.sh --upgrade ENDPOINT_NAME SpamExperts-2.0-4.app.zip
- Replace the version number with the one you're upgrading to and restart apache afterwards, with "(sudo) service httpd restart", “(sudo) service apache2 restart", or its equivalent
- Go to the application in POA, SpamExperts > General and Upgrade the instance. You can also upgrade from the instance screen
- Perform steps 2-3 for each endpoint/instance you want to upgrade
Upgrade from APS 1.2
Here are the steps of the upgrade path:
- In the Provider Control Panel, go to Applications > SpamExperts Integration > Resource Types, and click the main Application resource (usually named 'SpamExperts', it contains the Global settings)
- In the main Application resource, go to Activation Parameters > Global settings and click Edit
- Change the SpamExperts web interface URL and the API hostname to some other, non valid names and click Submit (ex: instead of my-spamexperts.com you could write my-spamexperts.nonvalidname.com)
- Go to Subscriptions and Unsubscribe the subscriptions you want to upgrade, to use the new app
- Go to Tasks and verify all related tasks have finished successfully
- Subscribe customers to the new SpamExperts 2.0 service template (installed by following our Knowledgebase guide)
- Go to the Customer Control Panel > SpamExperts > Operations and click Total Protection. This will ensure existing domains and service users are synced and Protected between the new 2.0 subscription and the SpamExperts servers
You can install the new APS 2.0 SpamExperts application either alongside the old one (keeping old service templates in case you need them) or after uninstalling the old service templates, resources and app. The choice is all yours.
To install the new app, you must follow the process described in the Provider Deployment Guide detailed above.
If an error does occur at any point, check in Tasks, go to the failed task (if any), click it and chose to cancel that task only (not the task tree). Do this for any failed task in succession. Don't cancel all the tasks, some may be important and will be triggered automatically, after you cancel the failed task.