
Reporting
Risk Intelligence provides reporting on financial and sensitive data risks, exposed when scanning devices within an organization.
In this Quick Start Guide we focus on how to create and run one of the most useful reports - the Expanded Data Breach Risk Report.
Before you can run this report you must first create it - see Creating an Expanded Data Breach Risk Report.
Once you have created your report and once a scan has been run on one or more devices, you can view the last run report on that scan or you can choose to generate a new report on current data - see Generating an Expanded Data Breach Risk Report.
To access Reports:
All existing reports are displayed for the selected organization.
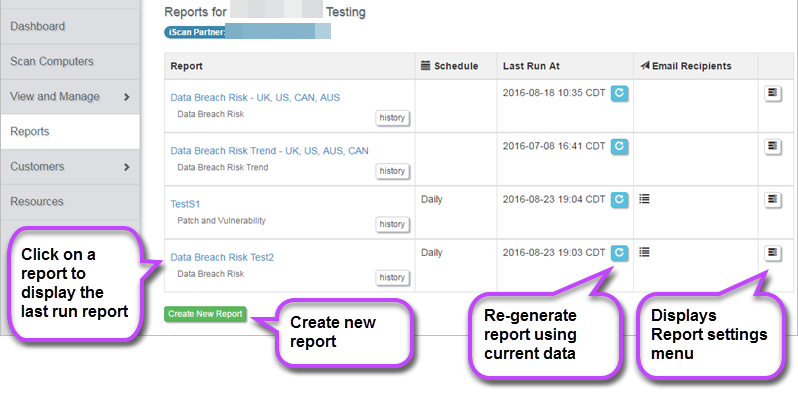
The following information/options are displayed:
- Report - The name and type of report. Click to display the last run report. You can edit the report menu from the Report Menu (below).
- History - Displays when the report was executed and the report status e.g. 'completed'. Also allows you to view the report in HTML or download the CSV file. You can also delete the report from here.
- Schedule - Details of the report scheduling (if set up in the Report Menu (see below))
- Last Run At - Date and time the report was last run. Click to re-generate the report using current data.
- Email Recipients - Hover over to display recipients set up to receive report by email. Edit these in the Report Menu (below)
- Report Menu - Click to open the Report Menu which allows you to:
- Edit the report columns and conditions
- Edit Schedule details - Daily, weekly, monthly, on a specific day of the month or no scheduling.
- Edit Email Recipients
- Edit report name
- Attach CSV to emailed report
- Automatically generate shared URL for report
- Clone Report - Copy and give new report a name
- Create New Report - Allows you to create a new report. See Creating an Expanded Data Breach Risk Report.