
Manage tickets through Workflow Rules
The default ticket creation policy is setup up as part of the PSA integration. However, you can use Workflow Rules if you have special case tickets that you want Datto Autotask to handle differently. For example, you may want to change the ticket status, due date, priority, and so on.
To configure Workflow Rules in Datto Autotask:
- On your Datto Autotask console, hover over the menu icon in the top left and select Admin > Automation
- In the Admin dialog, expand the Workflow Rules section and select Workflow Rules
- Select New and enter the required information to create a new rule
- Select Save & Close to apply
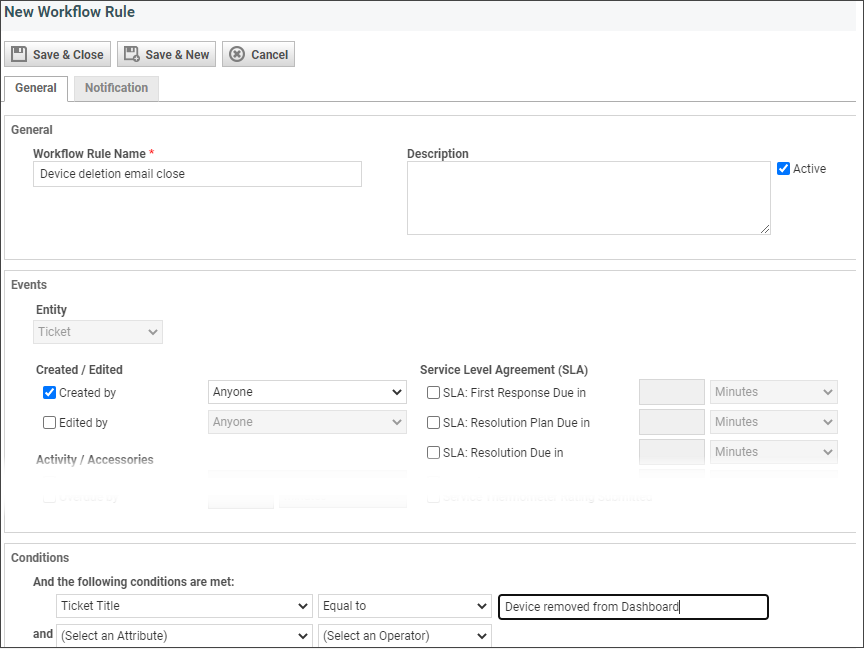
Example rule: Mark device deletion email as closed
The following example shows how you could create a rule to automatically mark a device deletion email as closed.
In the New Workflow Rule dialog, enter the following data:
- In the General section, specify the Workflow Rule Name and enter a Description (if required). Set the rule to Active.
- In the Events section, select Created By and use the drop-down menu to select Anyone
- In the Conditions section, use the first row of drop-down menus to select the required conditions: Ticket Title | Equals to | Device removed from the Dashboard
- In the Updates section, use the first row of drop-down menus to select the required updates: Status = Complete. You could add an additional row to change the ticket Priority = Low
- Select Save & Close
This rule is applied the next time a ticket matching the specified criteria is created.
For more information about Datto Autotask Workflow Rules, see the Datto Autotask documentation.