Custom Fields for Asset Tracking
You can add Custom Fields in the device Summary tab of the Asset Tracking Dashboard. You add a Custom Field with a name and then manually populate the field for each device or Client. For example, you can configure a custom field for Purchase Date and then enter that information for each device.
Custom Fields are applied account-wide for all devices regardless of the method you use to add them.
Add Custom Fields
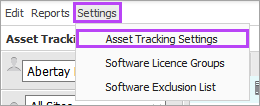
- In the Asset Tracking Dashboard, open the Asset Tracking Settings dialog using one of these methods:
- Go to Settings > Asset Tracking Settings
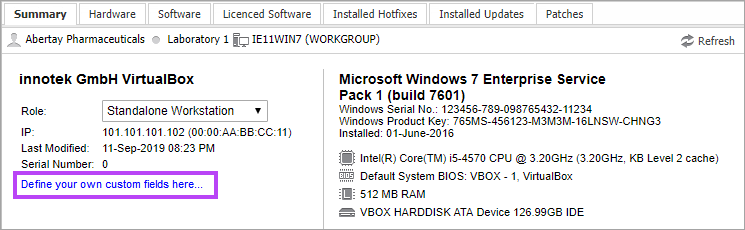
In the Asset Tracking South-pane Summary tab, click Define your own custom fields here... (if no fields configured yet)
- Go to Settings > Asset Tracking Settings
- Select the Custom Fields tab
- Enter a name for up to 10 custom fields.
In the Summary tab, the custom fields are displayed in the order listed in the Asset Tracking Settings dialog.
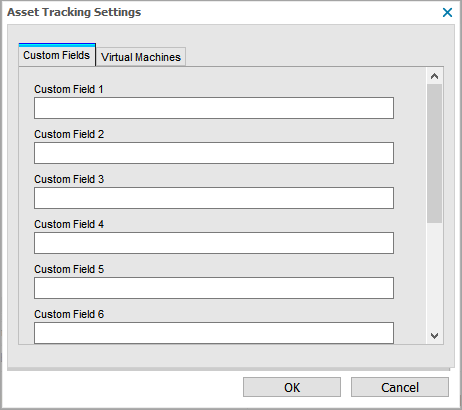
- Click OK to save
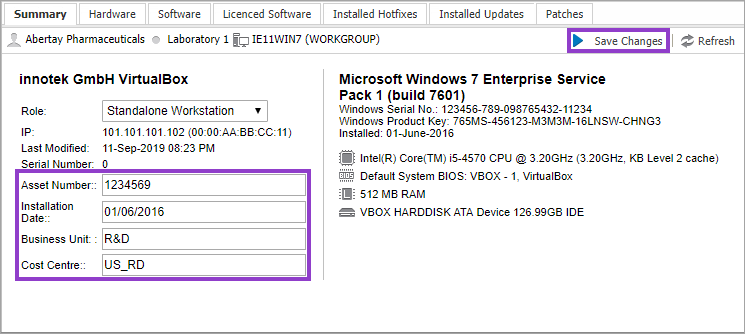
Populate Custom Fields in the Summary Tab
After you add a custom field, it is displayed in the Asset Tracking Summary tab for each device.
It is not mandatory to populate Custom Fields for each device. You can leave a custom field blank if applicable data is not available for a device.
To populate a custom field for a device:
- Click the device in the Asset Tracking North-pane to display the device details in the South-pane
- In the South-pane, select the Summary tab
- Enter the information for the custom field
- Click Save Changes to apply
Custom Field information is not retained when a device is deleted from the All Devices view. If you reinstall an Agent on a device, you must re-populate the Custom Field information.