Actions
Actions
Depending on which Trigger you select, a sub-set of the below 5 actions will be present for selection (for example, the Rotate Password action will only be offered for a Credential related Trigger).
Dynamic Tags can be added into the workflow Action. This allows dynamic population of various information into the workflow in compatible fields. Entering a [ (square bracket) displays an auto-complete list of possible tags.
| Available Dynamic Tags | ||||
|---|---|---|---|---|
| client_name | username | credential_type | folder | known_by |
| windows_sync_status | credential_state | trigger_name | organization_name | workflow_name |
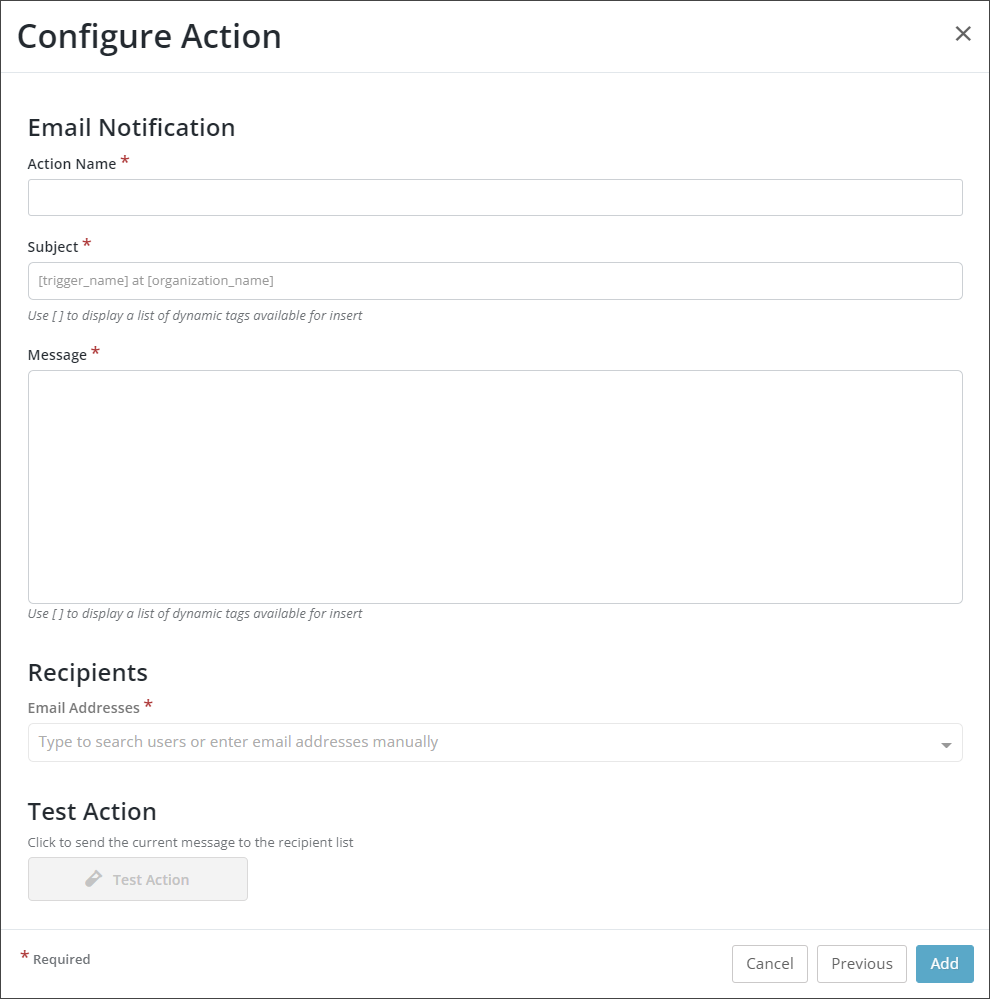
Email Notification
To sends an email notification to recipients:
- Enter an Action Name for identification purposes.
- Enter a Subject - Dynamic Tags can be used in this field.
- Enter a Message for the email - Dynamic Tags can be used in this field.
- Select the email Recipients using the drop-down menu.
- Test the Action if required using the Test Action button.
- Click Add to complete the Action setup.
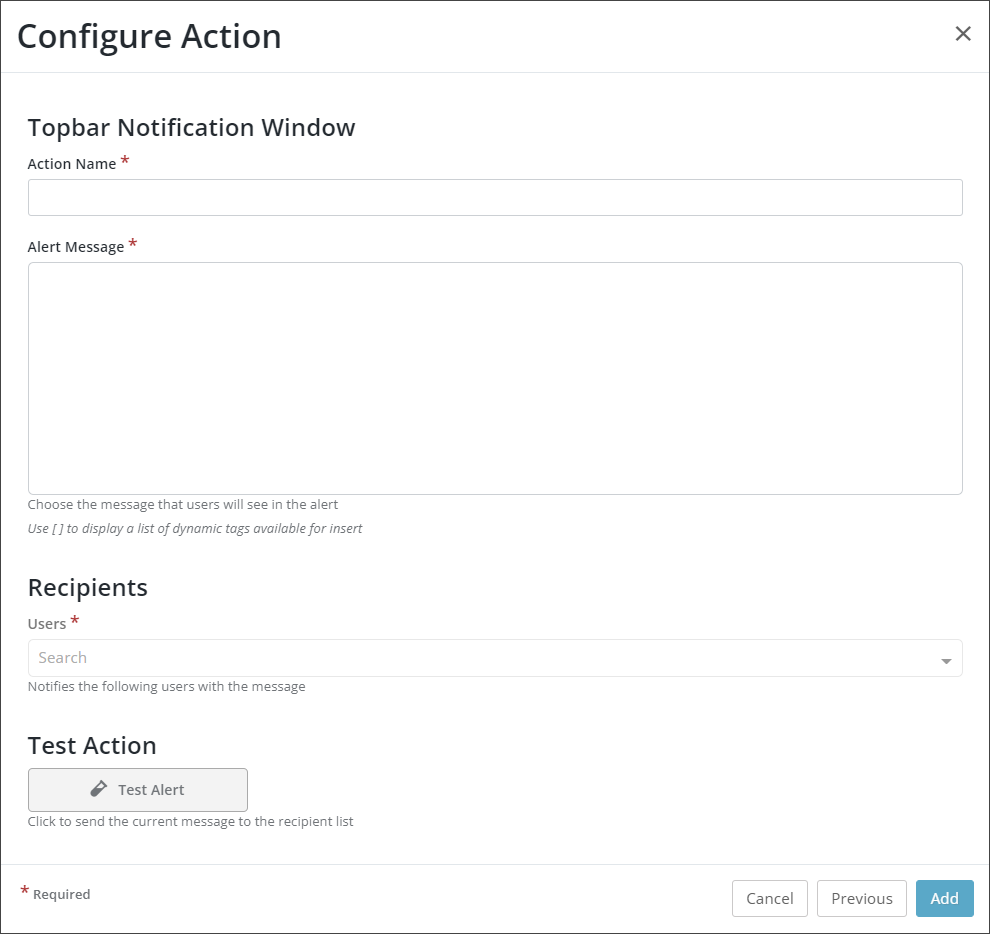
Notification Window
To generate a Notification Alert in the Passportal notification toolbar:
- Enter an Action Name for identification purposes.
- Enter an Alert Message that will be displayed in the Alert - Dynamic Tags can be used in this field.
- Select the Recipients using the drop-down menu - Dynamic Tags can be used in this field.
- Test the Action if required using the Test Action button.
- Click Add to complete the Action setup.
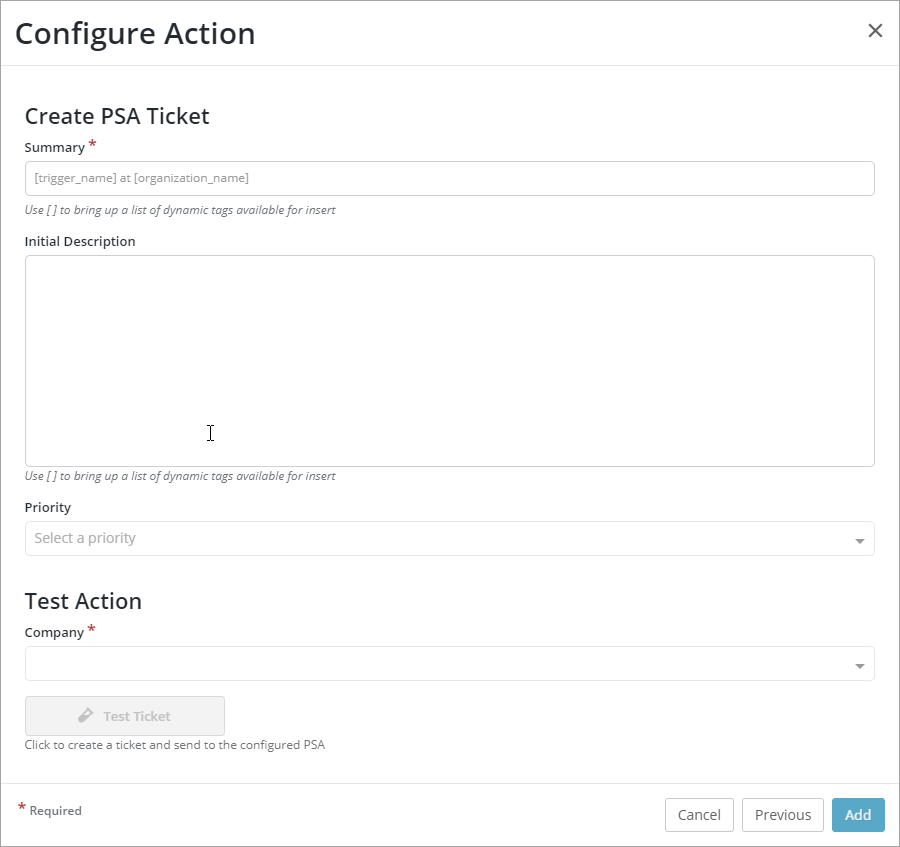
PSA Ticket
To open a ticket in either ConnectWise Manage or Datto Autotask if integrated with Passportal. This Action is unavailable if neither PSA integration is configured:
ConnectWise Manage
- Enter a Summary for the PSA Ticket to be created - Dynamic Tags can be used in this field
- Enter an Initial Description for the PSA Ticket - Dynamic Tags can be used in this field
- Select the Priority for the PSA Ticket using the drop-down menu.
- Test the Action if required using the Test Action button. You will need to select a Company from the drop-down menu to do so. This drop-down is populated by the Companies synced with ConnectWise Manage into Passportal.
- Click Add to complete the Action setup
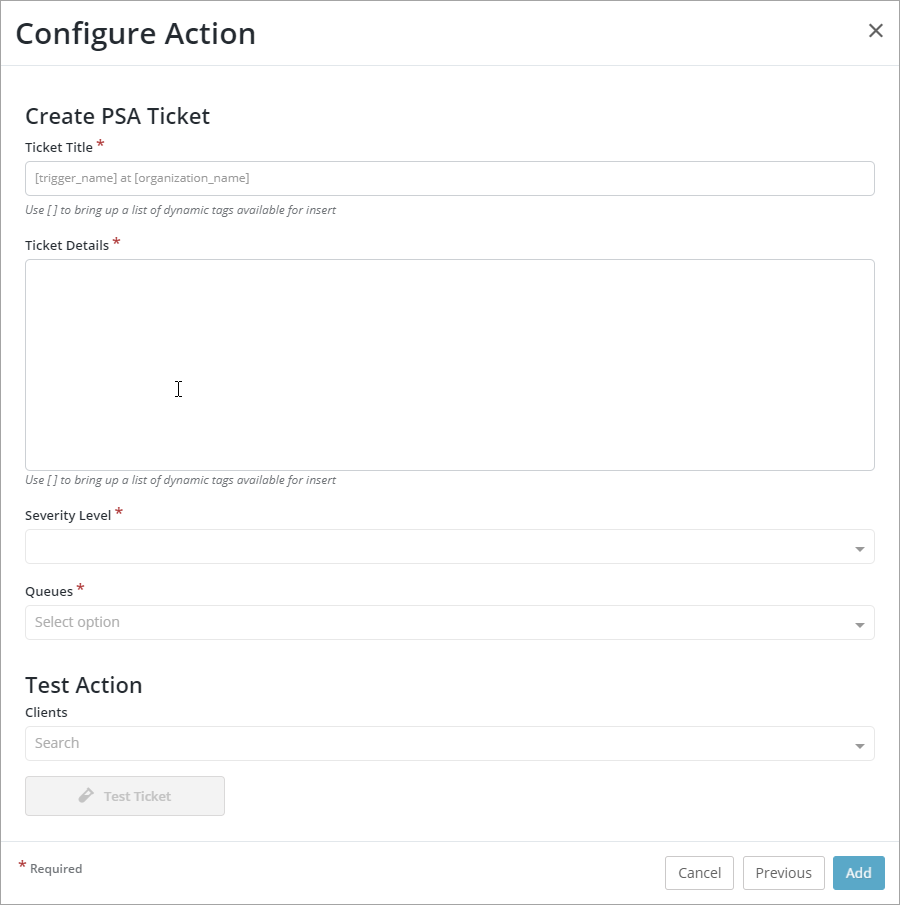
Datto Autotask
- Enter a Ticket Title for the PSA Ticket to be created - Dynamic Tags can be used in this field.
- Enter the Ticket Details for the PSA Ticket - Dynamic Tags can be used in this field.
- Select the Security Level for the PSA Ticket using the drop-down menu.
- Select which Queues the PSA Ticket is to be added to using the drop-down menu. This will populate with the Queues synced from Datto Autotask.
- Test the Action if required using the Test Action button. You will need to select a Client from the drop-down menu to do so. This drop-down is populated by the Clients synced with Datto Autotask into Passportal.
- Click Add to complete the Action setup.
Rotate Password
To reset credential as per the configured password generation rules or set Expired flag depending on Credential type and settings selected:
- Enter an Action Name for identification purposes. You can also use dynamic tags by using the square brackets to display a list of available tags.
- If required, enabled the toggle for: Force Rotation on Microsoft Active Directory Synced Credential. If required, enabled the toggle for: Create Expired Flag on Non-Automated Credential.
- Click Add to complete the Action setup.

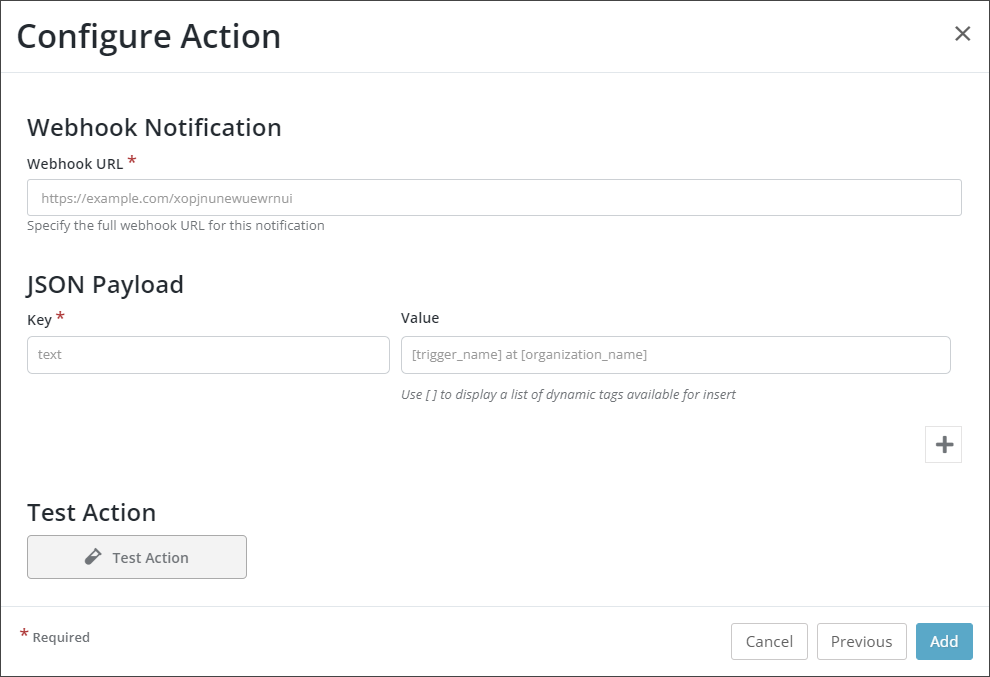
Webhook
JSON payloads consist of Key and Value pairs. The Key is a title or identifier to the Value detail. You should give the Key a meaningful name, based on the Values available to be pulled from Passportal using dynamic tags. You can define more than one dynamic tag in the Value field such as [trigger_name] at [organisation_name]. In some cases the Key may be defined by the target software expectations.
To generate a JSON payload to be delivered to the configured Webhook URL:
- Enter the Webhook URL to which the JSON payload is to be sent.
- Define a Key to be generated in the JSON payload.
- Enter a Value - Dynamic Tags can be used in this field.
- Click the + button to add further Keys and Value pairs as you require.
- Test the Action if required by clicking the Test Action button.
- Click Add to complete the Action setup.