ConnectWise Automate Control Center Plugin Configuration
- Ensure that you have restarted the ConnectWise Automate Control Center after installing or updating the Passportal Plugin.
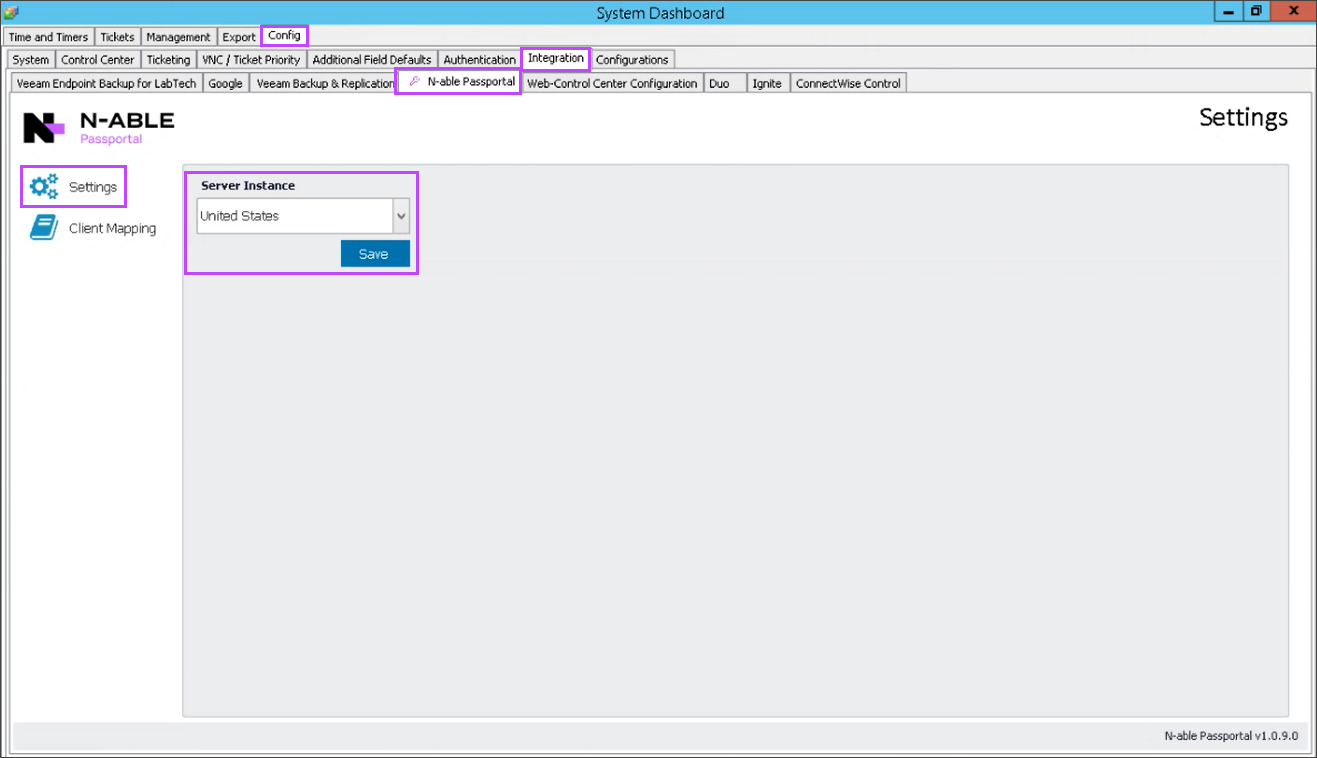
- Navigate to the System Dashboard > Config > Integration > N-able Passportal.
- On the Settings screen, select the Server Instance from the drop-down menu
- Select Client Mapping
- Enter your email address, password and What is an Organization key?.
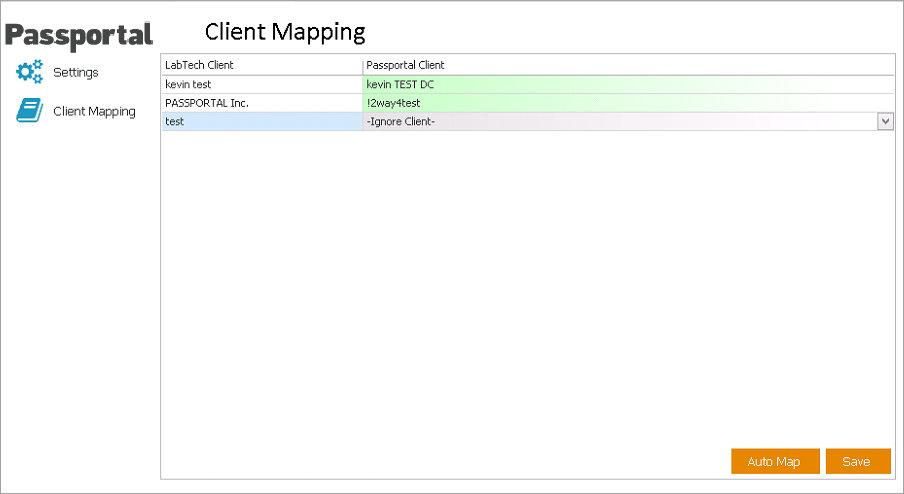
- Assign each client to a Passportal client to create a link. Auto Map will attempt to match Passportal clients based on Client Name.
- Save the client mapping settings and close the window.
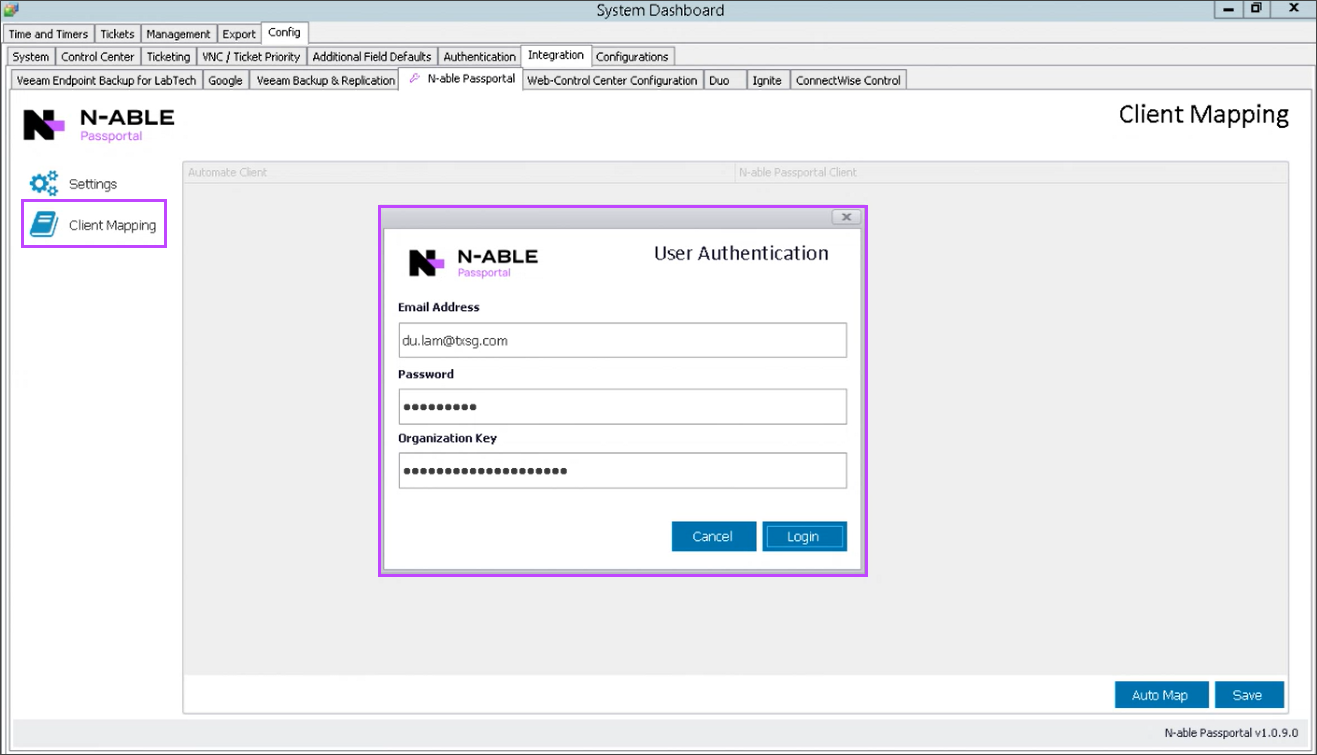
This creates a permanent link between the specified Passportal account and the user account in which you are logged into.
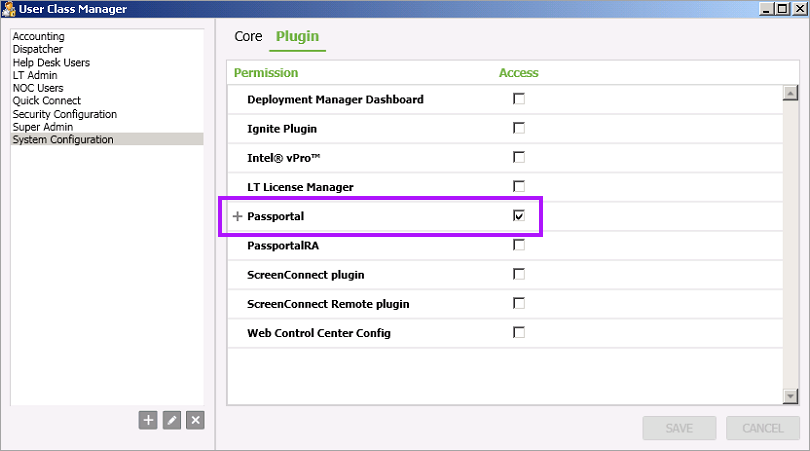
User Class Configuration - Plugin Permissions
To ensure that your users have visibility to the Passportal Plugin, you will need to configure these permissions for each User Class you wish to access the Passportal Plugin.
- Navigate to Tools > User Class Manager.
- Select the User Class which you want to Modify and then select the Plugin Tab/Section.
- Check the Access box alongside Passportal Plugin.
- Expand the Passportal Plugin section and grant access to specific functions within the plugin.
- Close the window.
- Users need to reload the Control Center for these changes to take effect.
- Ensure that you have restarted the Control Center after installing or updating the Passportal Plugin.