
Auvik Integration Configuration
Passportal can integrate with Auvik. Clients and their assets will sync directly into Documentation Manager. This document will describe how to create this integration.
You need to have Documentation Manager enabled in order to integrate with Auvik. Please contact your Account Manager if you are interested in enabling this feature.
Prerequisites
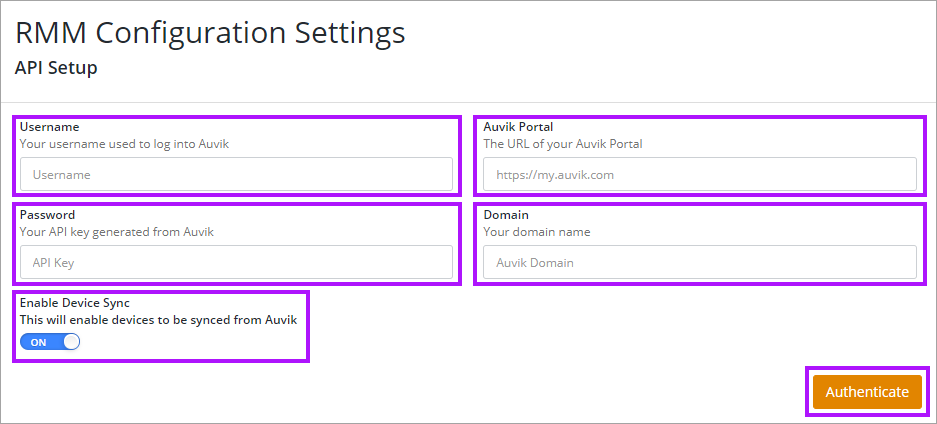
- An AuvikUsername with Inventory Access permissions.
- Your AuvikAPI Key, which can be generated in the profile edit area of Auvik.
- The URL for Auvikwhich is specific to your region. For example: https://us1.my.auvik.com.
- Your Domain name. This can be found next to the API Key location in Auvik.
https://support.auvik.com can assist with the above.
Enabling Auvik Integration
- Navigate to Integration Center > Configure Integration.
- Select Auvik.
- Enter the Auvik Username, portal URL, API Key and Domain name.
- Select Enable Device Sync to allow your devices within Auvik to be synchronized as assets within Passportal (if required).
- Click Authenticate.
- If you receive the error "Oops. Full authentication is required to access this resource", please enter the following command in CMD to verify your account has appropriate access to the API - Where EMAILADDRESS is replaced with your email in Auvik and APIKEY is replaced with your API Key.
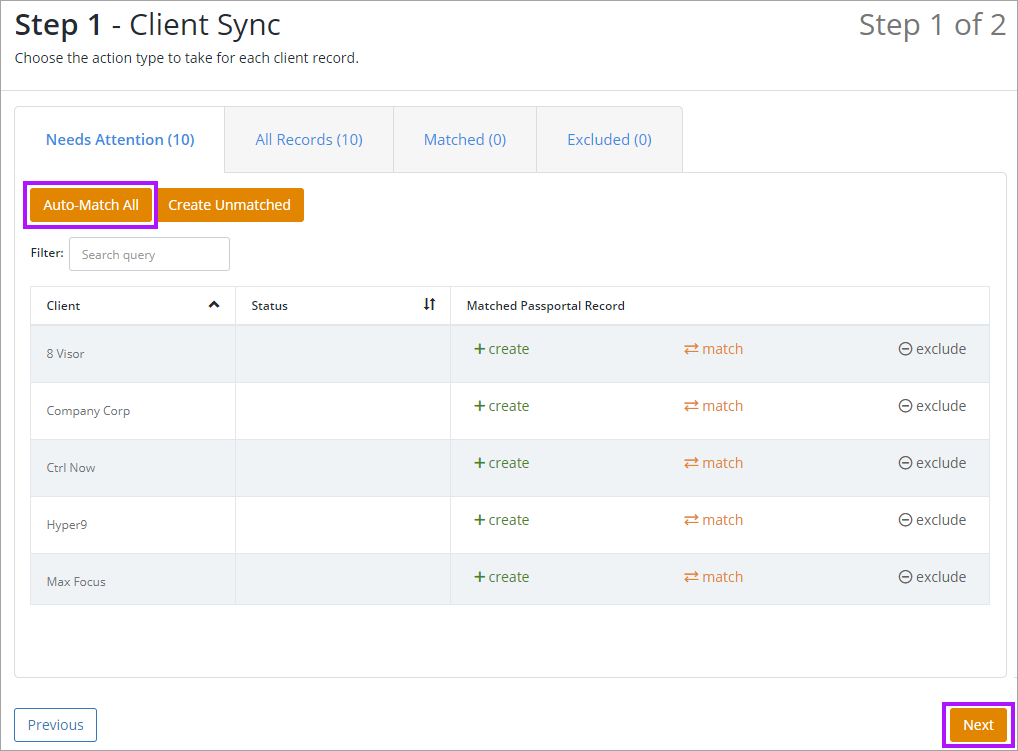
- If Device Sync had been enabled in the previous steps, the Client Sync screen is now displayed. Passportal will attempt to match all existing clients set up with their corresponding Auvik clients, to ensure duplicates are not created - Clients must have identical names for this to work - Select Auto-Match All to start this process.
- If you would prefer to manually match the clients, you can also do this by clicking on Match in the Matched Passportal Record column and clicking on the corresponding client in the drop-down.
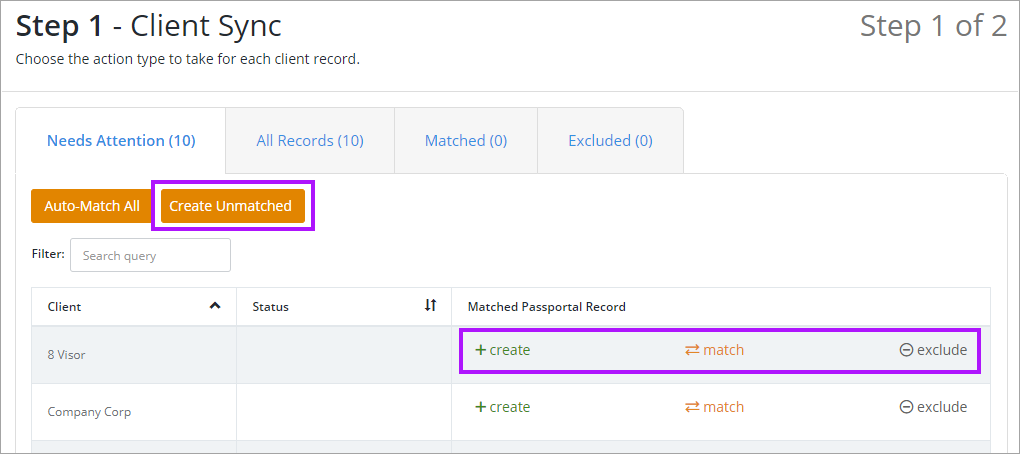
- For the remainder of the clients select either the Create or Exclude buttons in the Matched Passportal Record column. If you have a large list you can just exclude the clients you don't want and select the Create Unmatched button to create the remaining clients.
- If you excluded a client that you would like to later add, simply select the Excluded tab and select Create or Match.
- You will be able to revisit this page after the initial setup and change any of the settings or create any clients you had previously left uncreated. Click Next to continue.
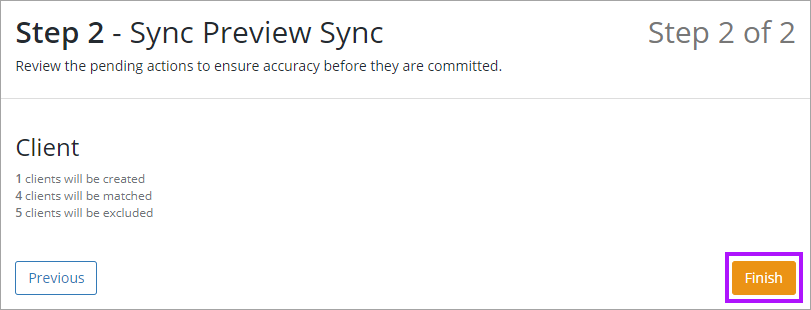
- The Sync Preview Sync screen is displayed, which is an overview of records to be created, matched, or excluded.
- Review to ensure the expected actions will be taken. Click Finish to complete the integration process.

curl -I -u EMAILADDRESS:APIKEY https://auvikapi.us1.my.auvik.com/authentication/verify
Once you have completed the process, it may take some time to allow the initial synchronization of assets to occur. Depending on the number of devices, this can take several hours. New devices are currently synchronized once per day during the evening.