Client Overview Dashboard (N-able Passportal + Documentation Manager)
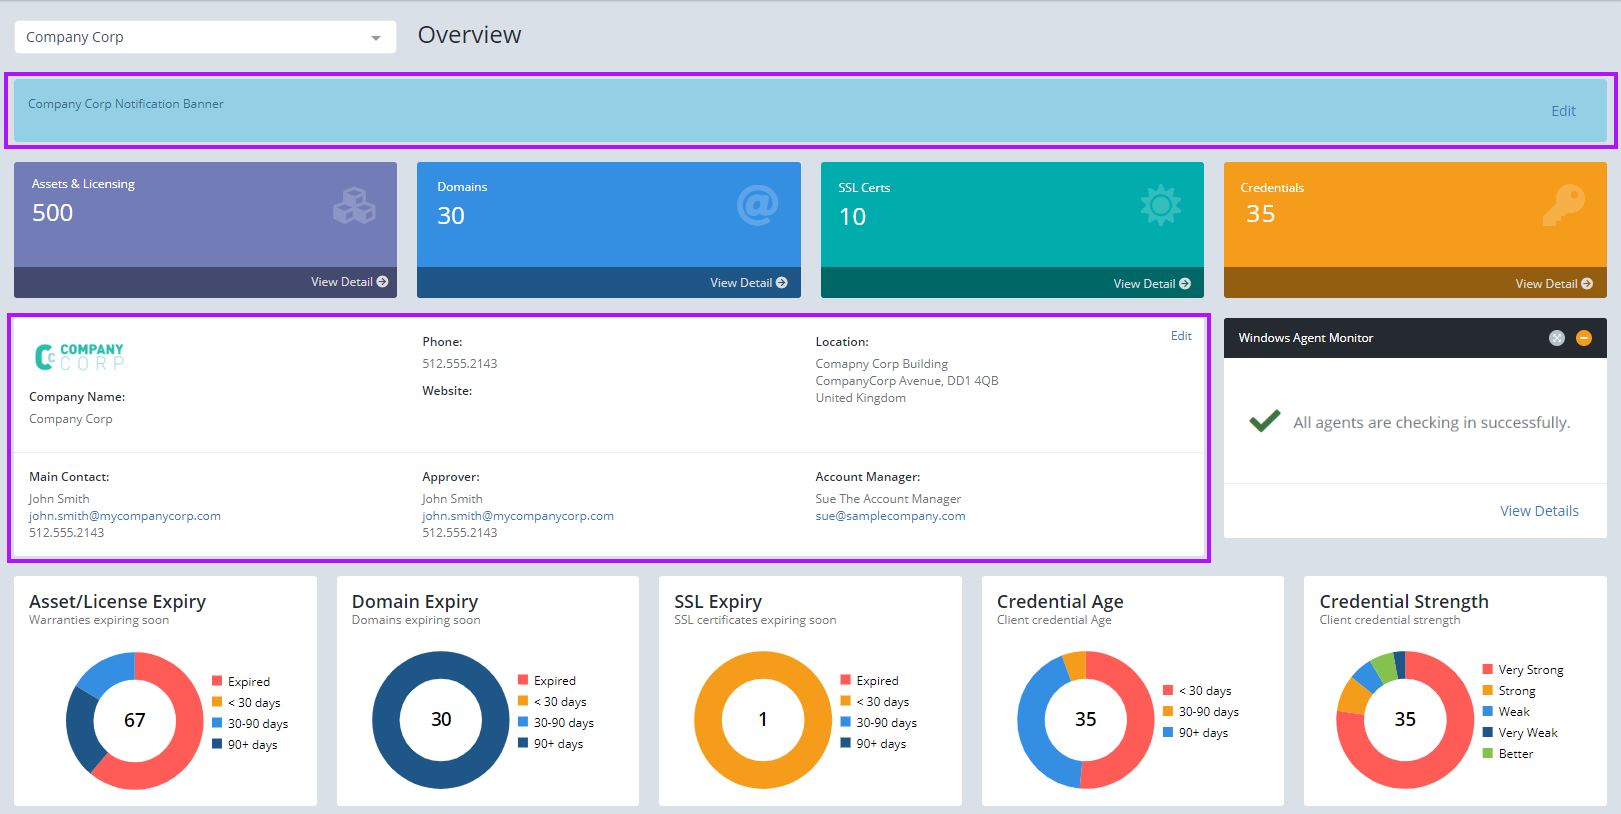
The Client Overview is only available if you have Passportal + Documentation Manager. It shows you at a glance the overall state of the clients credentials and various other aspects such as license expiry. Each section is clearly labeled and will give access to the specifics when clicked on.
The Notification banner and Client overview panel require certain permissions enabled in your profile to Edit. If you cannot see the Edit link in either, speak with your administrator who can enable these permissions.
Managing client overview panels
Notification banner
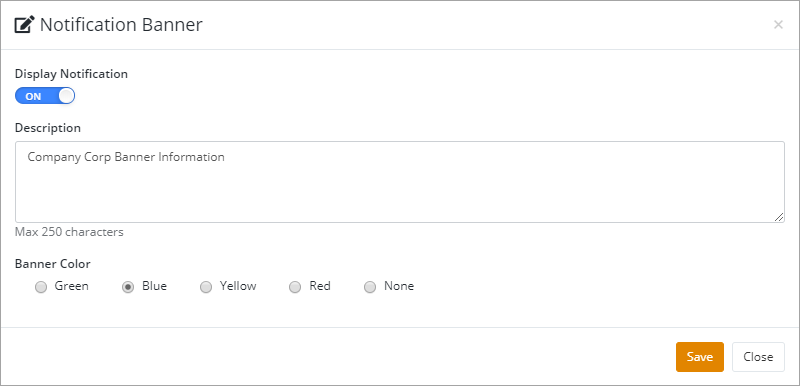
The banner at the top of the screen can be edited to contain pertinent information to that client, such as a warning not to call at certain times of the day for example. The banner color can also be set from the edit screen. To edit the banner, follow the below directions:
- Log into Passportal.
- Navigate to the required client.
- Select Edit in the banner.
- Enable the banner display by setting the toggle option to ON.
- Type the banner message in the Description box.
- Select the required color radio button.
- Click Save.
Client overview panel
- Log into Passportal.
- Navigate to the required client.
- Select Edit in the Client Overview Panel.
- Enter the required information in the appropriate fields.
- Select Save.
Ensure that appropriate information has been saved for that client as:
- The Website detail must be selected from an already stored Domain.
- The Location detail must be selected from an already stored Location.
- The Main Contact, Approver and Account Manager details must be selected from already stored Contacts.
Client search
On the top right of Client Overview screen, you will find a Client specific search field. This allows you to search within the Client that you are currently viewing, rather than searching all clients. This search tool also appears in the same location in the Credentials, Articles and Documents views. You can also limit the search within the client to only Credentials, Articles or Documents by clicking the drop-down menu and selecting the required filter.


