Secondary Domain Controller Manual Setup Instructions
If you have opted to not auto-install the Passportal Secondary DC Agents, or are only installing on selected Secondary DC's - you will need to manually install the Passportal Secondary DC Agent on each Secondary DC manually.
Prerequisites
- 64-bit
- Dual Core CPU
- 4-6GB RAM
- 30-40GB Storage Space
- Windows Server 2012R2 and newer promoted to a Domain Controller (i.e. has the FSMO roles RID, PDC and Infrastructure)
- Windows Server Core is NOT currently supported at this time as the OS GUI is required to facilitate authentication
- Domain Admin access on Domain Controller
- Supports TLS 1.2 or higher. More information on which versions of windows server support which TLS protocols can be found in this article.
- C++ 2015 Redistributable (64-bit version) and .NET 4.5 installed on target device.
- Outbound FTP Endpoint: agent.passportalmsp.com port 21 should be enabled (Optional)
- Ports 7771 and 7777 open for internal network communuications
- Port 443 (TLS) for communications with the Passportal dashboard
Should you prefer a 'headless' installation not requiring the server GUI, please raise a Feature Request via the N-ableMe
For clarification on the Windows Agent settings, see Active Directory and Entra ID Integration.
Terminology
We refer to Primary and Secondary DC's throughout the installation procedure.
The Primary DC is one of your own choosing (that meets the required Prerequisites above) where you will install the Primary Passportal Agent.
Any Secondary DC's are where you will install the Secondary Passportal Agents.
You will require a copy of PassportalSetup64.exe which was downloaded with the Windows Agent on the Primary DC, and an individual install command to run on each individual Secondary DC. The below instructions detail how to generate the install command and how to manually install on Secondary DCs.
To manually install the Secondary DC Agent:
Initial steps are taken on the Primary DC
- On the Primary DC launch the Passportal Agent Configuration Utility (either from the desktop shortcut or via
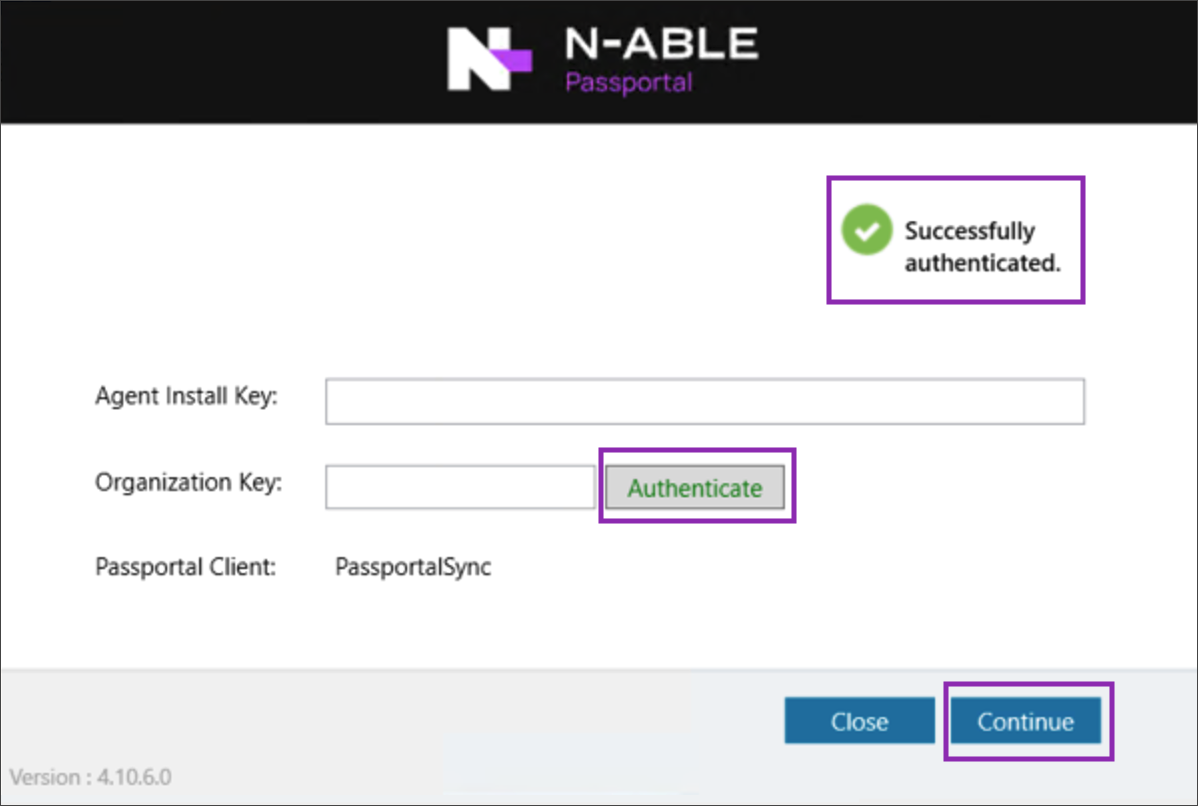
C:\Program Files\n-able\Passportal Agent. - Enter your login details, select the appropriate Country and Client and then click Continue.
- Enter the Windows Service Account Login credential and the Password (these can be retrieved from the Client Credentials in Passportal if needed), and then click Secondary DC Install.
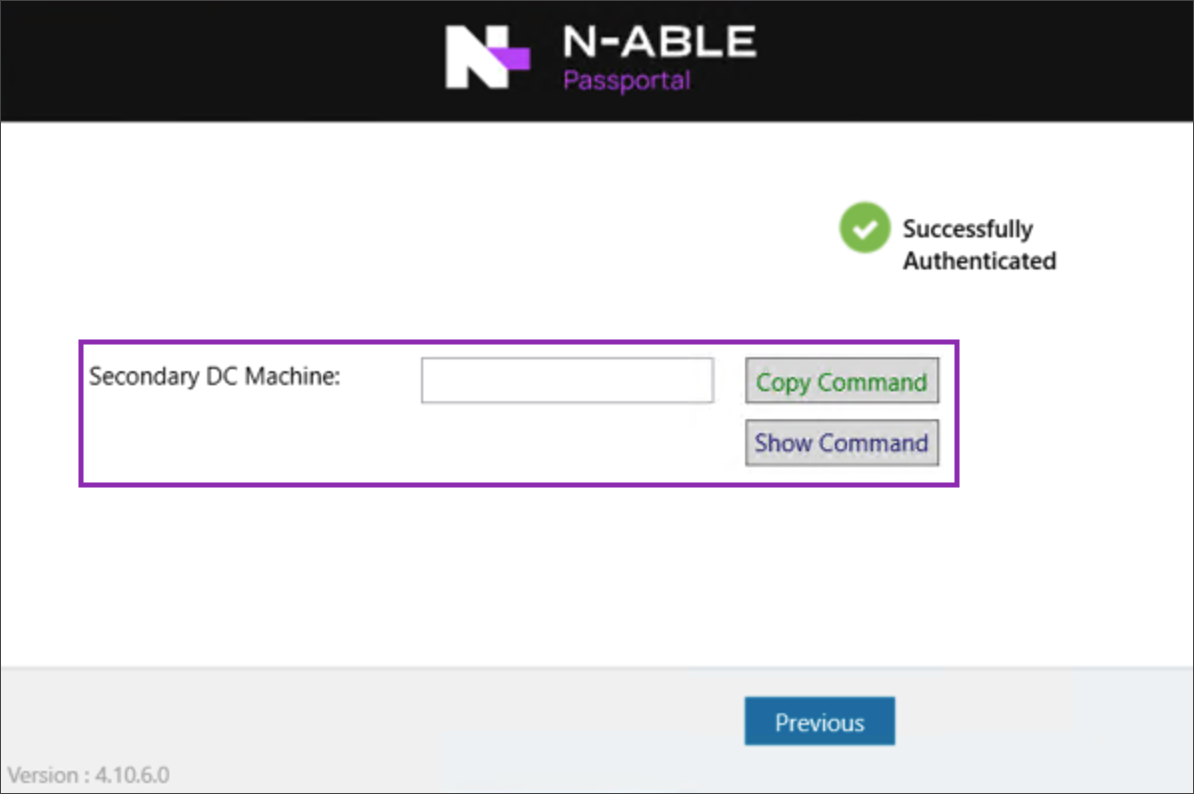
- The Passportal Agent Configuration Utility will take a few moments to confirm the credentials, and then the window will refresh to show the Secondary DC install command configuration.
- Enter the name of the Secondary DC Machine (Do not use it's IP Address), and click View Command - The install command will be copied to clipboard as it contains sensitive data such as passwords and domain credentials. We recommending saving this temporarily in a
*.txtfile to aid the installation process on the Secondary DC. Here is an example of the command with sensitive information redacted: - Copy the
PassportalSetup64.exeto a local folder on the Secondary DC, along with the command that was generated in Step 5. - Open a Command Prompt window, with Administrator rights (i.e. Open as Administrator).
- Change directory to the directory where you have stored the
PassportalSetup64.exe. - Execute the command created in step 5. The installation will proceed, with progress and any errors shown in the Command Prompt window.
- Once installed, the Secondary DC will need to be rebooted to allow 2-way sync to function, but does not need to be done immediately and can be done at your earliest convenience.
- Repeat from Step 1 for each Secondary DC.
PassportalSetup64.exe /s /v" /qn ISPRIMARY=False TARGETDIR=\"c:\Program Files\N-able\Passportal Agent\" ORGKEY=\"********\" DOMAIN=PPTEST.LOCAL PRIMARYIP=******** PRIMARYPORT=7771 SHAREDKEY=XXXXXXXXXXXXXXXXXXXXXXXXXXXXX SECONDARYID=PPTEST2 APIKEYS=\"XXXXXXXXXXXXXXXXXXXXXXXXXXXXXXXXXXXXXXXXXXXXXXXXX"
Now we take actions with each Secondary DC


