
Do not configure the Microsoft 365 sync at the Primary Admin level. See Users & Permissions for information on the different user levels.
Please check the Requirements, Limitations and What is configured during sync, so that you are fully aware of the feature before beginning.
- Log in as an Admin level user, via the securemail.management link
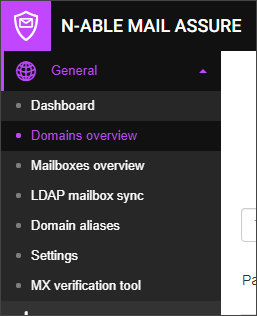
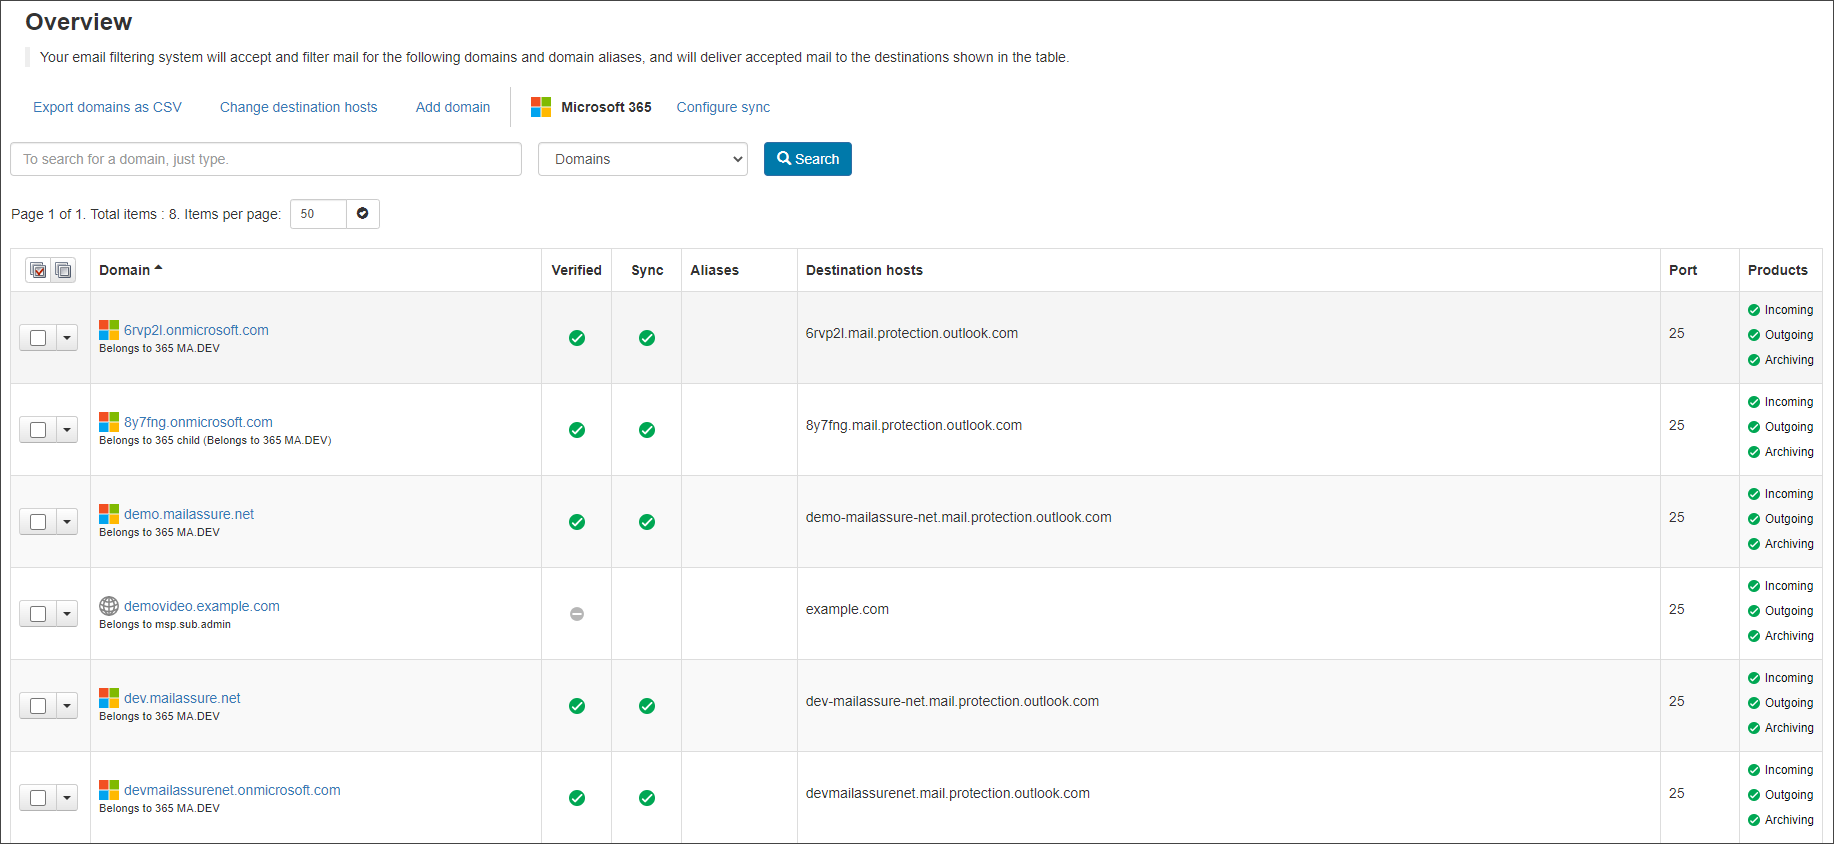
- Using the side menu on the left of the page, navigate to General > Domains Overview
- Select Microsoft 365 Configure Sync which can be found just below the page description

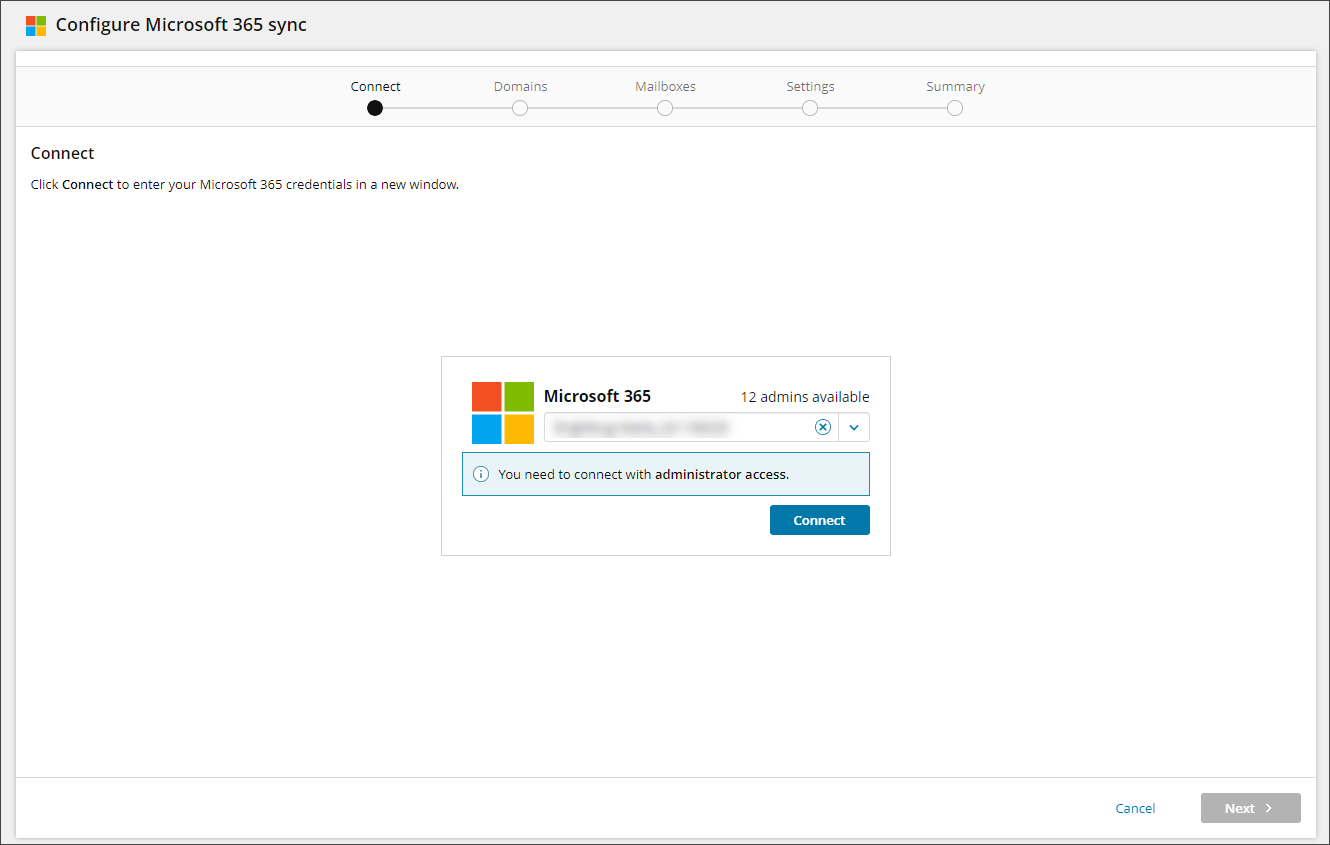
You will now be taken to the Configure Microsoft 365 Sync wizard.
- Select an existing Admin to associate the new Domain(s) to using dropdown or create a new Admin user by typing the new Admin name in the free text box, then selecting it from the dropdown list
It is our recommendation to create separate Admin accounts per Microsoft Tenant to allow for more specific configuration after the domains are added to Mail Assure
- Click Connect on the wizard
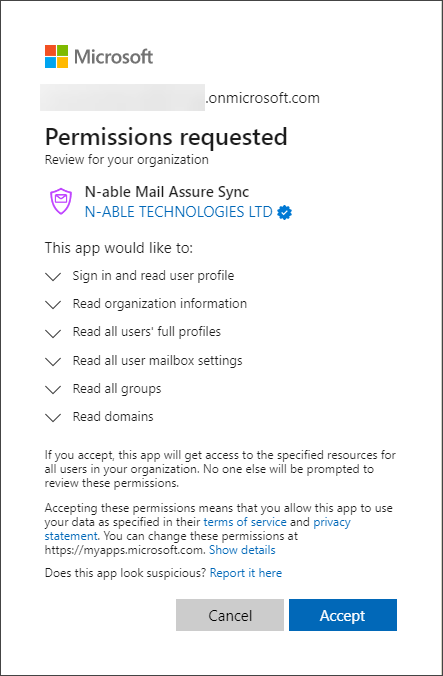
Ensure your browser is configured to allow pop-ups from Mail Assure before clicking on Connect in the wizard as you will need to authenticate to Microsoft 365 via a pop-up window for security purposes.
- Log in to your Microsoft 365 Global Administrator account
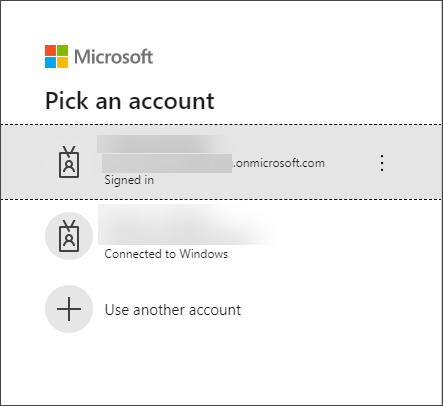
- Accept the permissions for the Mail AssureMicrosoft 365 sync. This connection is to allow the wizard to collect the domain and mailbox information
If you check Mail Assure at this time, you will see that Microsoft is processing the connection with a page that looks like the below:
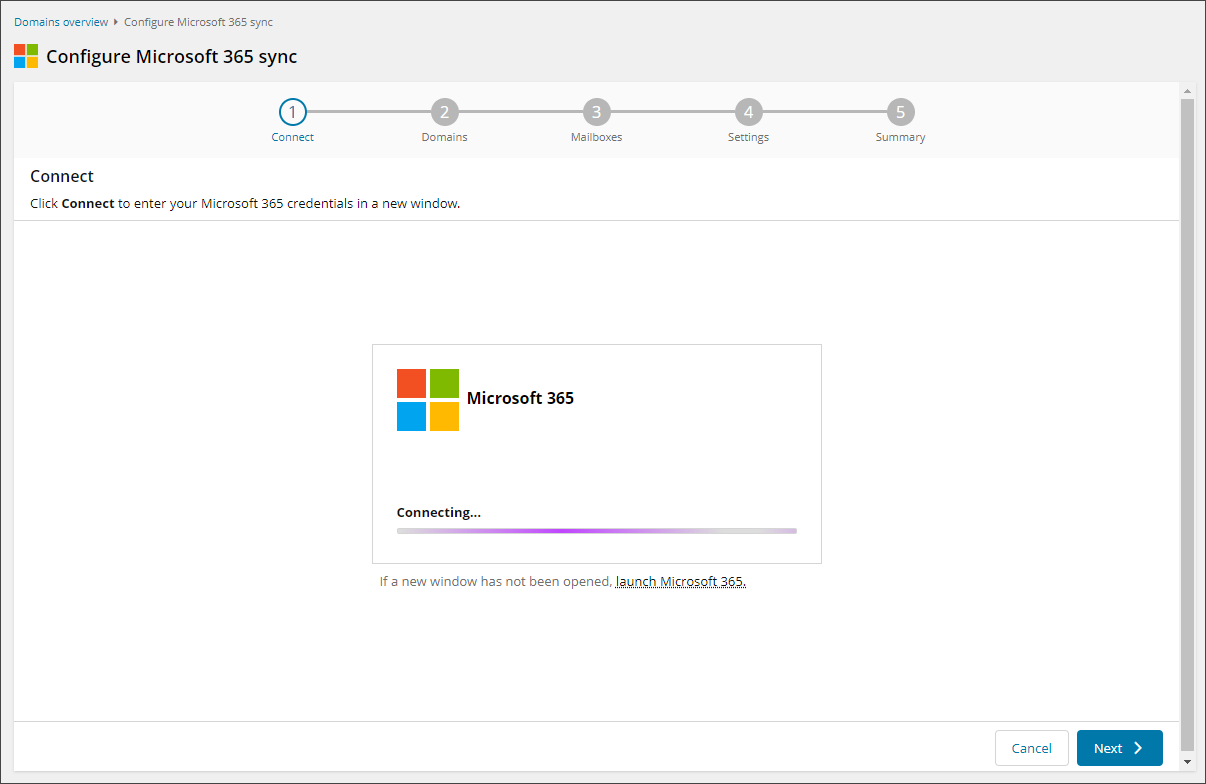
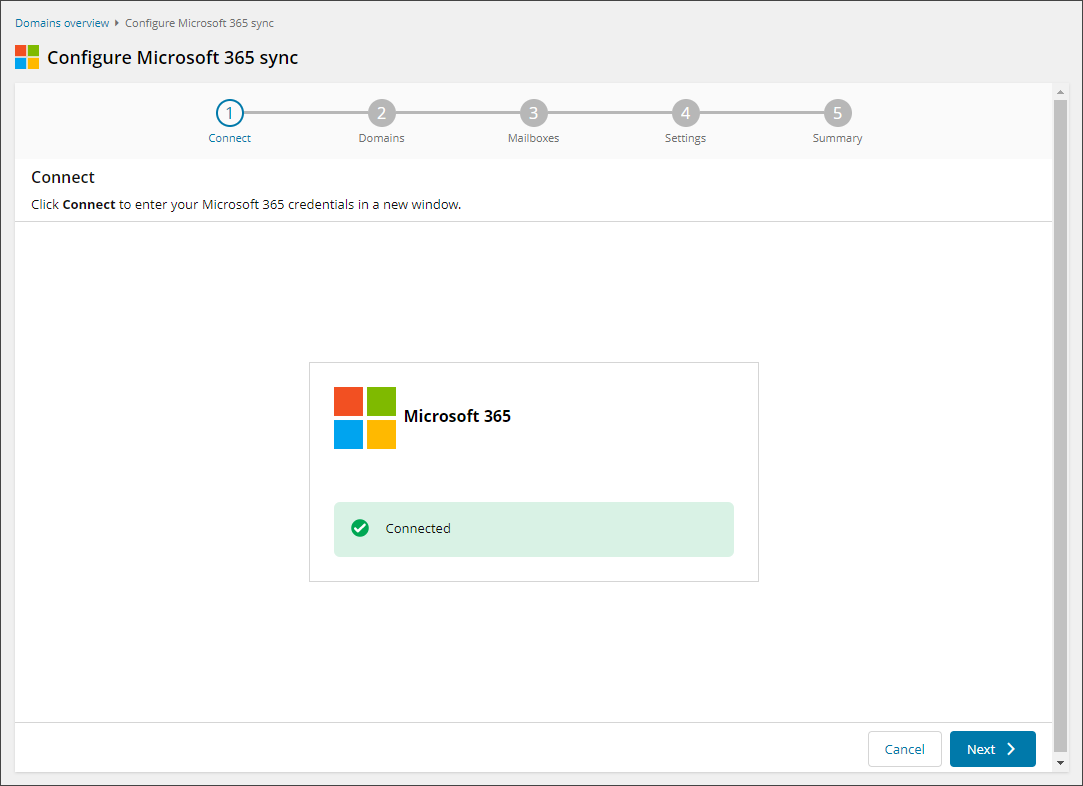
- Once you see the wizard has connected, click Next
- Select the domain(s) you wish to configure through the Microsoft 365 sync
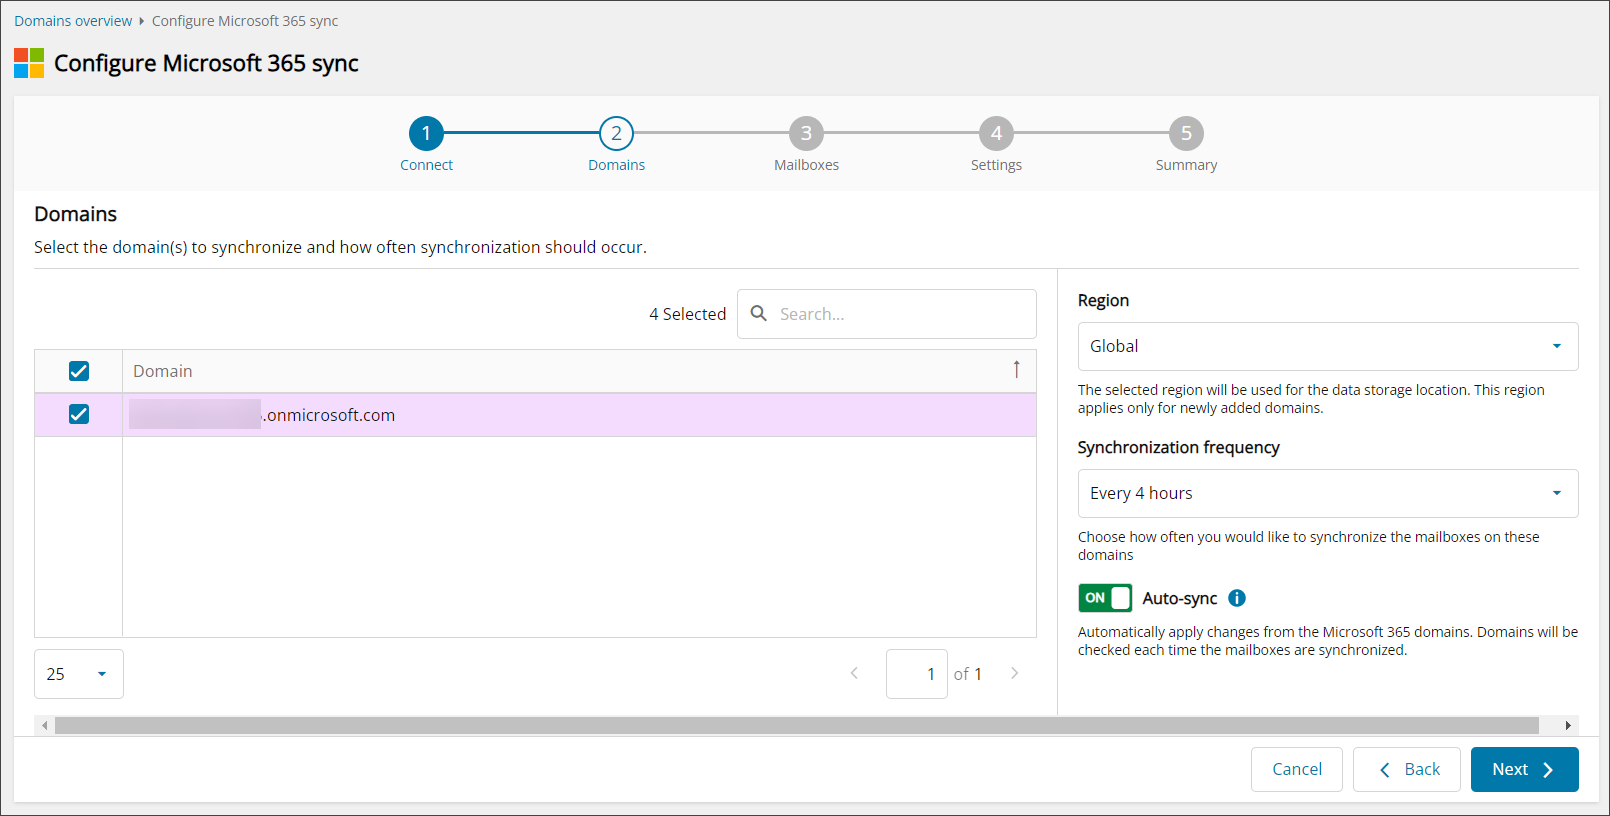
- Select the Region for the storage location
The region selected will be used for the data storage location and applies only to newly added domains.
- Select the synchronization frequency
The frequency times you may choose from are:
- Every hour
- Every 4 hours (default)
- Every 12 hours
- Every day
- Every week
- Enable Sync all Microsoft 365 domains to automatically include any other current or future Microsoft 365 domains in the Sync (default is off)
- Click Next
- Select the Mailbox(es) you wish to sync and click Next
Use the checkbox in the header row to select all mailboxes, or select individual mailboxes by placing a tick in each checkbox.
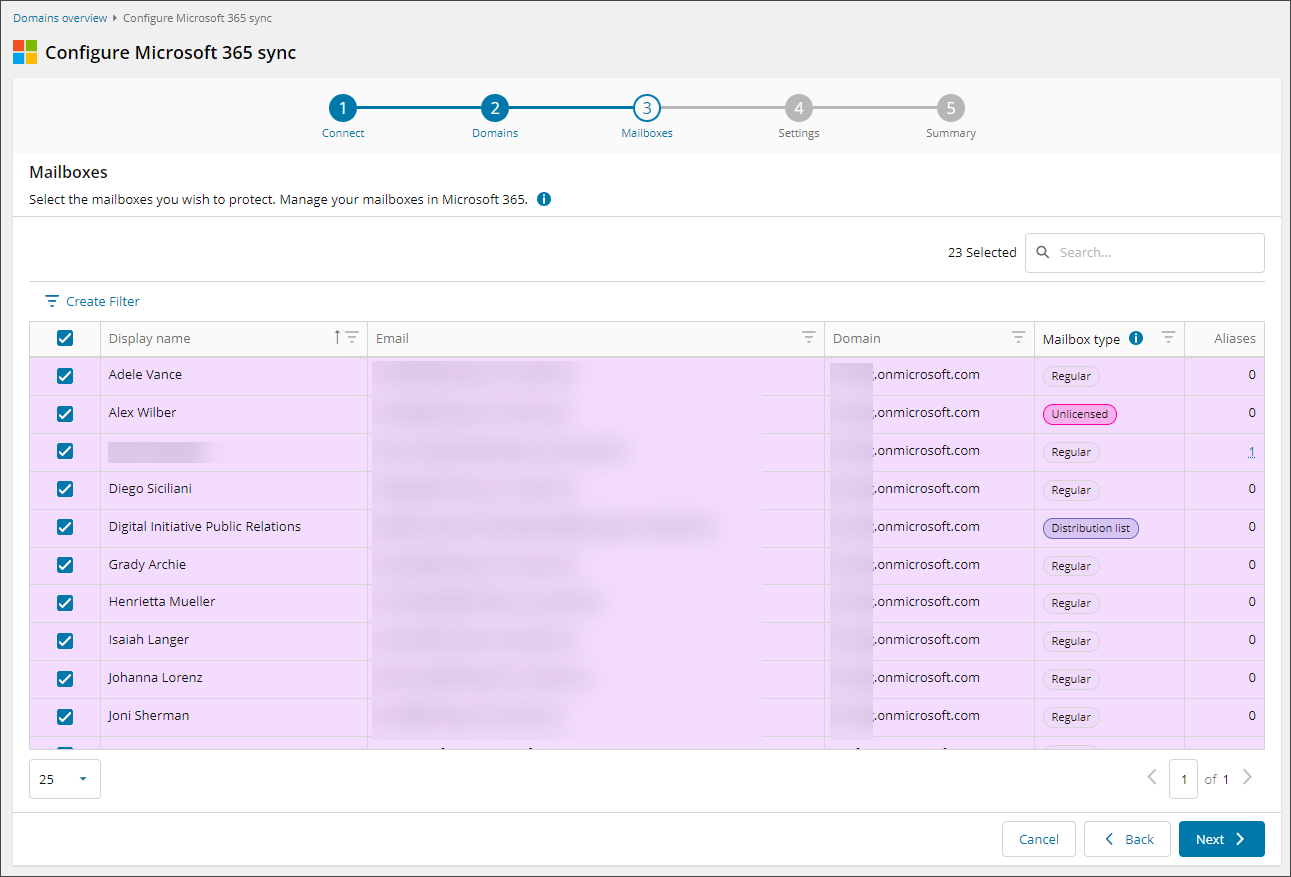
Non UTF-8 mailboxes cannot be added to Mail Assure
Though the Mailbox Type is always detected, due to a display limitation if the mailbox count exceeds 1000, the Mailbox Type column will not be displayed.
- Set the configuration for all the selected mailbox(es)
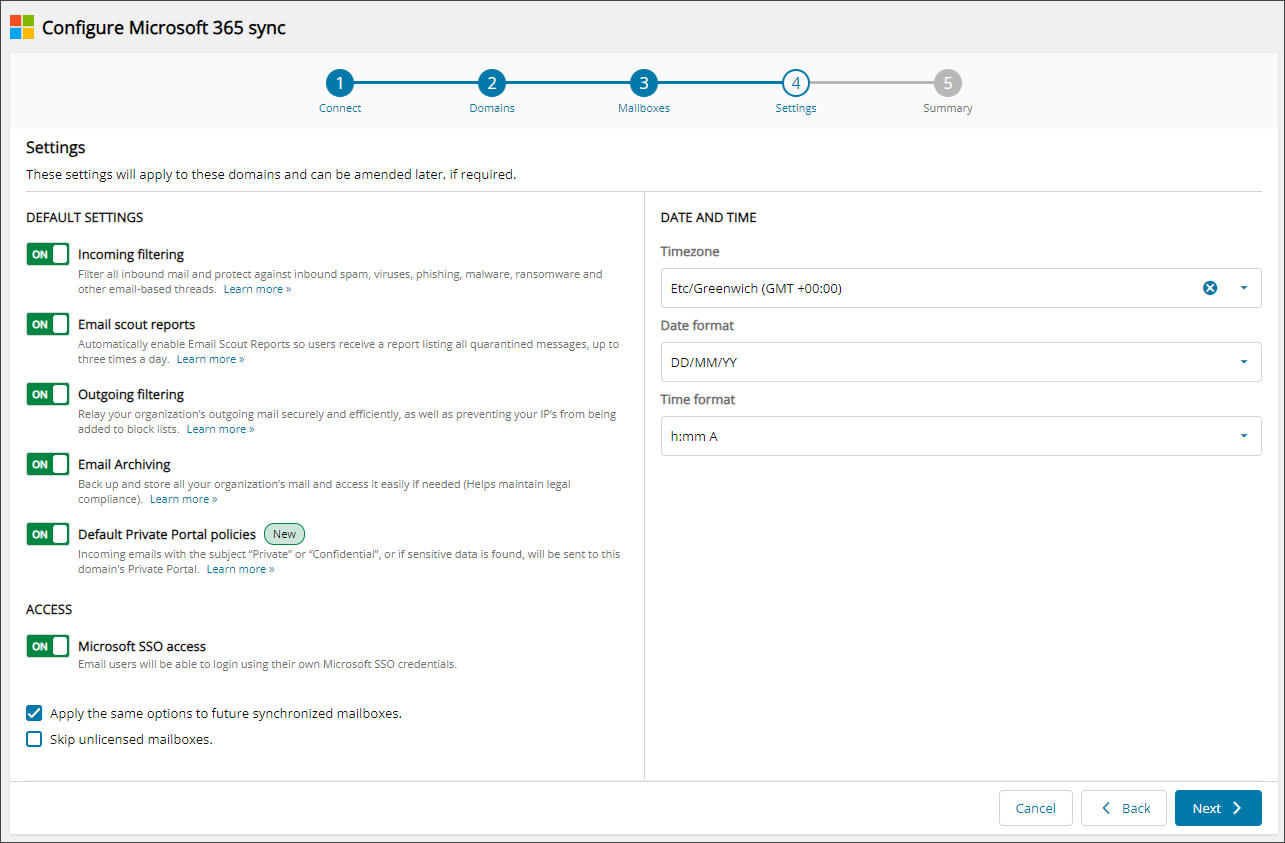
In here you can:
- Incoming Filtering - If enabled, all inbound email will be filtered
- Email Scout Reports - If enabled, Email Scout Reports will be automatically enabled so that they are sent to each recipient in your domain, up to 3 times a day
- Outgoing Filtering - If enabled, all outbound email will be filtered
- Email archiving - If enabled, a backup of all your organizations mail will be taken
- Default Private Portal Policies - If enabled, four policies will be created automatically every time the sync runs, to send emails that match the criteria to the Private Portal:
- Messages where the subject contains 'Private'
- Messages where the subject contains 'Confidential'
- Messages where the subject contains banking information
- Messages where the subject contains the padlock emoji (unicode character "U+1f512", or shortcodes ":lock:", "(locked)" or ":locked:")
Please check with your provider for how to add this
If enabled, the default Private Portal policies will apply to all the domains from the admin configuring Microsoft 365 sync process. If this admin also manages domains which are not part of Microsoft 365 sync process, the default Private Portal policies will also be applied to these domains. Therefore, we strongly recommend having different admins for the domains managed with and without Microsoft 365 sync.
- Microsoft SSO access - If enabled, email users will be able to log in using their own Microsoft SSO credentials
If Private Label (Branding) not enabled for the Domain's parent Admin (see Step #4), Microsoft SSO access will not be available for any user belonging to these Domains
- Apply the same options to future synchronized mailboxes - If enabled, all future mailboxes on the domain(s) added through the Microsoft 365 sync will have the same settings as configured here
- Skip unlicensed mailboxes - If enabled, all unlicensed mailboxes on the Microsoft 365 domain(s) added via the sync will be skipped and will not be added to Mail Assure
- Overwrite existing mailbox settings - If enabled, any manual configurations to mailboxes will be overwritten with the current sync settings
This setting is relevant only to the current manual run of the sync, and is not applied to any future auto synchronizations
- Date and Time -
- Timezone - Set the timezone the domain is based in
Automatically detected from the browser, but can be changed here
- Date format - Select a date format
- Time Format - Select a time format
Email Scout Reports for the Inbound and Outbound email flow are scheduled based on the above settings
- Timezone - Set the timezone the domain is based in
- Click Next
- Review your settings in the summary page and click Confirm. Here you will see a breakdown of the number of each mailbox type selected, the number of domains found and how many of these were selected, and all of the synchronization and configuration settings selected
If any changes are required, you can navigate back to the part of the wizard required by either clicking the breadcrumbs along the top of the screen, or Edit beside the specific section.
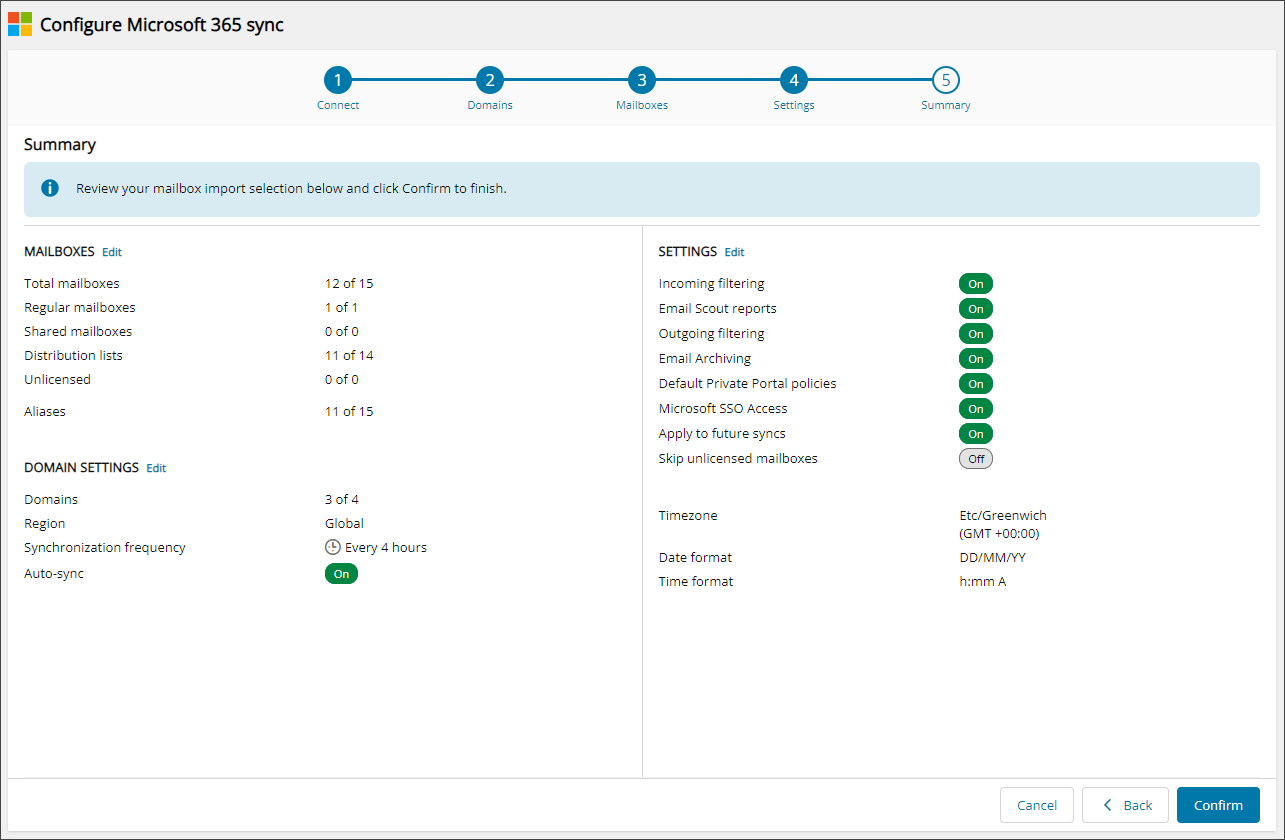
Due to a display limitation, if the mailbox count exceeds 1000, the Mailboxes section will not display the breakdown of Mailbox Type.
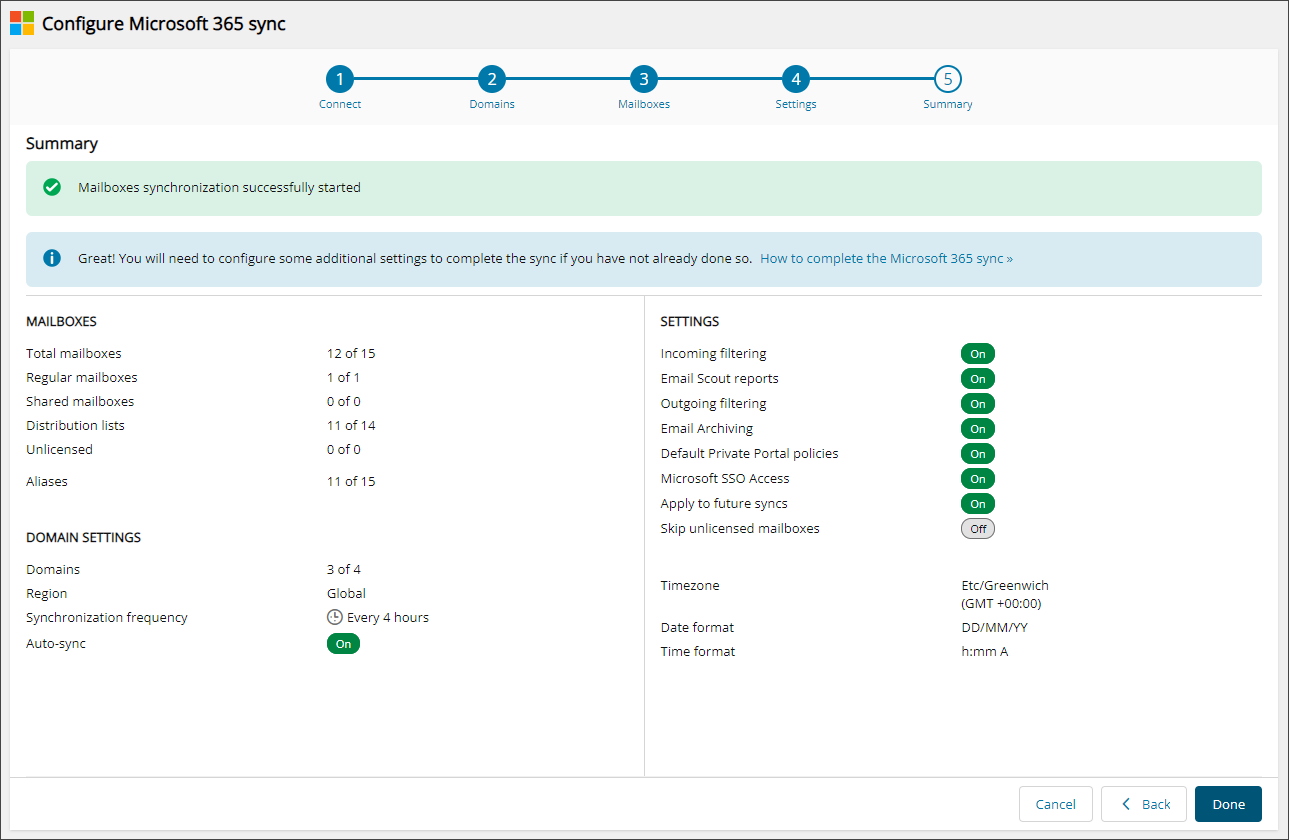
- Once confirmed, you will see the banner will change to say Mailboxes synchronization successfully started and you may now close the wizard
Due to a display limitation, if the mailbox count exceeds 1000, the Mailboxes section will not display the breakdown of Mailbox Type.
Syncing the onmicrosoft.com domain is strongly encouraged. It is used by Microsoft for email addresses and groups email aliases. If you deselect this here, a warning notification will be displayed to advise.
Once the wizard is closed, the Domains Overview page will refresh and you will see the domains added during the Microsoft 365 sync now showing in your list.
There may be a slight delay with population of the Domains and Mailboxes.
Next Steps
After completing the above configuration, you will need to apply several further changes outside the Microsoft 365 sync both in and outside of Mail Assure in order to ensure that mail filtering and archiving services (where applicable) are configured correctly. See our Next Steps section for these details.
When checking the Mailboxes list from Mailboxes Overview, you will find all Microsoft 365 mailboxes. The mailboxes that were selected during sync will show the selected services are enabled. Any that were not selected through the sync will show the services set to No.
The Columns to be Displayed dropdown can be used to display all the service columns to confirm the services selected during the sync.
