Step 1: Check your Domain can Communicate with the Google Workspace Mail Servers
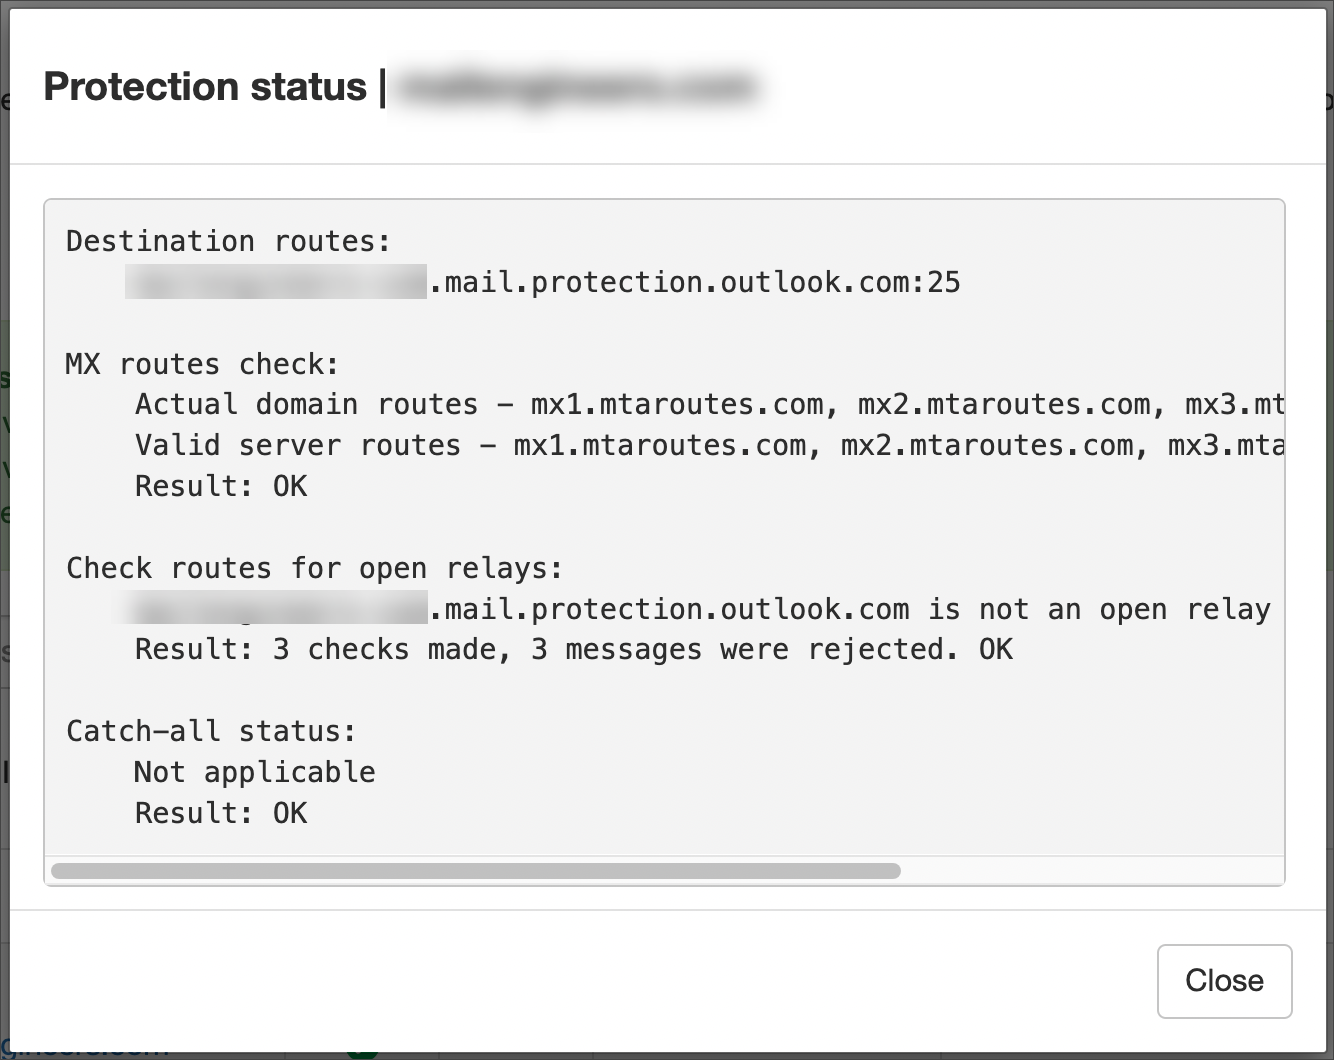
To ensure Mail Assure can communicate with the mail server, carry out a Protection status check:
- Login to Mail Assure as an Admin Level user
- Navigate toGeneral > Domains Overview to display all your domains
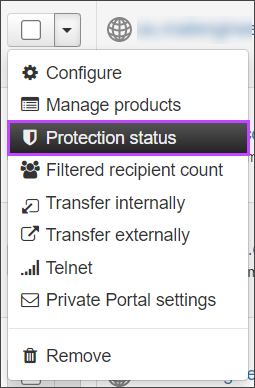
- Click on the dropdown alongside the domain you want to check
- Select Protection status to check the routes you have set:
The Protection status dialog should display connection details. If connection failed, a series of 'Connection timed out' responses are displayed.
Step 2: Set the Outgoing User
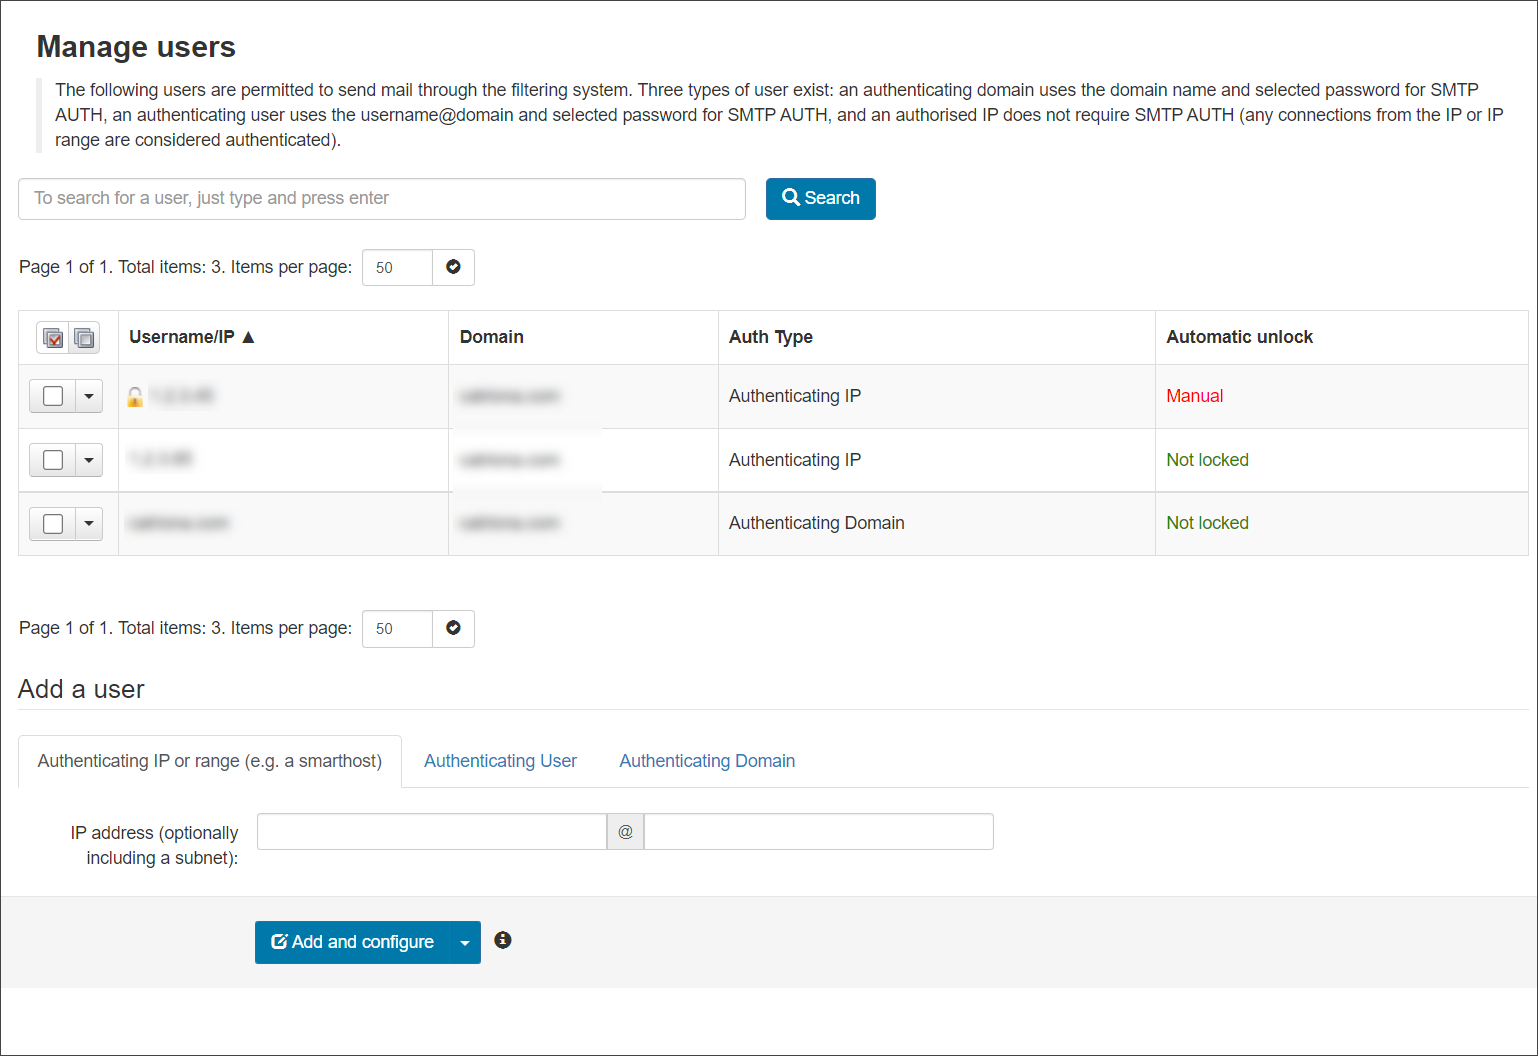
- When logged in to the Domain level Control Panel, click on Outgoing > Manage users
- In the Add a user panel, choose Authenticating Domain
- Enter the details and click on Add or Add & Configure (by selecting the arrow beside Add and clicking Add & Configure)
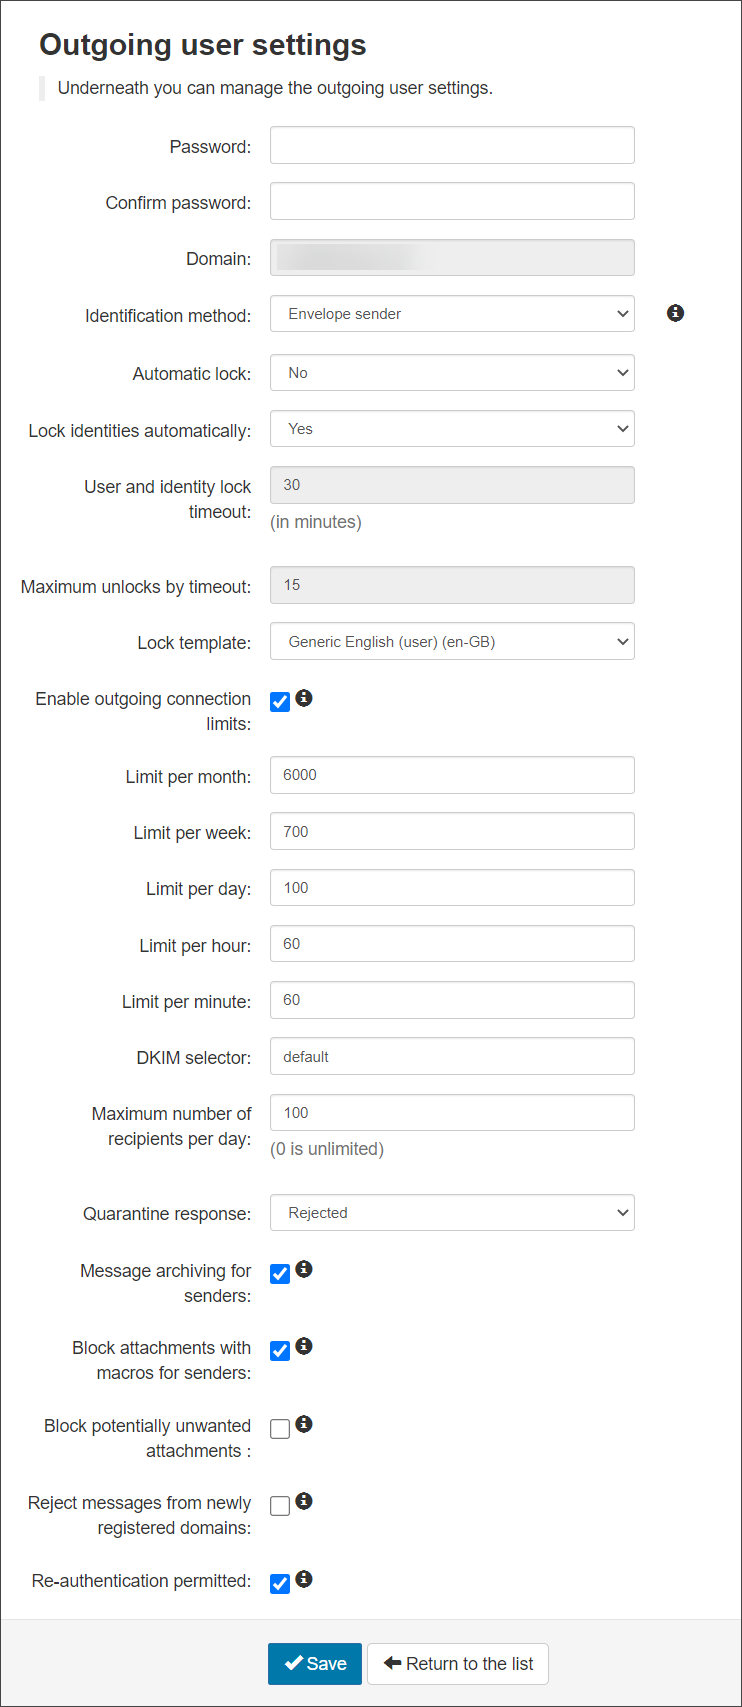
- Configure the user settings as required:
- Password - Create or change the password for the authenticating domain
This password is unique to the Authenticating Domain user and is not tied to any other user credentials. This password can be anything you please.
- Confirm Password - Confirm the password
- Identification Method - Choose from: “envelope sender”, “authentication user” or “Header” as the identification method:
Envelope Sender Use this if your system enforces the “envelope sender” (or MAIL FROM value). This is typically used by Mail Assure users. Authentication User The outgoing user’s authentication details. This is the best choice when you are providing unique usernames and passwords for each outgoing user, rather than using a smarthost system. Header If you choose this option, you are able to add any number of identification headers that we should search for in the message. For example, you might have a system that adds an “X-Client-ID” header, which uniquely identifies each of your end users. For each header, you may choose to either use the entire header value as the identity, or you can provide a regular expression that extracts out a part of the value to use. You may also choose to have our software remove the header after we have found the identity, if you don’t want this to be available to the recipient of the message.
We strongly recommend that an identity Header is set for all outgoing traffic. This makes monitoring and taking action against spammers much easier.
- Automatic lock - When enabled, and when the system detects that the user has sent approx 5 spam messages in 10 minutes, the user will be locked automatically. The user cannot send mail until they are unlocked (the administrator can do this from the alert sent or from the Outgoing Users/Authentication Methods page
We recommend that you do not enable the Automatic lock if you are using IP authentication within a smarthost.
- Lock Identities Automatically - This spam prevention, when enabled and the system detects that the identity has sent approx 5 spam messages in 10 minutes, the identity will be locked automatically. The identity cannot send mail until they have been unlocked. The identity can be unlocked from the Manage Identities page
- User and Identity Lock timeout - The amount of time an outgoing user or identity will be unable to send messages. This only applies to if you are using the Automatic User Lock or the Automatic Identity Lock
- Maximum unlocks by timeout - The maximum number of times the user will be automatically unlocked after the time-out value has passed. After this has been depleted, the user will have to be manually unlocked
- Lock Template - Select the email template to be used to inform the user of the lock
- Enable outgoing connection limits - Enable or disable limits on outgoing connections whether spam or not, to prevent bulk mailing
- Limit per month - The amount of outgoing connections that can be opened per month
- Limit per week - The amount of outgoing connections that can be opened per week
- Limit per day - The amount of outgoing connections that can be opened per day
- Limit per hour - The amount of outgoing connections that can be opened per hour
- Limit per minute - The amount of outgoing connections that can be opened per minute
- DKIM Selector- Choose the selector you wish to use at domain level. Use the default or add one that has been generated using the DKIM Certificate Generation tool. Once you have created the certificate you need to add the TXT to your DNS
- Maximum number of recipients per day - The maximum number of recipients the user can send emails to daily
- Quarantine Response – When an outgoing message is detected as spam and it goes into the outgoing quarantine the response you send back to the sender can be Rejected or Accepted. If 'Rejected', legitimate senders will receive a bounce message when their mail gets blocked and quarantined even though the message is stored in the quarantine. If 'Accepted' the SMTP response would be 'Accept’ and the message would still be blocked and shown in the quarantine but the sender will not receive a bounce message and will not know that the message is in the outgoing quarantine
The administrator will be notified that there are messages in the outgoing quarantine in the Abuse Report by entering the Adminstrator's contact email address in the Outgoing > Settings page in the Domain Level Control Panel (see Configure the Abuse Report Address). Alternatively, use the Email Scout Reports to create a schedule report with details of outgoing quarantine content.
Tip - Administrators may use this option to prevent the sender receiving notifications when messages are quarantined. For example, they may want to review a rejected message before releasing it.
- Message archiving for senders - Enabled/Disabled – If enabled, all outgoing messages from the outgoing user will be archived. If this is disabled, no outgoing messages will be archived. See Enable Archiving for Outgoing Mail
- Block attachments with macros for senders - If enabled, any message with a document based attachment that contains any kind of macro will be rejected
- Re-authenticate permitted - If enabled, authorized servers will be able to relay email on behalf of this user.
- Ensure the Re-authentication permitted option is ticked
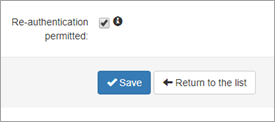
- Click Save to ensure you don't lose any changes
The Outgoing User Settings page is displayed:
Disclaimer: This documentation may contain references to third party software or websites. N-able has no control over third party software or content and is not responsible for the availability, security, or operation, of any third-party software. If you decide to utilize a release involving third-party software, you do so entirely at your own risk and subject to the applicable third party’s terms and conditions of the use of such software. No information obtained by you from N-able or this documentation shall create any warranty for such software.

