The Cloud Management Console is an older desktop-based version of the Management Console. Its supported ended in December 2017.
Installation
Hardware requirements
The hardware requirements are very basic:
- Processor: Intel Pentium dual-core or better
- Memory (RAM): 128 MB
- Hard disk space: 80 MB (Windows), 110 MB (macOS)
- A working Internet connection
Software requirements
You can install the Cloud Management Console on the following operating systems:
- Windows - all versions starting from Windows XP and Windows Server 2003
- macOS - all versions starting from 10.6 Snow Leopard (64-bit)
Installation instructions
On Windows, download the Cloud Management Console and follow the installation wizard.
On macOS, do the following:
- Download the Cloud Management Console
- Open the "Downloads" folder in the Finder
- Drag CloudManagementConsole to "Applications"
The installation is complete. Double-click on the application icon (M) to start the software.
User authorization
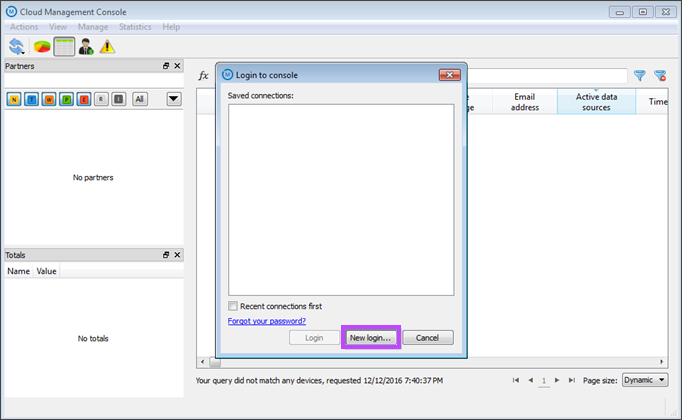
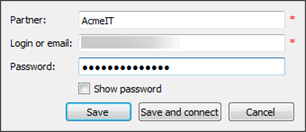
- When you start the Cloud Management Console for the first time, you must log in to your account
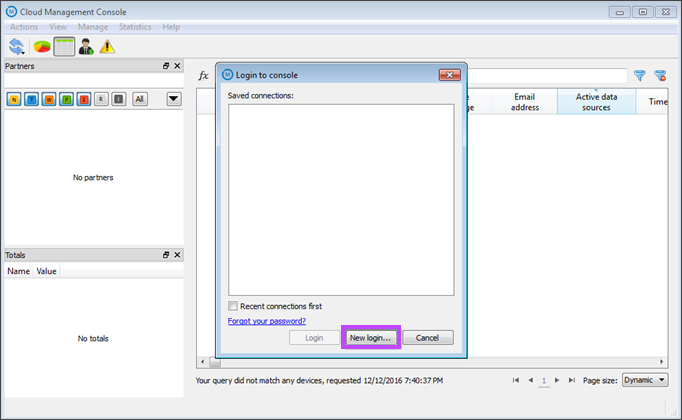
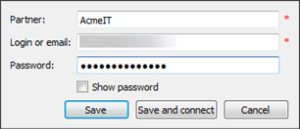
- Click New login and enter your access details:
- Partner – the name of the company you are trying to log in under
- Email – the email address your user account is registered on
- Password – the password for your user account
- Click Save and Connect
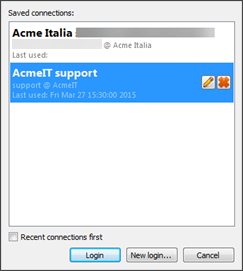
Managing existing connections
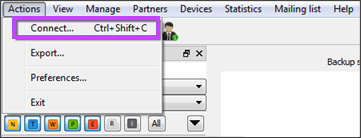
To manage existing connections, choose Actions > Connect from the menu bar at the top.
- To connect as another user, click New login
- To update your account credentials or to remove a connection from the list, click on its name and choose an appropriate option