
Cove Data Protection (Cove)'s Notification service is found in the Management section of Management Console.
Notifications in the form of email alerts can be created for backups failing or completing with errors, or critical configuration changes to the monitored devices.
Backup Status Alert
To add a new backup status alert email notification:
- Sign in to the Management Console using a SuperUser or Administrator account
- Navigate to Management > Notifications
- Click Add Notification
-
Give the notification a recognizable Name
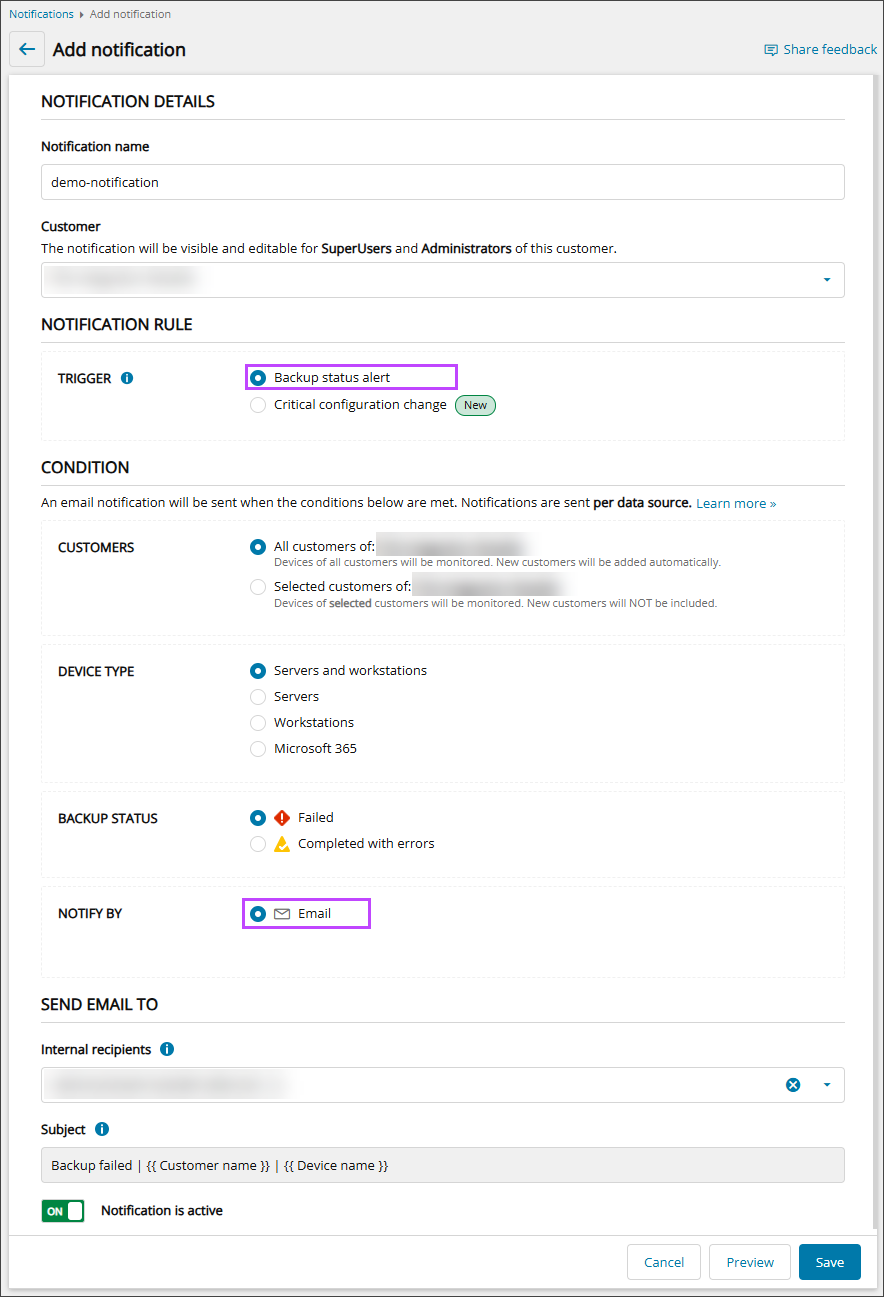
- Select the Customer from the dropdown
- In the Notification Rule section, select Backup status alert. This provides notifications on the status of your servers, workstations, and Microsoft 365 domain backups
- In the Condition section, set the conditions which must be met for an email notification to be sent:
- Customers:
- All Customers - Devices of all customers of the customer selected in step #5 will be monitored
New customers will be added automatically
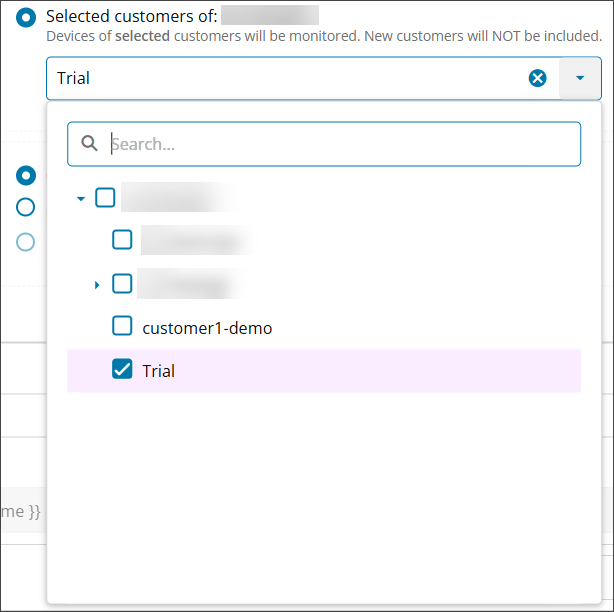
- Selected Customers - Only devices of selected customers of the customer selected in step #5 will be monitored
New customers will not be included automatically
Use the dropdown list to check all Customers whose devices or assets should be monitored for Backup status alerts and Critical configuration changes:
- All Customers - Devices of all customers of the customer selected in step #5 will be monitored
- Device Type:
- Servers and workstations
- Servers
- Workstations
- Microsoft 365
- Backup Status:
- Failed: Send a notification for backups which Failed
- Completed with errors: Send a notification for backups which Completed with Errors
- Notify By: Select Email for the method of notification.
- Customers:
- In the Send Email To section, configure the email settings:
- Internal Recipients: Begin typing or select the recipients who should receive the email notification
Only users belonging to the selected customer will be available to send the notification to
- The email Subject cannot be changed, this will dynamically generate the backup status, customer name and device name when each email is sent
- If the notification should begin monitoring straight away, ensure Notification is Active is On
- Internal Recipients: Begin typing or select the recipients who should receive the email notification
- Click Save before closing the window
Critical Configuration Change
To add a new critical configuration change email alert:
- Sign in to the Management Console using a SuperUser or Administrator account
- Navigate to Management > Notifications
- Click Add Notification
-
Give the notification a recognizable Name
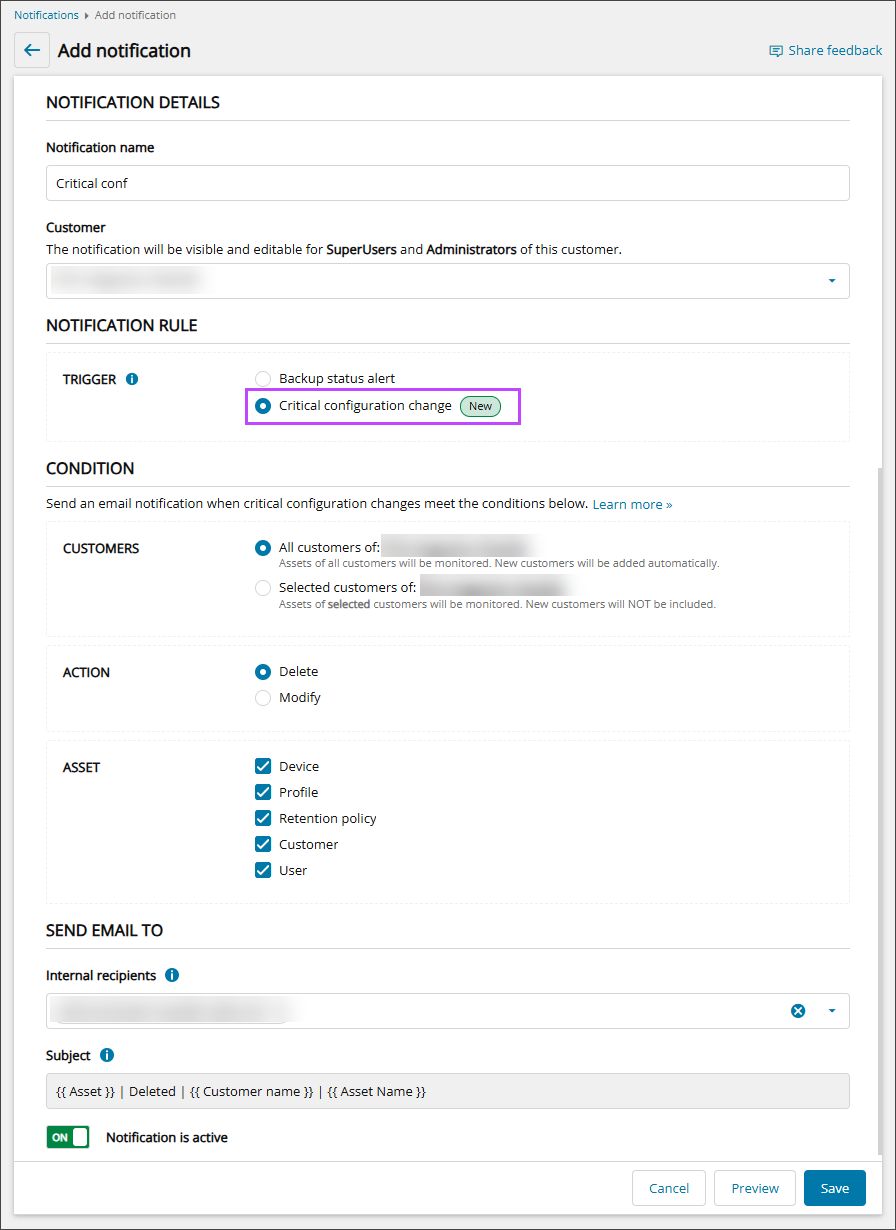
- Select the Customer from the dropdown
- In the Notification Rule section, select Critical configuration change. This provides notifications and alerts you whenever an asset (such as a device or profile) is deleted or modified, allowing you to respond and remediate quickly
- In the Condition section, set the conditions which must be met for an email notification to be sent:
- Customers:
- All Customers - Devices of all customers of the customer selected in step #5 will be monitored
New customers will be added automatically
- Selected Customers - Only devices of selected customers of the customer selected in step #5 will be monitored
New customers will not be included automatically
Use the dropdown list to check all Customers whose devices or assets should be monitored for Backup status alerts and Critical configuration changes:
- All Customers - Devices of all customers of the customer selected in step #5 will be monitored
- Action:
- Delete: notify if the asset selected is deleted
- Modify: notify if the asset selected is modified
- Asset:
- Device
- Profile
- Retention Policy
- Customer
- User
- Customers:
- In the Send Email To section, configure the email settings:
- Begin typing or select the recipients who should receive the notification in the Internal Recipients field
Only users belonging to the selected customer will be available to send the notification to
- The email Subject cannot be changed, this will dynamically generate the asset, action, customer name and asset name when each email is sent
- If the notification should begin monitoring straight away, ensure Notification is Active is On
- Begin typing or select the recipients who should receive the notification in the Internal Recipients field
- Click Save before closing the window