Recovery Locations, the host running the recovery service and processing data restores, can be added, edited, and deleted in the Recovery Locations page of the Management Console. They can be added prior to adding devices to the Standby Image plan, or on the first step of the Enable Standby Image to Hyper-V, Enable Standby Image to Azure and Enable Standby Image to ESXi wizards.
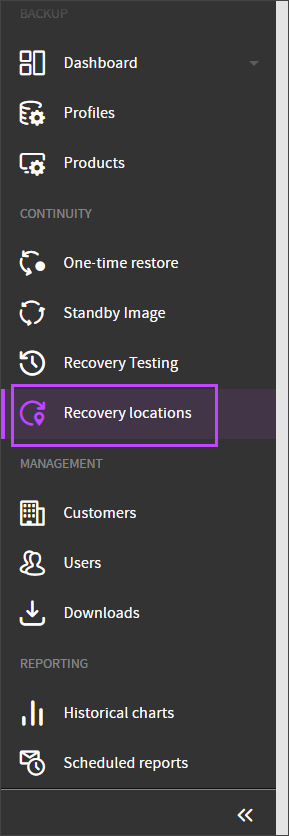
The Recovery Locations page can be found on the Management Console under the Continuity section:
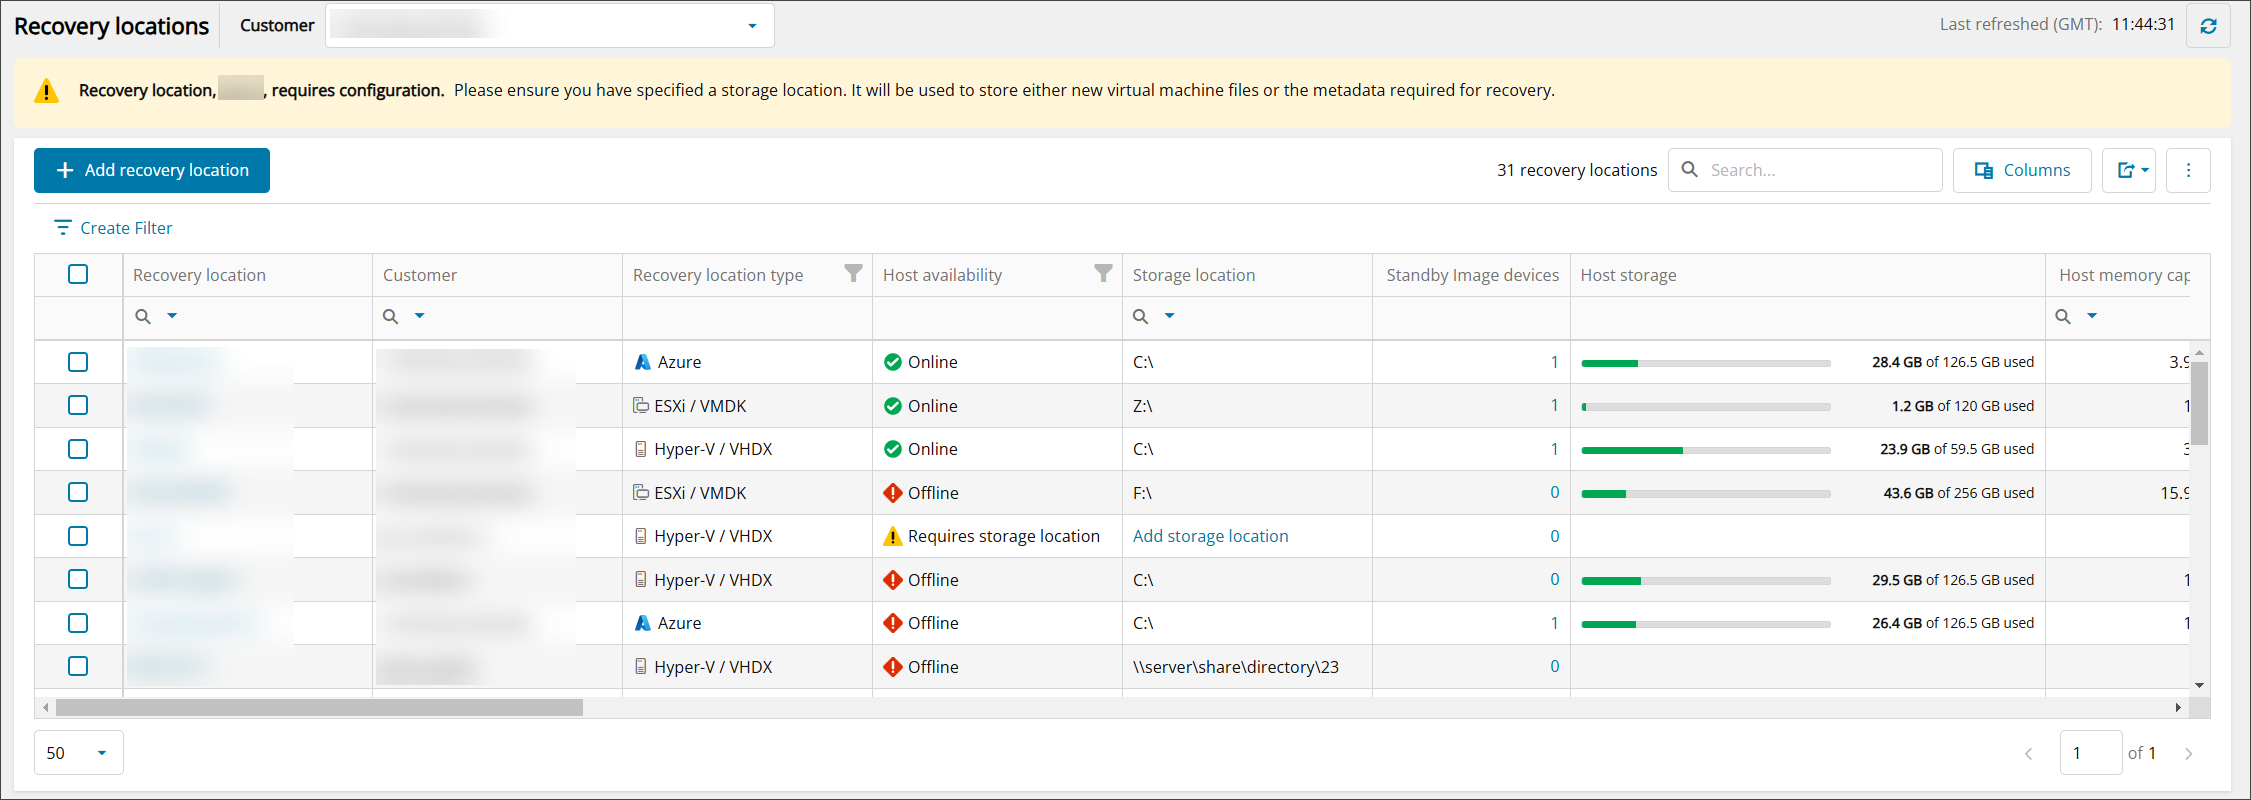
The page displays several pieces of information relating to previously created recovery locations.
View
The Recovery Locations page view can be edited to suit your needs in the following ways:
Columns
All columns are displayed by default:
- Recovery location name
- Customer
- Recovery location type
- Azure
- Hyper-V / VHDX
- ESXi / VMDK
- Host availability
- Offline
- Online
- Requires a storage location
The storage location is required for Standby Image and Recovery Testing locations as this is the location in the file system where the new Virtual Machine files will be created. This is not required for Azure and ESXi locations
- Storage location
For Hyper-V, this can be added by clicking Add storage location, entering the drive letter or local path in the box and clicking Save
- Standby Image Devices
- Host storage
- Host memory capacity
- Host CPU
- Host OS
- Version
- Created date
- Created by
- Last modified
- Last modified by
Add/Remove Columns
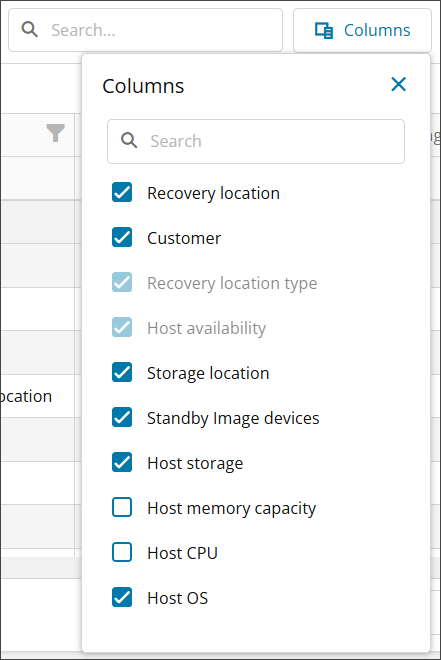
You can change the columns displayed by using the Columns button in the top bar, towards the upper right-hand side of the page:
Add or remove any columns using the check boxes to the left of each column listed:
The table will automatically update when any changes are made to column selection
Resize Columns
Columns can be resized by hovering over the dividing line and dragging this to the left or right to make the column wider or narrower:
Reset Table
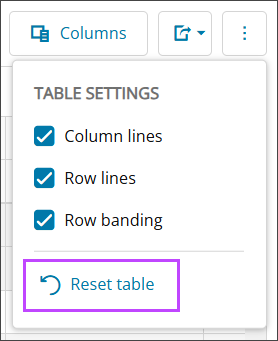
To reset the page view by reinstating removed columns and setting column widths back to their default:
- Click the Table Settings button in the top bar, towards the upper right-hand side of the page
- Select Reset table
This will not reset the column lines, row lines, or row banding table settings.
Table Settings
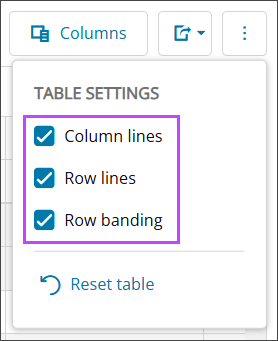
The Table Settings can be found by clicking the three vertical dots in the top bar, towards the upper right-hand side of the page.
To make changes to this:
- Click the Table Settings button in the top bar, towards the upper right-hand side of the page
- Select or deselect the settings:
- Column Lines - this will change the visibility of the dividing lines between the columns of the table
- Row Lines - this will change the visibility of the dividing lines between the rows of the table
- Row Banding - this will add or remove the shade differences between alternate rows
Search
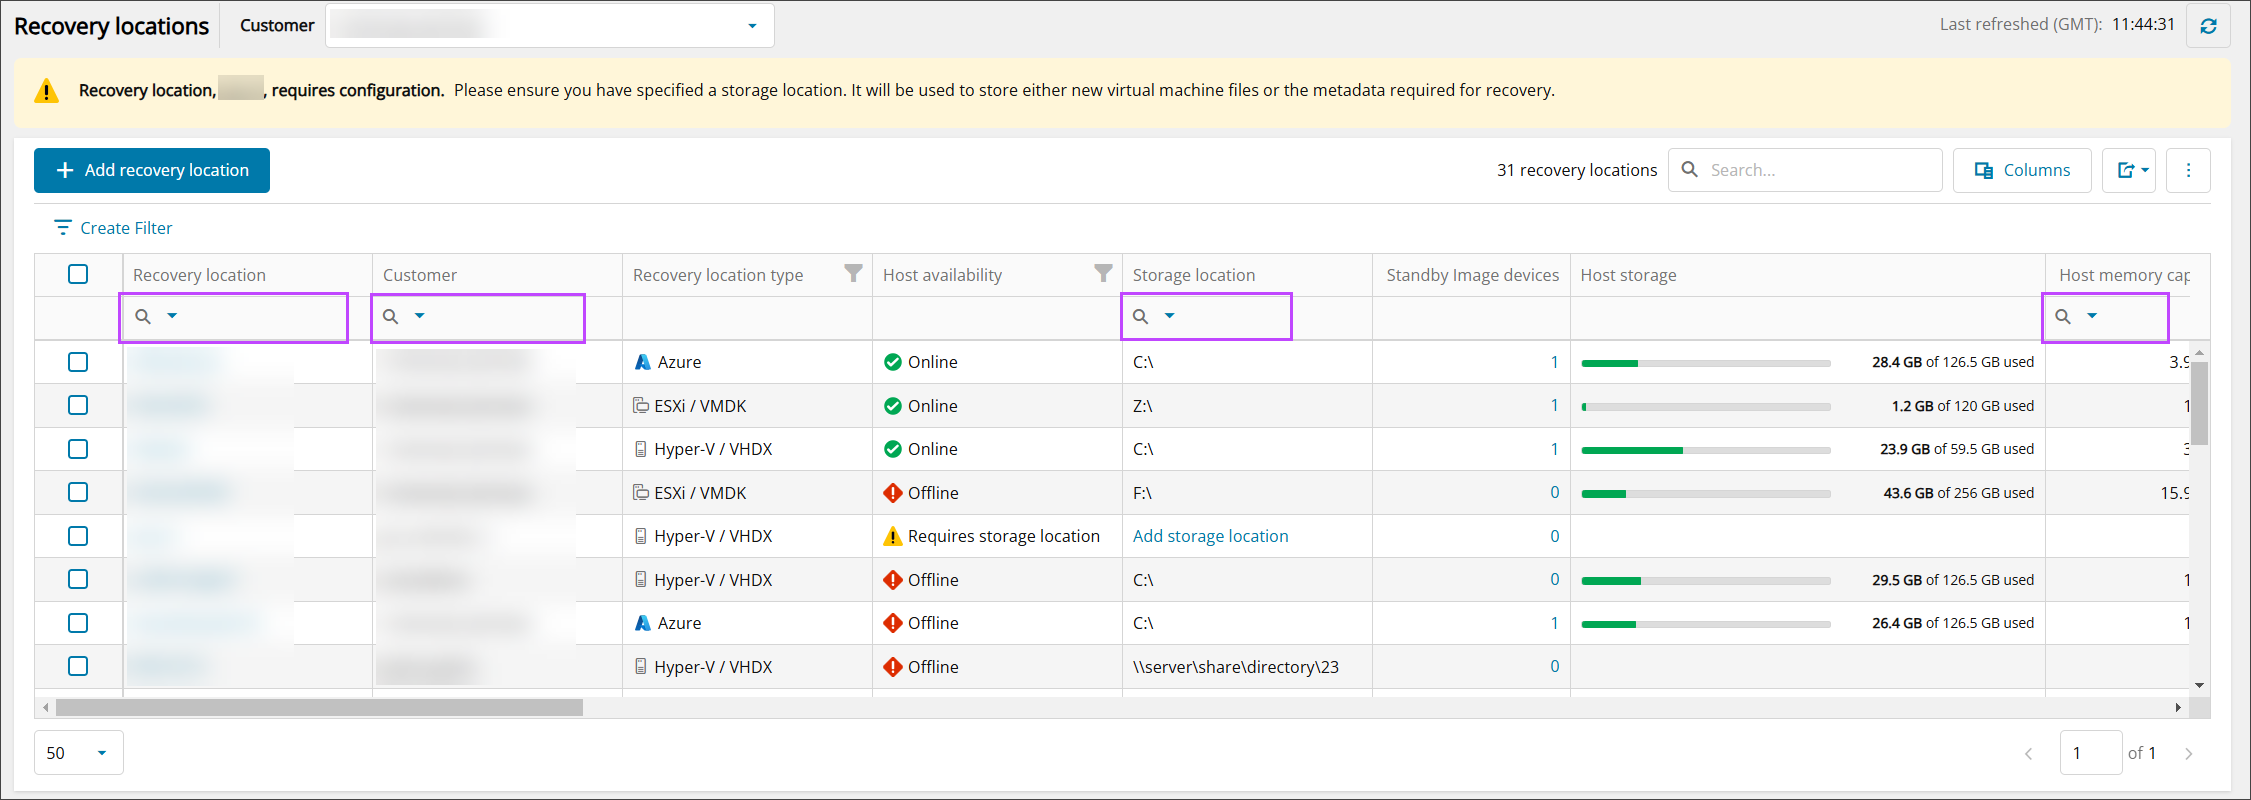
From the Recovery Location page, you can search using the Search bar, or by the Recovery Location name, Customer, Storage Location, Host memory capacity, Host CPU, Host OS, Version, Created date, Created by, Last modified, and Last modified by columns specifically to find locations from the full list that meet your required criteria.
Search Bar
Column Search
- The top row of the Recovery Locations list is the search bar, click into the cell with a magnifying glass or range icon to search the data in that column
- Enter the search term: the list of locations will update automatically to display results
Searches can be layered, e.g. Recovery Location name contains 'Azure' and Created by contains 'team'
Any search you place will be displayed above the Recovery Locations list as a filter:
Filter
Column Filtering
It is possible to filter the list of Recovery Locations using filterable columns. Any column which is filterable is identified by the filter icon.
To filter by individual column:
- Click into the top row of the Recovery Locations list as with the Column Search
- Make your selections for the columns as required. The following columns can be filtered:
- Recovery Location Type
- Select All
- Azure
- Hyper-V / VHDX
- Recovery Testing
- ESXi / VMDK
- Host Availability
- Select All
- Online
- Offline
- Requires Storage Location
- Recovery Location Type
Custom Filtering
It is possible to create custom filters using the Filter Builder to find specific Recovery Locations from the list.
- To create a custom filter, click Create Filter above the Recovery Locations list to open the Filter Builder
- In the Filter Builder window, create the filter using the following selections:
- And
- Recovery Location to which the following may be applied:
- Contains - Text box to enter the filter text
- Equals - Text box to enter the filter text
- Customer to which the following may be applied:
- Contains - Text box to enter the filter text
- Equals - Text box to enter the filter text
- Recovery Location Type to which the following may be applied:
- Is any of - Select from the list of values
- Azure
- Hyper-V / VHDX
- Recovery Testing
- ESXi / VMDK
- Is none of - Select from the list of values
- Azure
- Hyper-V / VHDX
- Recovery Testing
- ESXi / VMDK
- Is any of - Select from the list of values
- Host Availability to which the following may be applied:
- Is any of - Select from the list of values
- Online
- Offline
- Requires Storage Location
- Is none of - Select from the list of values
- Online
- Offline
- Requires Storage Location
- Is any of - Select from the list of values
- Storage Location to which the following may be applied:
- Contains - Text box to enter the filter text
- Equals - Text box to enter the filter text
- Host Memory Capacity to which the following may be applied:
- Equals - Text box to enter the filter text
- Is less than - Text box to enter the filter text
- Is greater than - Text box to enter the filter text
- Is less than or equal to - Text box to enter the filter text
- Is greater than or equal to - Text box to enter the filter text
- Host CPU to which the following may be applied:
- Contains - Text box to enter the filter text
- Equals - Text box to enter the filter text
- Host OS to which the following may be applied:
- Contains - Text box to enter the filter text
- Equals - Text box to enter the filter text
- Version to which the following may be applied:
- Contains - Text box to enter the filter text
- Equals - Text box to enter the filter text
- Created Date to which the following may be applied:
- Is between - use the date and time selectors to select the start and end date and time
- Created By to which the following may be applied:
- Contains - Text box to enter the filter text
- Equals - Text box to enter the filter text
- Last Modified to which the following may be applied:
- Is between - use the date and time selectors to select the start and end date and time
- Last Modified By to which the following may be applied:
- Contains - Text box to enter the filter text
- Equals - Text box to enter the filter text
- Recovery Location to which the following may be applied:
- And
- Click OK
Searches can be layered, e.g. Recovery Location name contains 'Azure' and Created by contains 'team'. Once the filter is created, this will appear above the updated list similar to: [Recovery Location] Contains 'Azure' And [Created by] Contains 'team'
Export
It is possible to export all data in the Recovery Locations page view. To do this:
- Make any required changes to the view of the Recovery Locations page using the features above
- Click the Export button in the top bar, towards the upper right-hand side of the page
- Select from the export options:
- Export all data to Excel
- Export all data to CSV
The file will automatically be generated and stored in your device's Download folder.

