Before you begin restoring Microsoft 365 Exchange data, ensure you have met the necessary requirements:
Requirements
The following account types are required:
- A user account for the Management Console at the following user level:
- SuperUser
- Administrator
- Manager
- Operator
- The Security Officer role assigned to the above user account
- A Global administrator account for Microsoft 365
Instructions
- Log in to the Management Console as a user with Security Officer permissions
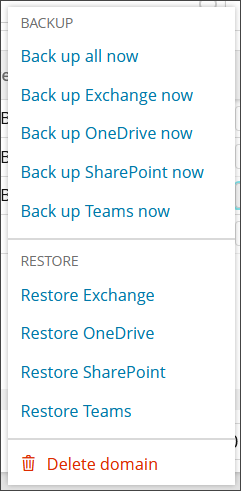
- Open the action menu for the domain and click Restore Exchange
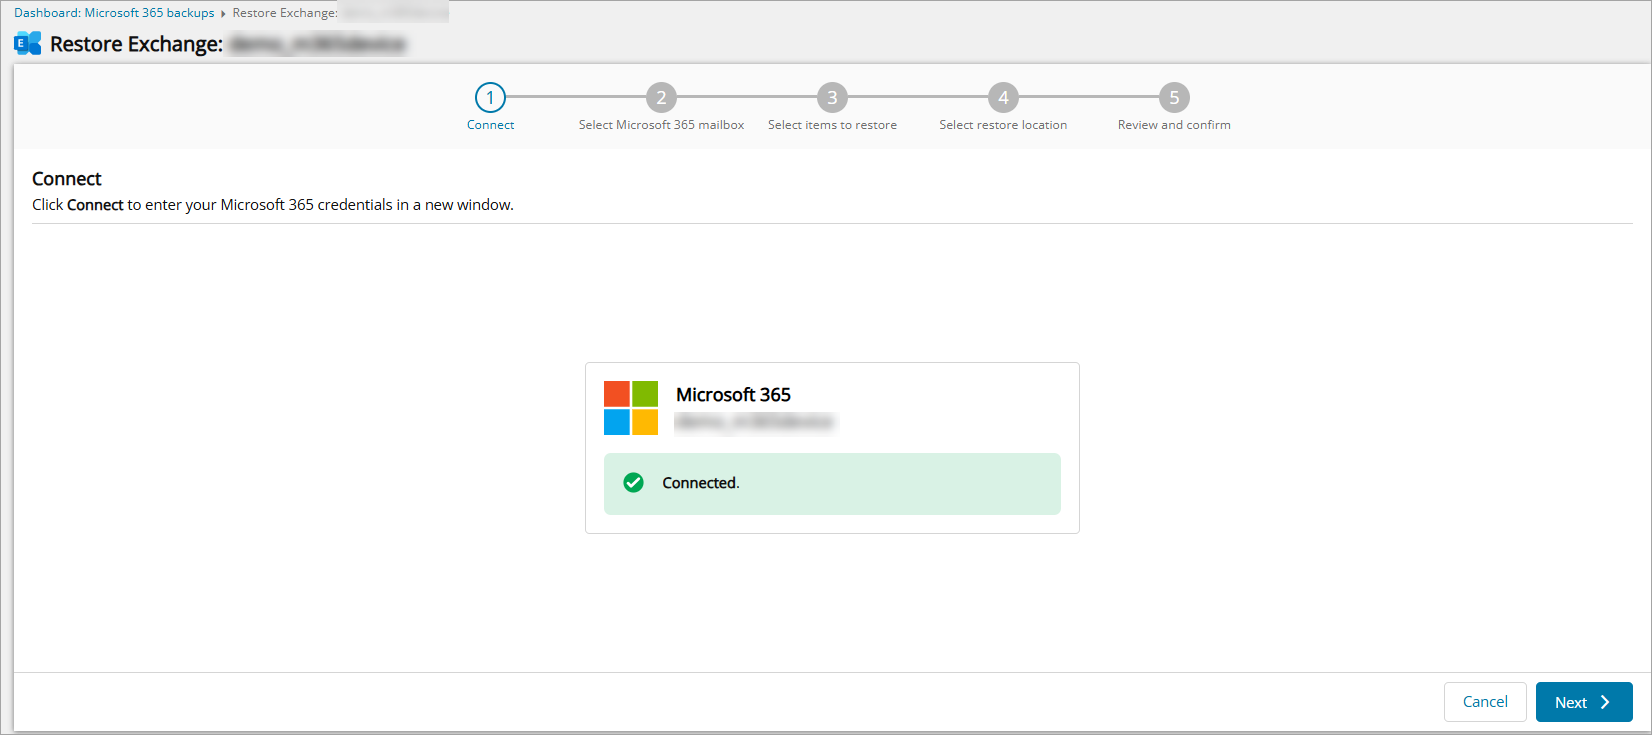
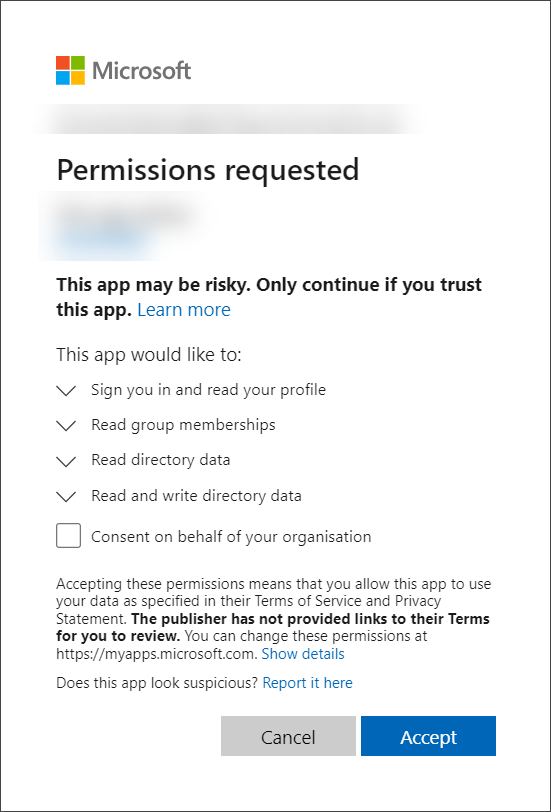
- Connect to the Microsoft 365 Exchange domain with administrative account credentials
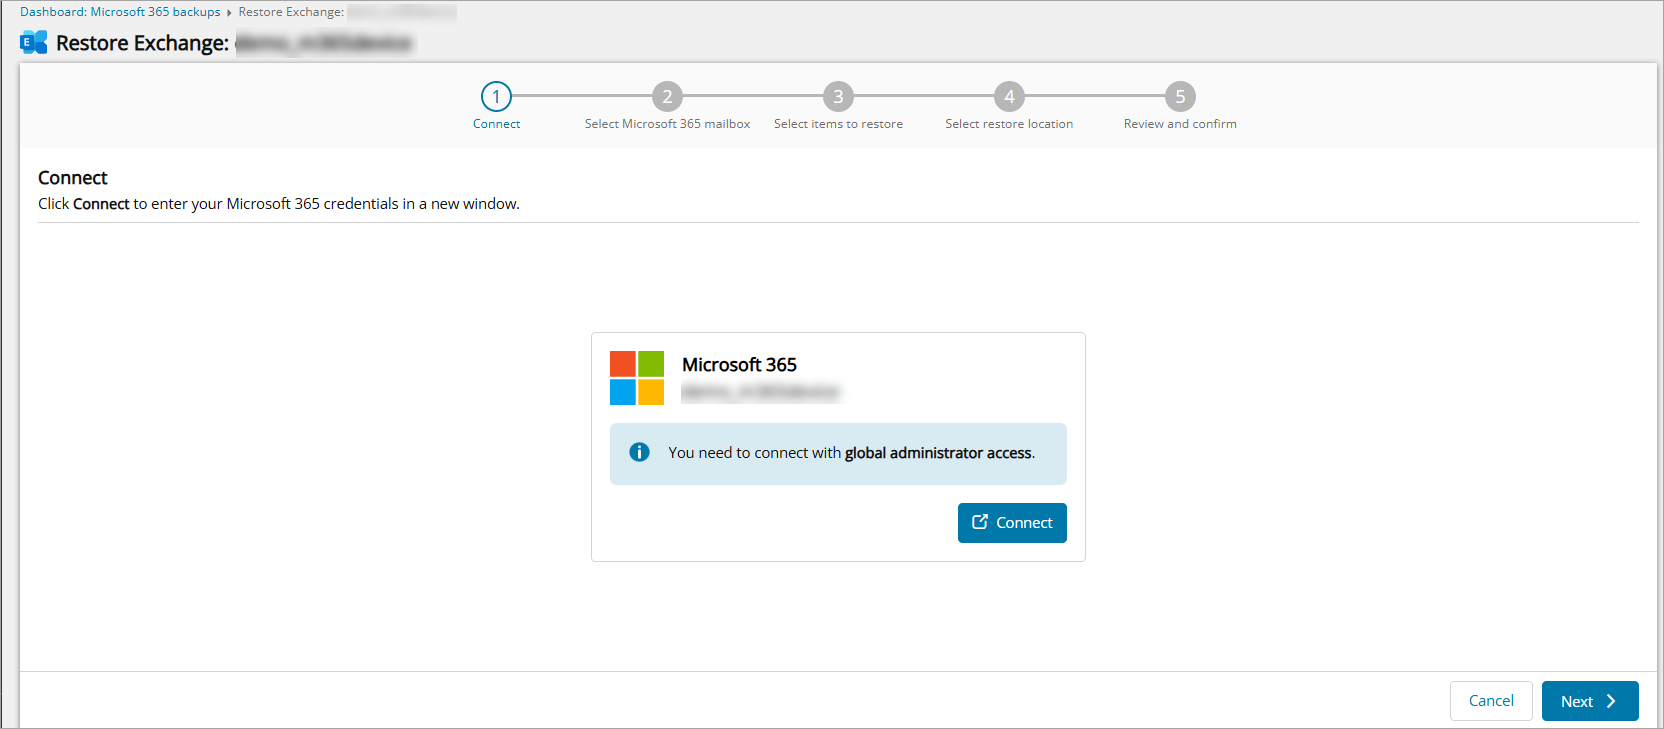
If you do not see the authentication page, make sure your browser is not blocking pop-up windows.
- Accept the required permissions
- You will receive a confirmation that the connection has been successful for the restore
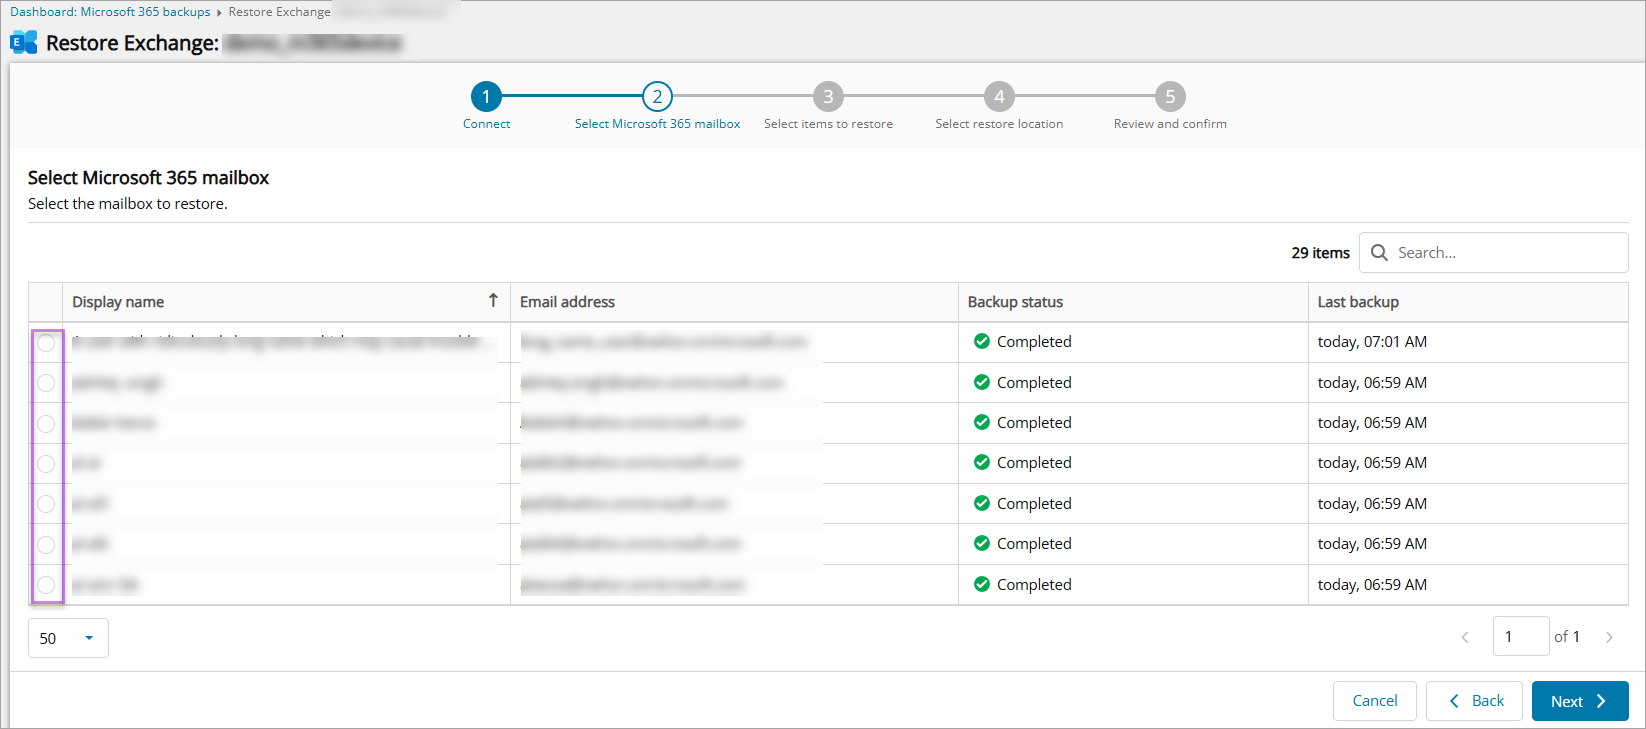
- Select the mailbox you wish to restore items from
- Select the backup session you wish to restore from
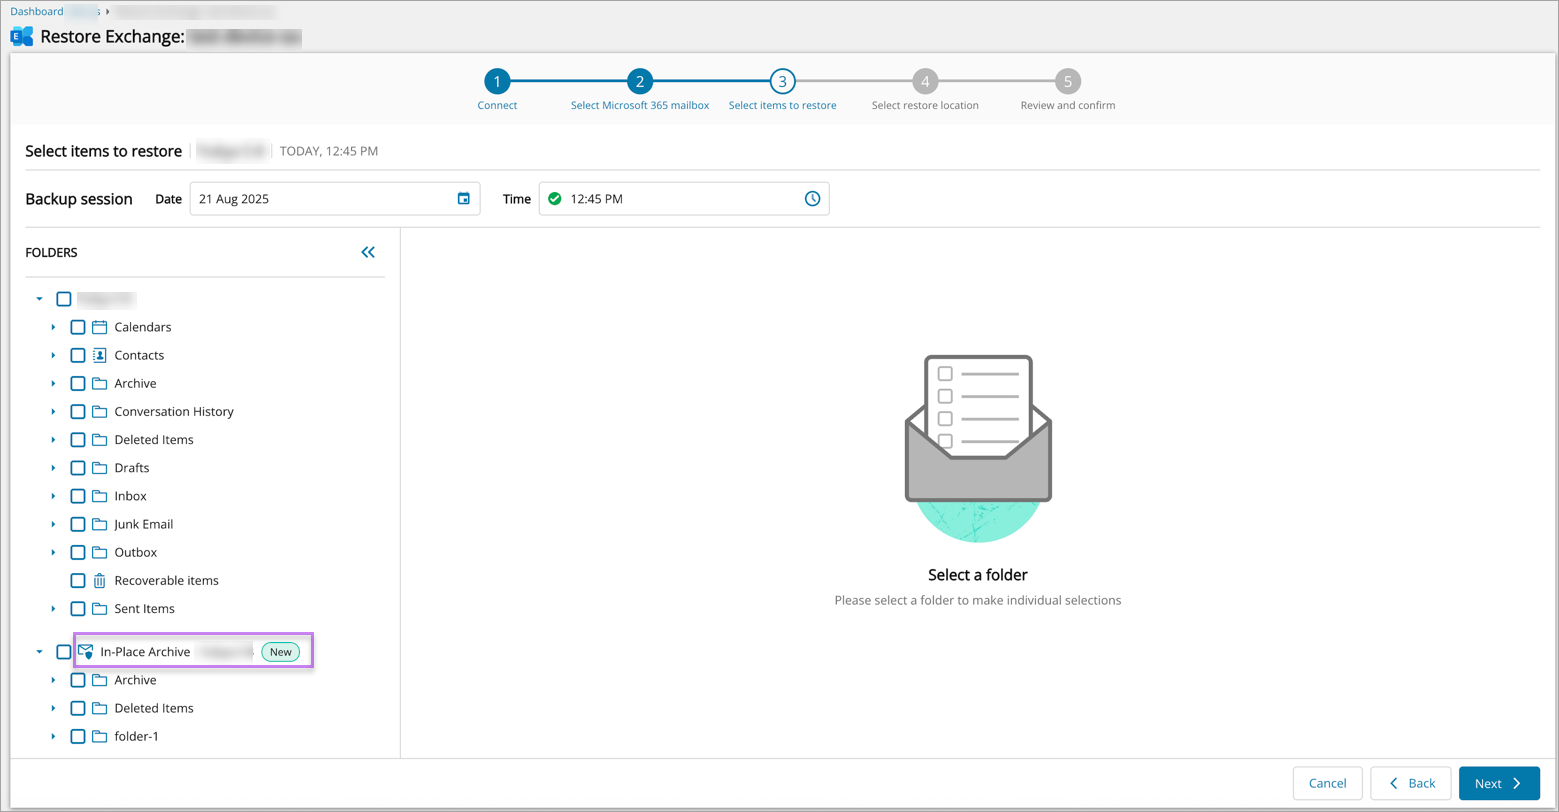
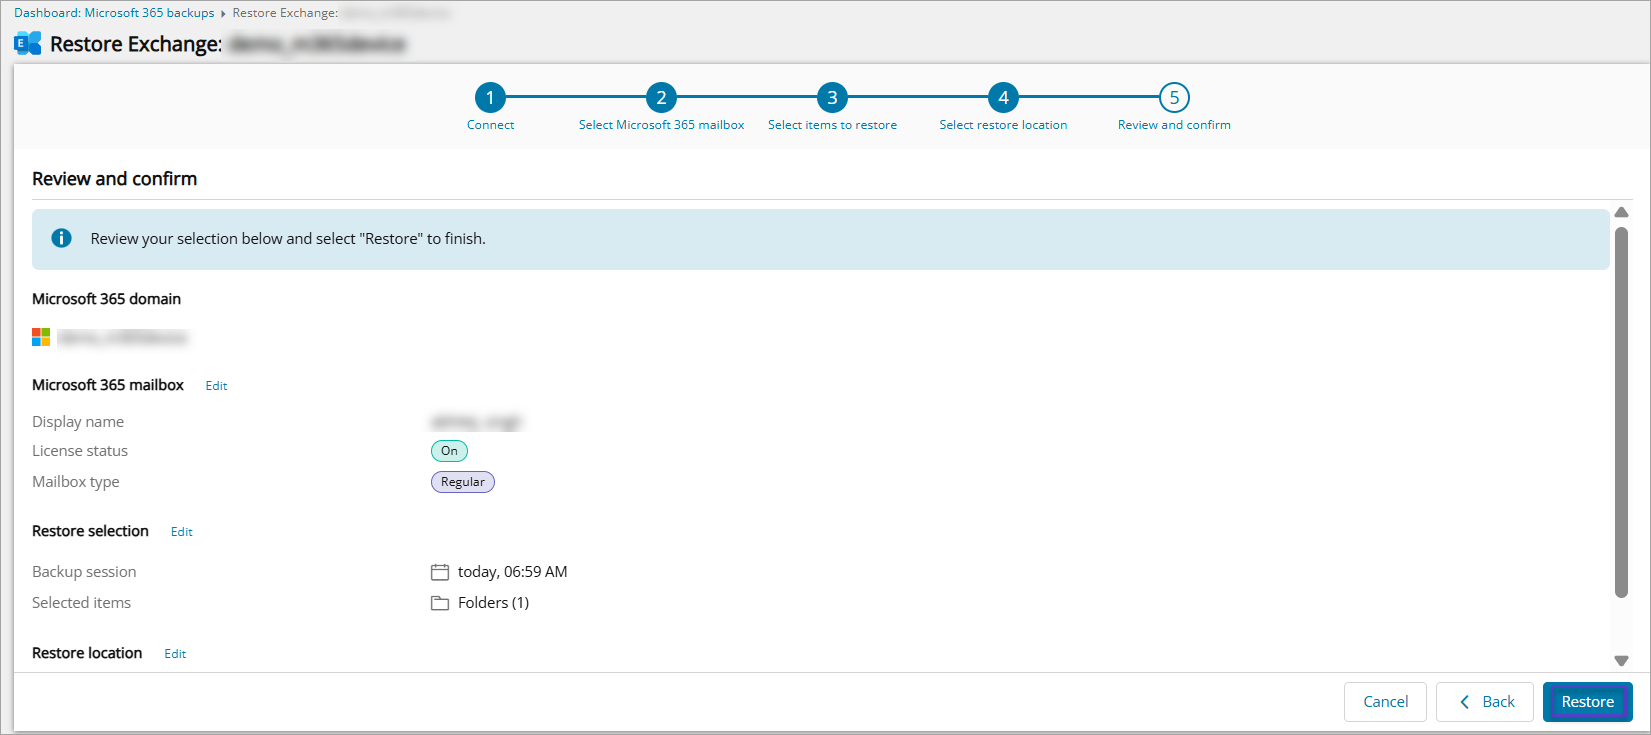
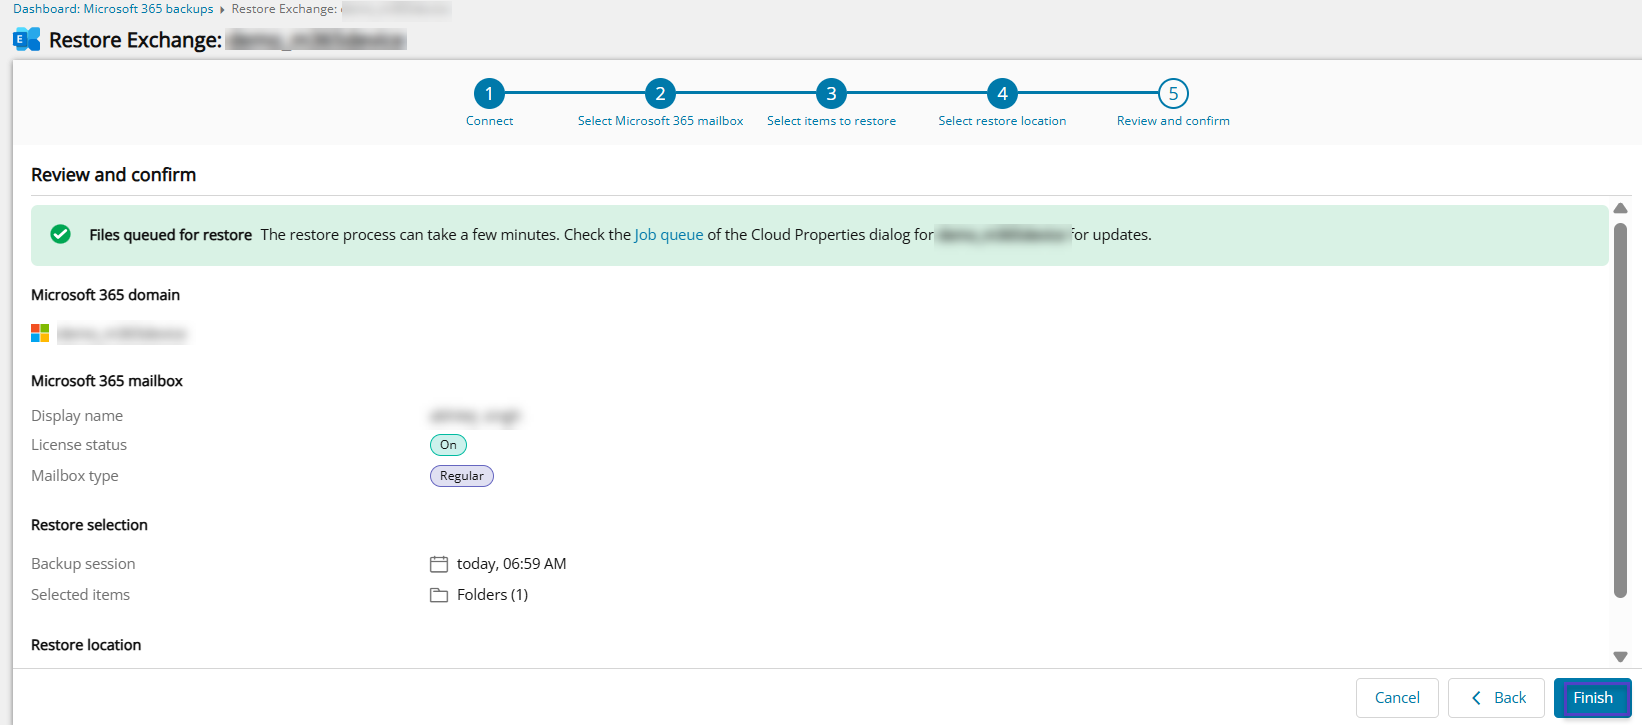
- Select the data to restore and click Next
- From the Folders tab:
- Regular Mailbox
- Archive
- Calendars
- Contacts
- Conversation History
- Deleted items
- Drafts
- Inbox
- Junk Email
- Outbox
- Recoverable items
- Sent items
- In-Place Archive mailbox
- In-Place Archives data is available for restore within each Exchange restore session where In-Place Archives were backed up for selected mailbox (In-Place Archives backup has been enabled for the device and the user has In-Place Archive mailbox enabled).
Microsoft may resend calendar event notifications when restoring a full mailbox. To avoid this, deselect calendar items before restoring.
- In-Place Archives data is available for restore within each Exchange restore session where In-Place Archives were backed up for selected mailbox (In-Place Archives backup has been enabled for the device and the user has In-Place Archive mailbox enabled).
- Regular Mailbox
- Select the folder you wish to filter from the list by clicking the arrow and the icon respectively
It is possible to filter for Inbox, Deleted Items, Drafts, Junk Email, Outbox, Recoverable items, Sent items or any additional folders by:
- Attachments
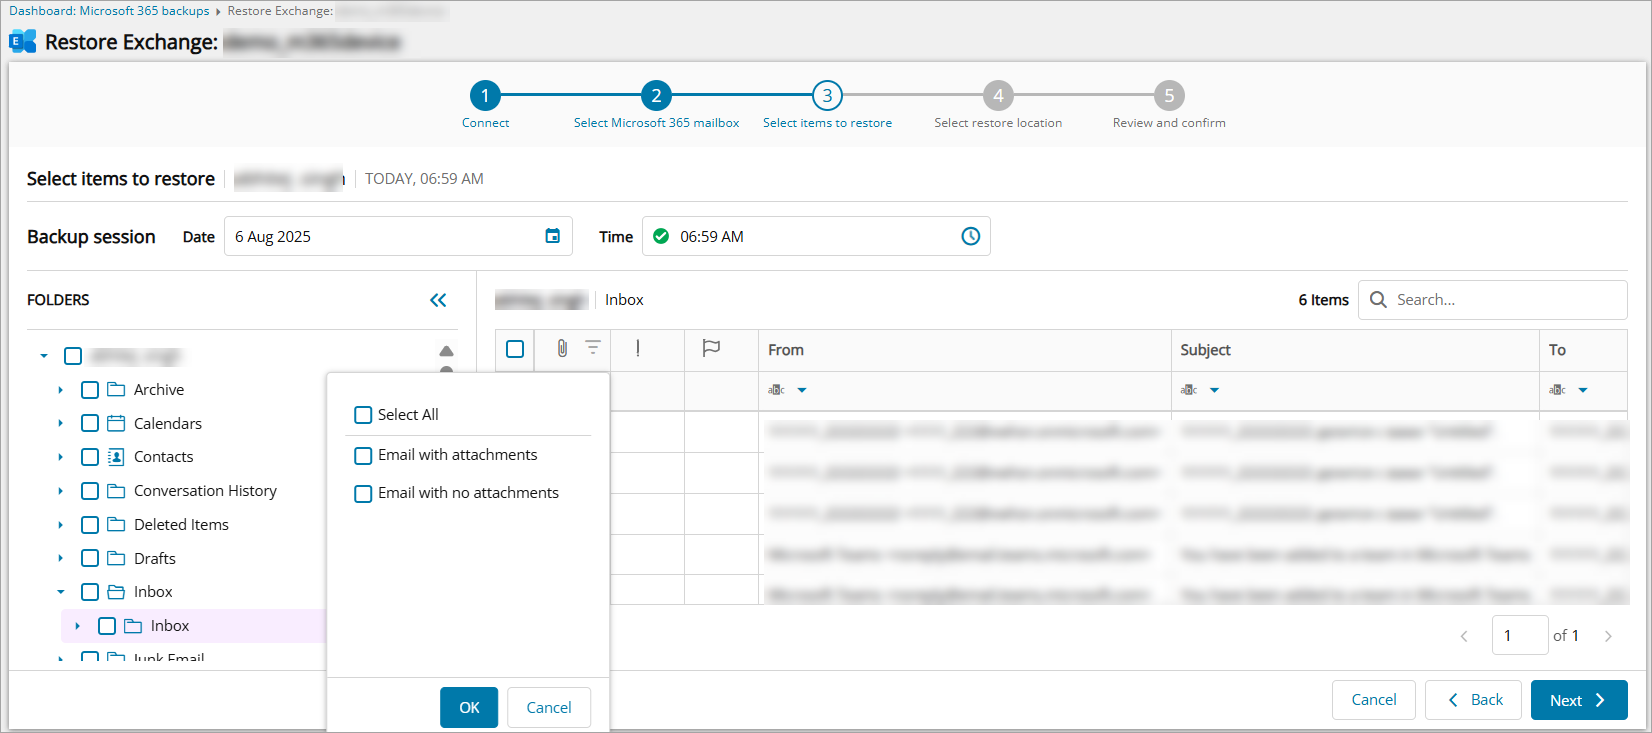
- All emails
- Email with attachments
- Email with no attachments
- Message fields
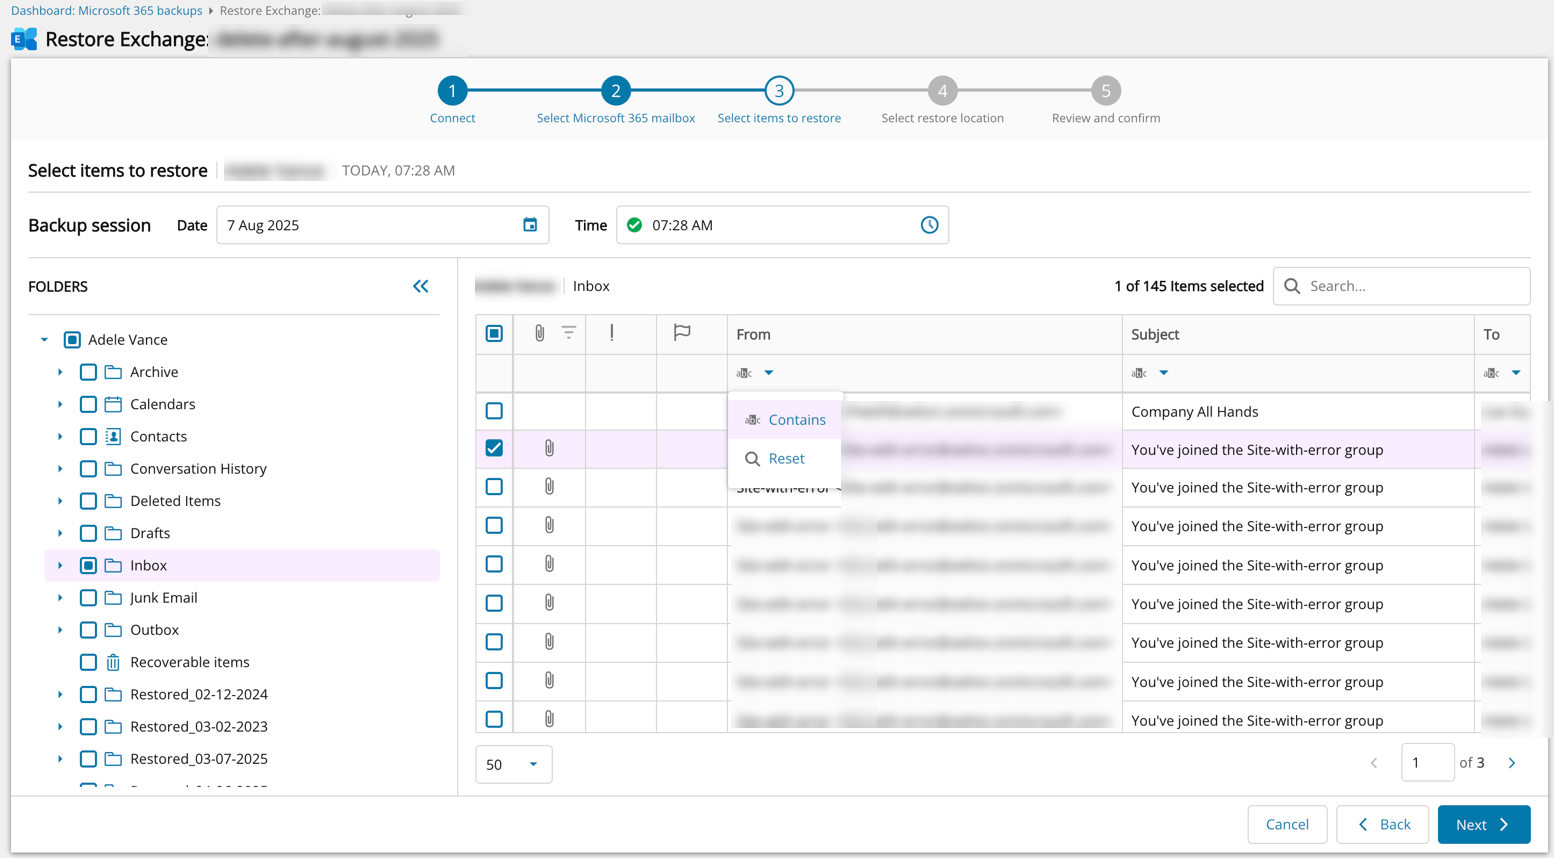
- From
If the search value matches the beginning of a word in the From field, messages are returned by the filter. If the search value is contained within a word but does not start the word, messages are not returned by the filter. Substring matching inside words is not supported.
E.g. A From address is TestSite1 <TestSite1@aabcd.onmicrosoft.com>. Filtering for 'Test' or 'aabcd' will return messages from this address. Filtering for 'bcd' will not return messages from this address.
- To
If the search value matches the beginning of a word in the To field, messages are returned by the filter. If the search value is contained within a word but does not start the word, messages are not returned by the filter. Substring matching inside words is not supported.
E.g. A To address is Adele Vance <AdeleV@aabcd.onmicrosoft.com>. Filtering for 'Adele' or 'onmi' will return messages to this address. Filtering for 'soft' will not return messages from this address.
- Subject
If the search value matches the beginning of a word in the Subject field, messages are returned by the filter. If the search value is contained within a word but does not start the word, messages are not returned by the filter. Substring matching inside words is not supported.
E.g. A message has the Subject 'You've joined the TestSite1 group'. Filtering for 'join' or 'Test' will return messages with this subject. Filtering for '1' will not return messages with this subject.
- Message content
- From
- Attachments
- It is possible to filter for contacts by:
- Name
- Company
- It is possible to filter for calendars by:
- Message fields
- Organizer
- Subject
- Calendar (Appointment Type)
- All
- Single
- Recurring
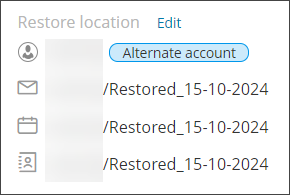
When restoring Calendar items, these will not be placed back into the original calendar location. Instead these will be placed in a folder titled "Restored_DD-MM-YYYY", where "DD-MM-YYYY" is the recovery date, in the mailbox.name/Calendar/ folder.
- Message fields
Or
- From the Folders tab:
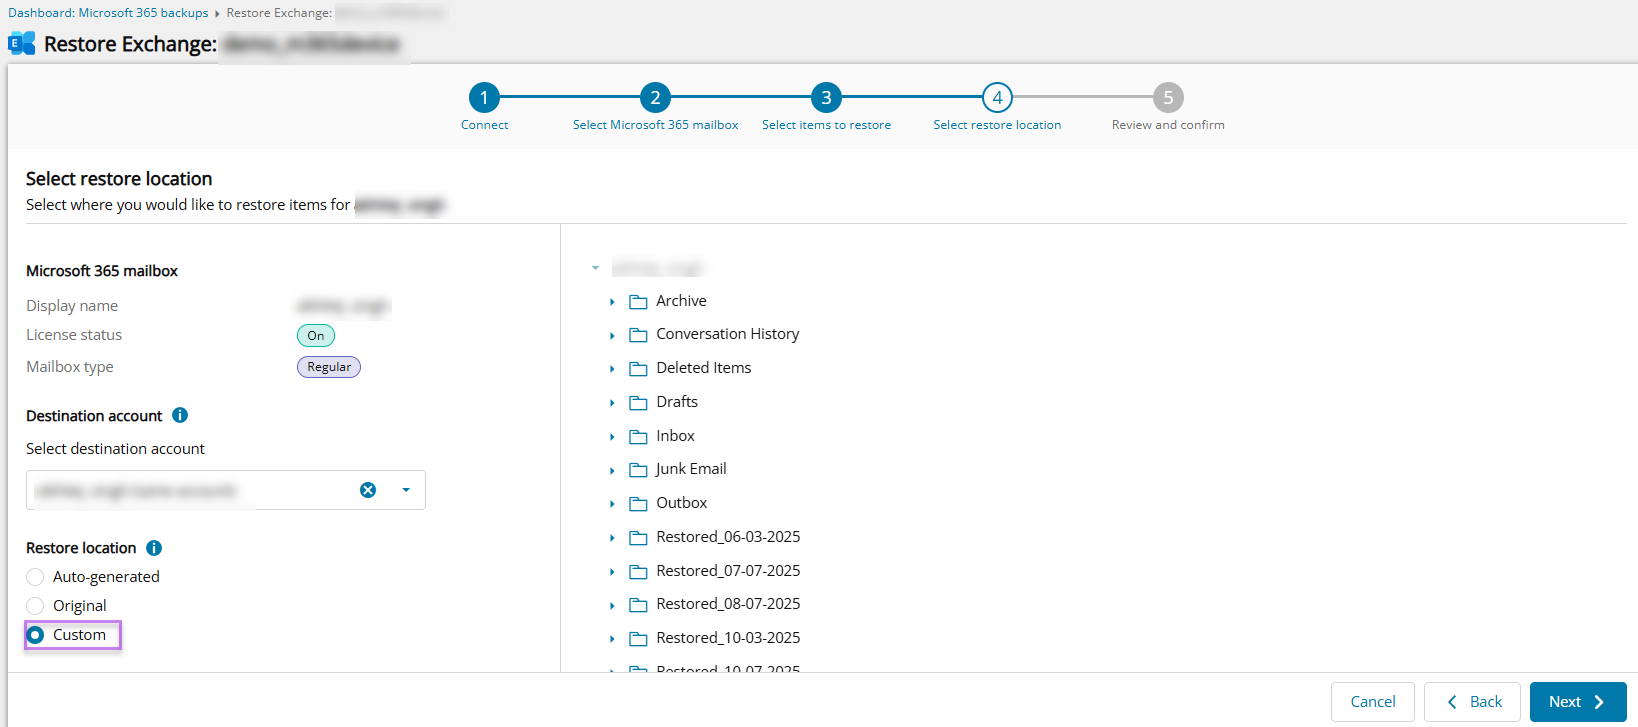
- Select the destination account for the restored data from the dropdown
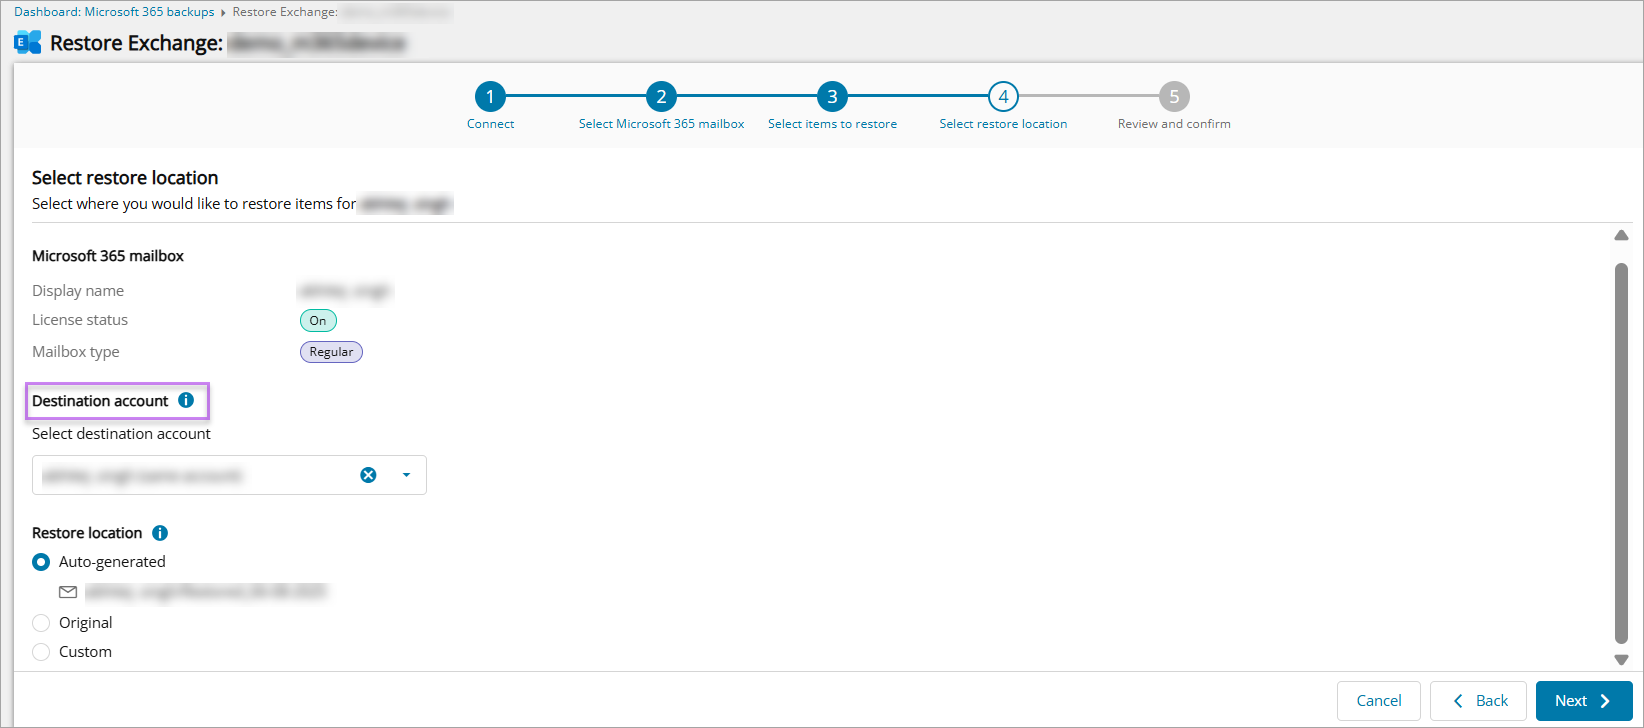
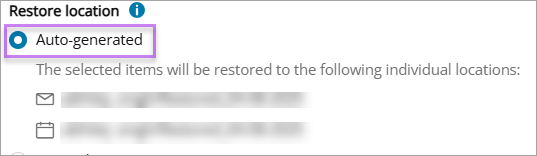
- Select the restore location for selection from Auto-generated, Original, or Custom:

- Confirm your intention to start the recovery and close the wizard
Microsoft may resend calendar event notifications when you restore a full mailbox. If you wish to prevent this, please deselect calendar items.
You can select either the original user or any alternate user from the destination account dropdown to restore the In-Place Archives data.
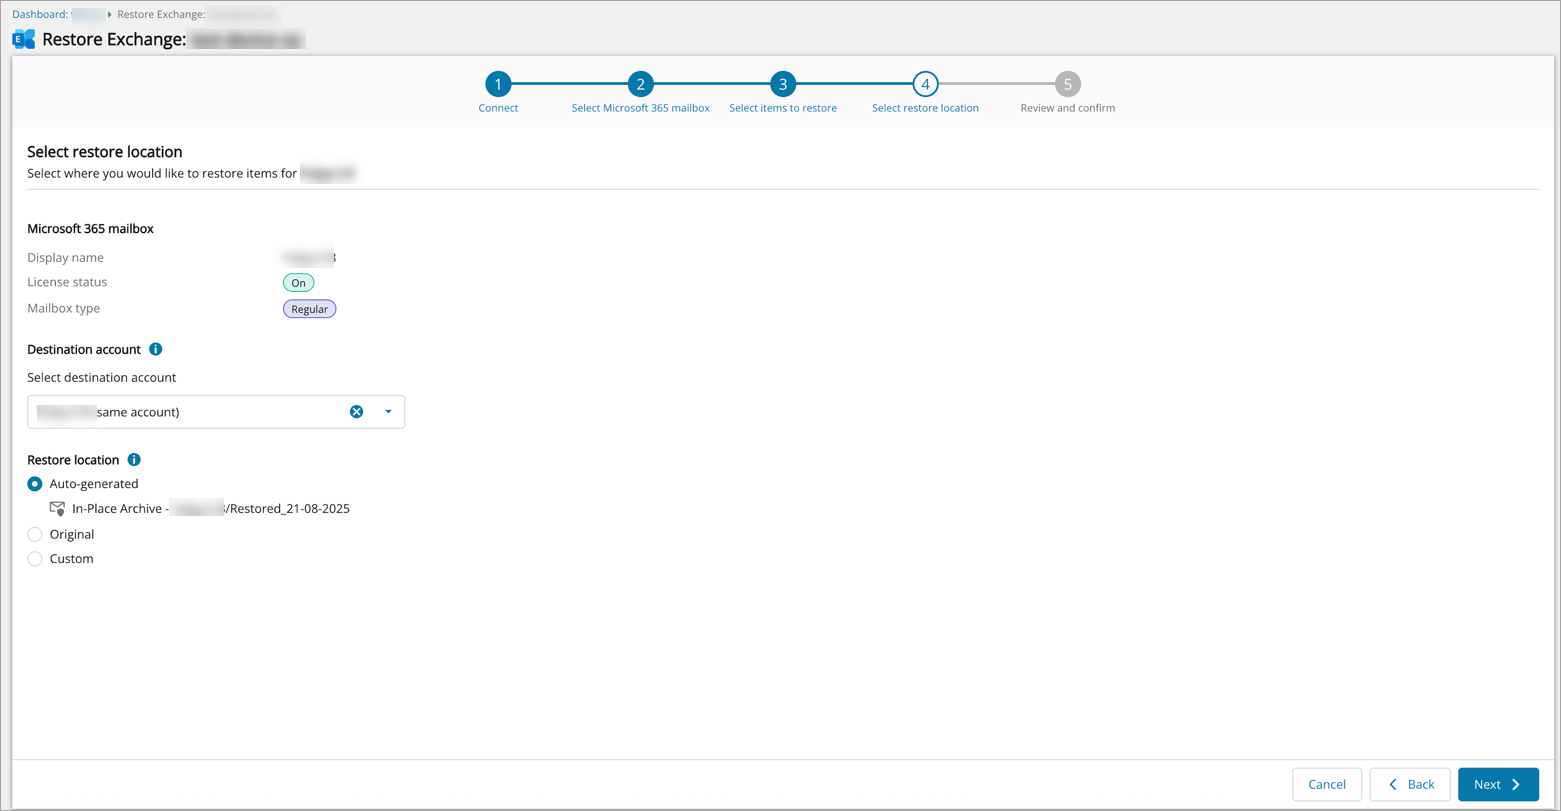
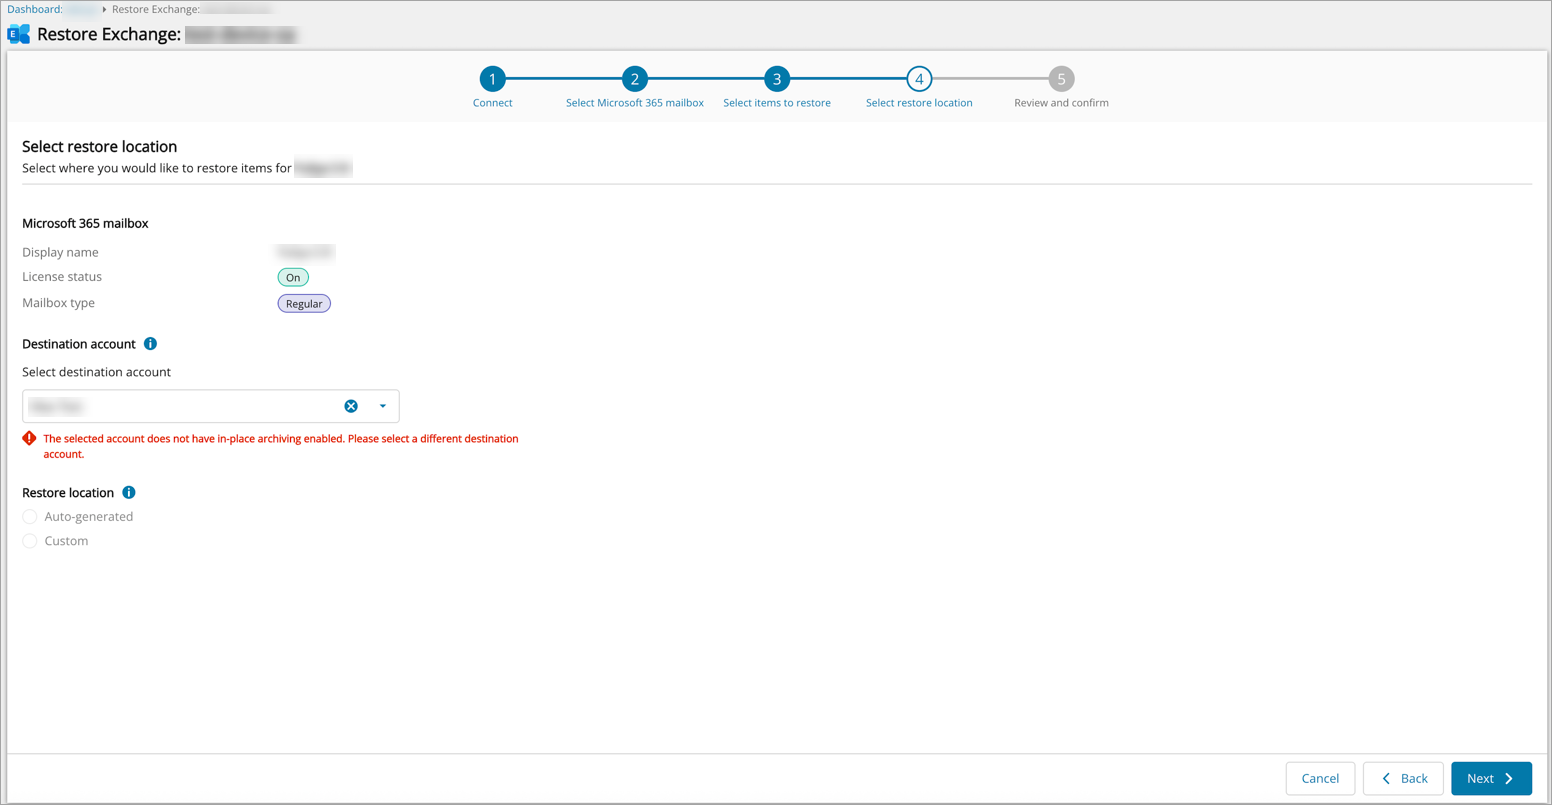
If the selected user does not have In-Place Archives enabled, the Restore location options will be disabled.
Exchange items from an active account can be restored to either the same account or another account. Exchange items from a deleted or unlicensed account can only be restored to another account.
You may request to disable the ability to select a restore destination at a different account by contacting N-able support.
In-Place Archives can be restored to Original, Auto-generated or Custom Restore location of In-Place Archives mailbox.