
To add a new device to Cove Data Protection (Cove)'s Disaster Recovery As A Service (DRaaS) plan:
- Sign in to the Management Console using a SuperUser or Manager account.
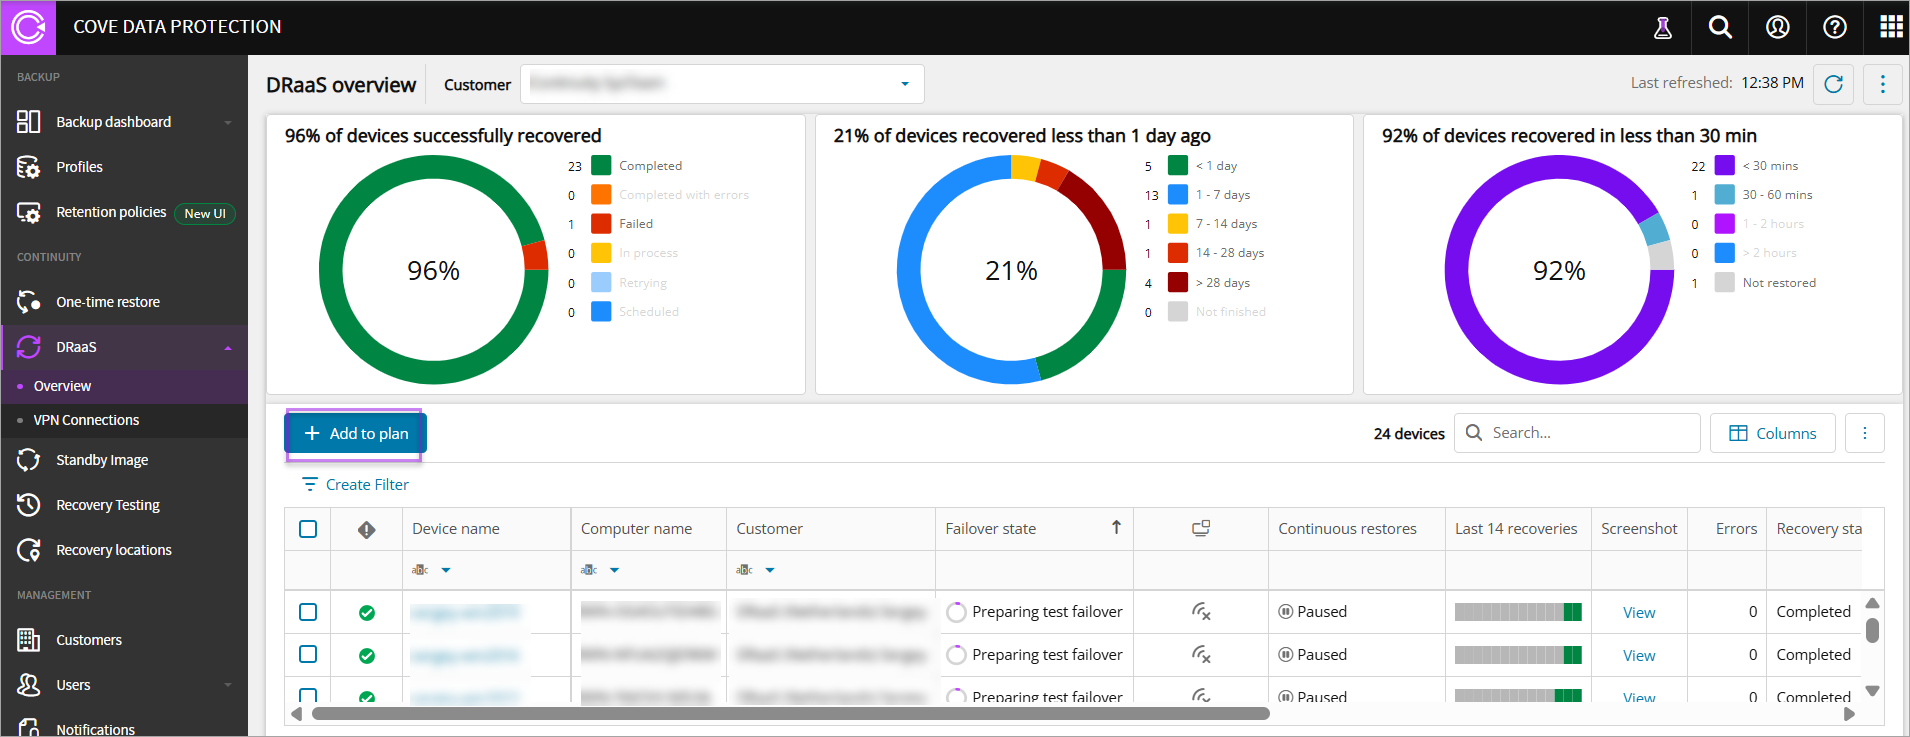
- Navigate to Continuity > DRaaS > Overview
- Click Add to plan
- In the Add devices(s) to recovery plan: DRaaS page, select the Customer from the Customer dropdown

- Select a Compatible device from the devices list
The compatibility logic is independent of devices added to other plans. Therefore, a device can be added to Recovery Testing/Standby Image and DRaaS.
- Click Next
- Enter the Encryption Key/Security Code or Passphrase for the selected device
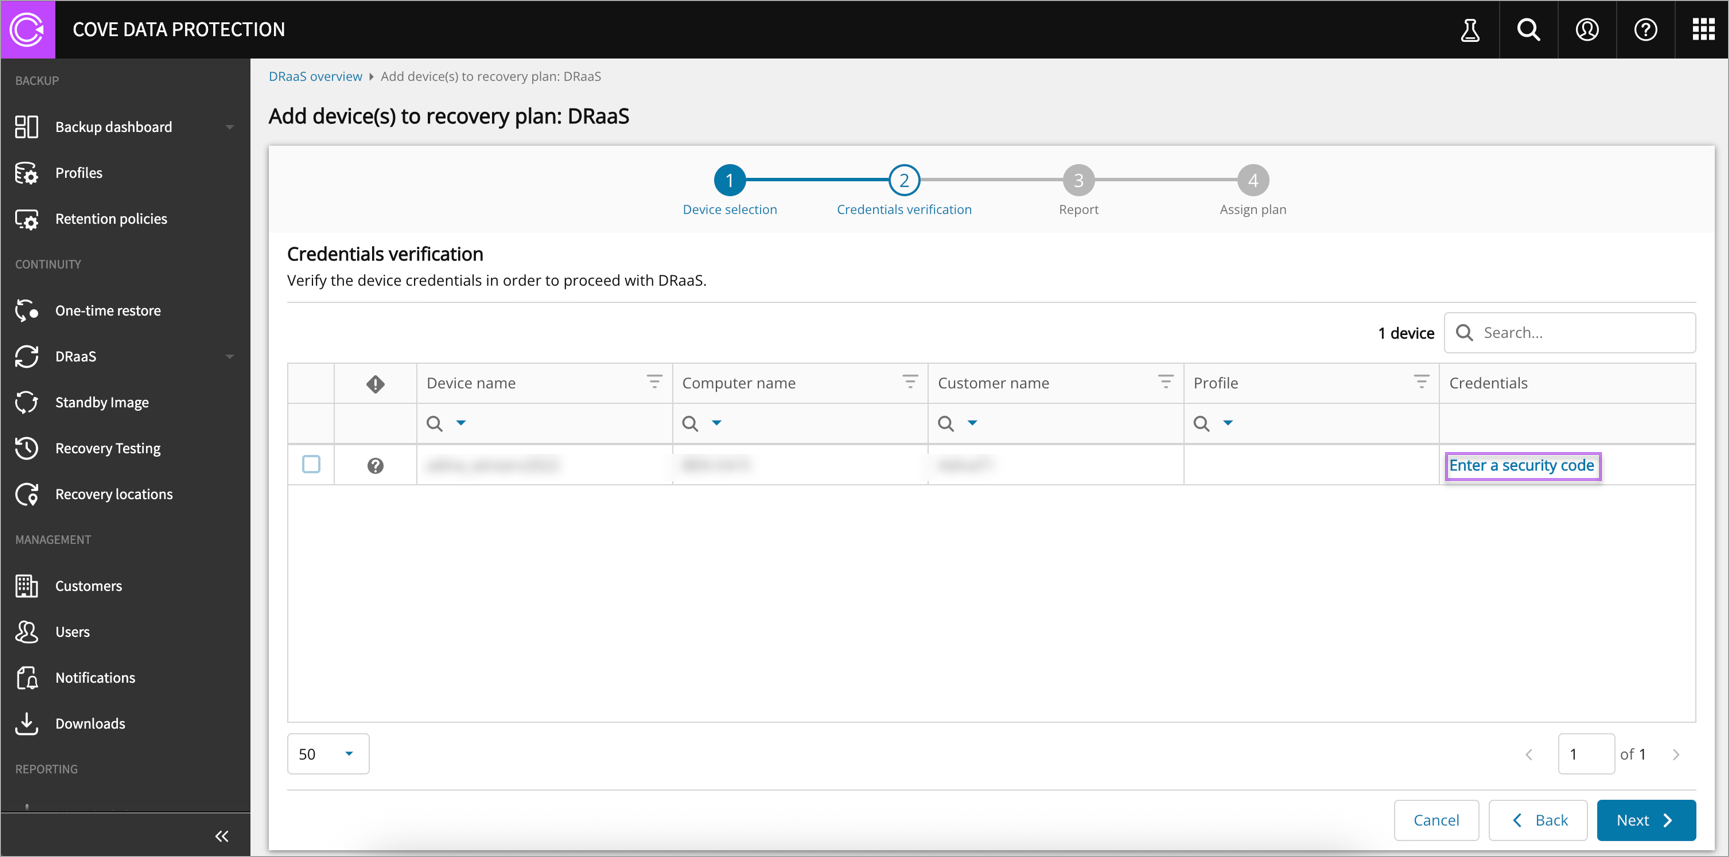
- Click Apply, then Next after credential verification completes
- Enter the email address of the recipient(s) who will receive successful and failed recovery reports (Optional)
- Click Next
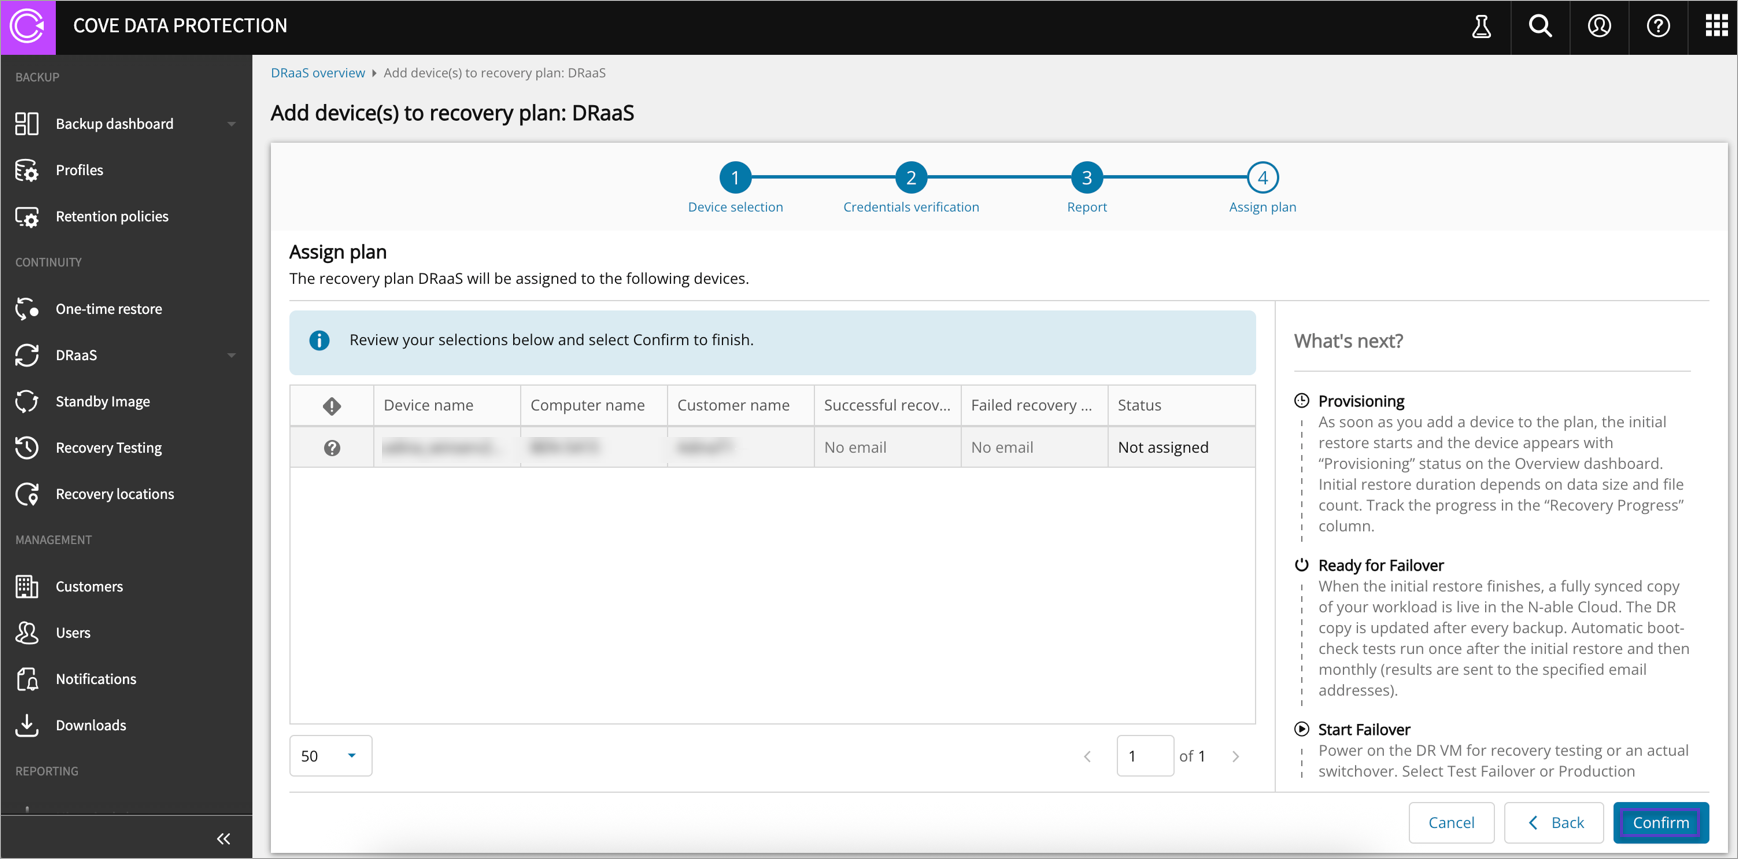
- Confirm your intention to assign the plan
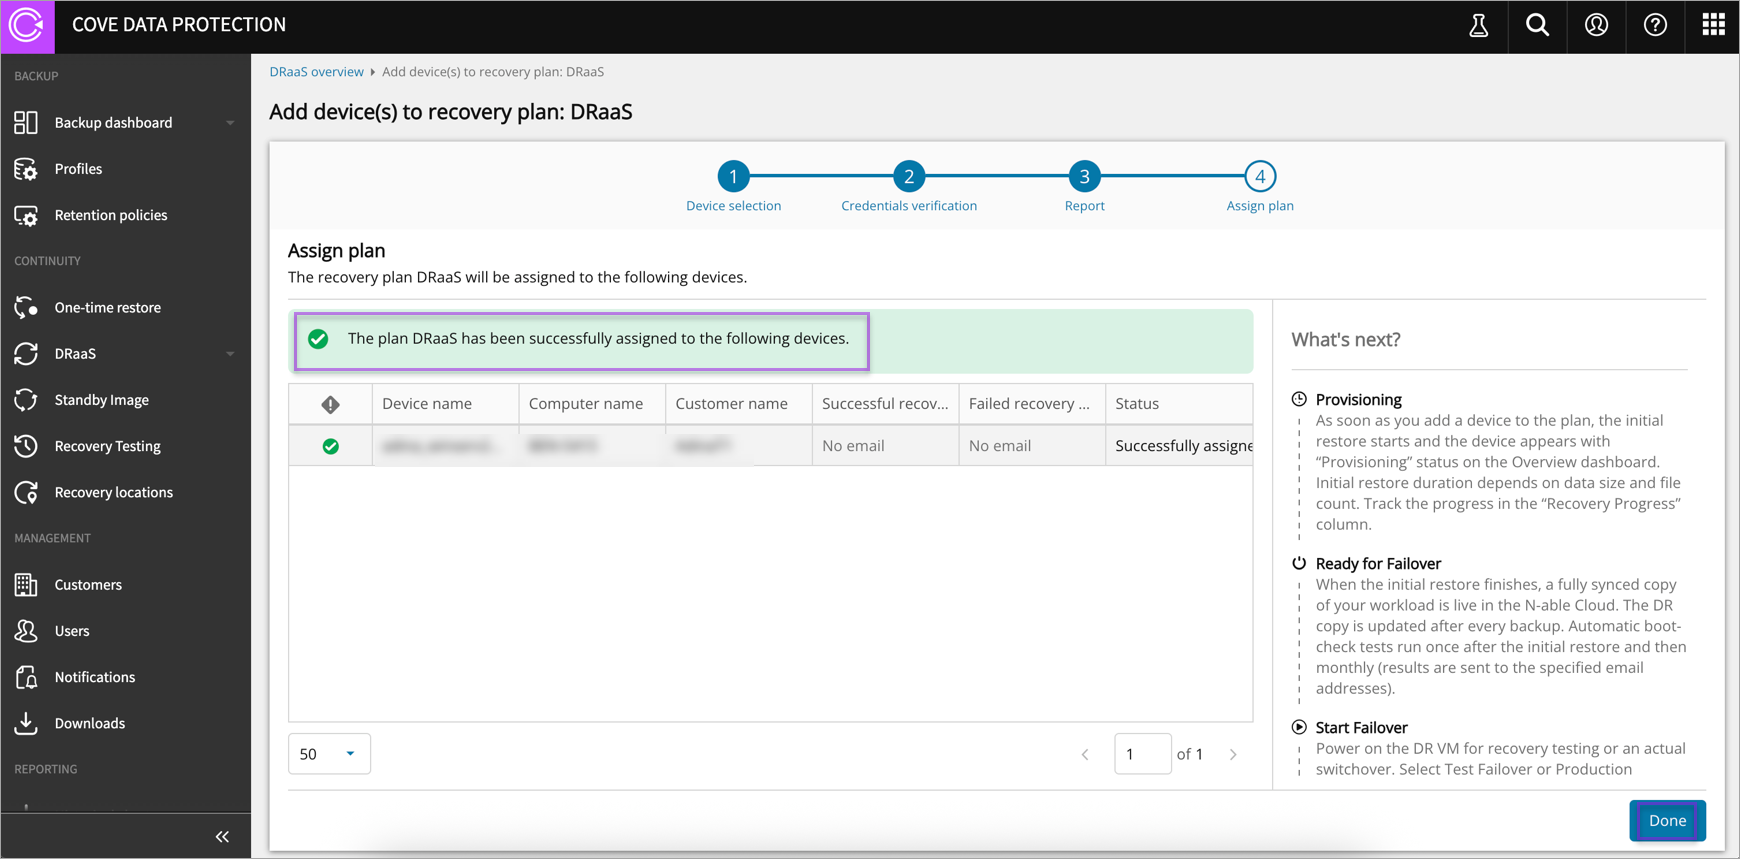
- Click Done to complete adding the device to the plan
See DRaaS Dashboard to see how you can view the latest boot test results.
Using your Device in the Plan
Now that your device is in the plan, the production device copy exists in our infrastructure, it’s updated according to your backup schedule and monthly boot-testing.
You can start the machine to:
- Access files or perform checks
- Run a test failover to verify functionality in a disaster scenario
- Execute a production failover if a real disaster occurs
To start the Virtual Machine (VM), you need to perform test or production failover.