To enable data recovery for a backup device, add it to the Recovery Console and specify recovery settings for it.
Keep in mind a few points before you get started:
- Devices are added one at a time and cannot be added in bulk
- The number of devices you can add is unlimited, but take into account the available resource on the system running the Recovery Console
- The devices you add must not be installed in Backup Manager on the same computer (this would result in a conflict)
- You can add only those devices that you have access to (full access details are required)
To perform recovery through the Recovery Console:
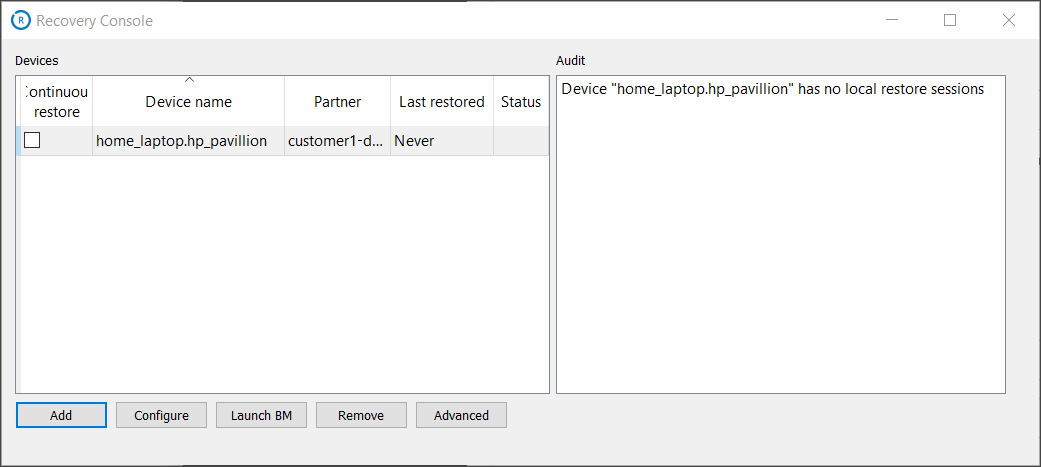
- Start the Recovery Console on the host system
- If the device already exists, move to step #3. If the device is not listed, you should add it first.
 To add a device:
- Click Add
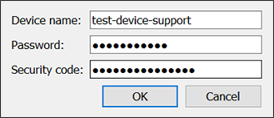
- Fill in the device details:
- Device name - The device name as was given when Backup Manager was initially installed. This can be found on the Settings tab of the device in the Management Console
- Password - The device's Installation Key which can be found on the Settings tab of the device in the Management Console
- Security code - This Is also known as the Encryption Key or Passphrase if the device was automatically installed or you have converted the device to use passphrase-based encryption
Device passphrases
To find the device name, passphrase etc. for automatically installed devices, please see Get Passphrase for Managed Device.
If you do not know the Encryption Key/Security Code for a regularly installed device, you will need to retrieve this information before progressing. This can be done by converting the device to use passphrase-based encryption. See Convert Devices to Passphrase-Based Encryption for full details.
- Click OK

- Select the data sources that you want to enable recovery for
- Configure settings for the data sources
- Click Next to proceed to the next one
- Click OK to finish and apply the settings once all the selected data sources have been configured
- If all the settings have been configured, you will get a message offering you to start data recovery. Click Yes to enable the continuous recovery mode or No if you do not want to start the recovery right now
If you click No to add the device without beginning data recovery, you will be able to do this any time using the Continuous restore checkbox
If the source device is already added but the sources are not configured, select the device from the devices panel and then click Configure
The list may contain up to 7 data sources, the selection depends on the product settings.
Selected data sources can be edited later.
We do not recommend specifying a Network Share as the storage location when initializing a device on Recovery Console even temporarily as it can be unreliable.
The length of time the recovery takes depends on the size of the system you are restoring, the data transfer speed, and the performance of your computer.
The Recovery Console must be open or minimized to keep functioning. If you have active devices, do not shut down the Recovery Console application and do not power off the computer.
Restore from date/time session
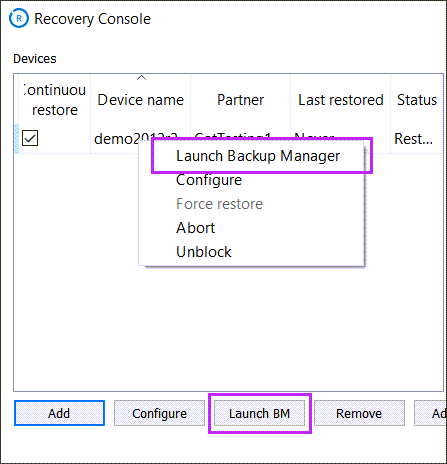
If you wish to restore from a specific session in the past and not from the most recent backup, this can be done by adding the device as above then clicking Launch Backup Manager or Launch BM from the Recovery Console Devices panel.
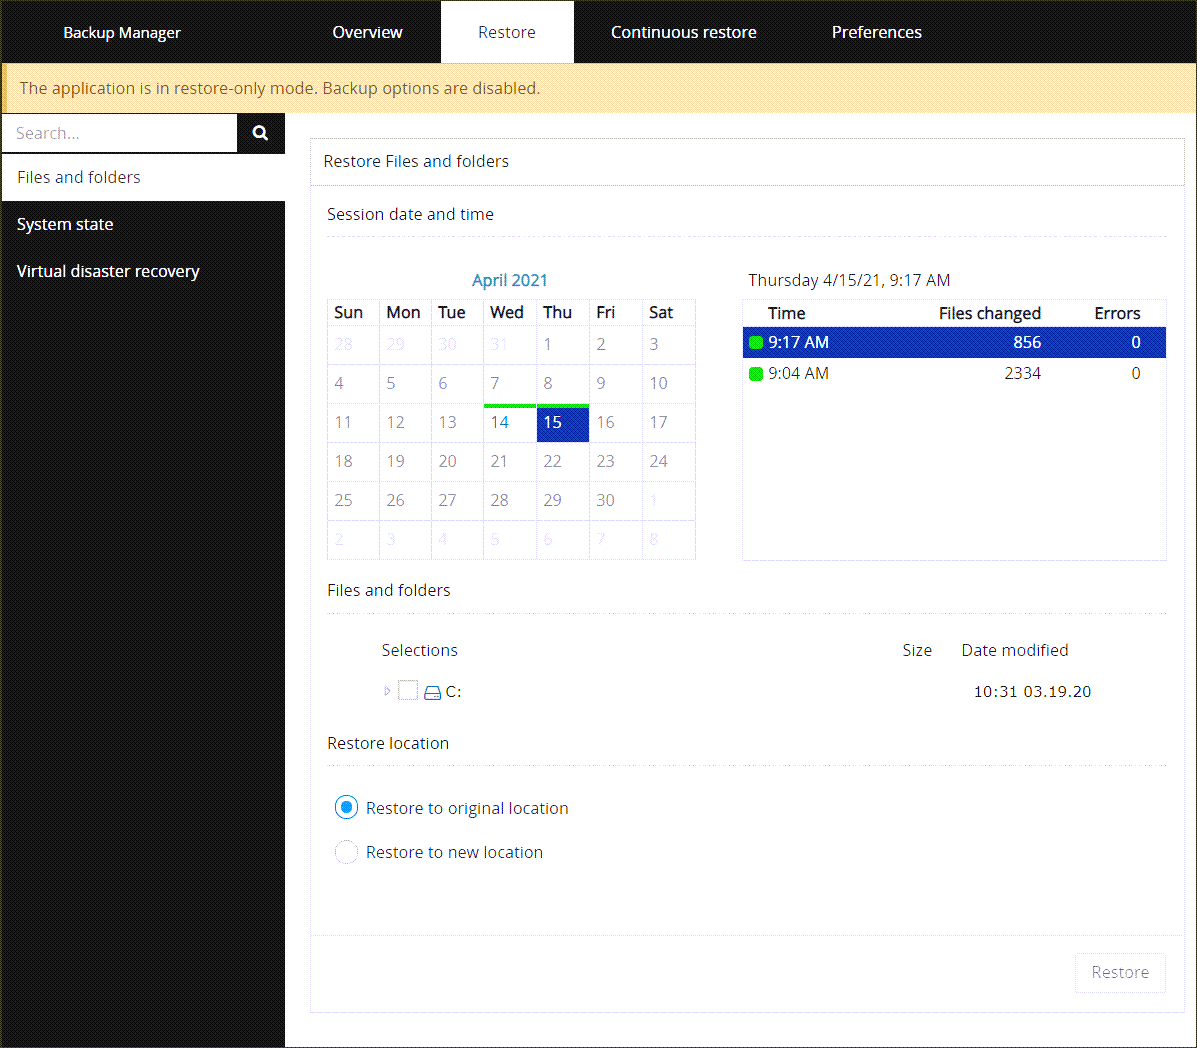
- Once open, the Backup Manager will show in restore-only mode
- Open the Restore module, and then select a data source from the vertical menu to the left. The selection includes all data sources that have been backed up at least once on the current device
- Select the backup session you want to restore
- (A) next to the name of a session means that the session is archived (more on backup session archiving)
- (L) means that the session has been saved locally in the LocalSpeedVault and the data is not synchronized with the cloud yet
- Select the data you want to restore. For some data sources like Files and folders you can expand the file tree and select individual files or directories. For other data sources only the root folder can be selected
- Specify where to restore the selected data: to the original location or to a new one. Enter the target location, if applicable
- Click Restore and wait until the restore process is completed. You can close Backup Manager in the browser while the recovery is in progress (it will continue in background)


