
Before beginning the Bare Metal Recovery (BMR), all requirementsmustbe met including Disk size.
To perform a Bare Metal Recovery (BMR) in a Proxmox VE (Virtual Environment), first ensure you have met the requirements, then proceed to download the Cove Rescue Media ISO image, create or prepare the target virtual machine, and begin the recovery process.
Steps to take:
- Obtain the rescue media (optional)
- Upload rescue media to Proxmox VE storage
- Create the target VM
- Attach the rescue media to target VM
- Boot the target VM
The boot menu images may appear different for your target device depending on your distribution.
Proxmox VE Requirements
Before beginning, ensure:
- Meet the general requirements for Bare Metal Recovery for Windows
- Proxmox Virtual Environment login credentials
Instructions
Obtain the rescue media (optional)
There are a number of ways to obtain the rescue ISO image:
- Download the Windows Rescue Media file (Windows .iso) directly from the Management Console downloads page.
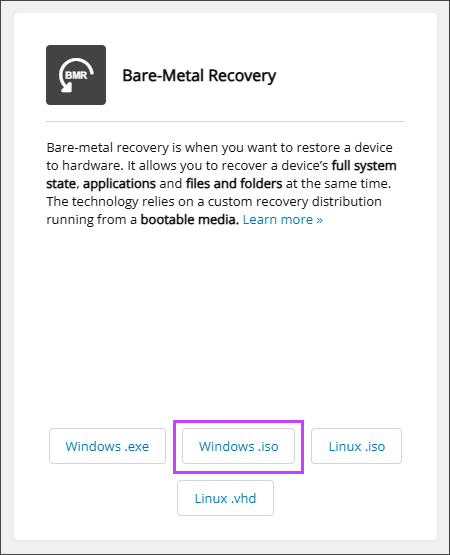
This is useful if your source device is broken or you want to get general ISO image that can be used to recover any Windows device.
Upload rescue media to Proxmox VE storage
- Login to Proxmox VE web interface
- Open the storage location
- Navigate to ISO Images
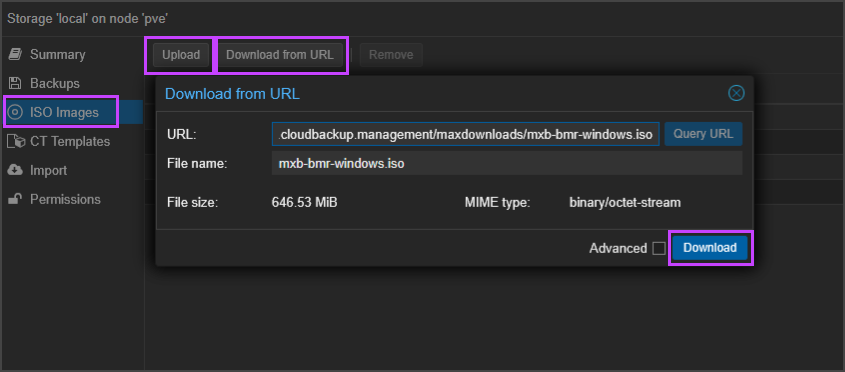
- Upload the downloaded ISO file from Step 1
- Select Download from URL
- Enter the ISO download URL:
https://cdn.cloudbackup.management/maxdownloads/mxb-bmr-windows.iso
- Select Download
Or
If you receive a 403 error, exit the window and try again.
Create the target VM
Skip this step only when the source machine and target machine are the same machine, meaning you are performing a recovery in place.
Via Proxmox VE
- Select Create VM
- Give the VM a recognizable name
- Click Next to move to the OS tab
- Select Use CD/DVD disk image file (iso)
- Set the storage to Local
- Attach the downloaded Cove rescue media in the ISO image field.
- Set the Guest OS type and version for the virtual machine in the Type and Version fields.
- Click Next to move to the System tab
- Set the same firmware type as the source machine, either Legacy BIOS (SeaBIOS) or UEFI (OVMF).
Recovery may fail in the case of a firmware type mismatch.
- Click Next to move to the Disks tab
- Create the same number of virtual disks as are on the source machine, using disk sizes that are equal to or larger than the original disks. When possible, the last partition on each disk should be expanded to use the remaining available space.
- Click Next to move through the remaining tabs, until you are able to complete VM creation
Via commands
Alternatively, the VM can be created using the commands in the terminal.
To create a UEFI VM (OVMF), use the following commands:
qm create <vmid> \
    --name <vm_name> \
    --memory <ram_mb> \
    --cores <cpu_cores> \
    --cpu host \
    --bios ovmf \
    --efidisk0 <storage>:1 \
    --scsi0 <storage>:<disk_size_gb> \
    --scsihw virtio-scsi-pci \
    --net0 virtio,bridge=<bridge> \
    --ide2 <storage>:iso/mxb-bmr-windows.iso,media=cdrom \
    --boot 'order=ide2;scsi0'
Ensure you replace the placeholder values in angle brackets (< >) with the relevant information
For Example:
qm create 107 \
    --name bmr-target \
    --memory 8192 \
    --cores 4 \
    --cpu host \
    --bios ovmf \
    --efidisk0 local:1 \
    --scsi0 local:10 \
    --scsihw virtio-scsi-pci \
    --net0 virtio,bridge=vmbr1 \
    --ide2 local:iso/mxb-bmr-windows.iso,media=cdrom \
    --boot 'order=ide2;scsi0'
To create a Legacy BIOS VM (SeaBIOS), you must remove the UEFI-specific options:
qm create <vmid> \
    --name <vm_name> \
    --memory <ram_mb> \
    --cores <cpu_cores> \
    --cpu host \
    --bios seabios\
    --scsi0 <storage>:<disk_size_gb> \
    --scsihw virtio-scsi-pci \
    --net0 virtio,bridge=<bridge> \
    --ide2 <storage>:iso/mxb-bmr-windows.iso,media=cdrom \
    --boot 'order=ide2;scsi0'
For example:
qm create 108 \
    --name bmr-target \
    --memory 8192 \
    --cores 4 \
    --cpu host \
    --bios seabios\
    --scsi0 local:10 \
    --scsihw virtio-scsi-pci \
    --net0 virtio,bridge=vmbr1 \
    --ide2 local:iso/mxb-bmr-windows.iso,media=cdrom \
    --boot 'order=ide2;scsi0'
Attach Cove Rescue Media
Skip this step if the Cove Rescue Media was attached already.
If the Cove Rescue Media was not attached to the target VM during VM creation, attach it after the VM was been created:
- Open the target VM
- Navigate to Hardware and select CD/DVD Drive (ide2)
- Click Edit
- Select Use CD/DVD disk image file (iso)
- Set the storage to Local
- Attach the downloaded Cove rescue media in the ISO image field.
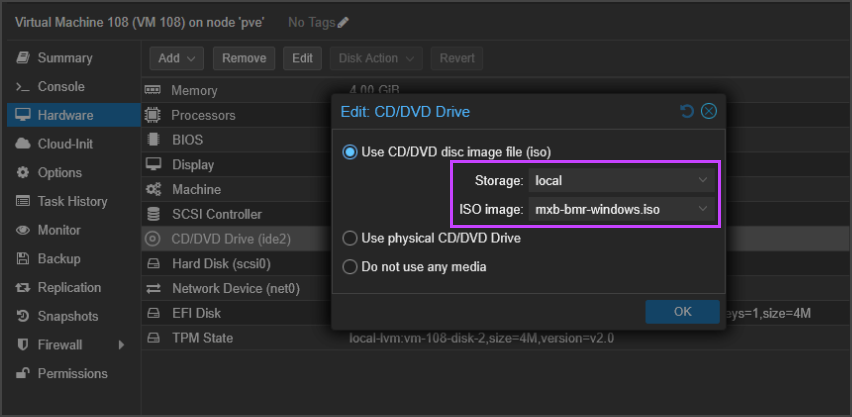
- Click OK to close the window
- Navigate to Options and select Boot Order
- Click Edit
- Modify the boot order so that the target machine boots from the Cove Rescue Media ISO image
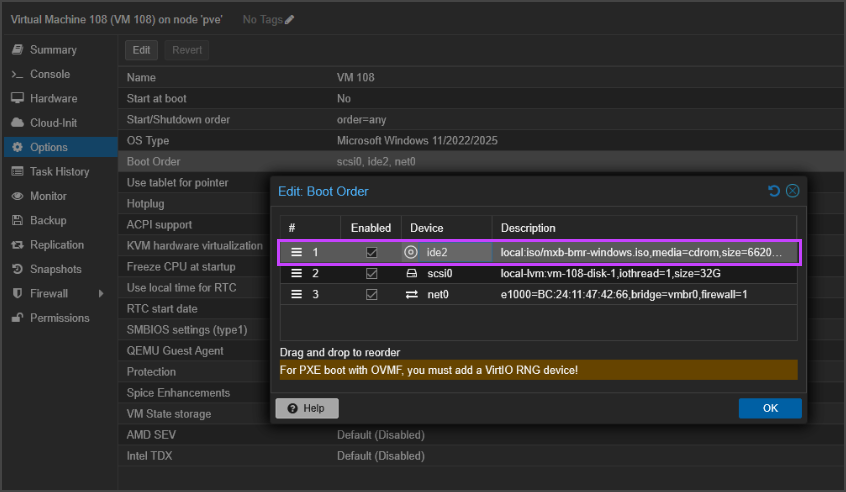
- Click OK to close the window
Boot the target VM
Once the Virtual Machine has been created:
- Boot the target machine. The Cove Rescue Media boot menu will open automatically
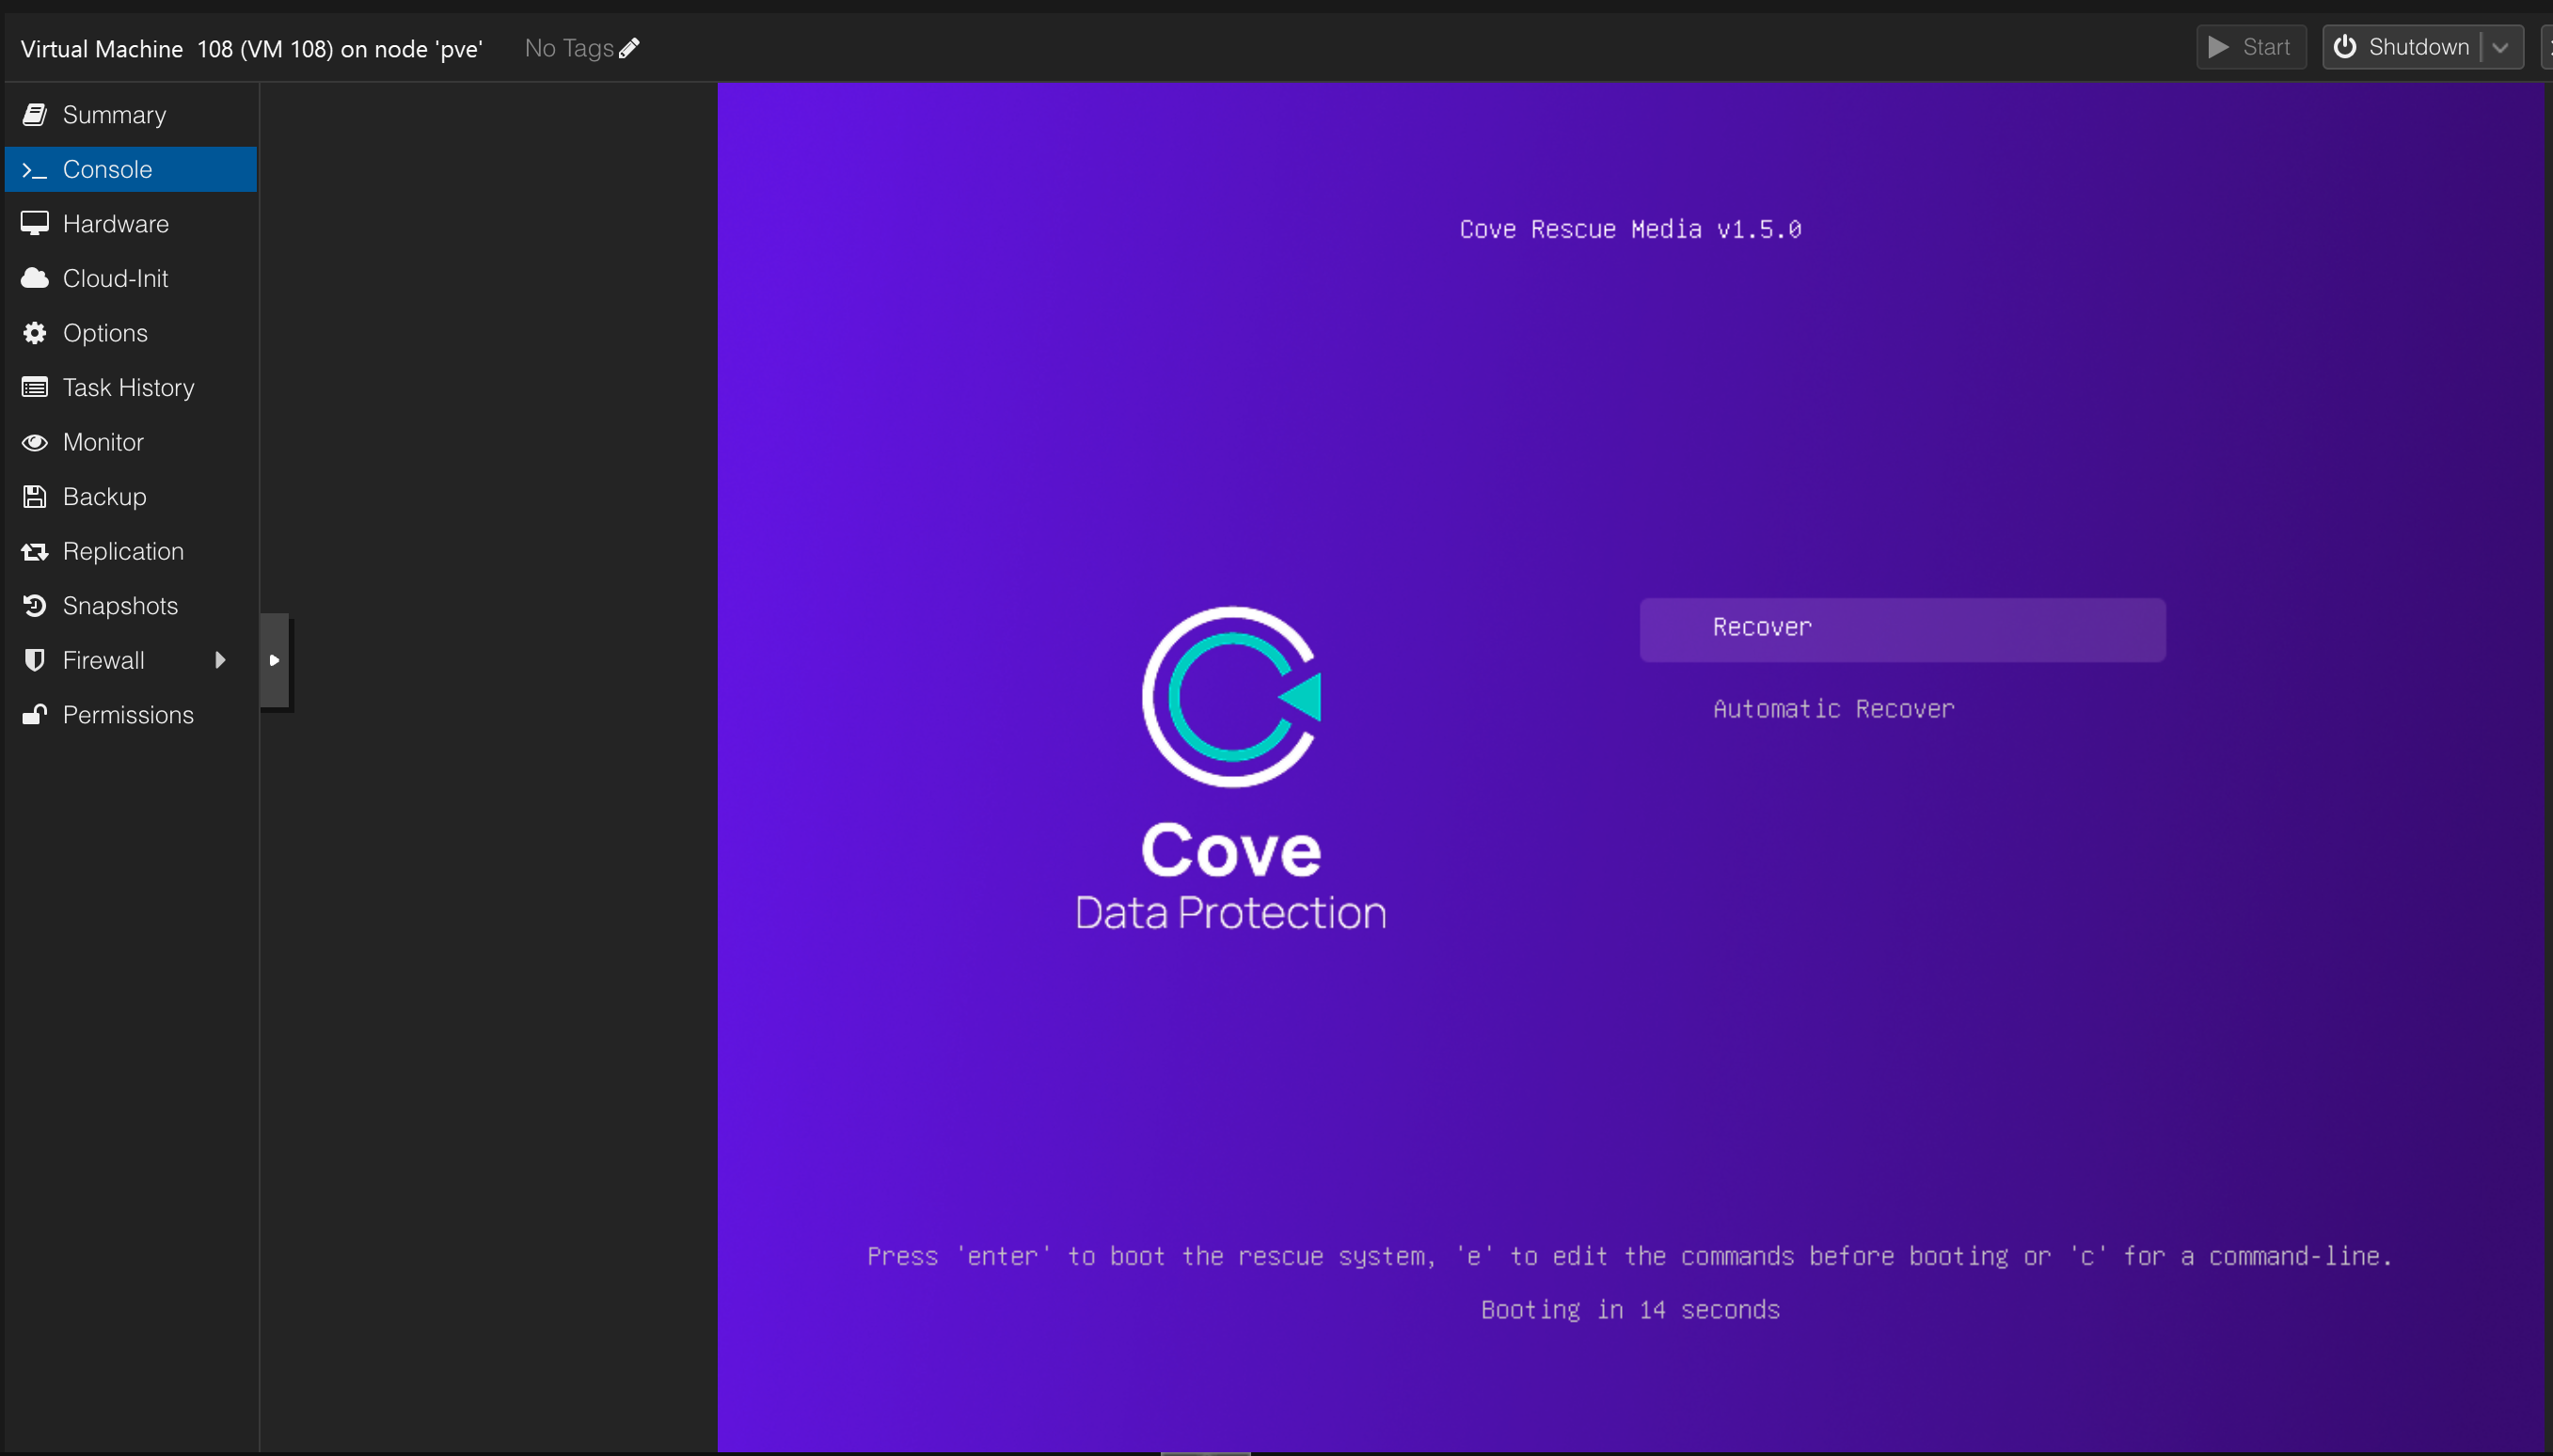
- Select the recovery method and follow the instructions on the Cove Rescue Media screen,
OR
- Follow the instructions to begin recovery to complete the Bare Metal Recovery of the device.