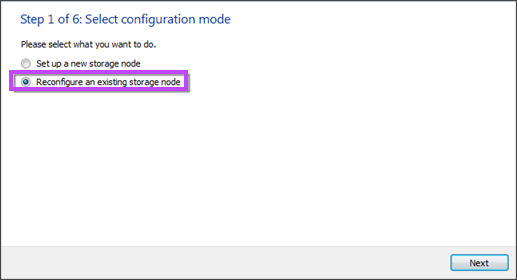
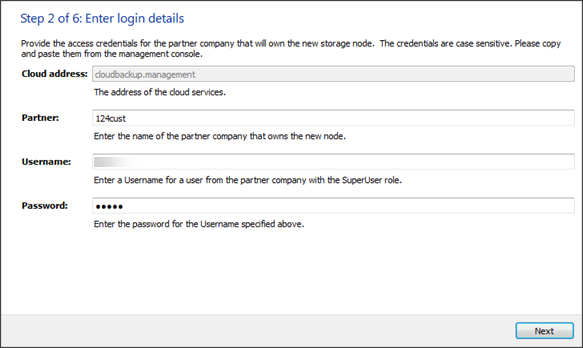
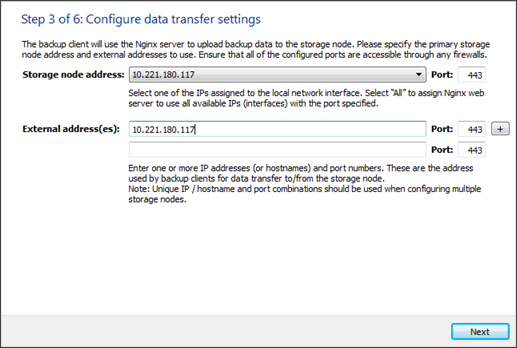
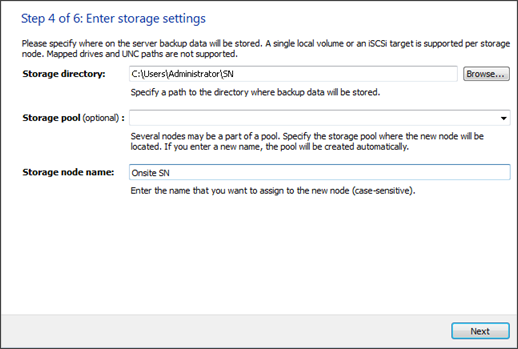
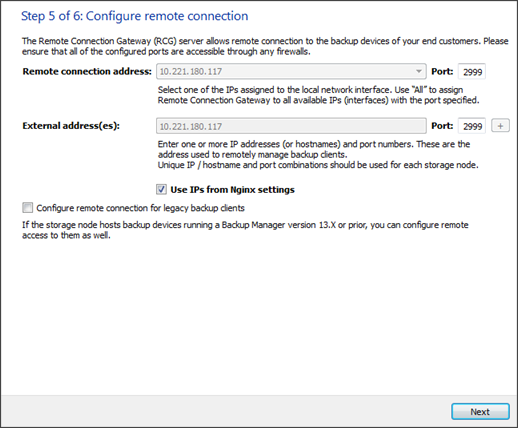
To update the storage node software or to reconfigure the current settings, you need to repeat the installation as you would when installing a storage node for the first time, with the Reconfigure option enabled.
Storage Node Installers are available in the Downloads section of the Management Console. They can also be downloaded from the N-able additional downloads page.
Storage node reconfiguration does not influence active backup sessions (new backup data is distributed among other storage nodes available to your company while the home node is unavailable).
Options
You can change most of the settings during storage node reconfiguration. There are only 2 major properties are not subject to editing during a reconfigure: name and customer. This means it is not possible to re-assign an existing node to a different customer or rename the node. In these cases you will need to create a new node and put the current node out of service if it is no longer needed.
The DNS record can be used in place of the IP address by entering the domain name in the External Address(es) field. In case other external addresses are used, the DNS record should be listed first.
Do not replace the IP addresses for the Remote connection address, External addresses for remote connections, Remote connection address for legacy backup clients and External address(es) for remote connections to legacy backup clients fields.
Instructions
- Download the Storage Node Installer for your operating system from the N-Able Cove Data Protection page
- Start the Storage Node Installer
- On Windows, it opens as a set-up wizard. Choose Reconfigure an existing storage node
- On Linux, use the command line. Set executable rights for the script (
root# chmod +x mxb-cloud-sn-linux-x86_64.run) and then run the Storage Node Installer (root# ./mxb-cloud-sn-linux-x86_64.run). You will be asked what you want to do. Set-installation-modetoinstall
- Proceed through the installation steps for the relevant Operating System, updating the settings needed:
 Windows
- Enter your login credentials for access to the cloud. An account with the SuperUser role is required
- Select the IP address you want to use for the storage node. You can enter the same IP address to the External address(es) field. If the external address differs from the primary storage node address, it should forward incoming traffic there (this is achieved with the help of a network adapter)
- Enter information about the new storage location
- Select the IP address for remote connections to backup devices. You can enter the same address to the External address(es) field. If the external address differs from the primary remote connection address, it should forward incoming traffic there (this is achieved with the help of a network adapter)
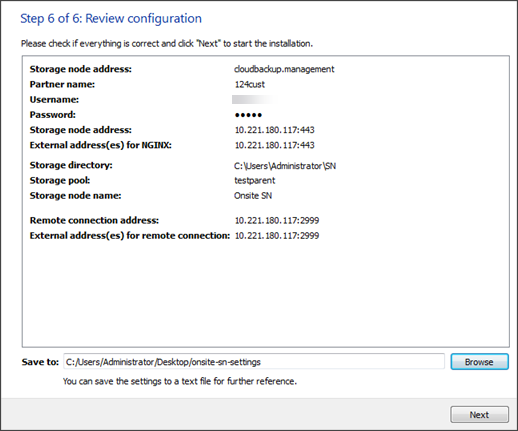
- Check the settings you have entered. Use the arrow button at the top to go back to the previous steps and edit the settings. You can save the settings to a text document for further reference (Save to)
- Click Next to complete the installation
The settings that you can reconfigure can be found in Settings for storage node installation
When installing storage nodes, please be aware that you must use IPv4 as IPv6 is not supported.
The DNS record can be used in place of the IP address by entering the domain name in the External Address(es) field.
In case other external addresses are used, the DNS record should be listed first.Do not replace the IP addresses for the Remote connection address, External addresses for remote connections, Remote connection address for legacy backup clients and External address(es) for remote connections to legacy backup clients fields.
After the reconfiguration, you can locate the node among the partner's storage nodes in the Cloud Management Console (Manage > View storage statistics) with the new configuration.
 GNU/Linux
- Submit the Installation parameters with the necessary changes
- Review the settings you have submitted. Enter
Y(Yes) if everything is correct or enterN(No) to start over. Here is an example:Please review all the information once again: ============================================================ Storage directory: /opt/mxb/storage ------------------------------------------------------------ Cloud address: cloudbackup.management:443 Cloud partner name: Smart Telecom Cloud user: root@email.com Cloud password: ******** ------------------------------------------------------------ Storage name: Primary Storage node name: Smart Telco Node 3 ------------------------------------------------------------ NGINX bind address: 192.168.0.222:443 External addresses: 192.168.0.222:443 RCG bind address: 192.168.0.222:1999 RCG external address: 192.168.0.222:1999 Web RCG bind address: 192.168.0.222:2999 Web RCG external addresses: 192.168.0.222:2999 ============================================================ Is everything correct? (Y/n) Y
When the reconfiguration is complete, the node will appear among the partner's nodes with the appropriate changes made.
./mxb-cloud-sn-linu x-x86_64.run
Verifying archive integrity... All good.
Uncompressing Cloud Storage Node installer........

Cloud storage node installation modes:
[1] Setup new or update existing cloud storage node
[2] Upgrade old appliance to a cloud storage node
Enter the number: 1

Cloud partner name: AcmeIT
Cloud user: root@email.com
Cloud password for 'root' user: 123456
Attempting to authenticate at cloud.securebackupandrestore.com:443... ok

Storage directory [/opt/mxb/storage]:

Storage name [Primary]: linux_001
Storage node name: Linux001
......
The new settings will be applied automatically within the next couple of hours.
If you have previously configured Log Size Limiting entries in the storage node config.ini, these will need to be re-added after reconfiguration of the storage node is complete:[Logging]
SingleLogMaxSizeInMB=X
TotalLogsMaxSizeInMB=X

