
Azure virtual machines cannot boot from ISO images. To enable Bare Metal Recovery (BMR) in Azure, use Linux Rescue Media in VHD format.
This VHD image is designed specifically for Azure and includes:
- cloud-init for automated configuration
- Azure Linux VM Agent for integration with Azure services
- Compatibility with the Azure Serial Console, which you can use to perform BMR through the Azure portal
Using this VHD ensures a seamless recovery experience in Azure environments.
Bare Metal Recovery on Azure requires the following steps:
- Download the rescue VHD file
- Upload the rescue VHD file to Azure Blob Storage
- Create a Managed disk from the rescue VHD file
- Attach the Managed disk to the target machine
- Boot the target machine
- Perform recovery
- Boot the target machine from recovered OS disk
Requirements
Before beginning, ensure you have:
- An Azure Storage account
To create an Azure storage account, go to Create an Azure storage account
- A container in Azure Blob Storage
To create a container and upload files to Azure Blob Storage, go to Quickstart: Upload files to Azure Blob Storage
Instructions
- Download the Linux Rescue Media in VHD format from:
- Cove Data Protection (Cove) Management Console Downloads page
- https://cdn.cloudbackup.management/maxdownloads/cove-rescue-media-linux.vhd
- Upload the rescue VHD file to Azure Blob Storage either via the Azure portal or by using the following
Azure CLIcommand:az storage blob upload \ --account-name <storage-account> \ --container-name <container> \ --file <path-to-vhd-file> \ --name <vhd-file-name> \ --auth-mode login
Ensure you replace the placeholder values in angle brackets (< >) with the relevant information
- Use the
az disk createcommand to create a managed disk in Azure from the VHD file uploaded to Azure Blob Storage.az disk create \ --resource-group <resource-group> \ --name <managed-disk-name> \ --source https://<storage-account>.blob.core.windows.net/<container>/<vhd-file-name> \ --location <location> \ --zone <zone> \ --os-type Linux \ --security-type <security-type> \ --architecture x64 \ --sku <sku> \ --hyper-v-generation <hyper-v-generation>
Ensure you replace the placeholder values in angle brackets (< >) with the relevant information
- Attach the managed disk with the rescue system to the target virtual machine.
- If the target and source machines are the same:
- Login to the Azure portal
- Navigate to the Disks page for the target VM.
- Swap the OS disk so that the managed disk containing the rescue system becomes the OS disk.
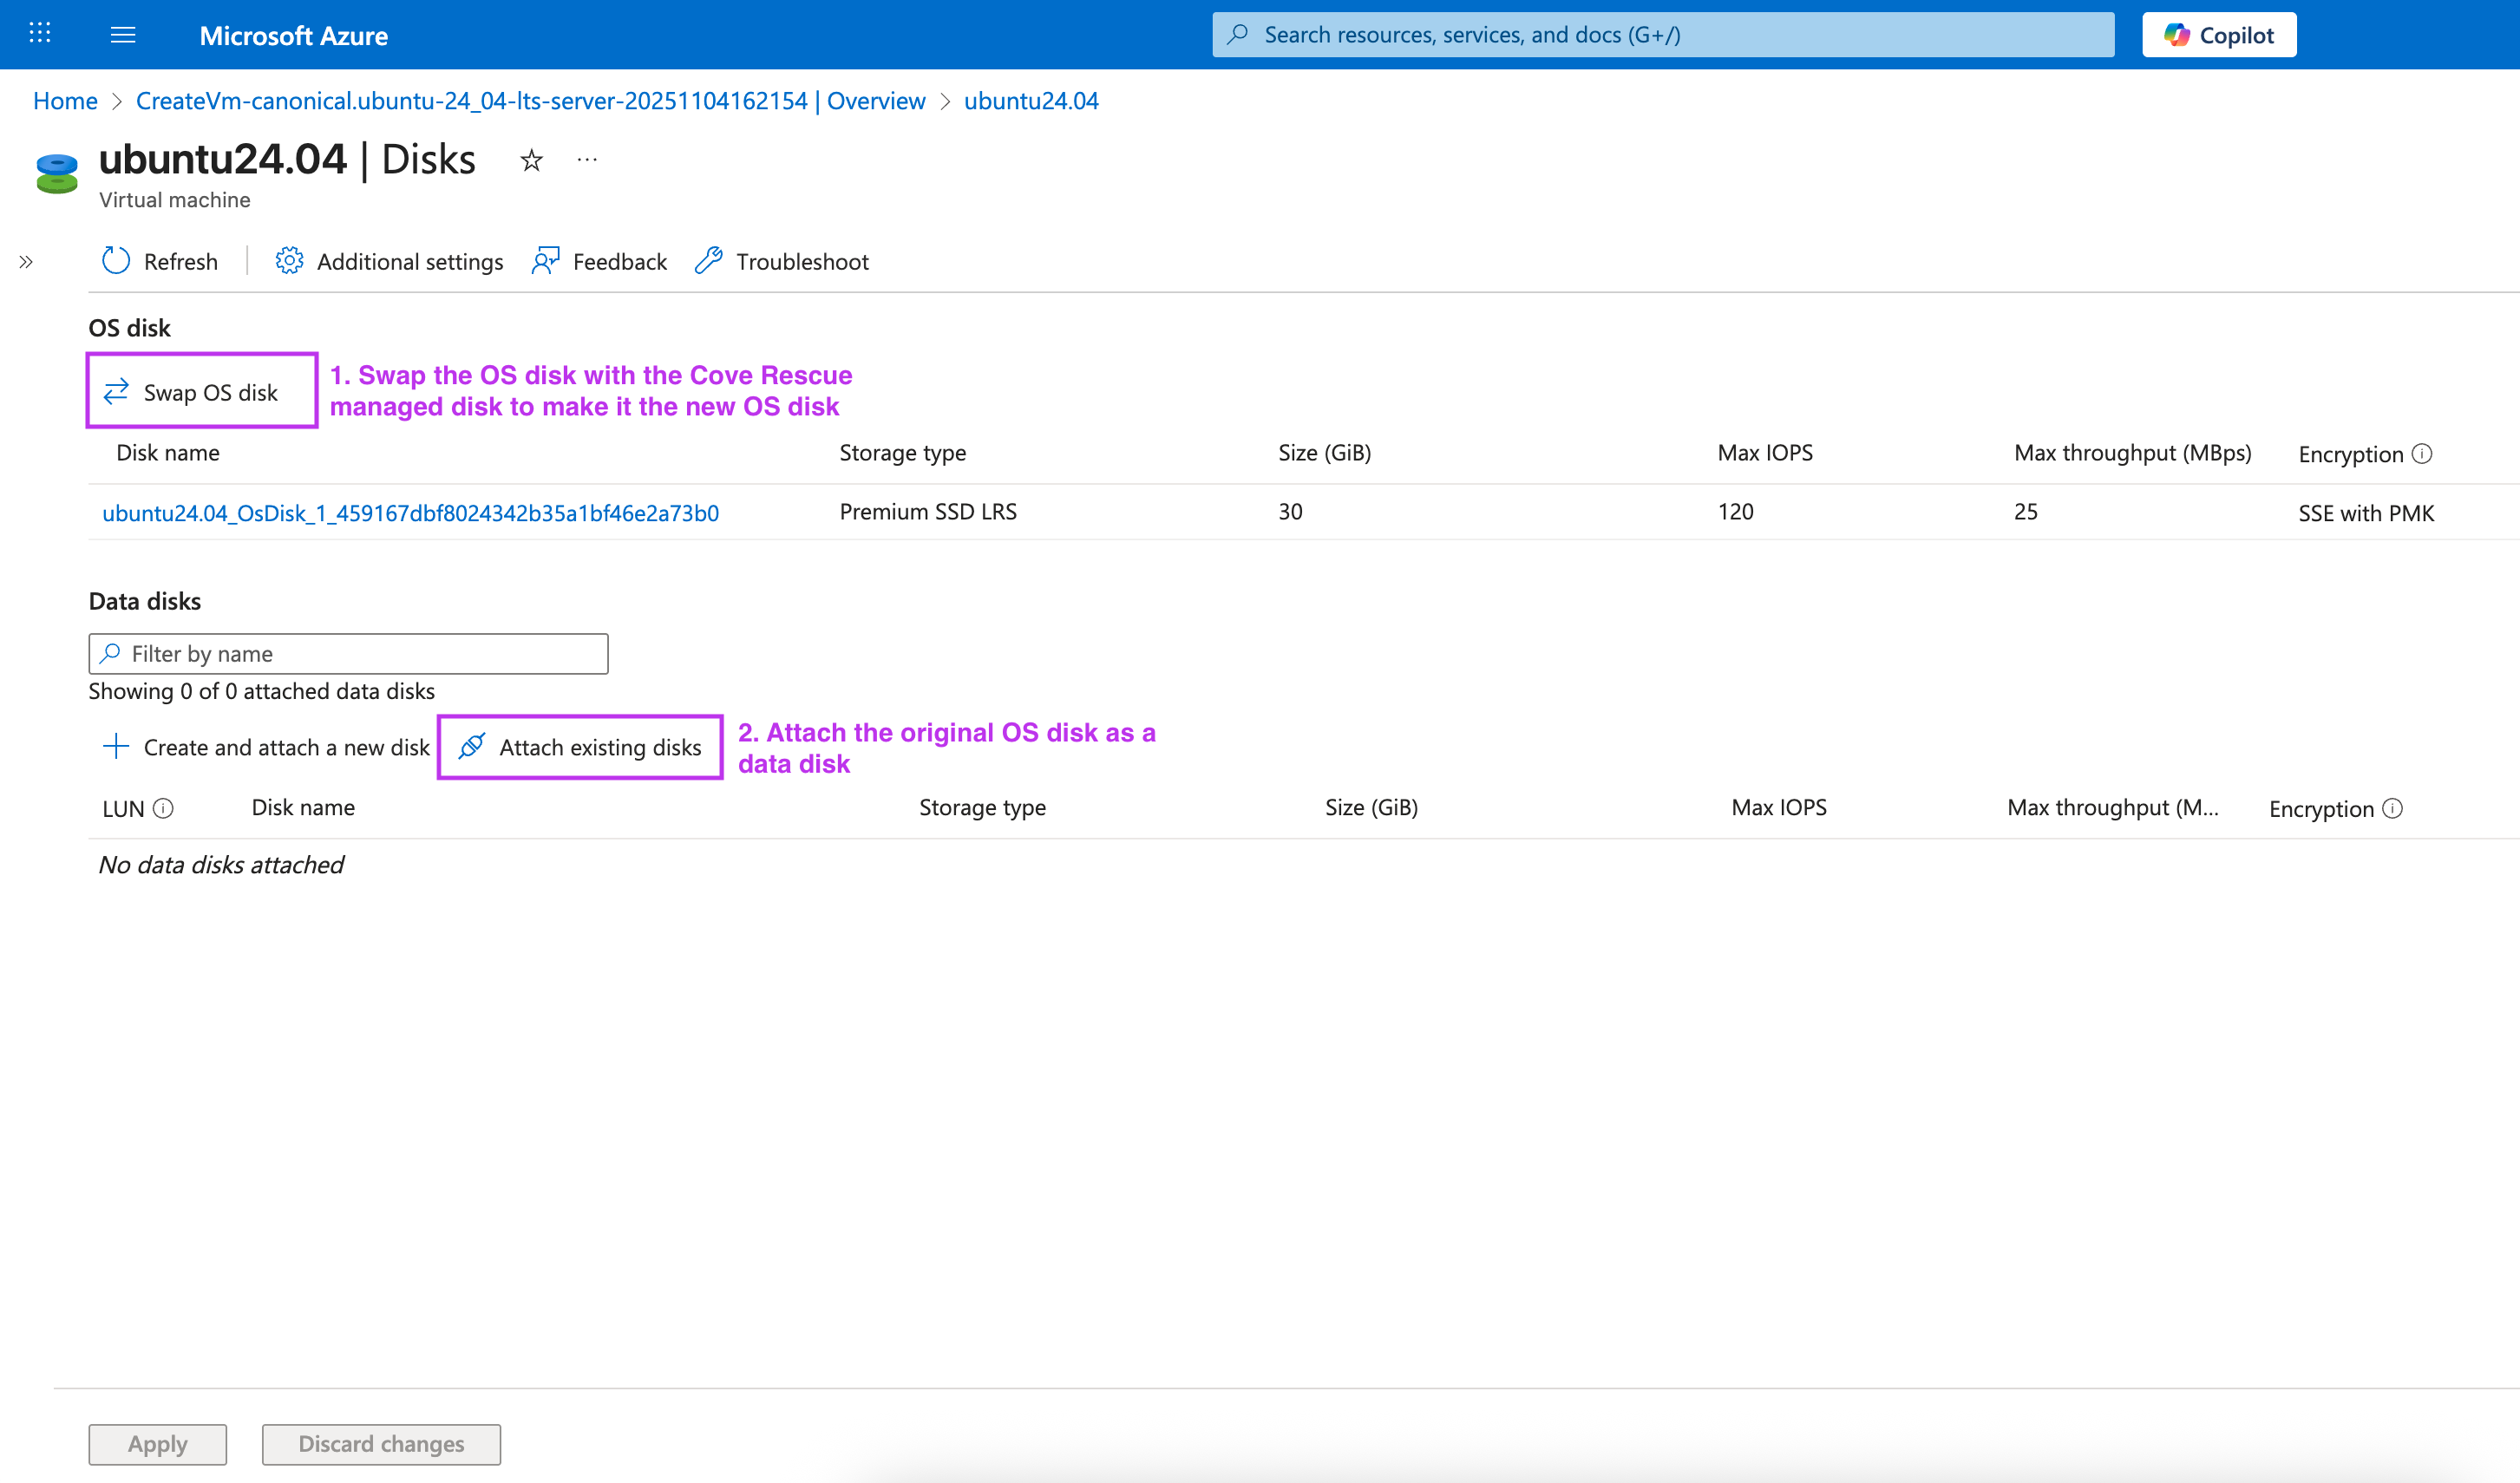
- Attach the original OS disk as a data disk.
This step is required because the original OS disk will be recovered; it will be repartitioned, and files and folders will be restored on it. For more information, see Swap the OS disk.
- If the target machine is a new blank VM, you must migrate the source system to a new VM:
- Create blank managed disks that match the size and number of disks on the source machine.
The disk that will become the OS disk after recovery must have the same OS type, Hyper-V generation, and security type as the target VM. This disk cannot be created in the Azure portal. Use the Azure CLI instead.
- Use the
az disk createcommand to create the OS disk.az disk create \ --resource-group <resource group> \ --name <disk name> \ --size-gb <disk size> \ --os-type Linux \ --hyper-v-generation <hyper-v-generation> \ --sku <sku> \ --security-type <security-type> \ --zone <zone>
Ensure you replace the placeholder values in angle brackets (< >) with the relevant information
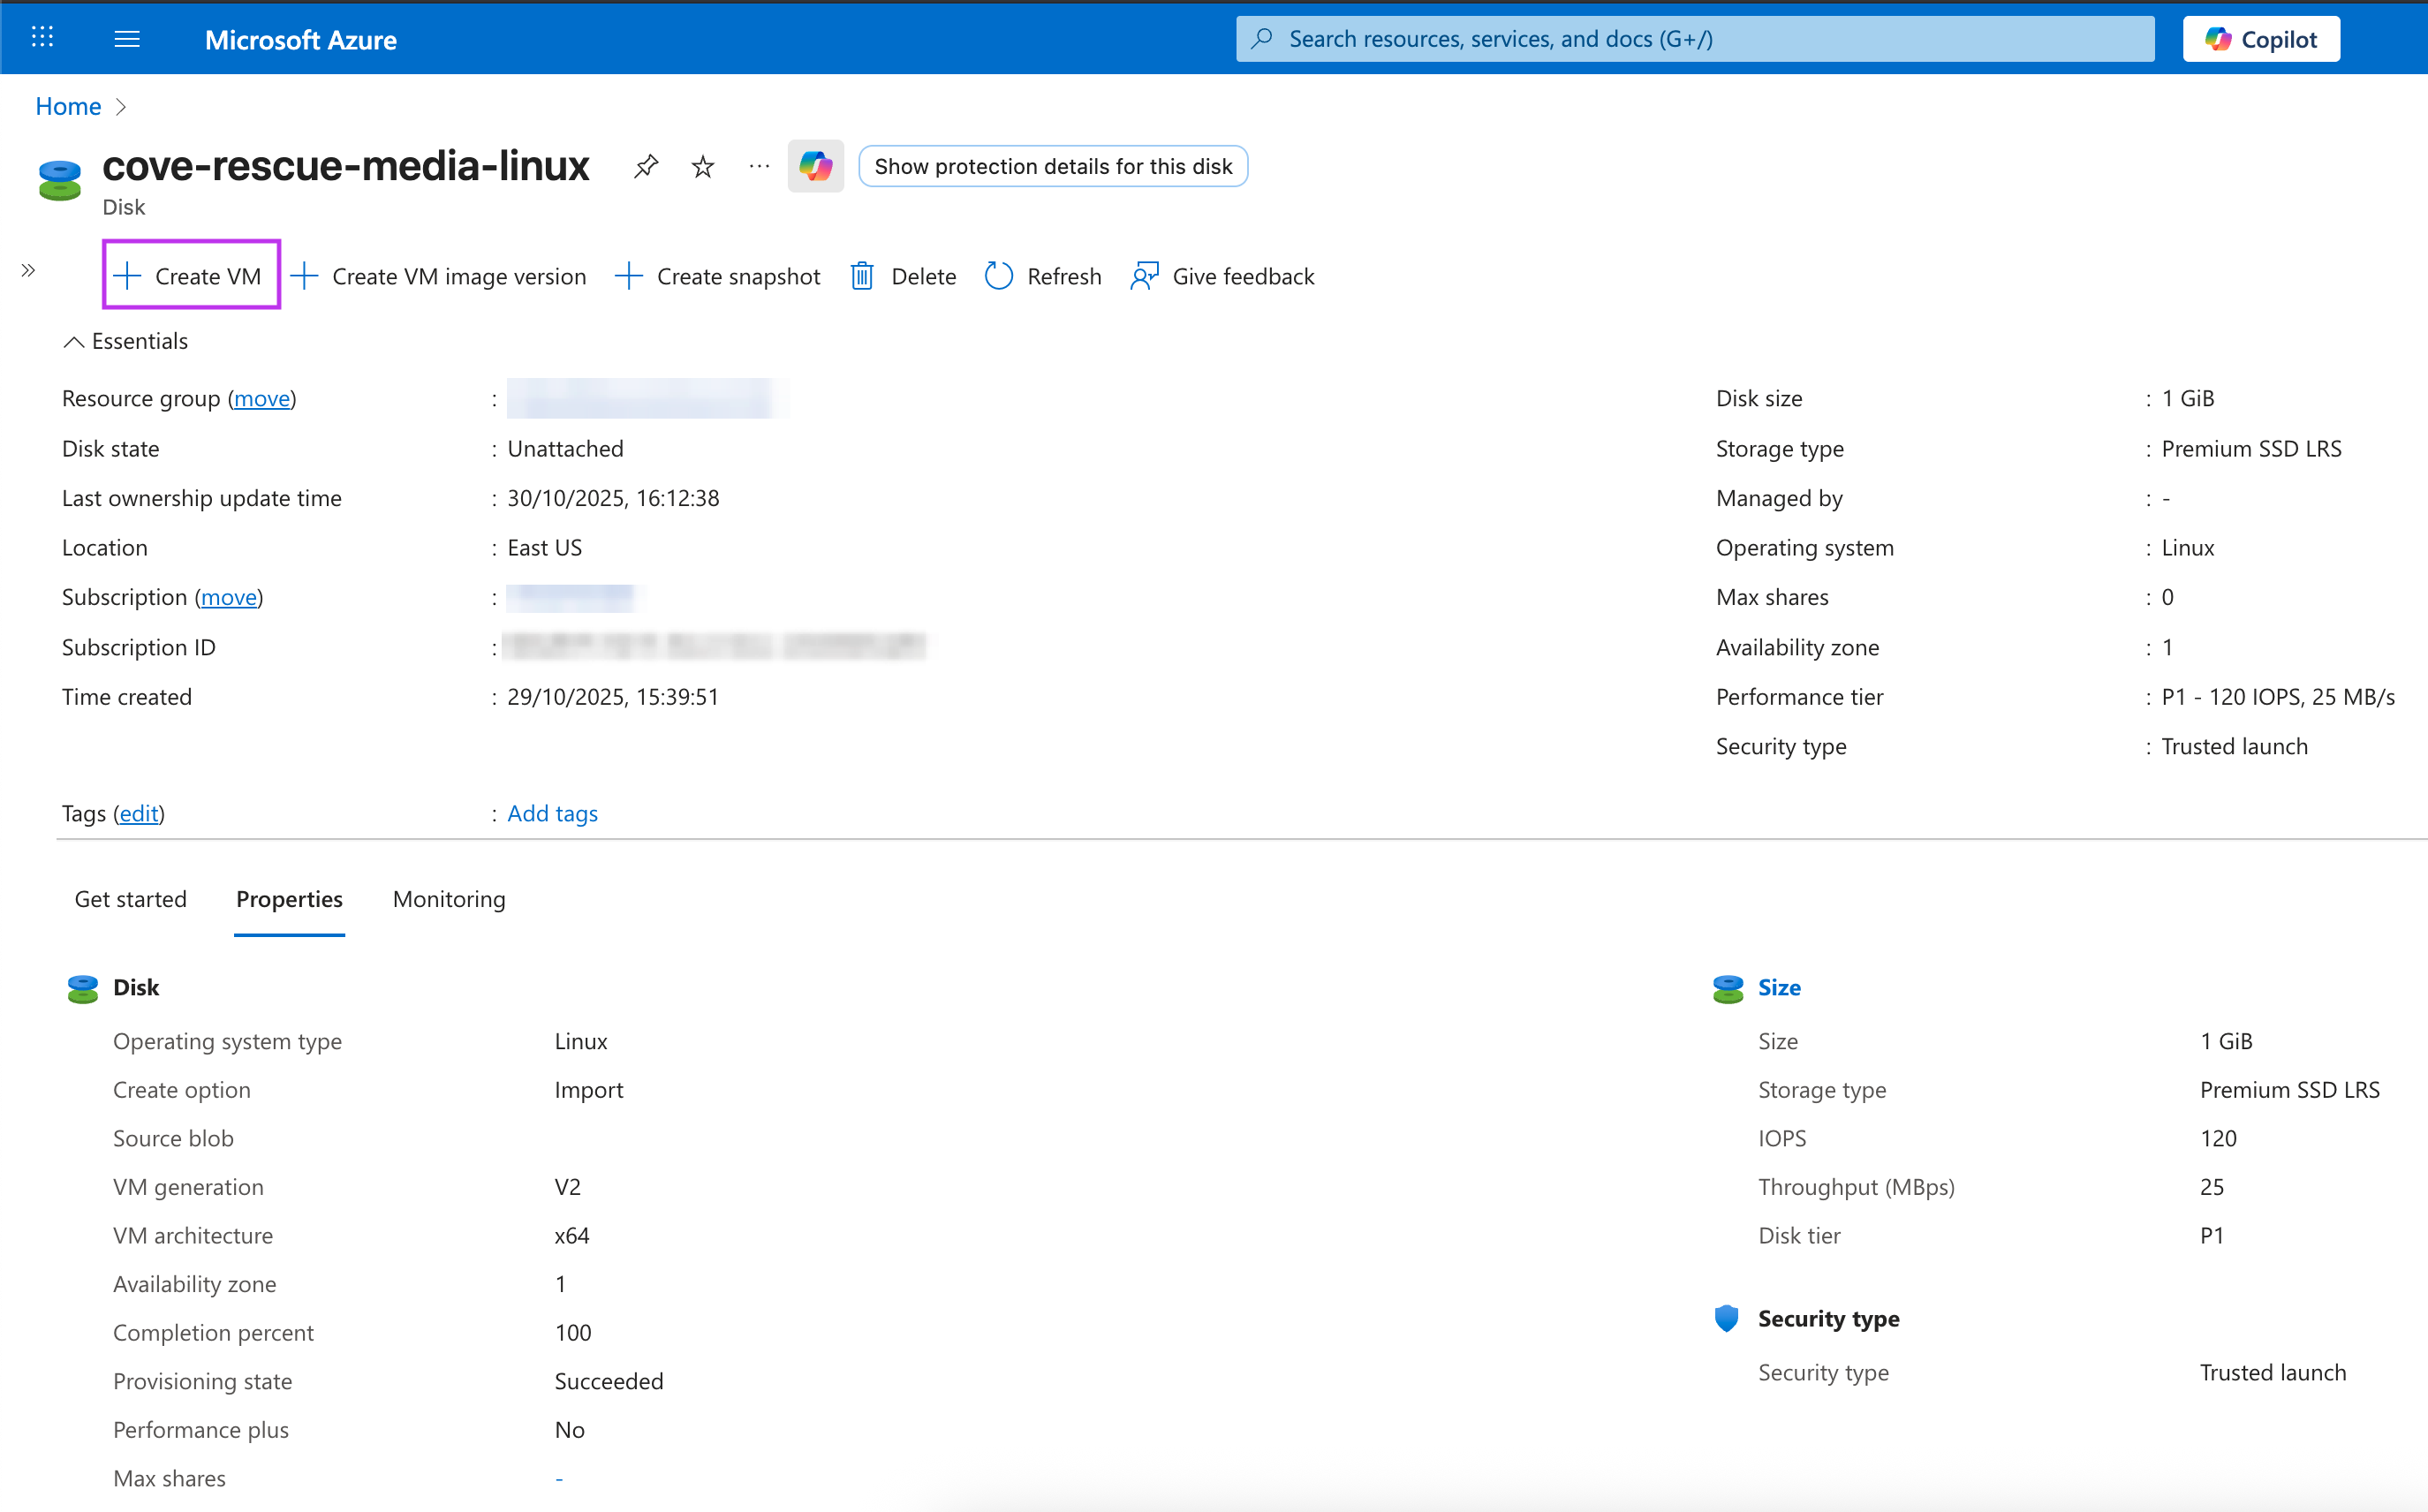
- Go to the managed disk that contains the rescue system and select Create VM to create the target virtual machine from this disk.
- During target VM creation, attach the blank disks as data disks.
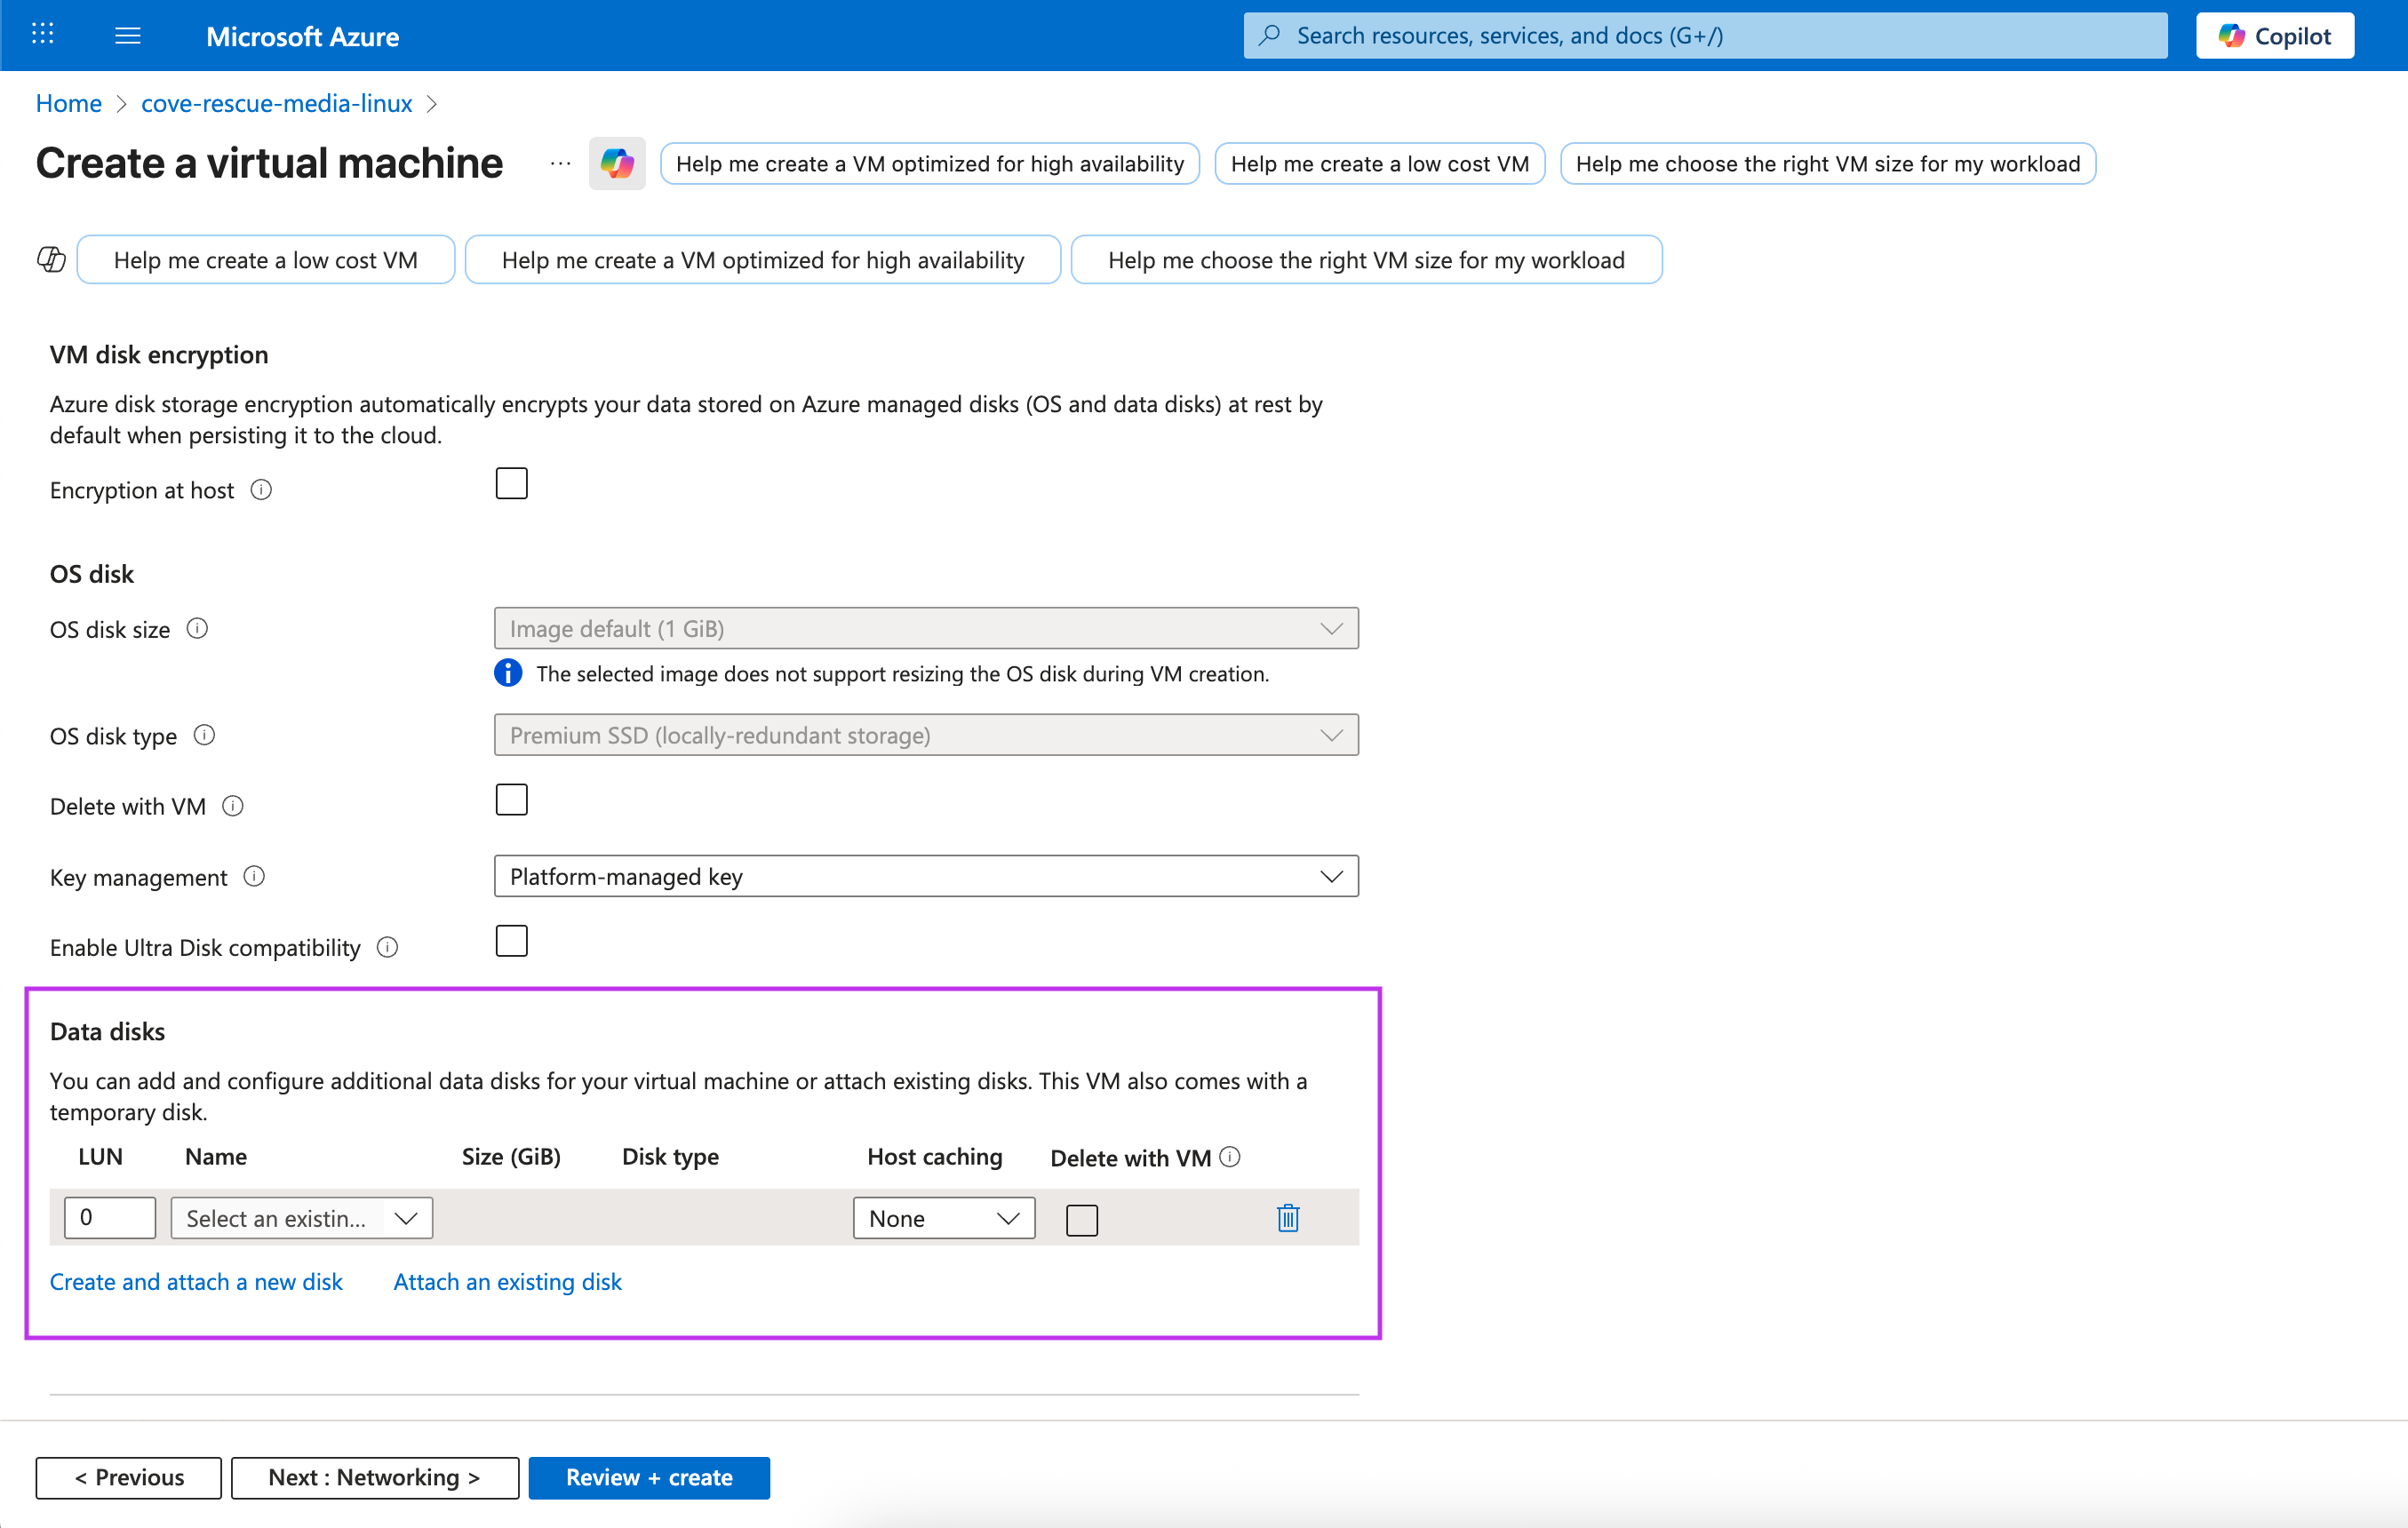
During recovery, the attached data disks will be repartitioned, and files and folders will be restored on them.
For example:
az disk create \ --resource-group DefaultResourceGroup \ --name target-vm-os-disk \ --size-gb 30 \ --os-type Linux \ --hyper-v-generation V2 \ --sku Premium_LRS \ --security-type TrustedLaunch \ --zone 1
- Create blank managed disks that match the size and number of disks on the source machine.
- If the target and source machines are the same:
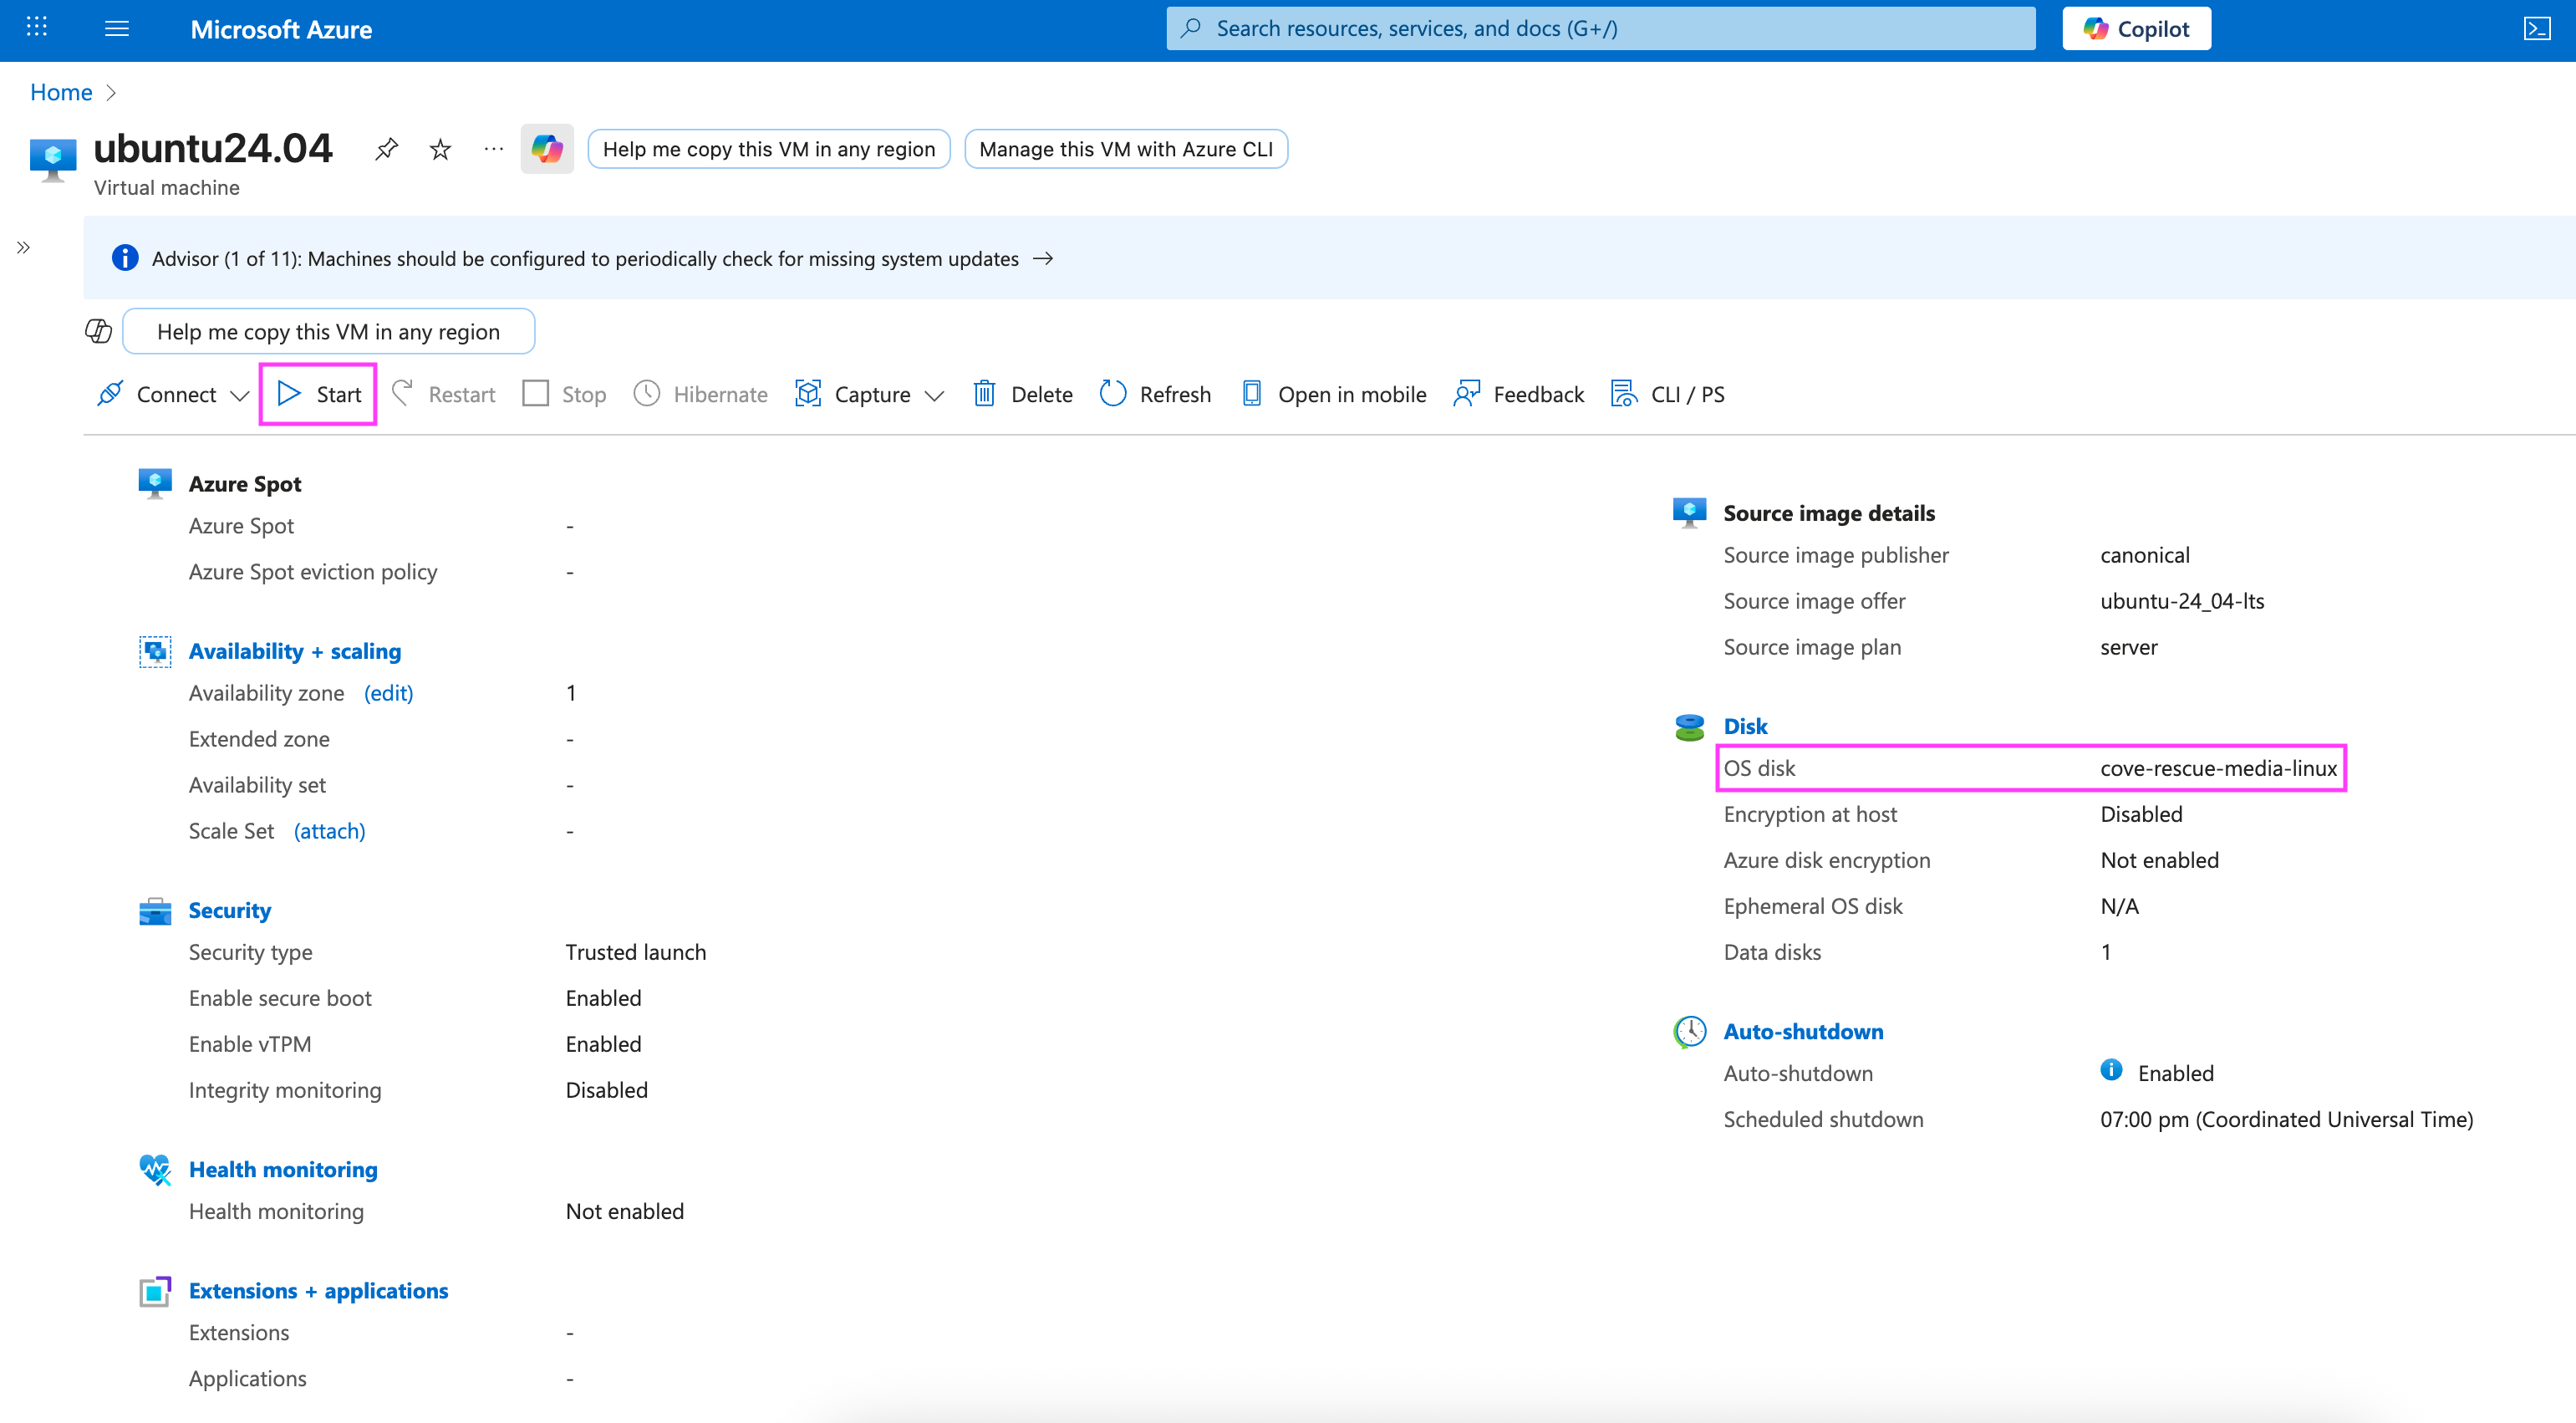
- Boot the target VM:
- Go to the target VM’s Overview page
- Verify that the managed disk containing the rescue system is attached as the OS disk
- Select Start.
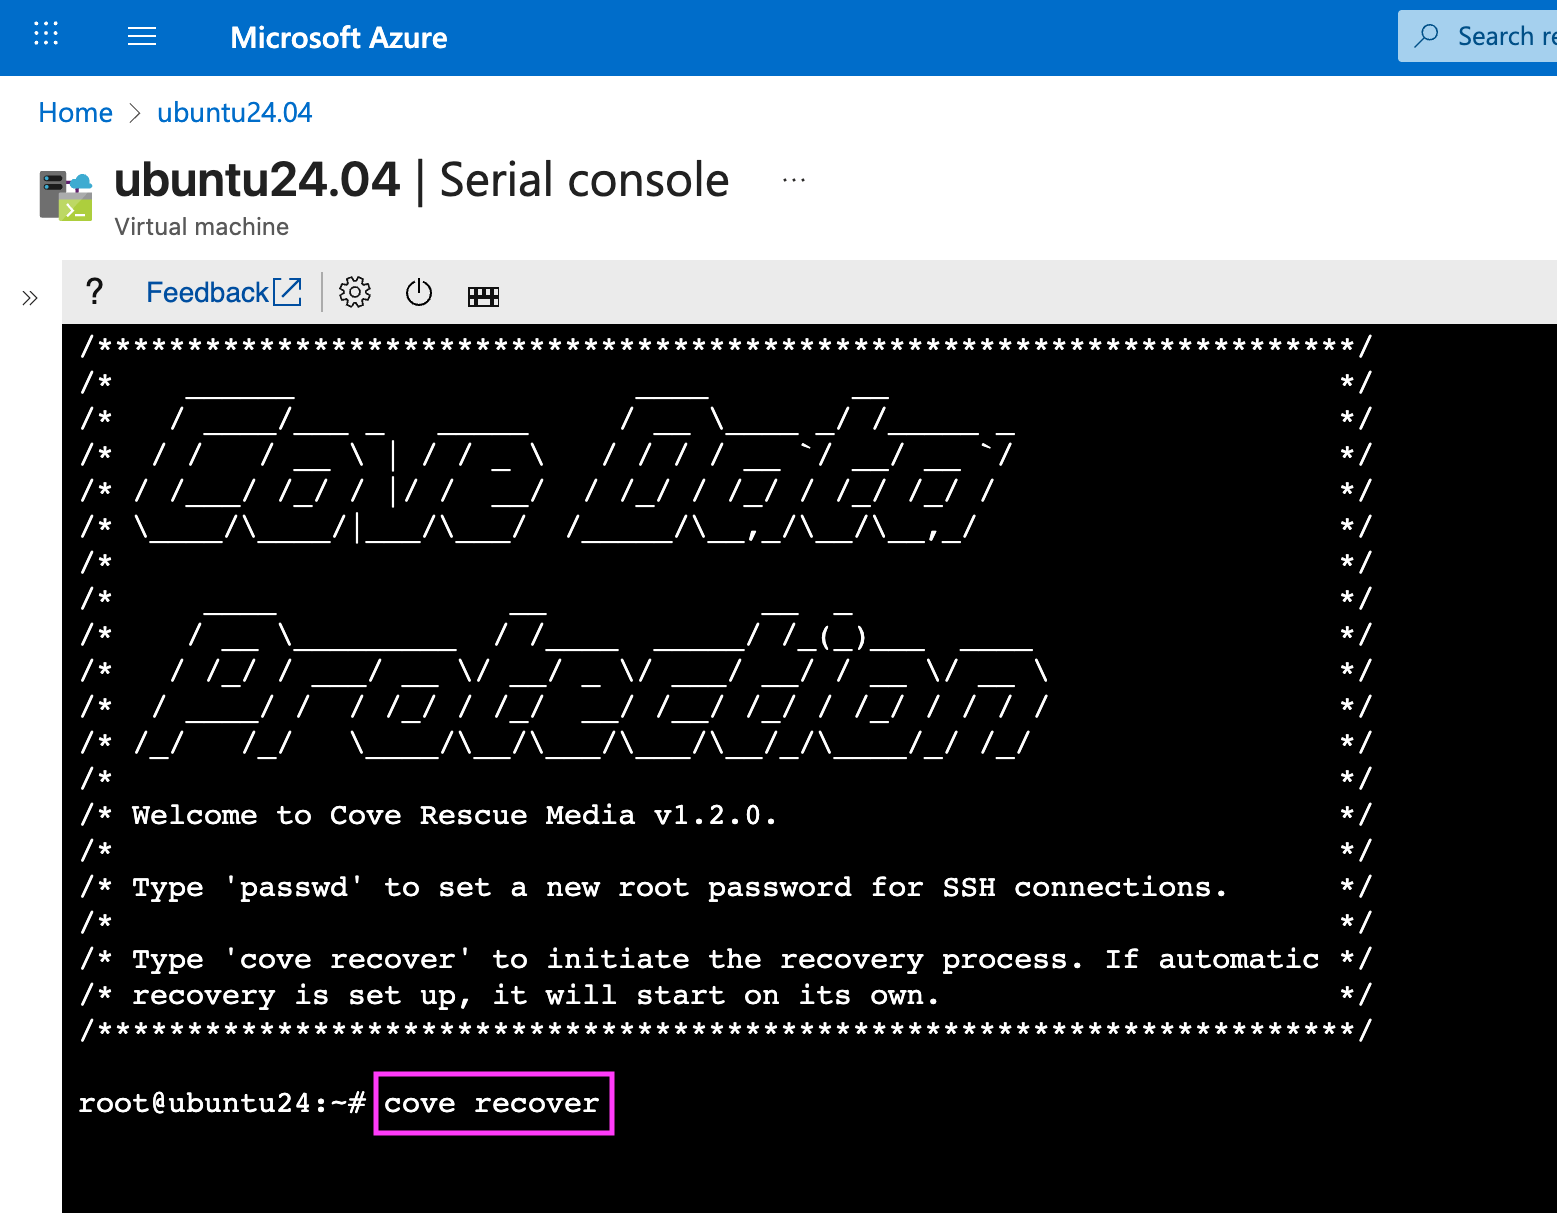
- Perform recovery via SSH or Azure Serial Console. You can recover the system by either:
- Setting up an SSH connection to the target VM
- Using the Azure Serial Console
- Run the
cove recovercommand to start the recovery process:cove recover
If you connect to the VM over SSH using a non-root account, run
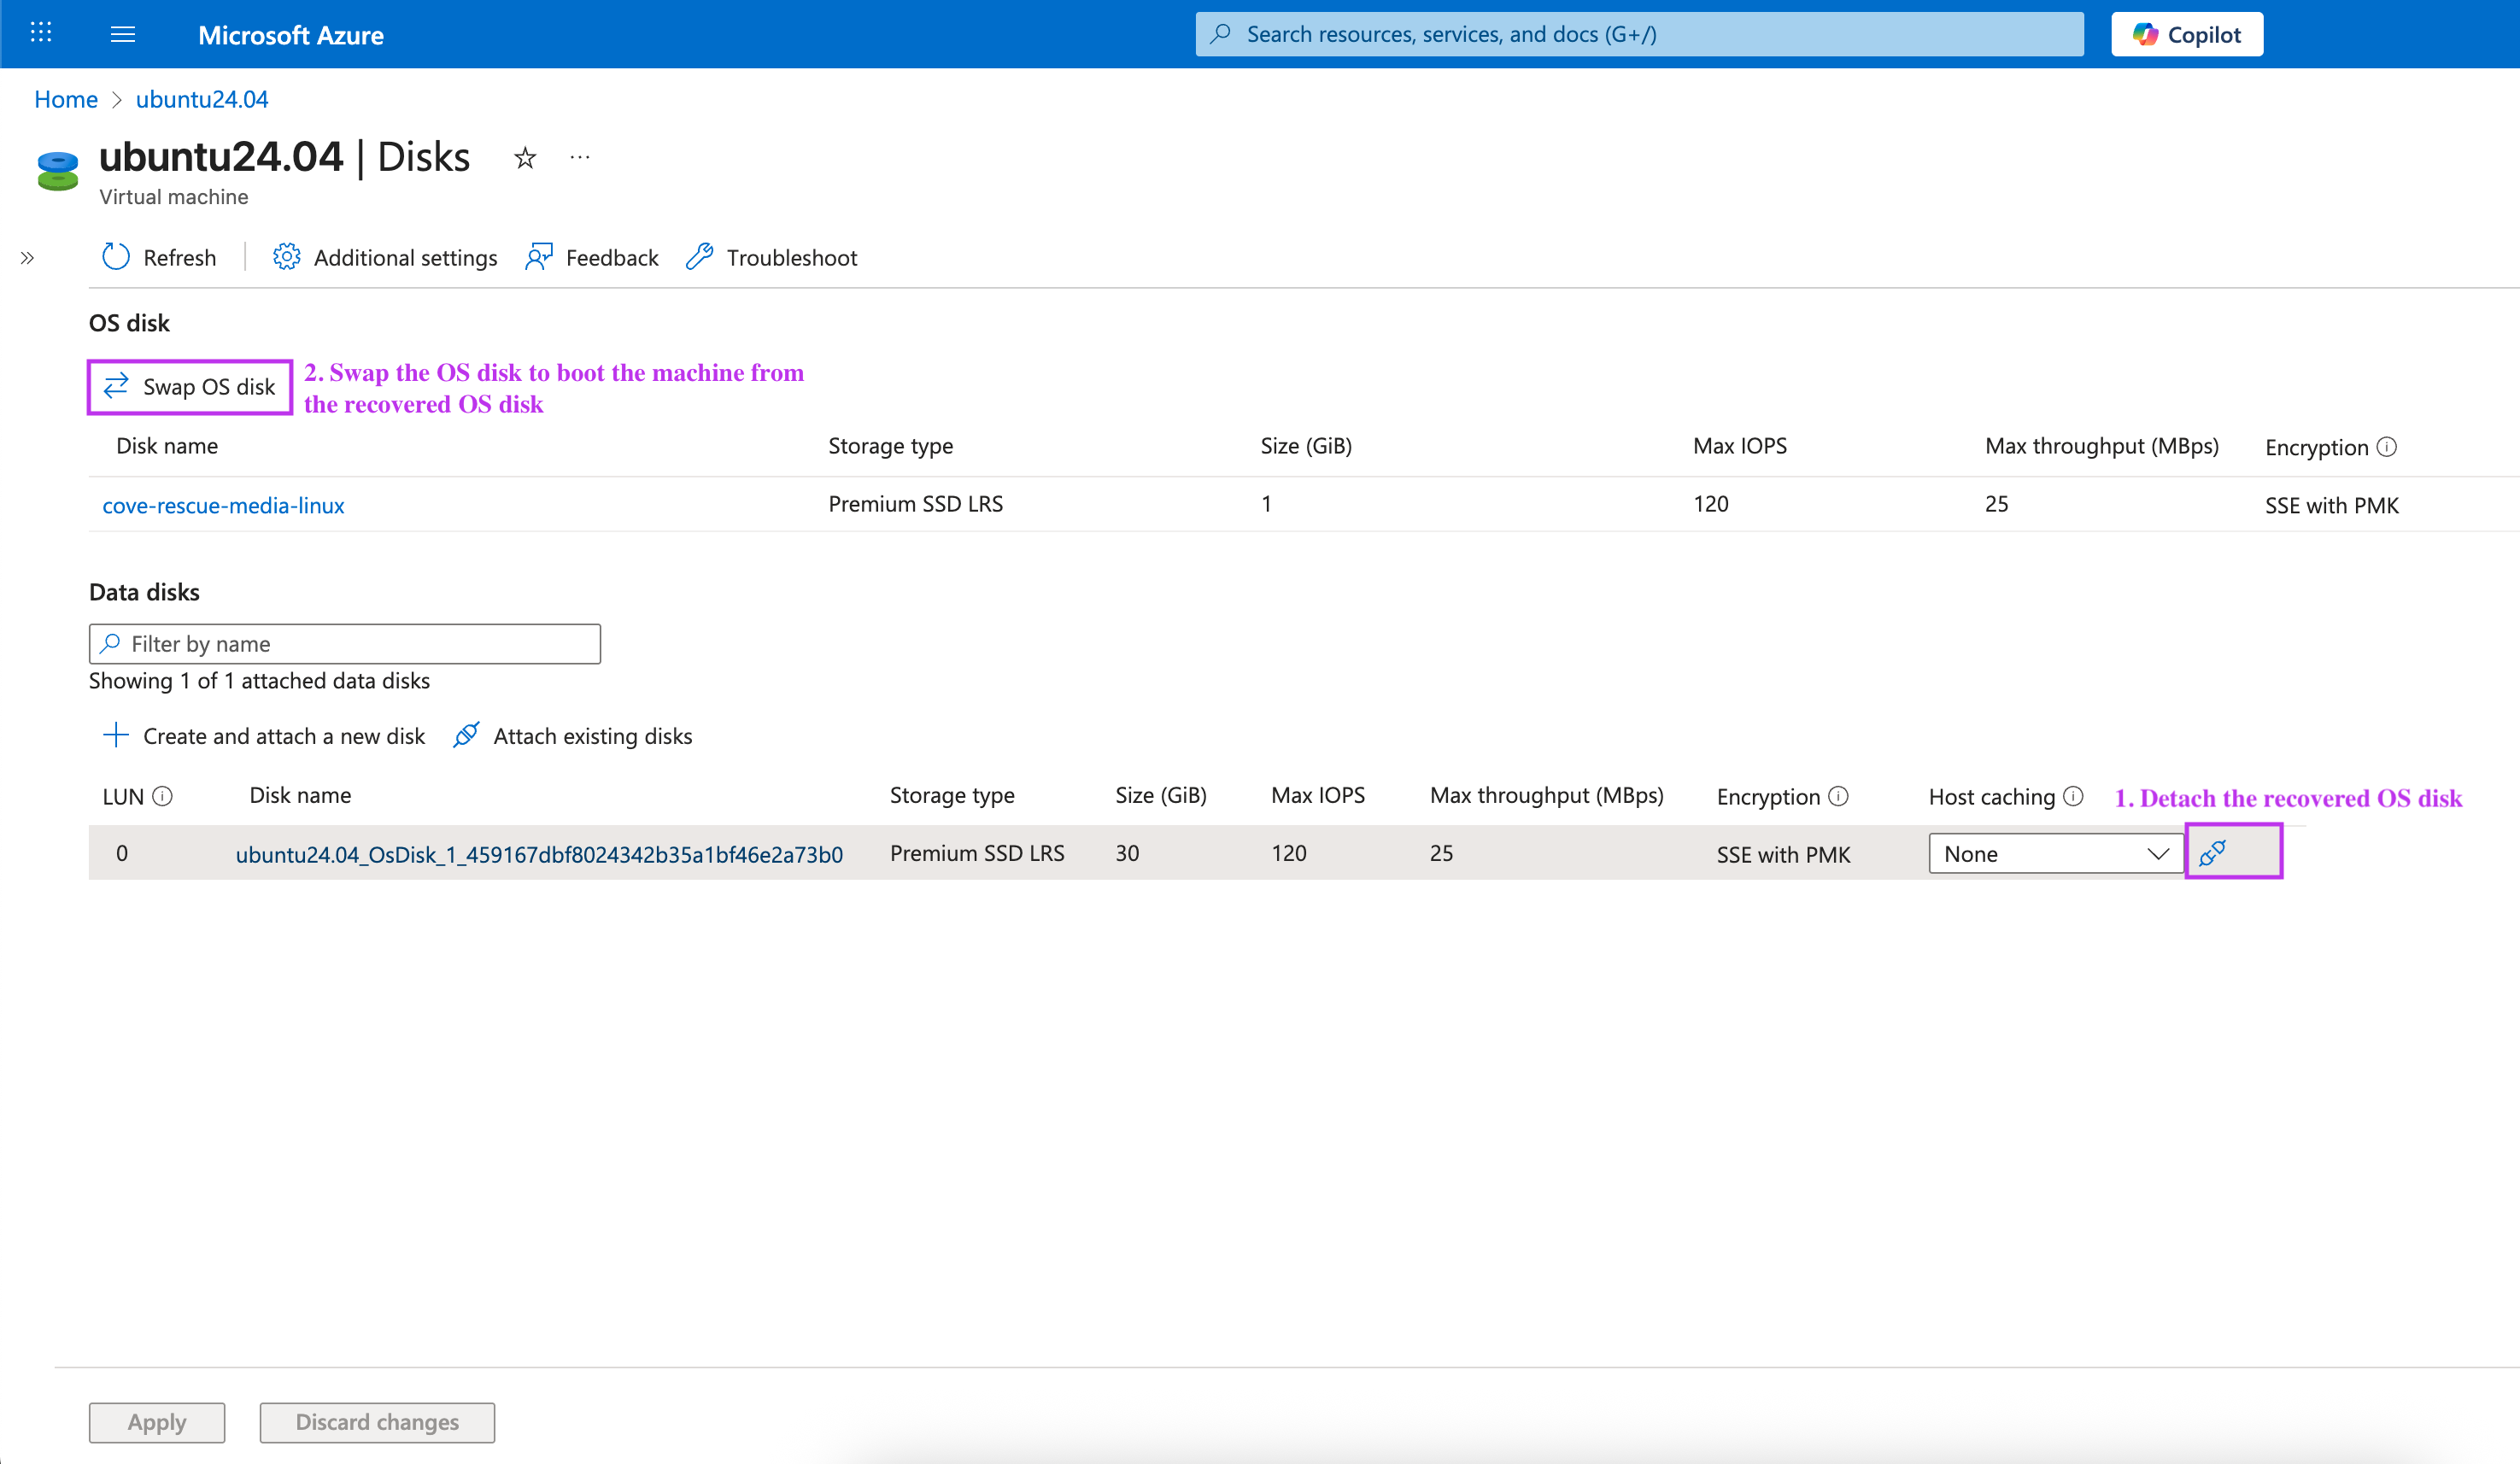
sudo cove recover. The recovery script requires root privileges. - Boot the target machine from the recovered OS disk after recovery completes:
- Detach the Cove Rescue managed disk from the target VM.
- Swap the original OS disk back so the VM boots from the recovered OS disk.
- Start the VM and verify that the system has been successfully recovered.
Session-specific rescue VHD files are not supported. It is not possible restore VHD files from the Backup Manager Restore tab.
For example:
az storage blob upload \
--account-name coverescuestorageaccount \
--container-name cove-rescue-media-container \
--name cove-rescue-media-linux.vhd \
--file ~/Downloads/cove-rescue-media-linux.vhd \
--auth-mode login
For example:
az disk create \
--resource-group DefaultResourceGroup \
--name cove-rescue-media-linux \
--source https://coverescuestorageaccount.blob.core.windows.net/cove-rescue-media-container/cove-rescue-media-linux.vhd \
--location eastus \
--zone 1 \
--os-type Linux \
--security-type TrustedLaunch \
--architecture x64 \
--sku Premium_LRS \
--hyper-v-generation V2
The values for parameters such as resource group, zone, security type, and Hyper-V generation must match the target virtual machine. If they do not match, the managed disk cannot be attached as the OS disk to the virtual machine.
For details on connecting to a VM, see Connect to the VM in the official Microsoft Azure documentation.
For more information about the recovery process, see the Bare Metal Recovery for Linux instructions. The process is the same as performing recovery with the Cove Rescue ISO image in hypervisor environments.