Backup Profiles in Management Console
Backup profiles let system administrators configure backup settings for multiple devices as one.
Backup profiles are available to the following types of customers: distributors, sub-distributors, resellers, end-customers and sites.
Profiles are supported for Windows, macOS and Linux backup devices
Two default profiles are available for use:
- 1 hour RPO - For hourly backups
- 24 hour RPO - For daily backups
Once a backup profile has been created, it cannot be moved to another partner. Profiles created at the reseller level can be applied to end-customers underneath this reseller, but profiles created at end-customer levels cannot be applied to other end customers or resellers.
When a profile is assigned to a device, the Performance tab of the Backup Manager GUI will no longer show the Abort backups and do not start backups when limited time frame is reached for these backup data sources option.
Pre- and post-backup scripts are not compatible with backup profiles, so once a profile is assigned to a device, the Scripts tab under Preferences will not be displayed.
Profiles are similar to products but they are more specific. Unlike products, backup profiles are optional.
Permissions configured through the backup profiles are added up to the product permissions. To be available on a device, a setting must be activated both in the product and in the profile.
Instructions
These steps must be followed for each data source you wish to configure under the profile
- Select the Data Source
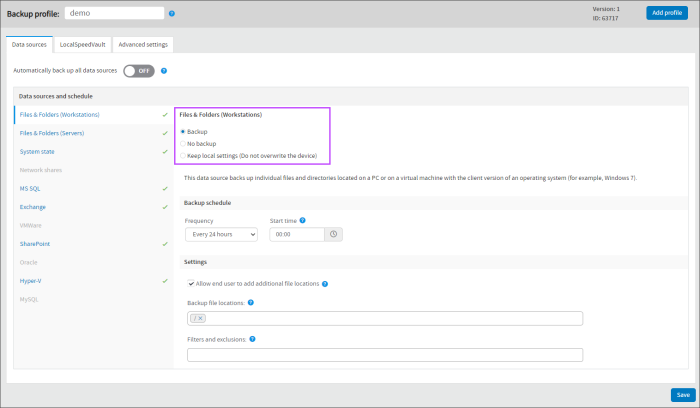
- Select the Backup Policy to use
- Backup - a force backup policy (overwrites local settings). It covers both the backup schedule and the backup selection. It is unavailable for data sources that require access credentials (such as Network shares)
- No backup - excludes a data source from backup, even if it is included in the backup selection locally
- Keep local settings. This is a mixed option using which the backup schedule is configured through the profile while the backup selection is configured locally
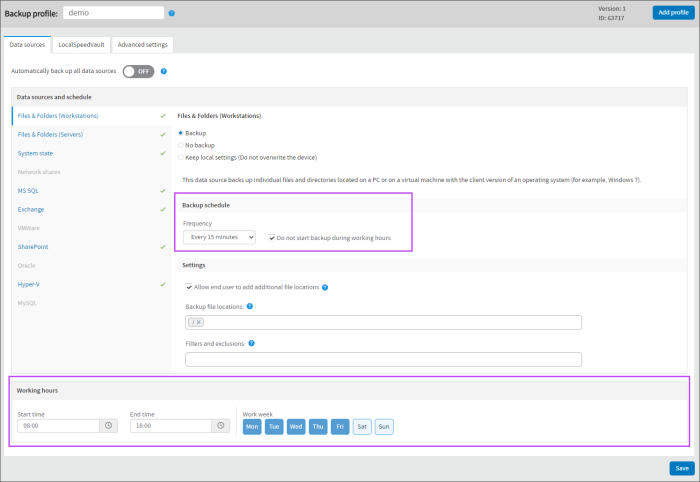
- Configure the policy Backup Schedule
- Select the Frequency
The following frequencies can be selected:
- Every 24 hours
- Every 12 hours
- Every 6 hours
- Every 4 hours
- Every 2 hours
- Every 1 hour
- Every 30 minutes
- Every 15 minutes
- Choose a start time for the schedule
Start Times can only be provided for the 24 hour, 12 hour and 6 hour frequencies
- If not using the Every 24 hour frequency, you will also be provided with an option to prevent backups starting during working hours. When selected you will be required to provide working hours at the bottom of the screen
- Select the Frequency
- Apply additional settings as required, such as:
- Auto select locations - Checking this allows the profile to auto-populate the backup selection with documents, images and videos that have been detected on the machine
This option will only be available for profiles where the setting was previously enabled.
- Backup file locations - This option is only available if Auto Select Locations is un-checked and allows you to select the specific locations to be backed up
- Fail backup if data source not present - Only available on certain data sources including MS SQL, Exchange, SharePoint and Hyper-V, this setting - when enabled - will cause the backup to fail if the source is not present on the device where this profile is assigned
- Filters or exclusions - Enter any file types or locations to be excluded from the backup
For a list of predefined filters, examples of file type exclusions and suggested additional filters, see Backup Filters and Exclusions
- Auto select locations - Checking this allows the profile to auto-populate the backup selection with documents, images and videos that have been detected on the machine
- Click Save
There are 3 backup policies to choose from:
Prior to the 18.4 release, backup schedules configured through the profiles ran on a certain day/time basis. Those older schedules were automatically converted to the new frequency-based format, which allows backups to run more frequently and make sure all file changes are protected.
When the profile is ready, you can assign it to devices:
- In the Management Console's Beta view of the Backup Dashboard, select the devices to assign the profile to
- Click Assign Profile on the toolbar
- Select the profile from the list
- Click Save
- (optional) Add the Profile column to the view (to see the profiles assigned to each device)
You can edit, rename and delete existing profiles. Only those profiles that are not assigned to any devices can be deleted.
Or
When the profile is ready, you can assign it to devices:
- In the Management Console's classic Backup Dashboard, select the devices to assign the profile to
- Click Assign on the toolbar
- Select Backup Profile

- Select the profile from the list. Click Save
- (optional) Add the Profile column to the view (to see the profiles assigned to each device)
You can edit, rename and delete existing profiles. Only those profiles that are not assigned to any devices can be deleted.
LocalSpeedVault settings in backup profiles
To prevent data loss caused by the profile applying the incorrect LocalSpeedVault credentials when not fully synchronized, LocalSpeedVault settings can no longer be applied in a profile.
The profile must be disabled before configuration of the LocalSpeedVault can be applied.
- Disable device profile
- In Management Console, select device checkbox in the dashboard > Assign Profile > Choose no profile
- Restart Backup Service Controller on affected device to apply the changes
- Launch the Backup Manager and change the LocalSpeedVault details to the correct location and save
- Re-apply the profile
- In Management Console, select the device checkbox in the dashboard > Assign Profile > Choose the profile you removed in step 1
Alternatively, wait 15 minutes and the changes will be applied automatically
Once the LocalSpeedVault is fully synchronized, further changes can be made from the profile
Managing Profiles
Edit Existing Profiles
- Log in to the Management Console
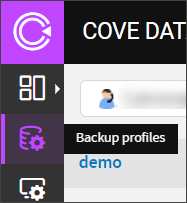
- Select Profiles from the vertical menu on the left-hand side of the page
- Choose the Customer the Profile belongs to from the dropdown
- Click on the Profile name to edit
- The Profile will open on the panel to the right, make any required changes
- Save the changes at the bottom of the page
Add a Profile by Copying Existing Profiles
If you have an existing profile which you need to duplicate, this can be done by:
- Log in to the Management Console
- Select Profiles from the vertical menu on the left-hand side of the page
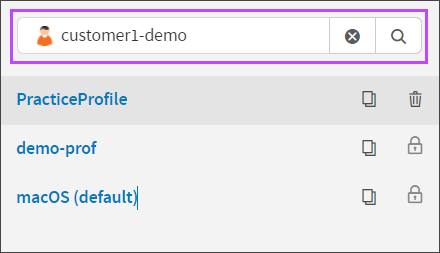
- Choose the Customer the Profile belongs to from the dropdown
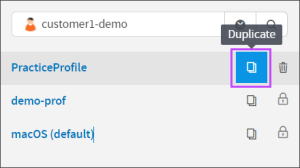
- Find the Profile you need to duplicate and click the duplicate icon to the right of the profile name
- Once the profile has been copied, a banner will be displayed to advise the profile has been successfully cloned and it will appear in the Profiles list with the same profile name 'ExistingProfileName - clone'
- Make any required changes to the copied profile
- Click Save at the bottom of the page
Find a Profile ID and Version
Backup Profile IDs are generated automatically when the automatic deployment is enabled.
- Log in to the Management Console
- Select Profiles from the vertical menu on the left-hand side of the page
- Choose the Customer the Profile belongs to from the dropdown
- Click on the Profile name you need the ID or Version for
- The ID and Version number can be found at the top right of the page
Removing and Deleting Profiles
Remove a Profile on the Management Console Beta Dashboard
- In the Management Console's Beta view of the Backup Dashboard, select the devices to remove the profile from
- Click Assign Profile on the toolbar
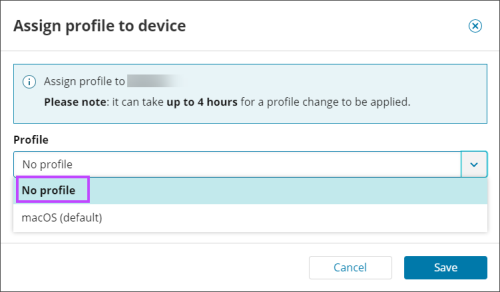
- Select No Profile from the dropdown
- Click Save
Or
Remove a Profile on the Management Console
- In the Management Console's classic Backup Dashboard, select the devices to remove the profile from
- Click Assign on the toolbar, then Backup Profile
- Select No Profile from the dropdown
- Click Save
Delete a Profile
- Log in to the Management Console under a SuperUser account
- Select Profiles from the vertical menu
- Find the profile you wish to delete
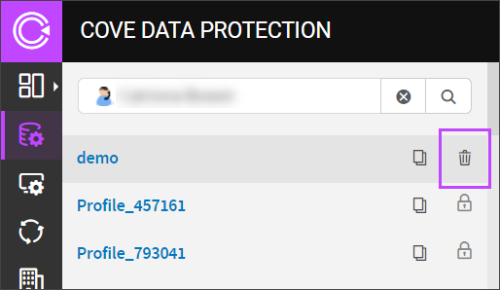
- Click the trashcan icon to the right of the profile name
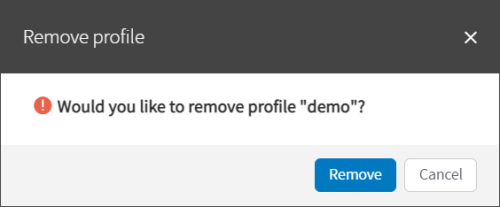
- You will be prompted to confirm you wish to delete the profile. Click Remove
Only those profiles that are not assigned to any devices can be deleted.
Profiles that have been deleted cannot be restored. If you need a profile that has been deleted, you must recreate it manually.


