
Customer management in Management Console
A customer in the Management Console is a general term for a company that provides, sells or consumes backup services.
- If you are a service provider, customers are your clients
- If you are a system administrator, customers are groups or departments within your own company. Treat customers as a way to organize backup devices and control storage usage
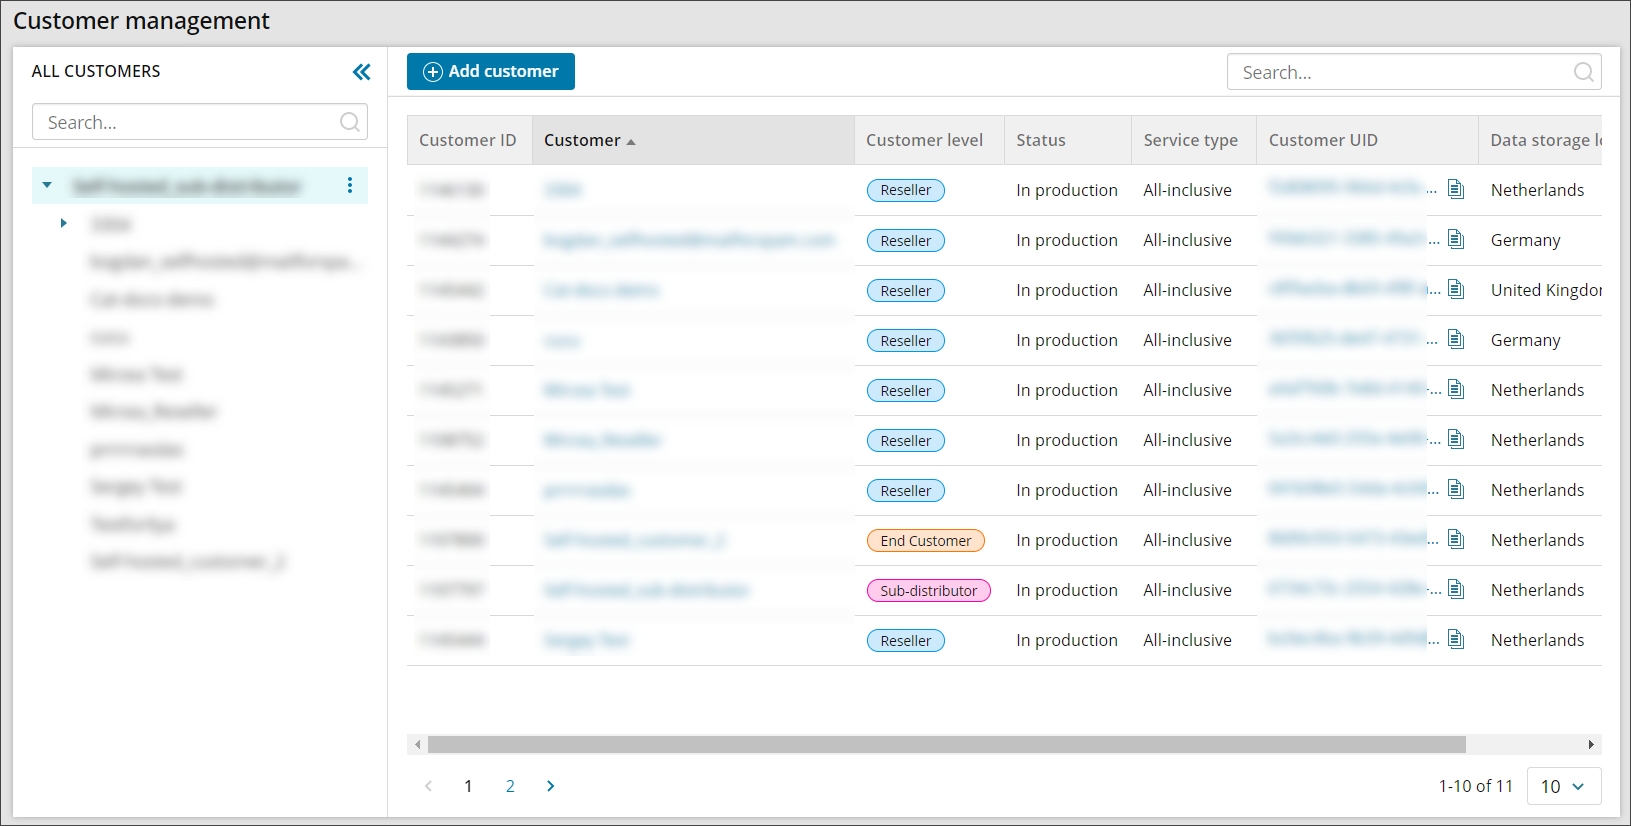
When you open the Customer management page in the Console, you will find your own company at the root level. Your customers are displayed below and all customers listed in the right-hand panel.
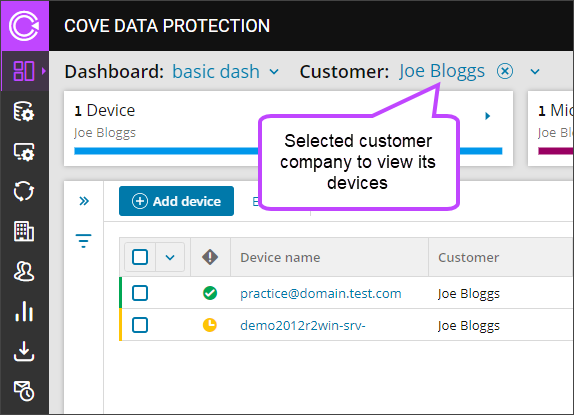
To view or manage devices belonging to a certain customer, go to Backup Dashboard and select the customer from the Customer list at the top of the page.
Types of customers
Customers are organized in a hierarchy with Distributor at the top level.

Access to some modules in the Management Console is based on the type of customer. See the table below for the details.
| Module or feature | Distributor | Sub-distributor | Reseller | End-customer | Site |
|---|---|---|---|---|---|
| Quick Installation and generating passphrases (in Backup Dashboard module) | Unavailable | Available | Available | ||
| Backup profiles | Available | ||||
| Customer management | Unavailable | ||||
| Backup Dashboard (all features except for Quick Installation and generating passphrases) | Available | ||||
| Downloads | |||||
| Historical charts | |||||
| Product management | |||||
| User management | |||||
Access to features within a module may require a certain user account type (learn more).
Adding customers
Adding customers differs depending on the customer level.
Add a Distributor, Sub-Distributor or Reseller
To add a new Distributor, Sub-Distributor or Reseller to the system, do the following:
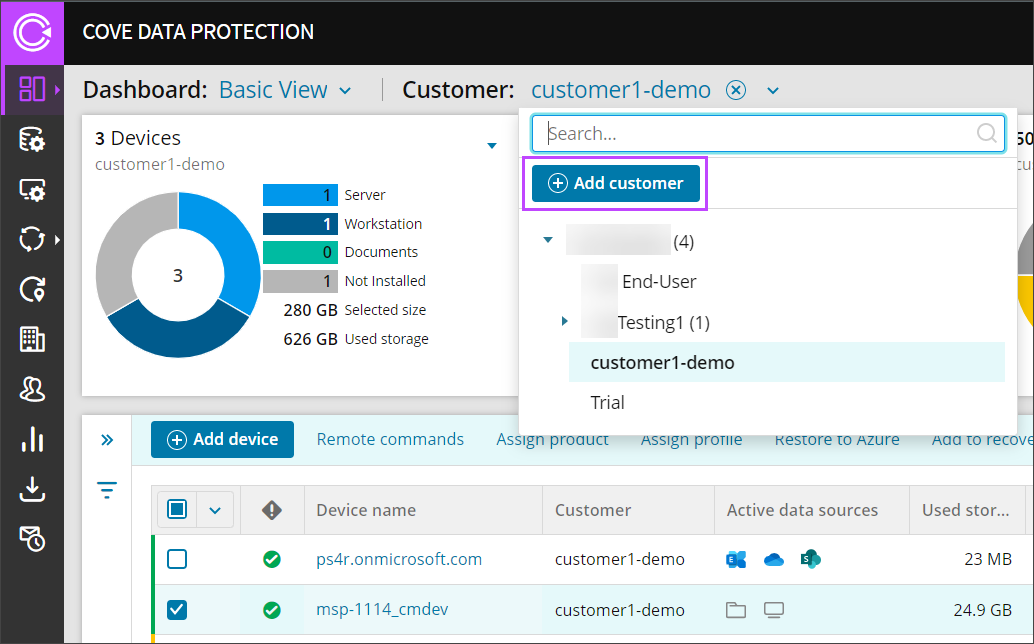
- In the Management Console's vertical menu, click Customer Management or from the Backup Dashboard, select the customer dropdown at the top of the page
- Click Add customer
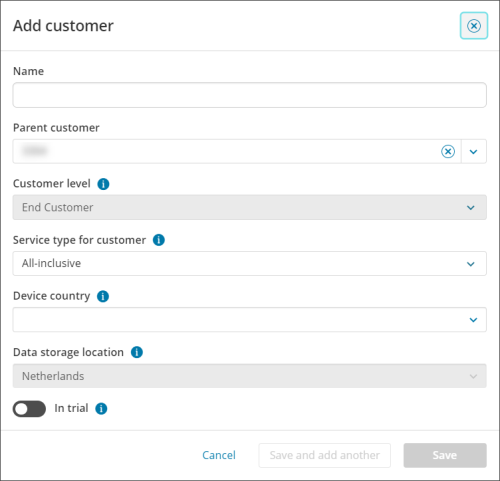
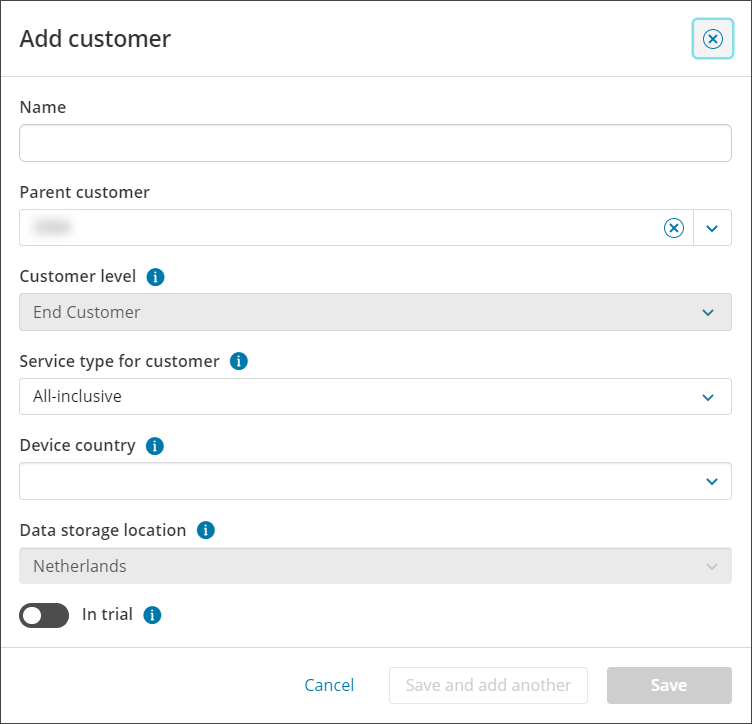
- Fill out the details for the customer:
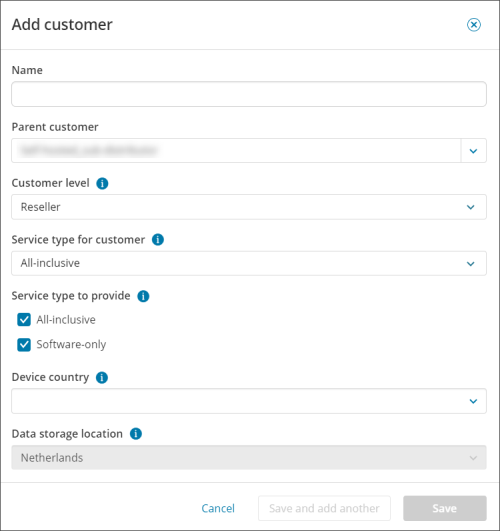
- Name - The name of the customer as you want it to show on the dashboard
- Parent customer - Using the dropdown, select the customer this new one should belong to
- Customer Level - Using the dropdown, select the level of customer
- Service type for customer - Use the dropdown to select either All-Inclusive or Software-Only.
- Service type to provide - Use the checkboxes to select which services the new customer will be able to provide to their customers, with a choice of All-Inclusive and Software-Only.
- Device country - Use the dropdown to select the country the devices will be located
- Data storage location - If you have selected a country where we host storage, this will be automatically selected in the Data Storage Location dropdown and you will be unable to change it. However, if you have selected a country where we do not have storage, use the dropdown to select your preferred storage location
- The following data center locations are available, and are subject to change without notice:
Australia Belgium Brazil Canada Denmark France Germany Italy Netherlands Norway Portugal South Africa Spain Sweden Switzerland United Kingdom United States
- The following data center locations are available, and are subject to change without notice:
- Click Save

You must assign the country at the time of customer creation. Changing the country for existing customers has no influence on the storage location.
Once the storage location has been selected, you will not be able to change this yourself and must contact support if you wish to change this.
Adding End-Customer or Site
To add a new End-Customer to the system, they must be added as a child to a Reseller or to add Site to the system, they must be added as a child to an End-Customer.
- In the Management Console's vertical menu, click Customers to open the customer Management window or from the Backup Dashboard, select the customer dropdown at the top of the page
- Ensure you are in the Reseller or End-Customer you wish the End-Customer or Site should be in
- Click Add customer
- Add the details for the:
- End-Customer:
- Name - Provide an easily identifiable name for the End-Customer
- Parent customer - Using the dropdown, select the Reseller the End-Customer should belong to
- Customer Level - This will automatically be set to End customer and cannot be changed
- Service type for customer - Use the dropdown to select either All-Inclusive or Software-Only.
- Device Country - Using the dropdown, select the country the Site is based in
- Data storage location - If you have selected a country where we host storage, this will be automatically selected in the Data Storage Location dropdown and you will be unable to change it. However, if you have selected a country where we do not have storage, use the dropdown to select your preferred storage location
- The following data center locations are available, and are subject to change without notice:
Australia Belgium Brazil Canada Denmark France Germany Italy Netherlands Norway Portugal South Africa Spain Sweden Switzerland United Kingdom United States
- The following data center locations are available, and are subject to change without notice:
- In trial - If selected, the customer will be added as a trial for 30 days and will not be invoiced during this period. The customer will automatically go into Production when the trial is over.
- Site:

- Name - Provide an easily identifiable name for the Site
- Parent customer - Using the dropdown, select the End-Customer the Site should belong to
- Customer Level - This will automatically be set to Site and cannot be changed
- Device Country - Using the dropdown, select the country the Site is based in
- Data storage location - If you have selected a country where we host storage, this will be automatically selected in the Data Storage Location dropdown and you will be unable to change it. However, if you have selected a country where we do not have storage, use the dropdown to select your preferred storage location
- The following data center locations are available, and are subject to change without notice:
Australia Belgium Brazil Canada Denmark France Germany Italy Netherlands Norway Portugal South Africa Spain Sweden Switzerland United Kingdom United States
- The following data center locations are available, and are subject to change without notice:
- End-Customer:
- Click Save

After customer is Added
Further steps you can take:
- Give the customer access to the Console. For this purpose you need to create user accounts for people (or teams) from the customer company. You can create all necessary accounts yourself or create one administrator account and let in-house administrators create the rest
- Give the customer access to the backup and recovery service. You need devices for this purpose. You may add these yourself or an administrator from the customer company can do this through the Backup Dashboard module
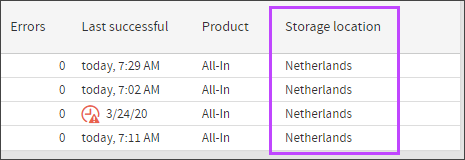
To make sure the customer has the desired storage location assigned, add a test device for this customer and check the country in the Storage location column. If you do not see the column, you will need to add it to the view
Local data centers are not available for every country, so your selection could route your data to a different region. Consult your dedicated account manager for the current listing of regional data centers. New data center availability and the associated routing are subject to change without notice.
Delete customers
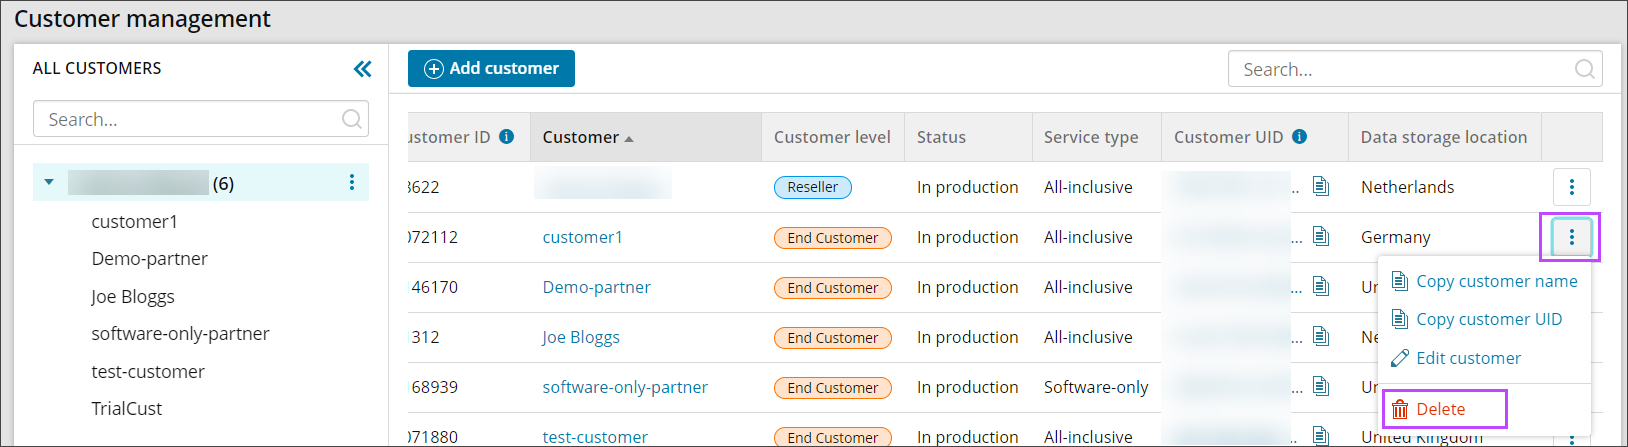
You can remove only those customers that do not have any devices or customers of their own, or with any recovery locations assigned to them. This must be done from the Customer Management window:
- Log on to the Management Console
- Click Customer Management to open the customer Management window
- Find the name of the customer to remove
- Scroll to the right of the Customer and click the three vertical dots to open the action menu
- Click Delete
- Confirm your intention to delete the customer
Editing customers
To access customer editing options, this must be done from the Customer Management window:
- Log on to the Management Console
- Click Customer Management to open the customer Management window
- Find the name of the customer to edit
- Scroll to the right of the Customer and click the three vertical dots to open the action menu
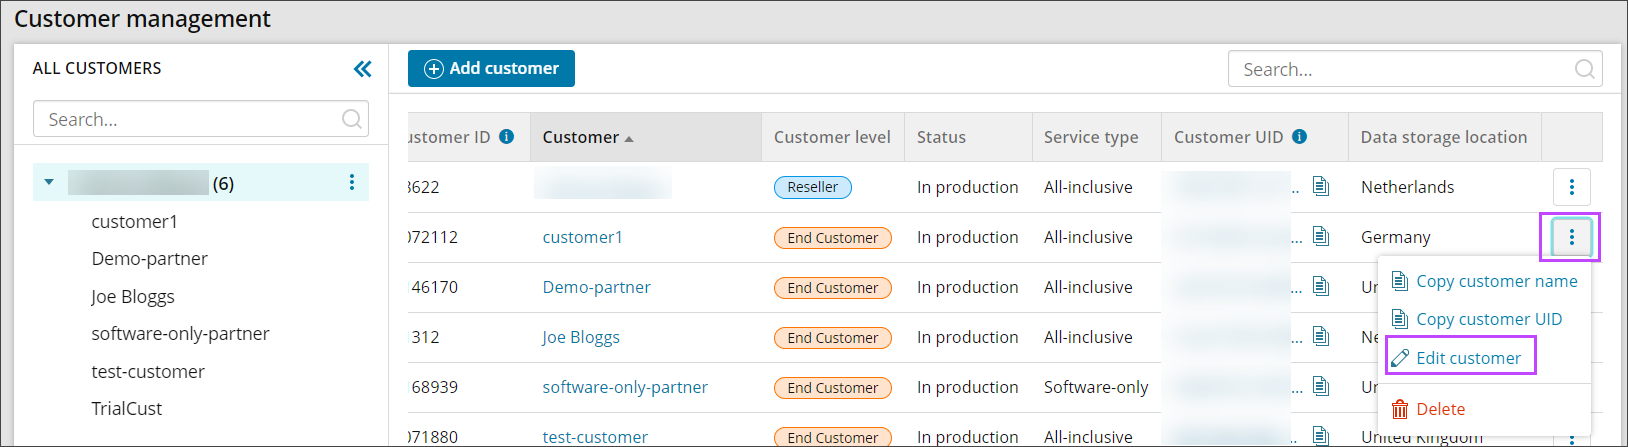
- Click Edit customer
- Make any changes as detailed below
- Click Save
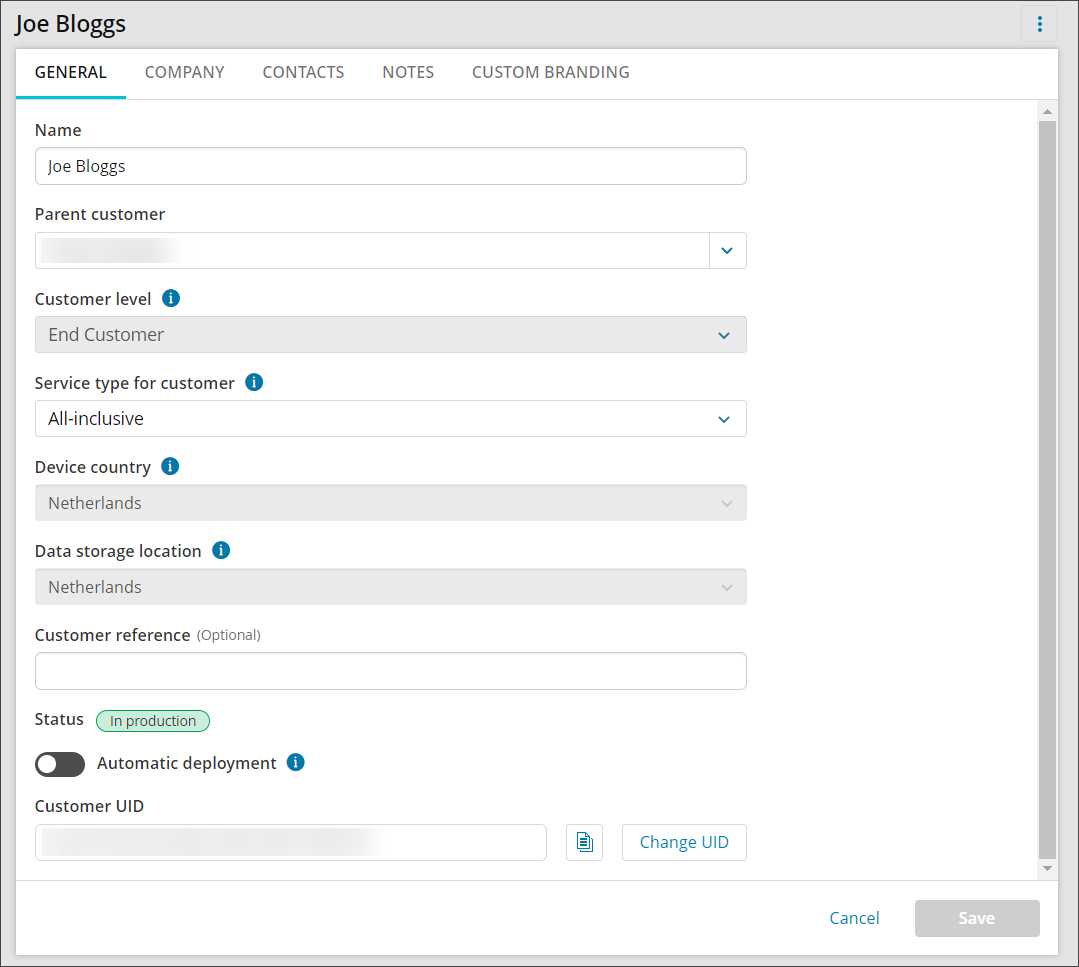
You can change the settings that you configured when creating the customer and access additional settings on the numerous tabs:
General
- Name - You may rename the Customer, but please keep in mind that customer names are sometimes required for authorization. So users from the customer company will need to update their access credentials for the Cloud
- Parent Customer - Move the Customer to a different parent Customer
- Customer Level - Change the customer to a different customer level
- Service type for customer - Use the dropdown to select either All-Inclusive or Software-Only.
- Service type to provide - Use the checkboxes to select which services the new customer will be able to provide to their customers, with a choice of All-Inclusive and Software-Only.
- Customer Reference - Add additional information to identify the Customer
- Automatic Deployment - Enable or disable Automatic Deployment for devices under this partner
- This feature allows unattended installation of the Backup Manager through the command line on Windows device. For full information see Enable Automatic Deployment in Management Console Beta Dashboard
Company
All fields in this tab are optional:
- Legal Name
- Website
- Country
- State
- Address
- Zip Code
- City
- District
- Phone number
- Fax number
- Camber of commerce #
- Vat #
- Bank Account #
Contacts
All fields in this tab are optional. Click Add Contact to add the names of people to contact and their details:
- Title
- First Name
- Last Name
- Position
- Phone Number
- Type:
- Authorized signer
- Administrative
- Technical
- Sales
Notes
Notes can only be added once a contact is created. Click Add Note to register past and upcoming communication activities, or relevant information regarding the Customer:
- Contact
- Type:
- Phone
- Personal contact
- Instant messenger
- Contactless
- Status:
- Planned
- Done
- Date and Time
- Details
Custom Branding
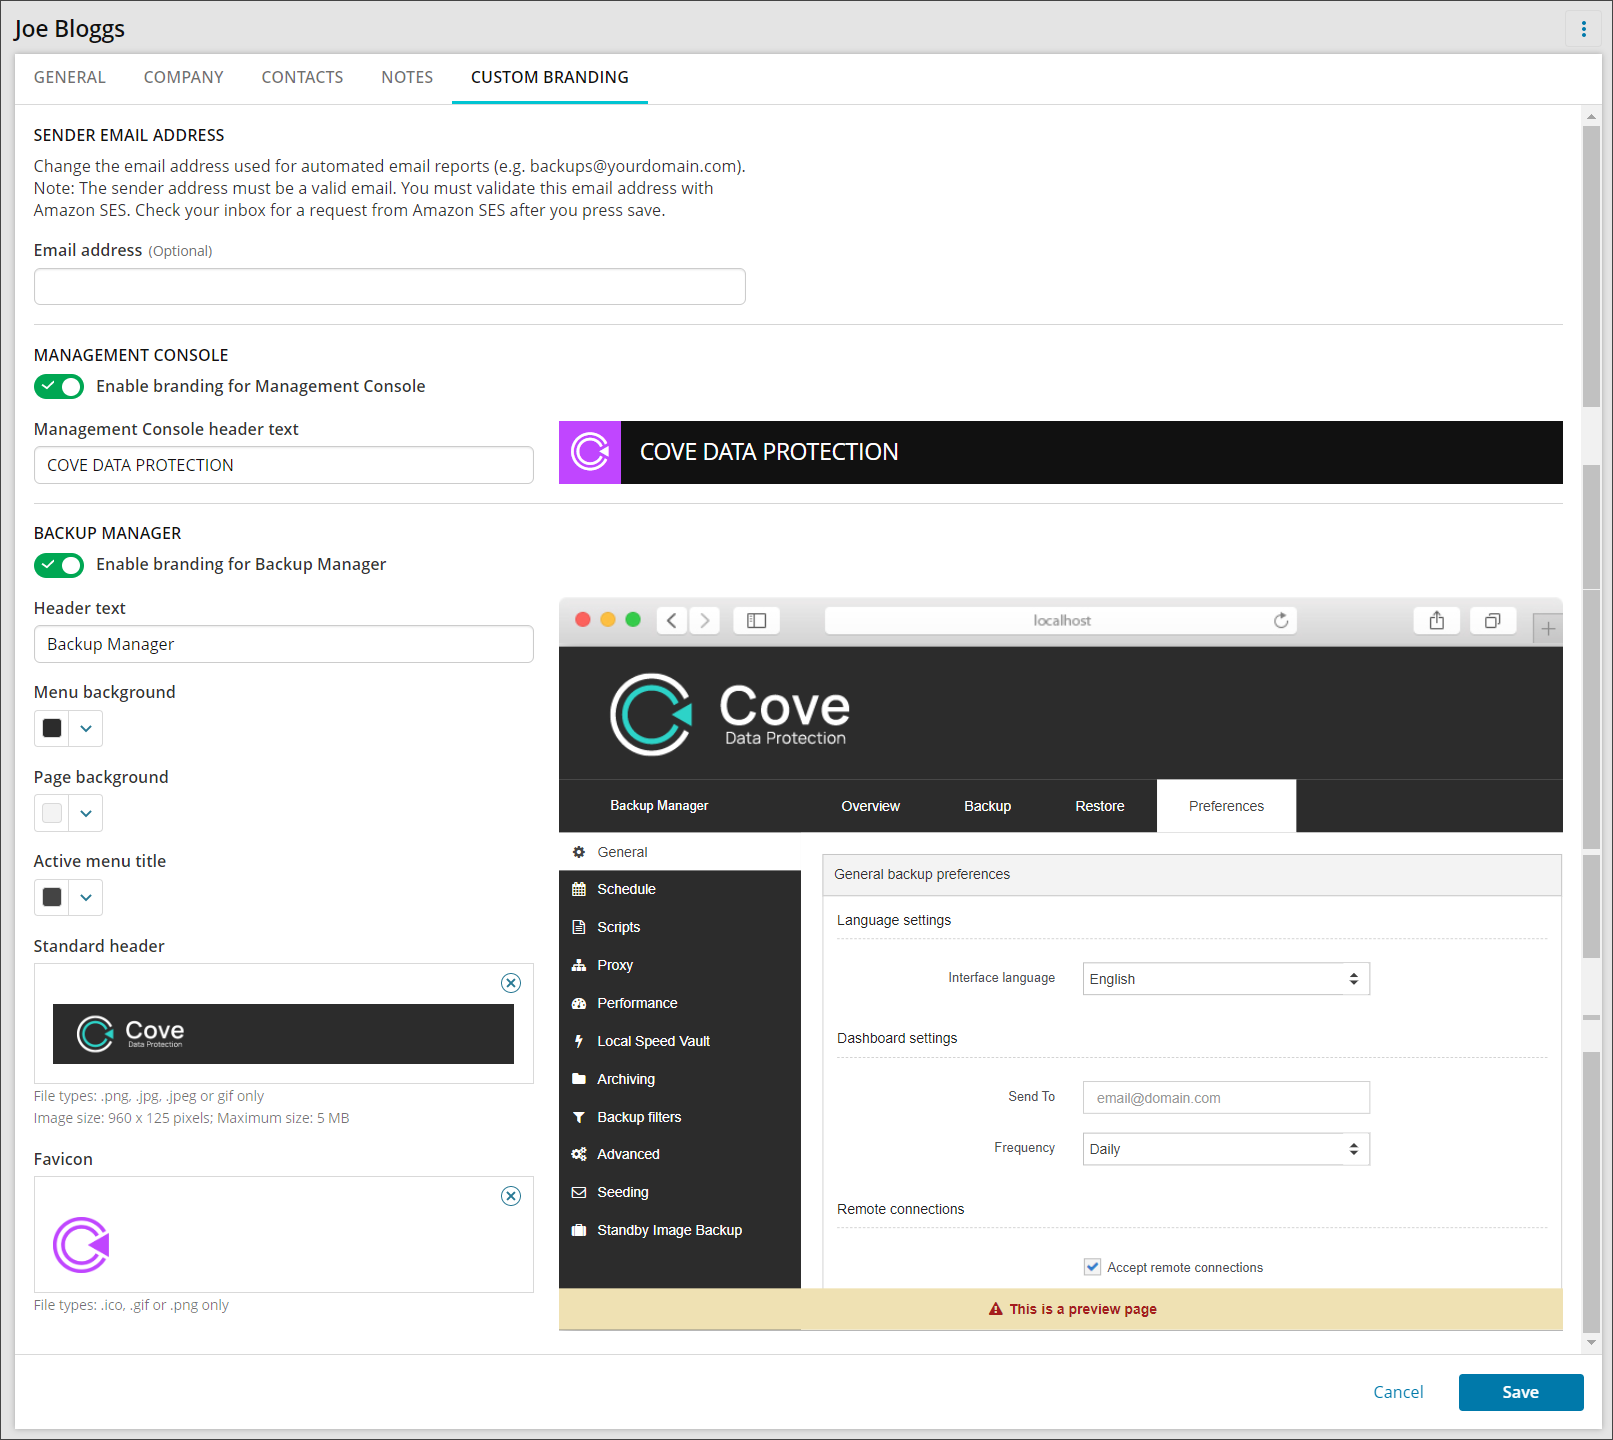
- Sender Email Address - Change the email address used for scheduled reports (e.g. backup-reports@yourdomain.com). The default address is backup@n-able.com
- Enable Branding for Management Console - Once enabled, the following additional option is given:
- Management Console header text - this allows you to change the text shown in the header of the Management Console from the default of Cove Data Protection to something different in line with your custom branding
- Enable branding for Backup Manager - Once enabled, the following additional options are given:
- Header Text - This allows you to change the text shown in the header of the Backup Manager tool from the default of Backup Manager to something different in line with your custom branding
- Menu Background - use the colour picker, RGB, HSL or Hex code to select a colour matching your branding
- Page Background - use the colour picker, RGB, HSL or Hex code to select a colour matching your branding
- Active Menu Title - use the colour picker, RGB, HSL or Hex codes to select a colour matching your branding
- Standard Header - remove the default Cove header image and drop or browse to add a custom header image
- Favicon - remove the default Cove favicon image and drop or browse to add a custom favicon image
Be aware if you use a custom sender address you will will need to verify the address by clicking on a verification link that arrives in the configured email address's inbox. If this does not happen then you will not receive any backup related emails (Let's get started, Backup daily Dashboards, reports, email views etc.).