Backup Manager installation on Windows and macOS
To start using the Backup Manager, download an installer for your operating system. The installation wizard guides your through several quick steps.
Step 1: Add device
- Log in to the Console under a SuperUser account belonging to a reseller or end-customer
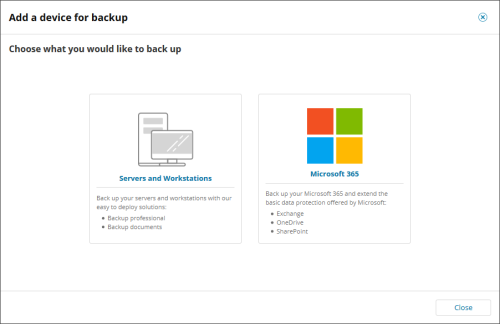
- Click Add, select Servers of Workstations
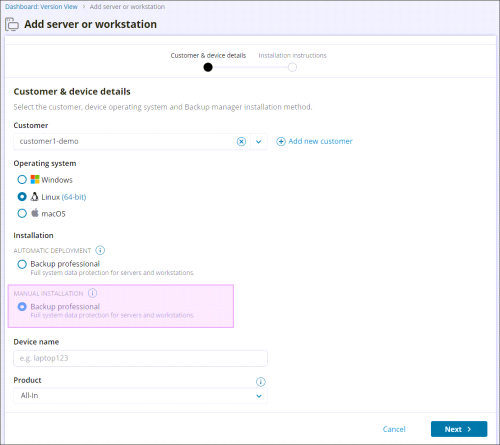
- Select the partner to install the device for from the dropdown
- Select the Operating System for the device
- Choose the Installation type of Manual Installation > Backup Professional for the regular installation.
- Give the device a memorable name (it will be required for installation)
- Click next and you will be given a link to download the Backup Manager, copy the device details to clipboard or send the installation instructions via email
- Download and run the installer and follow the instructions provided at the next step.

You will need the Device name and Password in Step 3: Personal access. These can be found at a later date from the device properties Modification tab if this is closed before taking a note.
If the installer does not run after downloading and attempting to run, check the properties of the install file to ensure that it has not been blocked by your system upon download or attempt to run as the Administrator on the device.
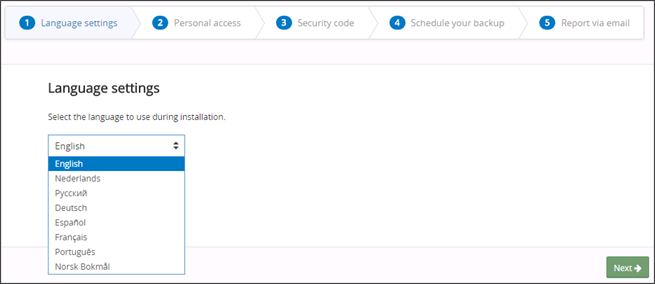
Step 2: Language settings
The Backup Manager is available in many languages. Choose the language for the current installation.

Step 3: Personal access
Enter your access details for the Backup Manager. Your device name and password is required.
If you need access details, please contact your system administrator or service provider.
Step 4: Security code/Encryption key or Passphrase
Set a security code/encryption key or Passphrase that will be used to encrypt your data.
It can be any word or sentence of your choice, but should be secure and not easily guessed. Using this secret code, you can encrypt your files with a strong encryption algorithm, thus keeping your private data protected from unauthorized access.
The most important challenge is finding the best code, the one that you can remember but that no one else knows or can guess. There is an encryption limit of 100 characters for the security code/encryption key.
You MUST remember your security code. It will not be possible to restore your backed up data without it or to re-install the current backup device.
We do not store this code, so please ensure you keep it safe, stored somewhere other than on this device.
Step 5: Schedule your backup (optional)
You can specify at what time to start regular backups and choose appropriate frequency.
Step 6: Report via email (optional)
Enter your email address to start receiving email reports on the statuses of recent backup activities. The frequency of report delivery is customizable.
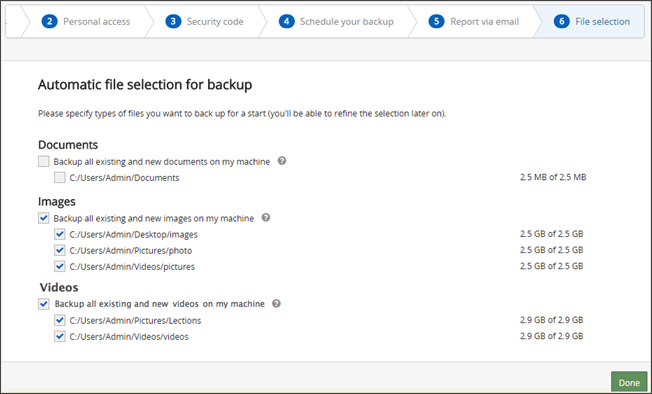
Step 7: Automatic selection for backup (Windows workstations only)
You can quickly populate your backup selection with documents, images and videos detected on your computer.

You can change your initial choice of the file groups after the installation as well as refine your backup selection.
Ensure you enable Full Disk Access for the Backup Manager before running backups on macOS 10.14 (Mojave) or later.


