MySQL backup
Requirements
Backup Manager offers a backup and recovery service for MySQL databases on all the supported operating systems.
- Backup Manager must be installed on the MySQL server that you want to back up
- The MySQL service must be started at the time a backup session starts
- The MySQL backups depend on VSS Snapshots, so VSS must be available on the system
- Full permissions (with all privileges) are required to a MySQL database to backup the MySQL data source
- On Linux, glibc 2.5 or higher is required.
- Backup Manager supports the following MySQL versions on Windows and Linux:
- 5.0.22
- 5.1
- 5.5
- 5.6
- 5.7
- 8.0.15
- Backup Manager supports the following MySQL versions on MacOS:
- 5.0.22
- 5.1
- 5.5
It is possible to add multiple MySQL instances to your backup selection so long as they are installed on the same machine
Types of backups
Backup Documents only has 3 types of MySQL backups, they are OS version-dependent:
- Cold backups - the MySQL server is stopped for some time while the backup session runs; it is necessary that no third-party applications should be keeping the database forcibly open at that time
- Warm Backups - the MySQL server is locked for write operations for some time while the backup session runs, but is still accessible for read operations
- Hot backups - the MySQL server keeps functioning while a backup session is running
| MySQL version | Windows | Linux | Mac |
|---|---|---|---|
| MySQL 5.0.22 | Warm backups |
|
|
| MySQL 5.1 | Warm backups |
|
|
| MySQL 5.5 | Warm backups |
|
|
| MySQL 5.6 | Warm backups |
|
Currently unsupported |
| MySQL 5.7 | Warm backups |
|
Currently unsupported |
| MySQL 8.0.15 | Warm backups |
|
Currently unsupported |
Backup through the Backup Manager
To configure MySQL backups, create a schedule-based backup from the Backup Manager client.
- Launch the backup client using one of the methods detailed on Launch the Backup Manager client
- Configure the backup selection as in Step 1: Configure backup selection
- Set the backup schedule as in Step 2: Create backup schedule
You must complete both the configuration of the selection and the creation of the schedule or backups will not run successfully
Step 1: Configure backup selection
- Open the Backup tab in the Backup Manager
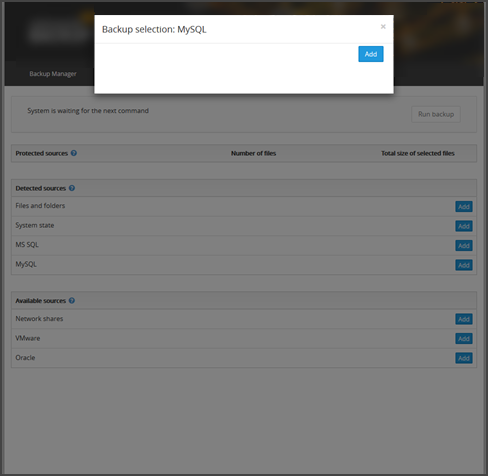
- Click Add next to the MySQL data source
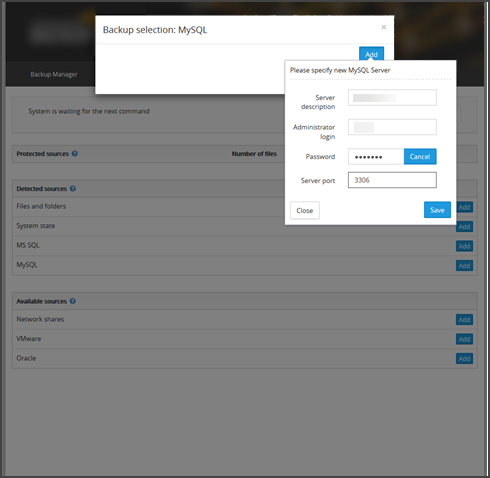
- Now enter the details for an Administrator login for the MySQL server
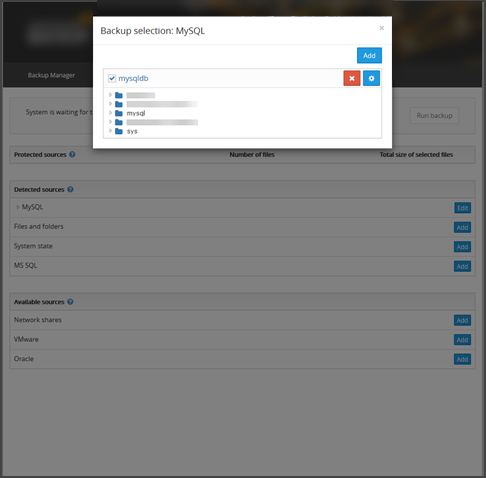
- Make the selection for backing up the MySQL databases
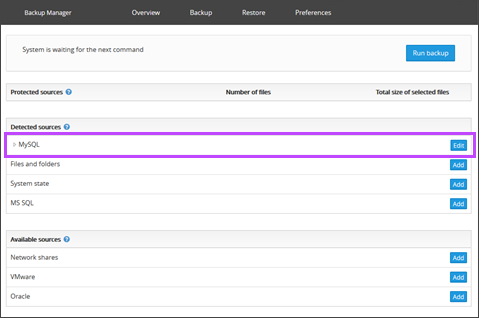
The MySQL datasource will now show as added and editable. You can click on the name of the data source to be sure all necessary data has been included in the backup selection.
If you clear your backup selection after at least one backup has been completed, you will be offered to remove all backup copies of these files from the Cloud. The action is irreversible.
Step 2: Create backup schedule
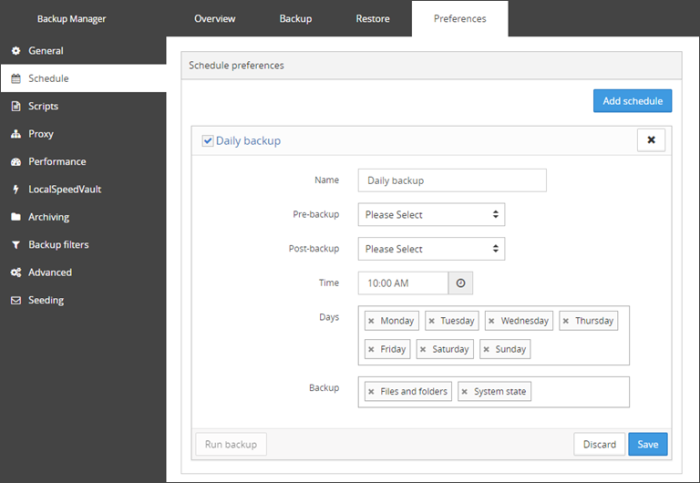
It is most convenient to set up a backup schedule and let backups run automatically without interference. You can create multiple schedules for each device if, for example you want Files and Folders to run at 9 am but you want System State and MySQL to run at 9 pm.
To create a backup schedule or edit existing schedules:
- Navigate to Preferences > Schedule
- Expand the existing schedule to edit it, or click Add schedule to create a new one
- Provide a name for the schedule so that you can easily identify each one, for example 'MySQL daily backup'
- Add any pre- or post-backup scripts
- Set a time for the backup to run
- Select which days of the week to run this backup schedule
- Select the MySQL data sourcein the Backup field
- Save
Start a one-time backup
You can initialize a backup manually at any time
To run the backup for all data sources added for the device:
- Launch the backup client using one of the methods detailed on Launch the Backup Manager client
- Open the Backup tab
- Click Run backup
The Run backup button is unavailable until at least one data source is configured for backup.
Backup through the command line
You can back up and restore data not just using the web interface but through the command line as well. This is done using the Client Tool, an executable file included into all Backup Manager installations (view primary Client Tool instruction).
Here is a sample instruction for MySQL. The current instruction is based on a Linux case, the same work flow can be used on Windows:
-
Start your terminal emulator and move to the Backup Manager installation directory (this is where ClientTool is located)
cd /opt/MXB/bin
-
Configure access to the MySQL server that you want to back up
./ClientTool control.mysqldb.add -name mysqldb -user root -password ********** -server-port 3306
Where ********** is the password
Here are the parameters to submit:
-name– assign a name to the MySQL server as it will appear in the Client Tool and Backup ManagerWe support Latin letters and most punctuation marks. No slashes.
-user– your username for access to the MySQL server (we recommend using the root)-password– your password for access to the MySQL server-server-port– the port number of the MySQL server. If in doubt, check the option file on your machine (my.cnf).
-
Add the MySQL server to your backup selection
./ClientTool control.selection.modify -datasource MySql -include mysqldb
You can make sure the MySQL server has been included into the backup selection using the
control.selection.listcommand -
Create a schedule for the MySQL data source, for example:
./ClientTool control.schedule.add -name MySQL_Daily -active 1 -datasources MySql -days All -time 20:00
-
Start the backup of the MySQL data source
./ClientTool control.backup.start -datasource MySql
You can check the current status of the backup session using the
control.session.listcommand

